1. Icons in Tree Structure
Construct Tree Structure for the first time is sometimes regarded as a “pain-staking” process but
future usage will only require the user to Re-use the old Tree Structure by editing and saving it with
another name. Thus the Tree Structure is commonly known as “Construct Once Reuse Forever”.
Important notes for the user in constructing a good Tree Structure:
1. Each Tree Structure is unique based on the user’s creativity and demand
2. It uses Parent and Child concept (User need to identify the Parents FIRST before inserting the Child)
![]()
Diagram 1.1.1: Location to open tree structure window
Click Constraints Tree to open up Tree Structure window
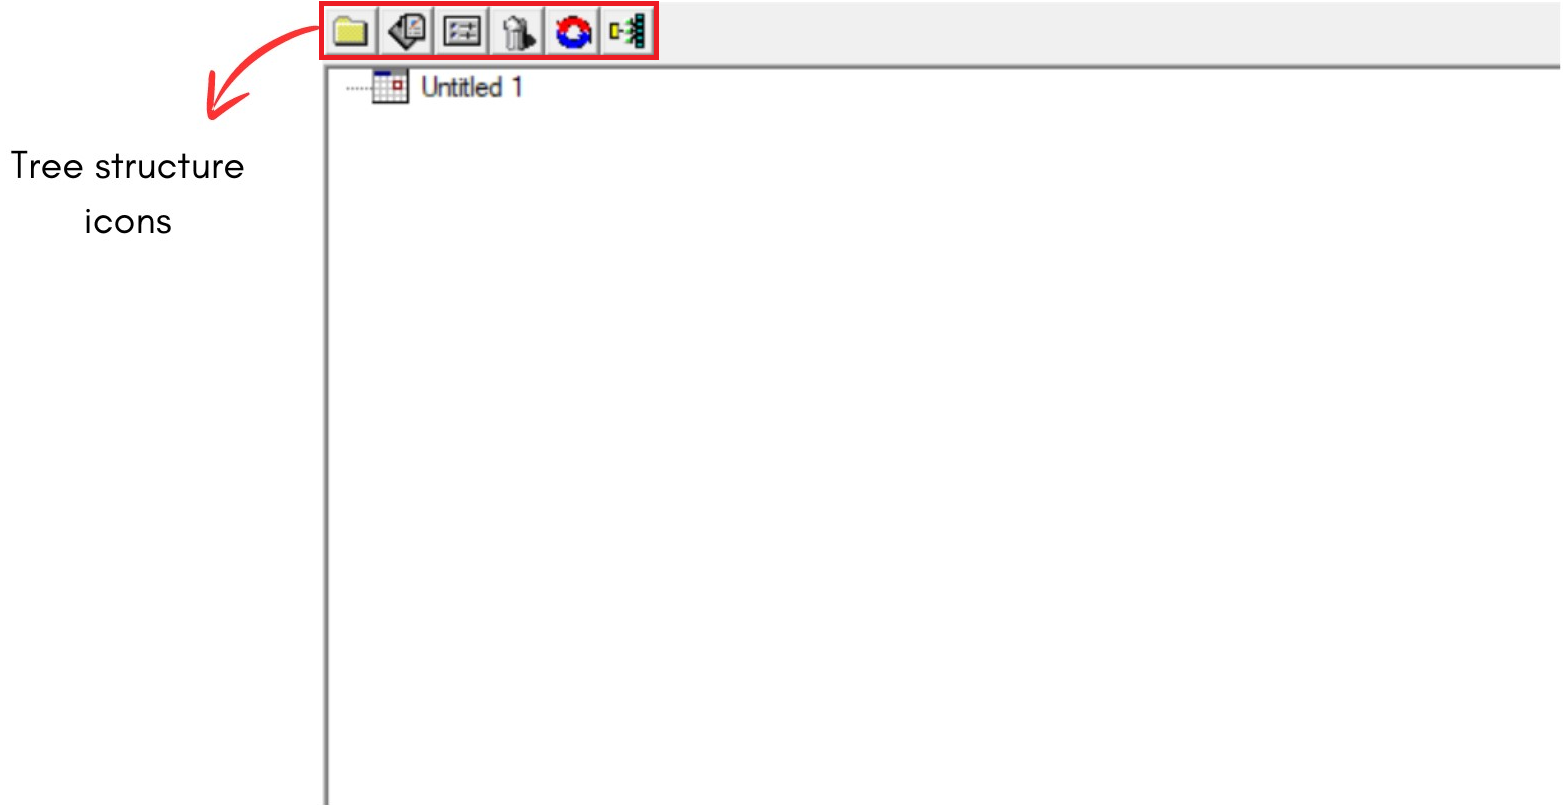
Diagram 1.1.2: Tree structure window
A new window will pop up, showing the Tree structure window.
Inside Tree structure window, you will be able to see icons on the left side.
![]()
| Click this icon to create New Constraint Group : Group Identity and Constraint User can define the grouping terminology by hierarchical status (Example: Program, Semester, and Subject offered). This folder is also created for additional Constraint (Demand), that is why it is called a New Constraint Group; (Example: Merging group or same time class) | |
| Click this icon to Add New Section (Who teach what Subjects, Class Duration & Class offered per week) | |
| User can use this function to Open the Properties of the following : 1. Constraint Group Box(Yellow Folder) 2. Course Management Properties(Section) | |
| Click this icon to Delete Constraint Group Or Section Reminder: User need to ensure that by deleting the Parent folder, the entire Child folder will be automatically deleted. | |
| Click this icon to refresh User can use this function for 2 purposes: 1. When changes made do not respond automatically 2. Closing the expanded Tree Structure | |
| Click this icon for Expand Tree Structure : Expand all the Child under Parent Folder |