5. SIS TABLE
5. SIS Tables
Purpose:
The SIS Tables section allows administrators to manage various data sets by importing, viewing, and exporting table data. To ensure accurate data management, administrators must follow specific steps, such as using the correct Excel template and selecting the approriate view before importing.
Part 1: Navigating to SIS Tables
-
Accessing the System Tables Section:
-
From the dashboard, click on the System Menu.
-
Under System, click SIS Tables to open the data management page where you can view and manage various tables.
-
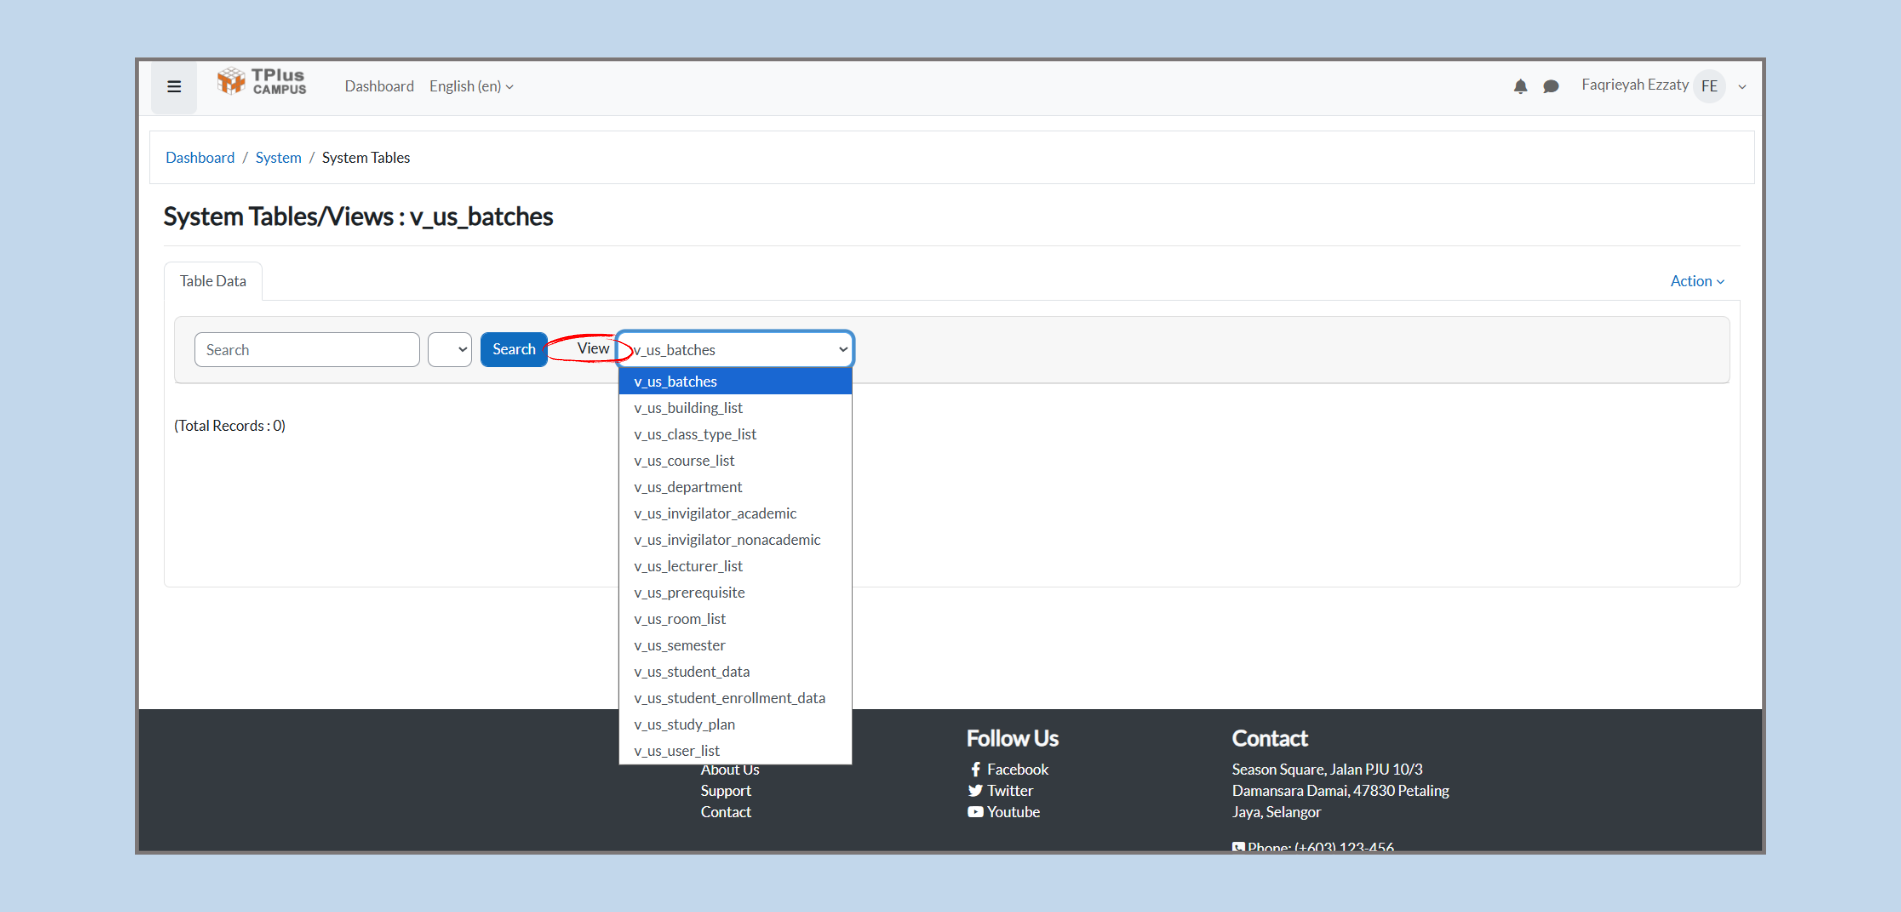
Part 2: Selecting the Correct View
-
View Dropdown
-
Step 1: In the View dropdown, select the relevent table to work with (e.g., v_us_batches, v_us_lecturer_list, v_us_course_list).
-
Step 2: After selecting the view, the system will display the corresponding data for that table.
-
Tip: Always ensure that the correct view is selected, as this will filter the data shown for management or export. The views available include:
-
v_us_batches: View batch information.
-
v_us_lecturer_list: View lecturer data (e.g., lecturer names, departments).
-
v_us_course_list: View course data (e.g., course codes, names).
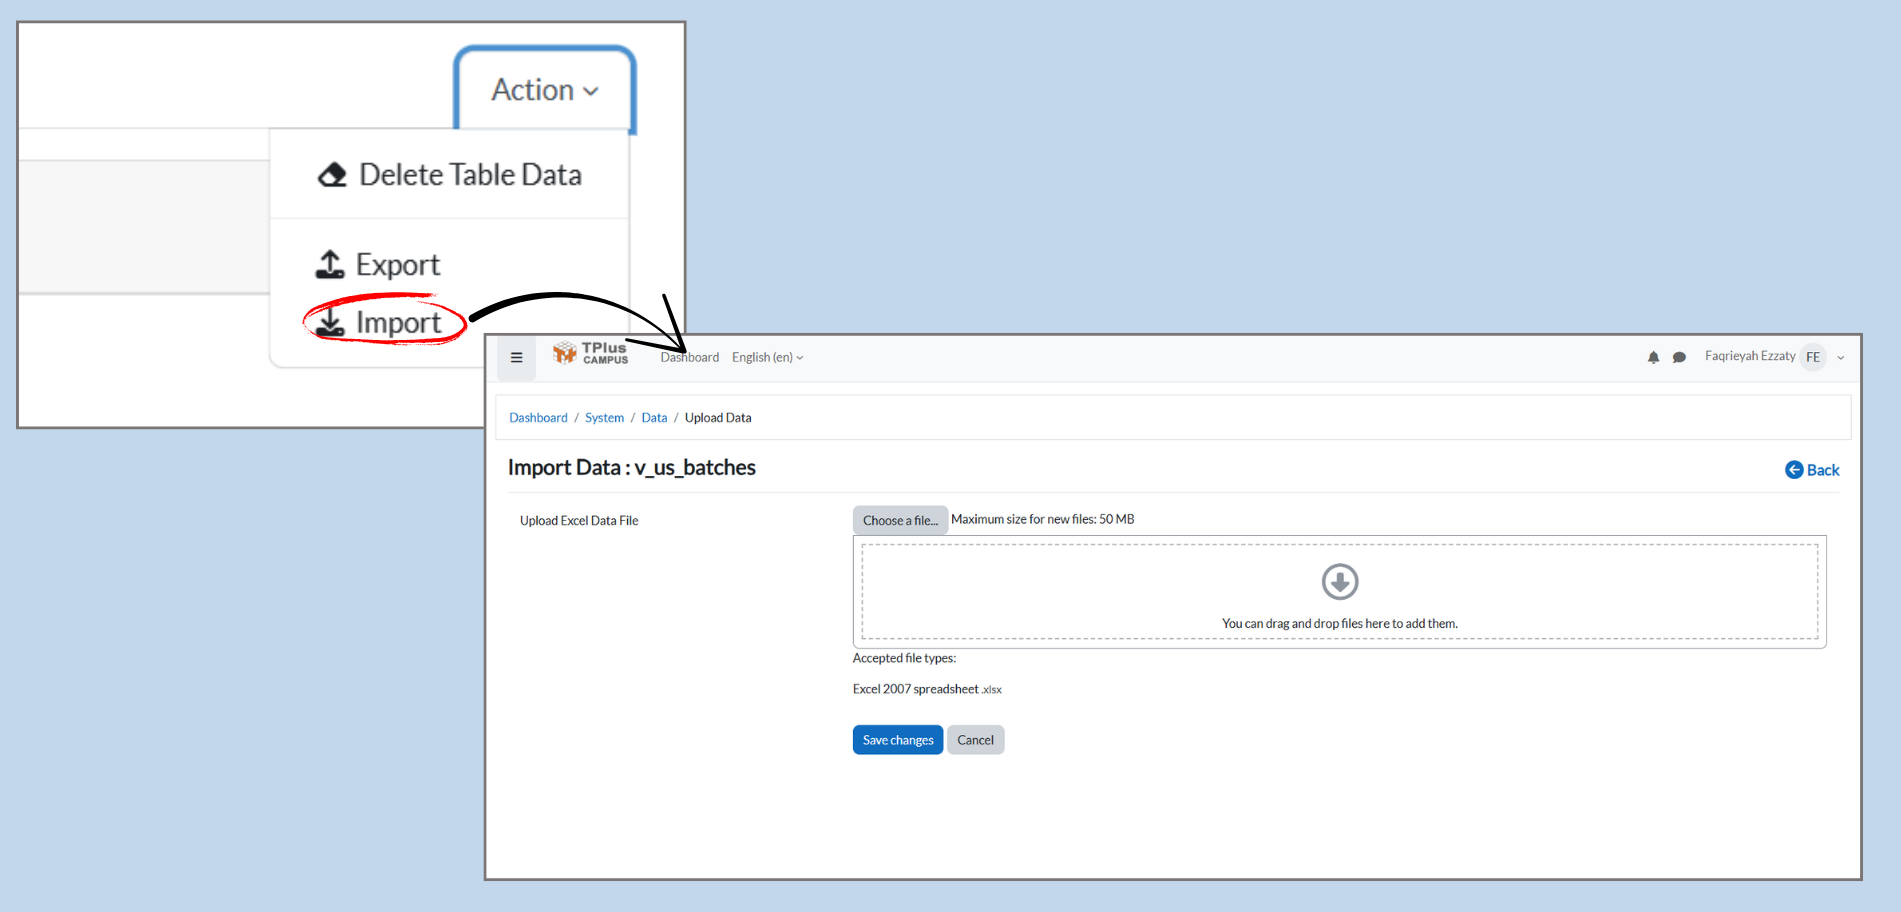
Part 3: Importing Data
-
Importing Excel Data:
-
Step 1: After selecting the appropriate view, click on the Action dropdown menu.
-
Step 2: From the dropdown, choose Import.
-
Step 3: The system will take you to the Import Data page, where you can upload your Excel file.
- Important: Before importing, administrators must use the Excel template provided by the system. This template will be given to the admin to ensure that all information entered follows the correct format and structure.
-
-
Upload the Excel File:
-
Step 1: Click Choose a file to browse and select your file .
-
Step 2: After selecting the file, click Save Changes to import the data into the system.
-
Part 4: Exporting Data
-
Exporting Excel Data:
- Step 1: In the View dropdown, select the table containing the data you want to export (e.g., batches, lecturers, or courses).
- Step 2: Once the data is displayed, click on the Action dropdown menu.
- Step 3: From the dropdown, choose Export.
- Step 4: The system will generate an Excel file based on the selected data, and a download option will appear.