3. USER ACCESS
3. User Access Management
Part 1: Overview of User Access Management
The User Access Management page is used by administrators to control which users have access to different modules and features within the system. Here, administrators can update user access rights and grant permissions based on roles.
Purpose:
-
To manage user access to various system modules such as Timetable, Rooms, Course, etc.
-
To assign permission for each user, such as allowing them to update subgroups or edit timetables.
Part 2: Navigating to User Access Management
-
Step 1: Access the System Menu
-
From the dashboard, navigate to the System menu.
-
-
Step 2: Open User Access Management
-
Under the System menu, click on User Access. This will open the User Access Management page where you can manage users’ permissions.
-
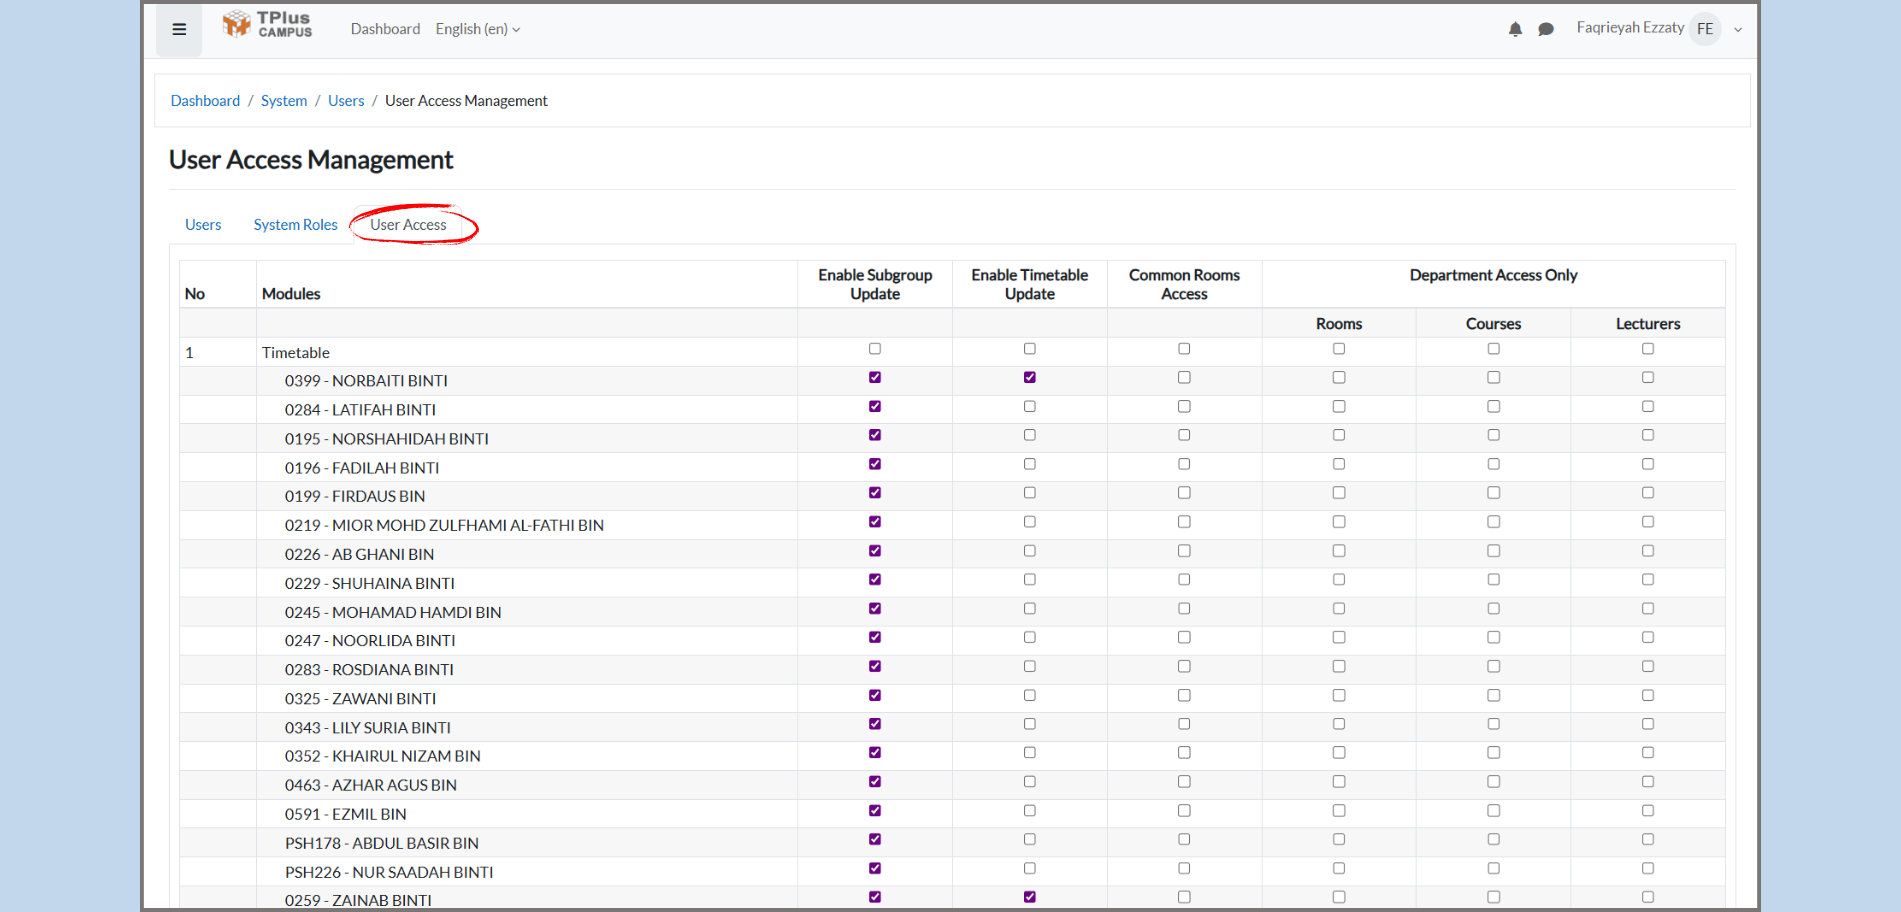
Part 3: Understanding the User Access Table
In the User Access Management page, you will see a table with different users and their corresponding access settings. The table includes the following columns:
-
Modules:
-
This column shows the different modules (e.g., Timetable) to which the users have access.
-
Tip: You can scroll throught this list to find the module you want to manage.
-
-
User Names:
-
In this column, you will see the names of users (e.g., NORBAITI BINTI, LATIFAH BINTI). These are the users who have access to the system.
-
-
Enable Subgroup Update:
-
Checkbox: If the checkbox is checked, the user allowed to update subgroups in selected module.
-
-
Enable Timetable Update:
-
Checkbox: If the checkbox is checked, teh user is allowed to update the timetable in the selected module.
-
-
Common Rooms Access:
-
Checkbox: IF checked, the user has access to common rooms within the system.
-
-
Department Only:
-
Checkbox: If checked, the user is restricted to department-level access only. They will not be able to access broader system areas.
-
-
Rooms, Courses, Lecturers:
-
These column contain checkboxes for allowing users to access or manage Rooms, Courses, or Lecturers.
-
If checked, the user has permissions to interact with these entities within the system.
-
Part 4: Managing User Permissions
-
Step 1: Granting Permissions
-
To grant access, check the relevant boxes for each user. For example:
-
If you want a user to be able to update the timetable, check the Enable Timetable Update box for that user.
-
If you want the user to have department-level access only, check the Department Access Only box.
-
-
-
Step 2: Updating Permissions
-
To update the access rights for user, simply click the checkbox besides the feature you want to enable or disable.
-
Tip: Ensure to double-check the modules and permissions before saving changes to avoid giving unwanted access.
-
-
Step 3: Applying Changes
-
After updating the permissions, make sure to save the changes to apply the new access settings.
-
Tip: Regularly review the permissions to ensure users have only the necessary.
-