3. My Courses
Purpose: Shows details of courses and their subgroups, and lets you edit subgroup info or its timetable.
A. Accessing My Courses
Steps
-
From the dashboard, go to Class Timetable > My Courses.

B. Top Filters & Page Layout
1) Semester dropdown
-
What it does: Filters the course list to the selected semester. If nothing is chosen, the course pane stays empty.
-
When to use: First action on the page—pick the working semester before expanding courses.

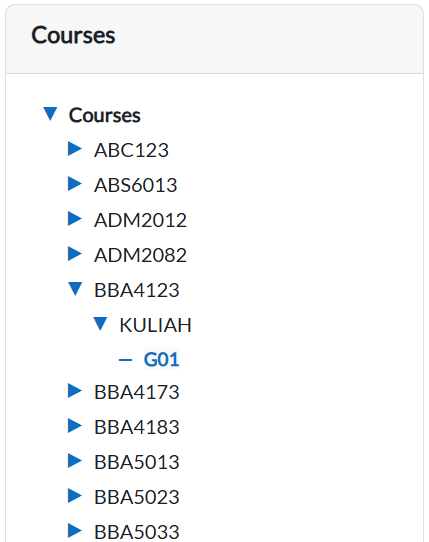
2) Course list panel
-
What it shows: All courses available in the chosen semester (collapsed by default).
-
Key control: Blue expand arrow at the left of each course row.
C. Expanding a Course
3) Blue expand arrow
-
What it does: Expands/collapses a course to reveal its class types (e.g., Kuliah, Tutorial) and subgroups under each class type.
-
Details shown after expand:
-
Class types under the course (e.g., Kuliah, Tutorial)
-
Subgroups under each class type (e.g., G01)
-
-
Example from your system: Course CA4073 has Kuliah and Tutorial; under Kuliah there is subgroup G01.
D. Opening a Subgroup
4) Subgroup link (e.g., G01)
-
What it does: Opens the Subgroup Details pane for that subgroup.
-
What you’ll see: Subgroup metadata and action buttons (blue/orange).
-
Tip: Only subgroups for the selected semester appear.

E. Action Buttons in Subgroup Details
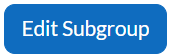
5) Blue button (Edit Subgroup)
-
Label: Edit Subgroup (blue button).
-
Function: Opens the form to update subgroup details.

-
Usage: Use this when you need to make changes to the subgroup information.
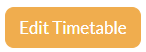
6) Orange button (Edit Timetable)
-
Label: Edit Timetable (orange button).
-
Function: Opens the timetable editor for the selected subgroup.

-
Usage: Use this when you want to add, change, or delete sessions for the subgroup.