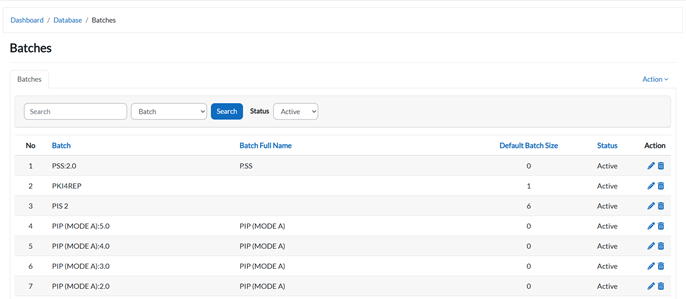
4. Batch Management
1. View Batch List
- Navigate to the Batches Management section.
- The system will display a table of all batch records.
2. Filter by Batch
- Click on the Batch Dropdown button.
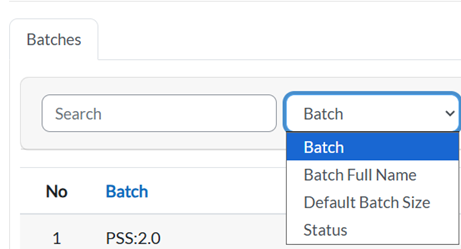
- Select a batch from the list to filter and view its details.
3. Filter by Status
- Click on the Status Dropdown button.

- Choose a status to display only batches with that status.
4. Edit Batch Information
- Locate the batch in the table.
- Click the Pencil Icon next to the batch you want to edit.

- Update the details in the form.
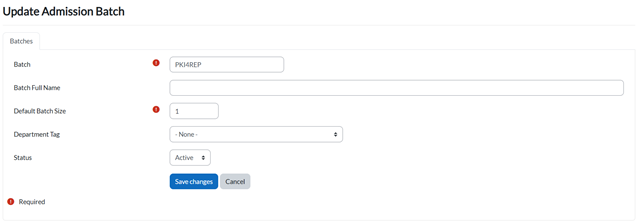
- Click:
- Save Changes to confirm.
- Cancel to discard.
5. Batch Actions
- Click on the Action Button in the batch row.
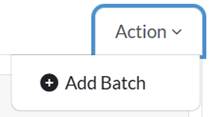
- Add Batch button will be shown.
6. Add a New Batch
- Click the Add Batch button on the Action Button.
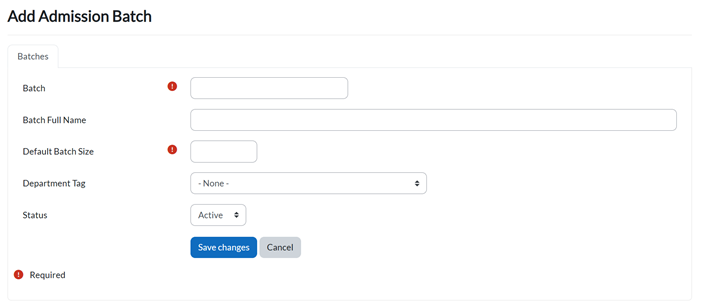
- Fill in all required fields (marked with !).
- Click:
- Save Changes to create the new batch.
- Cancel to abort.
Key Notes
- Filtering: Use the dropdowns to quickly find batches by name or status.
- Editing: Only users with admin access can update batch details.