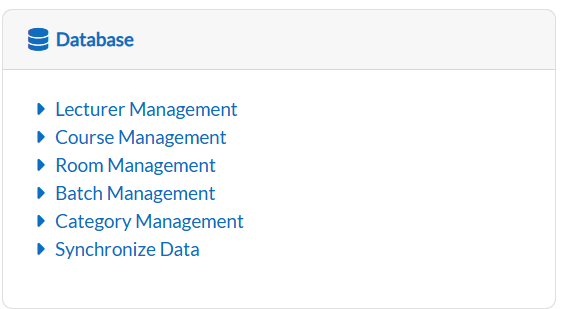
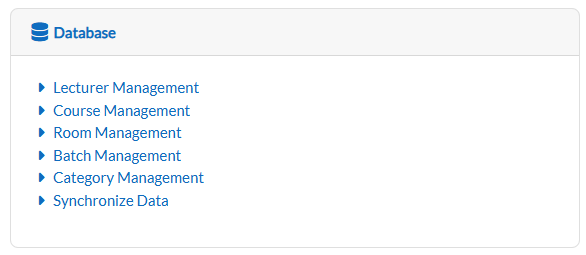
Database
| Site: | Timetable Plus |
| Course: | Timetable Plus Campus (Ver 1) |
| Book: | Database |
| Printed by: | Guest user |
| Date: | Friday, 1 May 2026, 3:10 AM |
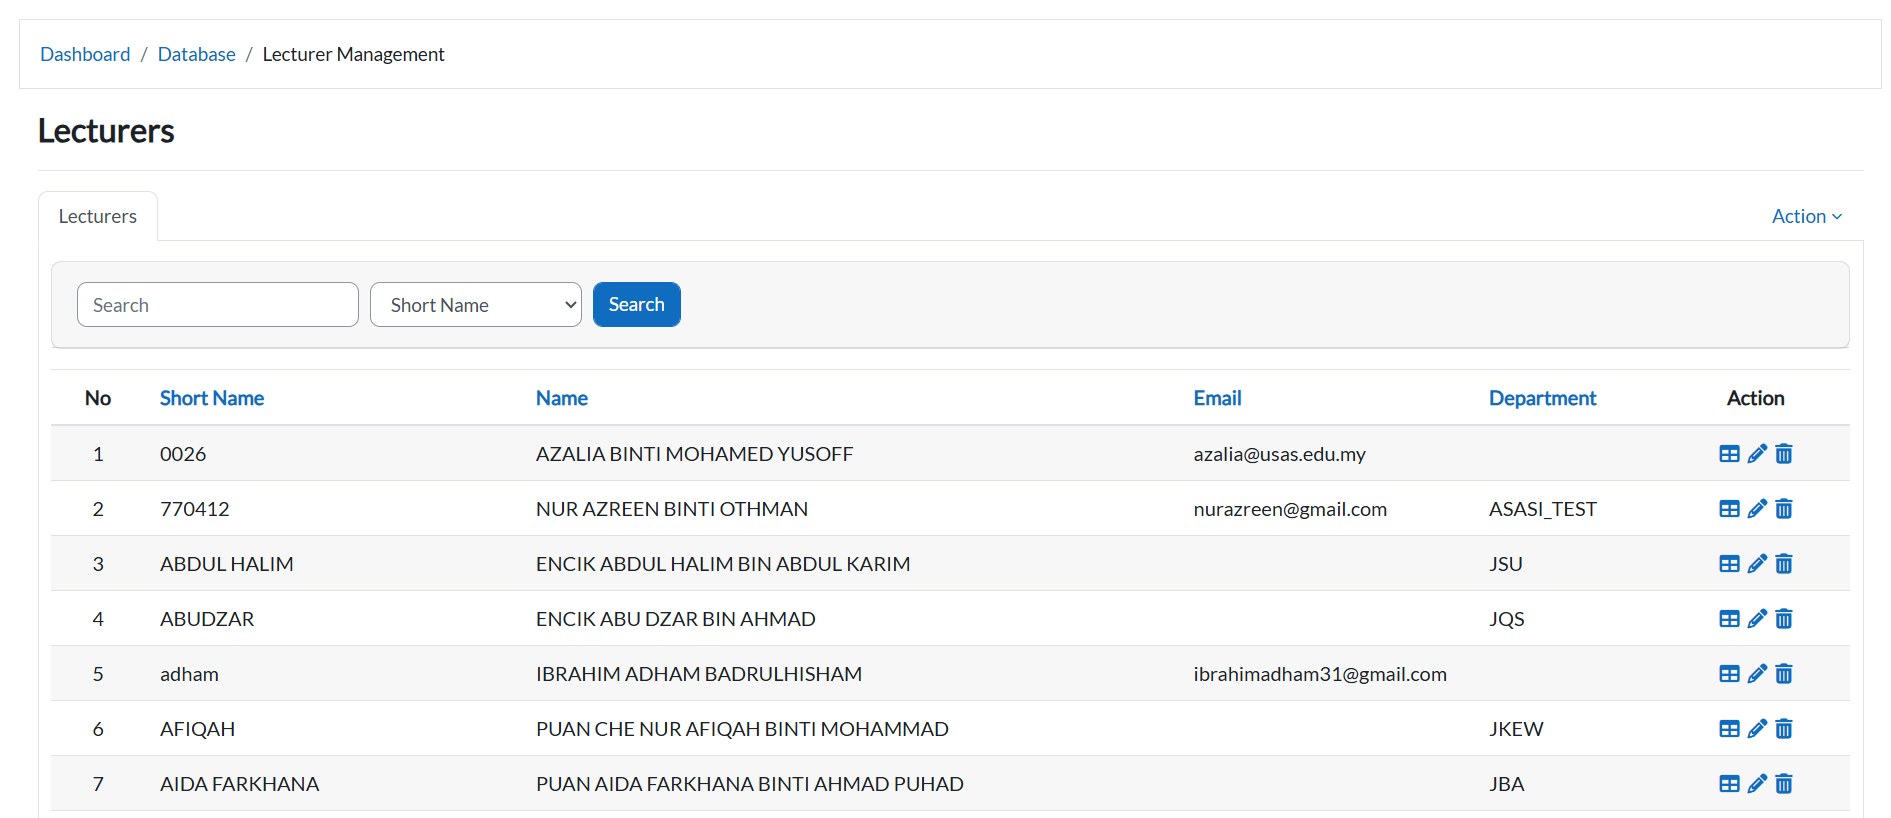
1. Lecturer Management
1. View Lecturer List
-
Navigate to the Lecturer Management section.
-
The system will display a table of all lecturer records.
-
To view a lecturer’s timetable:
-
Click the "Table Icon" next to their name.

-
2. Print Lecturer Timetable
-
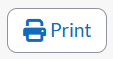
From the timetable view (after clicking the table icon), click the Printer Icon (top-right).
-
The system will redirect you to a PDF preview page.
-
To download/save:
-
Press Ctrl + P (Windows) or Cmd + P (Mac).
-
Select "Save as PDF" as the destination.
-
Click "Print/Save".
-
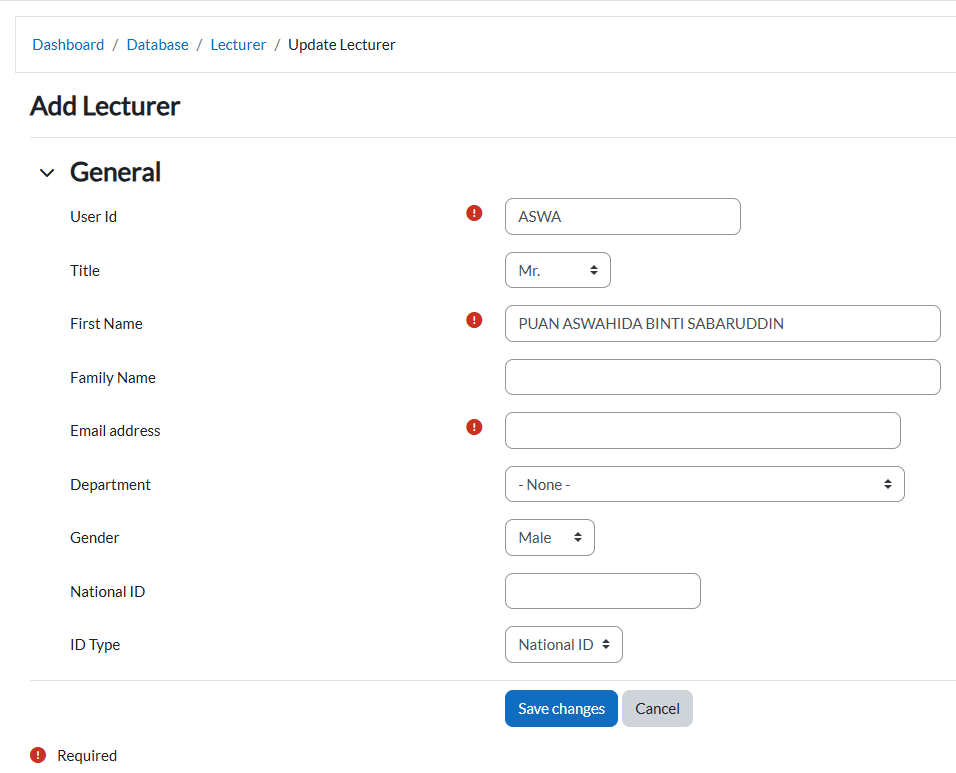
3. Edit Lecturer Information
-
Locate the lecturer in the main table.
-
Click the Pencil Icon in their row.

-
Update the details in the form.
-
Click:
-
"Save Changes" to confirm changes.
-
"Cancel" to discard.
-
4. Add a New Lecturer
-
Click the "Add New Lecturer" button.
-
Fill in all required fields (marked with *).
-
Click:
-
"Save Changes" to add the lecturer.
-
"Cancel" to abort.
-
Key Notes
-
Timetable Access: Always click the Table Icon to view/edit a lecturer’s schedule.
-
PDF Export: The print feature generates a PDF layout; use browser controls (Ctrl + P) to save/print.
2. Course Management
1. Accessing Course Management
-
From the main dashboard, locate and click on Course Management.
-
The system will open to the Course Catalogue tab by default.

2. Course Catalogue
View All Courses
- The main table displays:
- Course ID
- Course Code
- Name
- Credits
- Status (Active/Inactive)
- Action

- Navigate through pages using:
-
- Next/Previous buttons.
- Page numbers.

Add a New Course
-
Click the Action dropdown button.
-
Select "Add Course".

Fill in:-
Required Fields:
-
Course Code
-
Course Name

-
-
- Click:
-
-
"Save Changes" to add.
-
"Cancel" to abort.
-
Edit a Course
-
Locate the course in the table.
-
Click the pencil icon in its row

-
Update fields:
-
Required:
-
Course Code
-
Course Name
-
-
Optional:
-
Course Color
-
Credit
- Final Exam Duration
- Status
- Department Tag
- Description
-
-
-
Click:
-
"Save Changes" to confirm.
-
"Cancel" to discard.

-
Search by Filter Courses
-
Click any dropdown arrow in column headers.
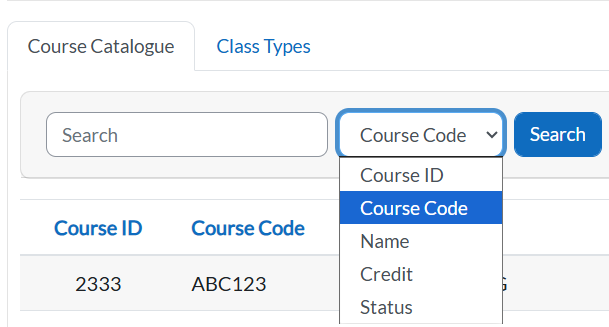
-
Select criteria.
-
Type in the keyword.
- Click Search button to see the result.
View Course Information
- Locate the course in the table.
- Click the Magnifying Glass Icon in the row.

- The system will display the full course catalogue details, including:
-
-
Course Code
-
Course Name
-
Default Credit
-
Status
-
Department Tag
-
3. Class Types Management
View Class Types
- Click the "Class Types" tab.

- The table lists:
- Class Type
- Action
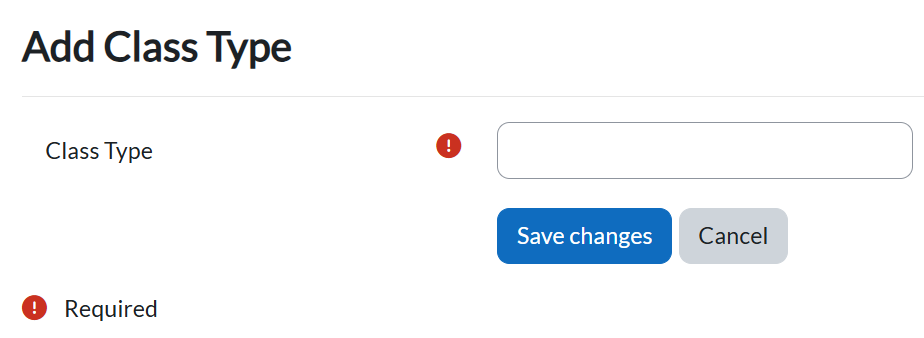
Add a Class Type
- Click the Action dropdown > "Add Class Type".
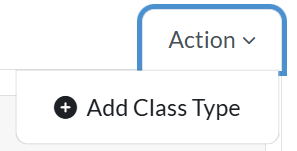
- Enter:
- Class Type
- Click "Save Changes".
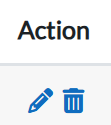
Edit/Delete a Class Type
- Locate the type in the table.
- Click the pencil icon to edit or trash icon to delete.
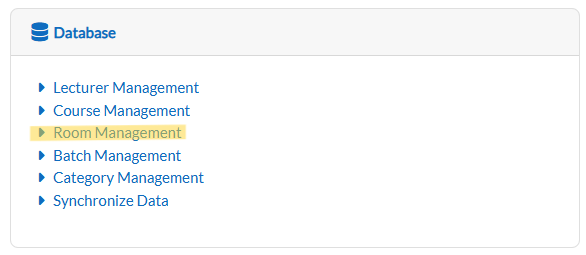
3. Room Management
This section will guide you through managing rooms, buildings, and room types in Timetable Plus Campus.
Step 1: Access Room Management
-
From the Dashboard, locate and click the Room Management.
-
The system will display three sub-tabs: Rooms, Buildings, and Room Types.
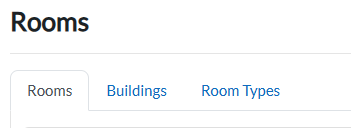
Step 2: Manage Rooms
View and Filter Rooms
-
Click the Rooms sub-tab.
-
The table displays all rooms.
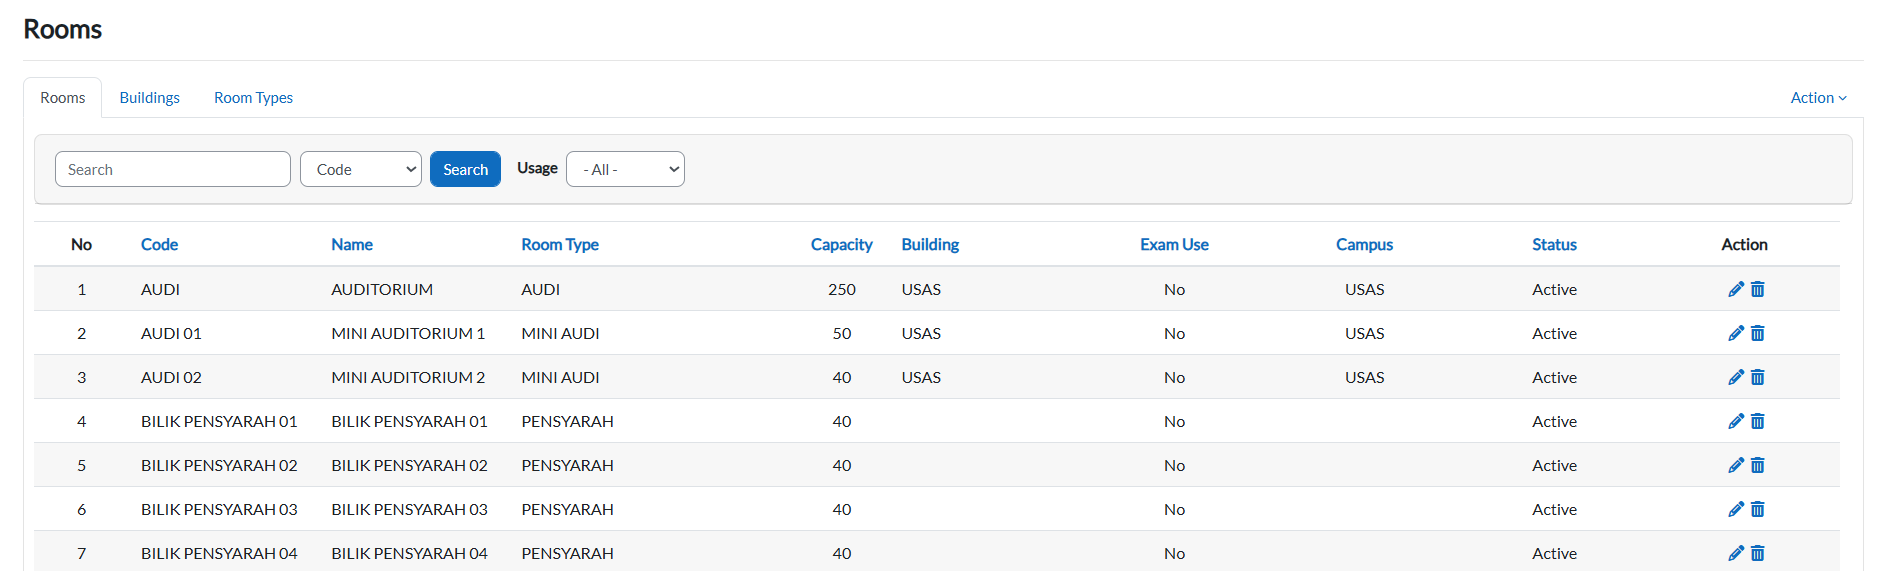
-
To search by filter:
-
Click the dropdown arrow.
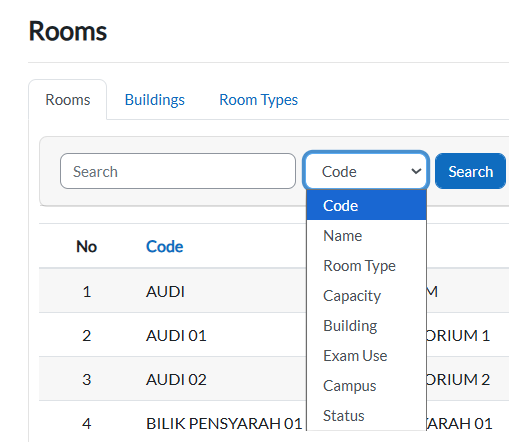
-
Select your criteria and click the Search button.
-
The table updates automatically.
-
Edit a Room
-
Locate the Room
-
Scroll through the table or use filters to find the room you want to edit.
-
-
Open Edit Mode
-
Click the pencil icon in the room's row.

-
-
Edit Room Details
In the edit form, you can modify:-
Required Fields (must be filled):
-
Code
-
Capacity
-
-
Optional Fields:
-
Building
-
Name (English)
-
Name (Alternate)
-
Room Number
-
Level
-
Room Type
-
Usage
-
Exam use
-
Gender
-
Status
-
Campus
-
-
-
Save Changes
-
Click Save Changes to confirm updates.
-
Click Cancel to discard changes.
-
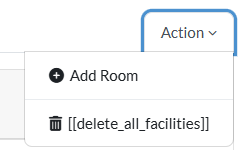
Add a New Room
-
Open the Add Form
-
Click the Action dropdown button in the top-right corner.
-
Select Add Room.
-
-
Fill in Room Details
-
Required Fields (marked with !):
-
Building
-
Code
-
Room Type
-
Capacity
-
-
Optional Fields:
-
Name (English)
-
Name (Alternate)
-
Room Number
-
Level
-
Usage
-
Exam Use
-
Gender
-
Status
-
Campus
-
-
-
Submit or Cancel
-
Click Save Changes to add the room.
-
Click Cancel to discard the form.
-
Step 3: Manage Buildings
View Buildings
-
Click the Buildings sub-tab.
-
The table list all buildings.

Edit a Building
-
Locate the building in the table and click the pencil icon
-
In the Update Building form, modify:
-
Required Fields:
-
Code
-
Name (English)
-
-
Optional Fields:
-
Name (Alternate)
-
Usage
-
Gender
-
Status
-
Campus
-
-
-
Click:
-
Save changes to confirm.
-
Cancel to discard.
-
Add a Building
-
Click the Add Building button (top-right of the table).
-
Fill in:
-
Required Fields:
-
Code
-
Name (English)
-
-
Optional Fields:
-
Name (Alternate)
-
Usage
-
Gender
-
Status
-
Campus
-
-
-
Click:
-
Save Changes to add.
-
Cancel to abort.
-
Step 4: Manage Room Types
View/Edit Room Types
-
Click the Room Types sub-tab.
-
To edit:
-
Click the pencil icon
-
Update the room type.
-
Click Save Changes
-
Add a Room Type
-
Click Add Room Type on Action button.
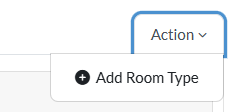
-
Enter the room type.
-
Click Save Changes.
4. Batch Management
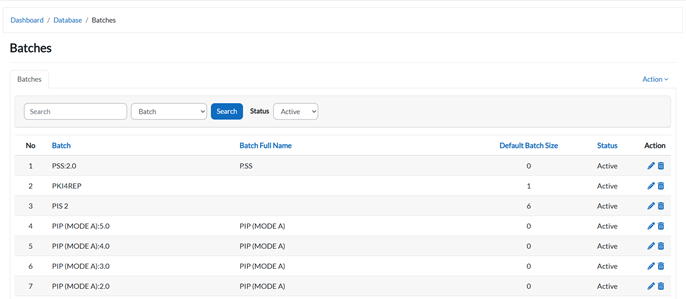
1. View Batch List
- Navigate to the Batches Management section.
- The system will display a table of all batch records.
2. Filter by Batch
- Click on the Batch Dropdown button.
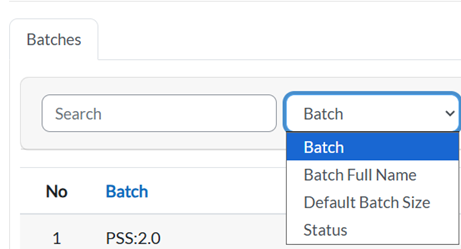
- Select a batch from the list to filter and view its details.
3. Filter by Status
- Click on the Status Dropdown button.

- Choose a status to display only batches with that status.
4. Edit Batch Information
- Locate the batch in the table.
- Click the Pencil Icon next to the batch you want to edit.

- Update the details in the form.
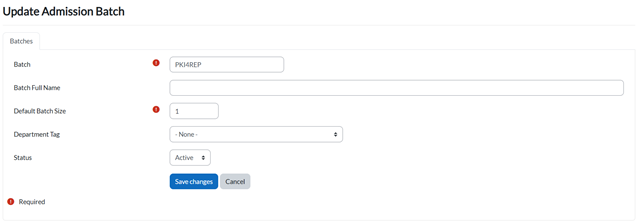
- Click:
- Save Changes to confirm.
- Cancel to discard.
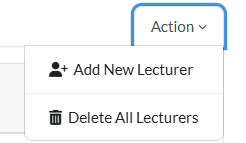
5. Batch Actions
- Click on the Action Button in the batch row.
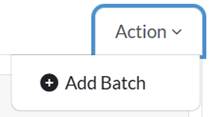
- Add Batch button will be shown.
6. Add a New Batch
- Click the Add Batch button on the Action Button.
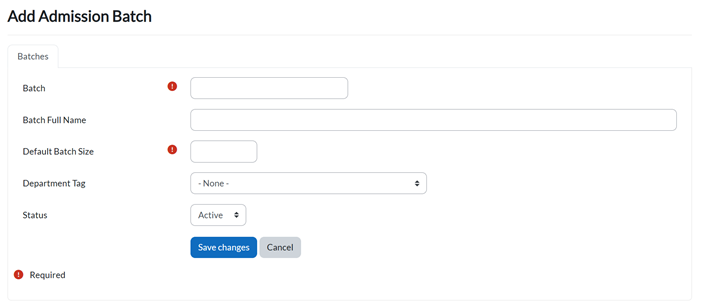
- Fill in all required fields (marked with !).
- Click:
- Save Changes to create the new batch.
- Cancel to abort.
Key Notes
- Filtering: Use the dropdowns to quickly find batches by name or status.
- Editing: Only users with admin access can update batch details.
5. Category Management
1. View Category List
- Navigate to the Category Management section.
- The system will display a table of all category records.

2. Filter by Category Name
- Click on the Category Name Dropdown button.
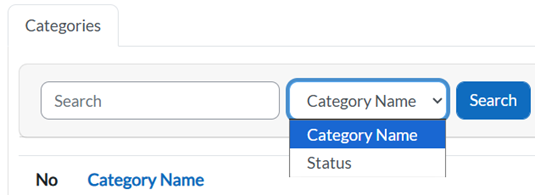
- Select a category from the list to filter and view its details.
3. Filter by Status
- Click on the Status Dropdown button.
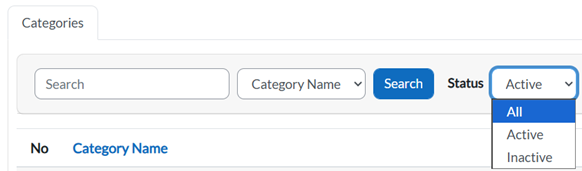
- Choose a status to display only categories with that status.
4. Edit Category Information
- Locate the category in the table.
- Click the Pencil Icon next to the category you want to edit.

- Update the details in the form.

- Click:
- Save Changes to confirm.
- Cancel to discard.
5. Category Actions
- Click on the Action Button.
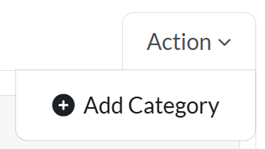
- Add Category button will be shown.
6. Add a New Category
- Click the Add Category button.

- Fill in all required fields (marked with !).
- Click:
- Save Changes to create the new category.
- Cancel to abort.
Key Notes
- Filtering: Use the dropdowns to quickly locate categories by name or status.
- Editing: Only users with admin privileges can update category details.
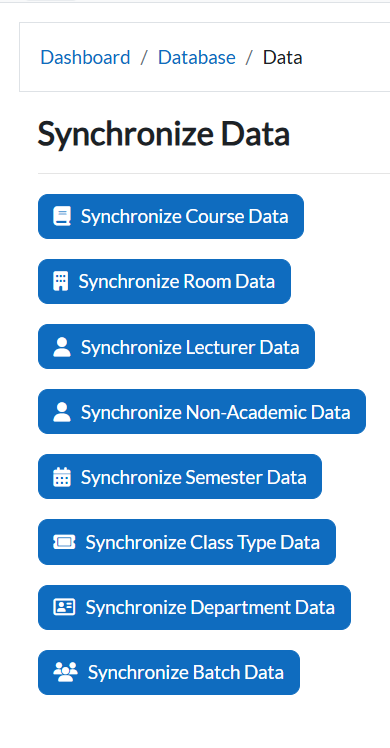
6. Synchronize Data
Purpose
The Synchronize Data feature ensures that all newly inserted or updated information in the e-Campus website is reflected and updated in the Timetable Plus system.
Whenever new records are added (e.g., new courses, lecturers, or batches), you must run synchronization so the system works with the latest data.
Access Synchronization Page
-
Navigate to: Dashboard → Database → Synchronize Data.
-
The Synchronize Data page will display multiple synchronization options.