2. Add, Edit and Delete in Database
2.1. Course Management
In this subchapter, we will learn on how to Add, Edit and Delete Course in Course Management  .
.
1. Add Course
To add course in Course Management, there are 3 simple steps.
STEPS 1: To create new course, click on the icon Create New Course. 
STEPS 2: Once you have clicked the icon, select the new course that appearing on left side.
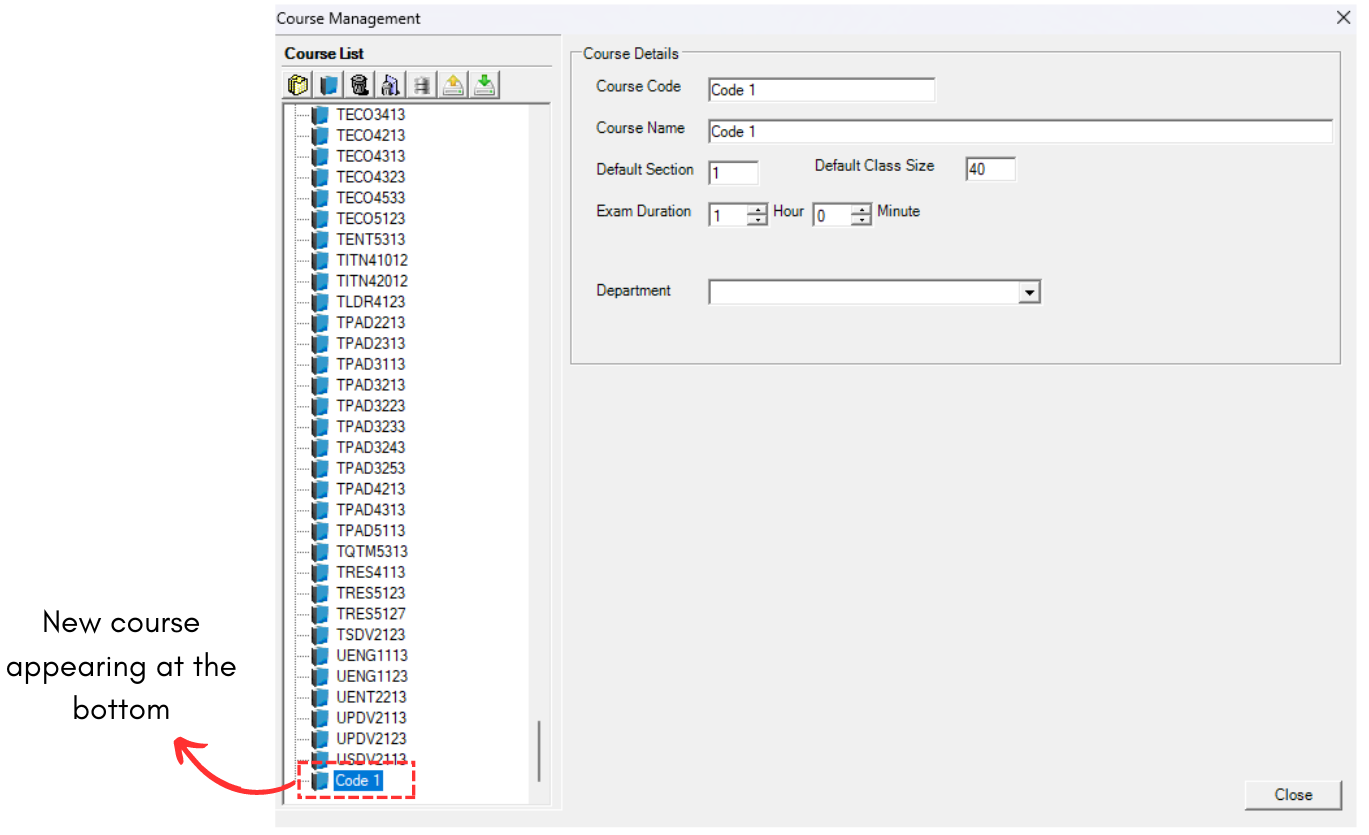
Diagram 2.1.1 New Course
You will be able to see the Course details on right side.
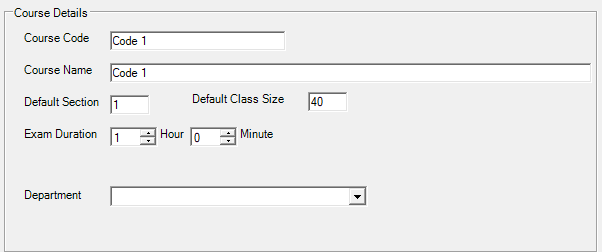
Diagram 2.1.2 Course Details
STEPS 3:To fill in, refer to the table below.
|
Course Code |
Short name for the course. Course Code is compulsory and cannot be duplicated. Example : CS110 |
|
Course Name |
Course Name of the Code. Course Name is compulsory. Example : Computer Science |
|
Default Section |
Default Section number in the timetable. |
|
Default Class Size |
Default number of class capacity. |
|
Exam Duration |
Default on how long the exam will be held for the course. This field is compulsory. |
|
Department |
Department of the course belong to. This field is non-compulsory. |
Table 2.1.1 Course Details Explanation
Below is the example how it will look like after filling the form. Noted that there is No Save Button. You may close it and it will be automatically added into the Course Management.
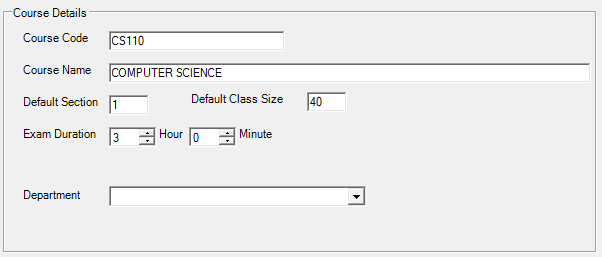
Diagram 2.1.4 Filled course details
IMPORTANT NOTE: If you put the Exam Duration here, you won't be having to add exam duration in Student Raw Data.

Diagram 2.1.5 Location of the new course before and after you fill up the details
Optional: Organize your courses into respective folder (Non-Compulsory)
Once you have multiple courses, you may want to organize them into folders. For example, folder is organized by course's faculty.
Press the New Folder
 icon.
icon.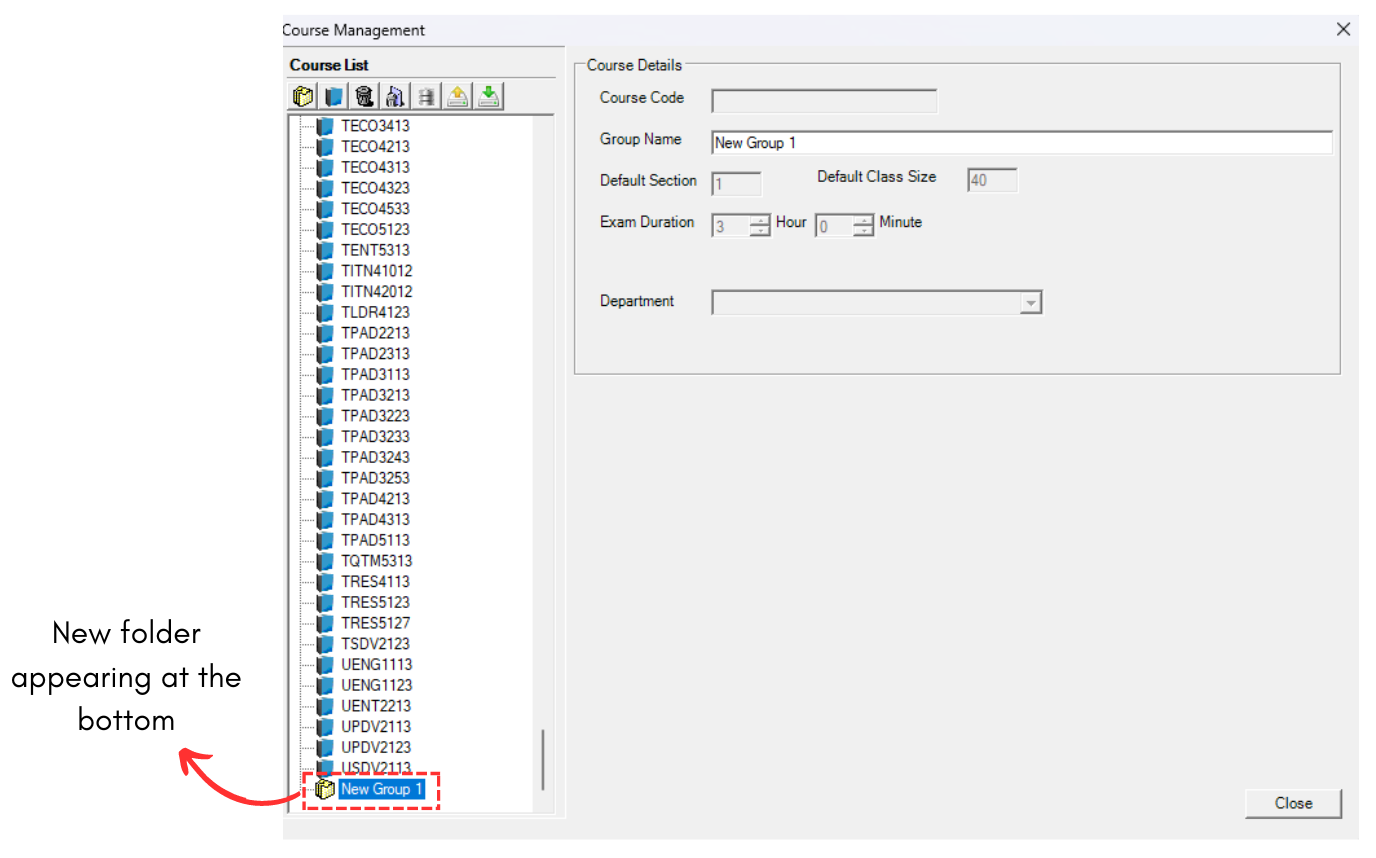
Diagram 2.1.6 New Course Folder
Note that new folder you created will also automatically appear at the bottom list of folder. When you reopening the Course Management, the folder can be found in the list according to alphabetical order.
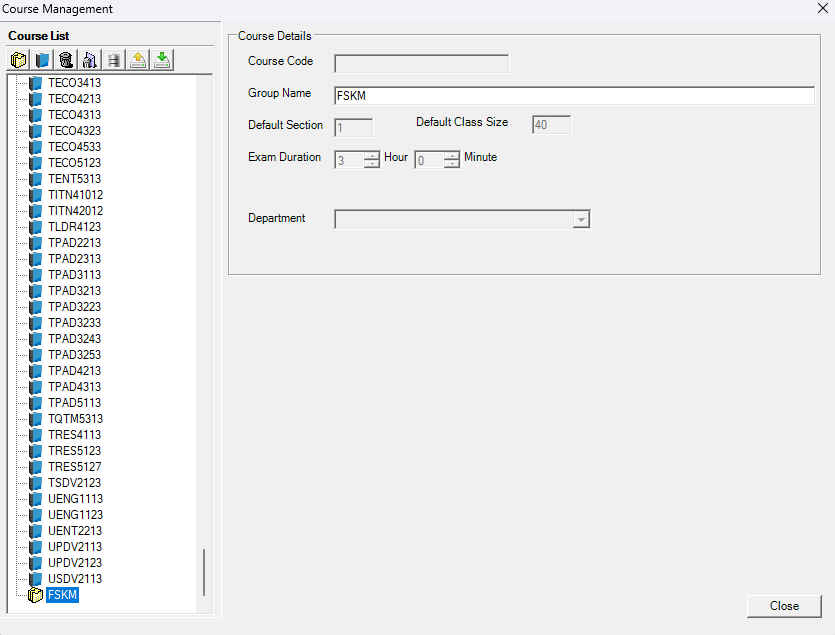
Diagram 2.1.7 Filled course folder details
Select your desired course.

Diagram 2.1.8 Selected desired course
Drag it to the folder and drop.

Diagram 2.1.9 Course dragged inside the folder
2. Edit Course
To edit course in Course Management, there are 4 simple steps.
STEPS 1: To edit course, you may open the Course Management .
STEPS 2: Choose the course that you want to edit.
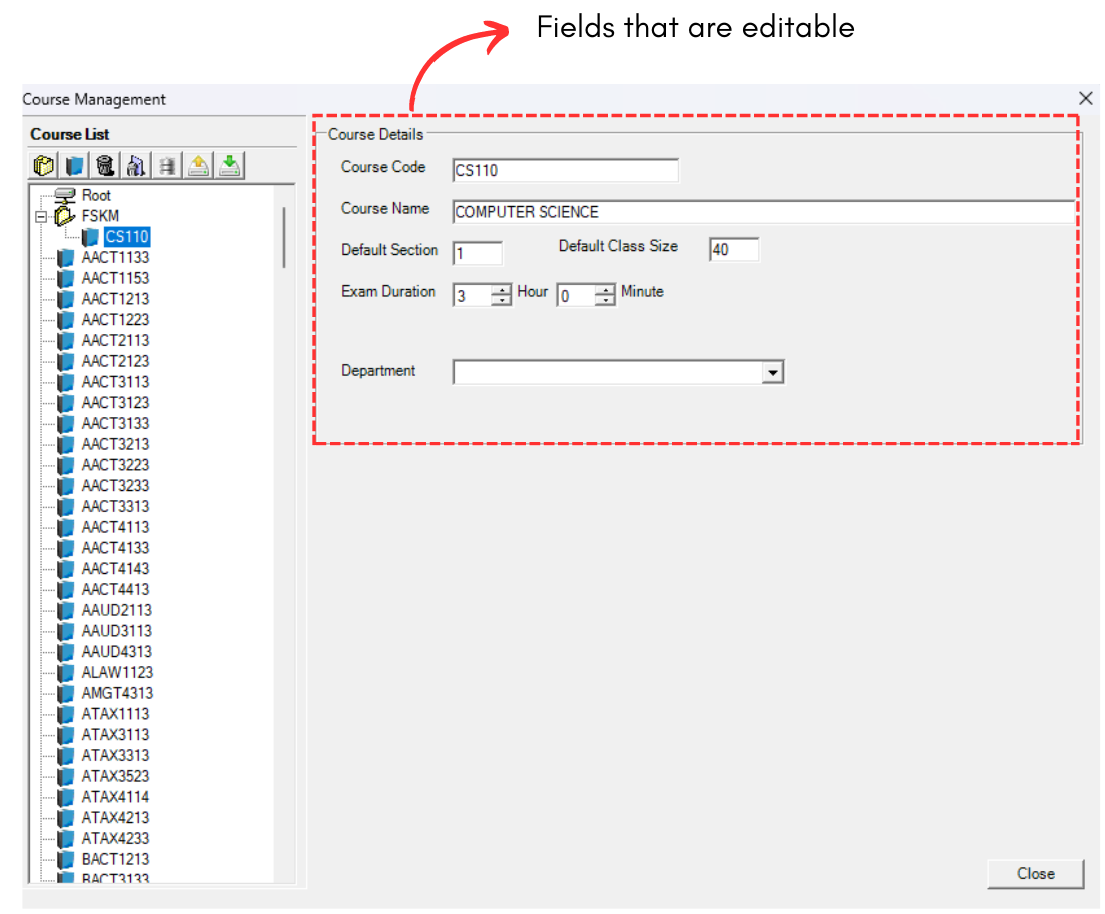
Diagram 2.1.10 Editable Fields
STEPS 3: Edit the course information. For Example, changing the course code from CS110 to CS112. Refer to the picture below.
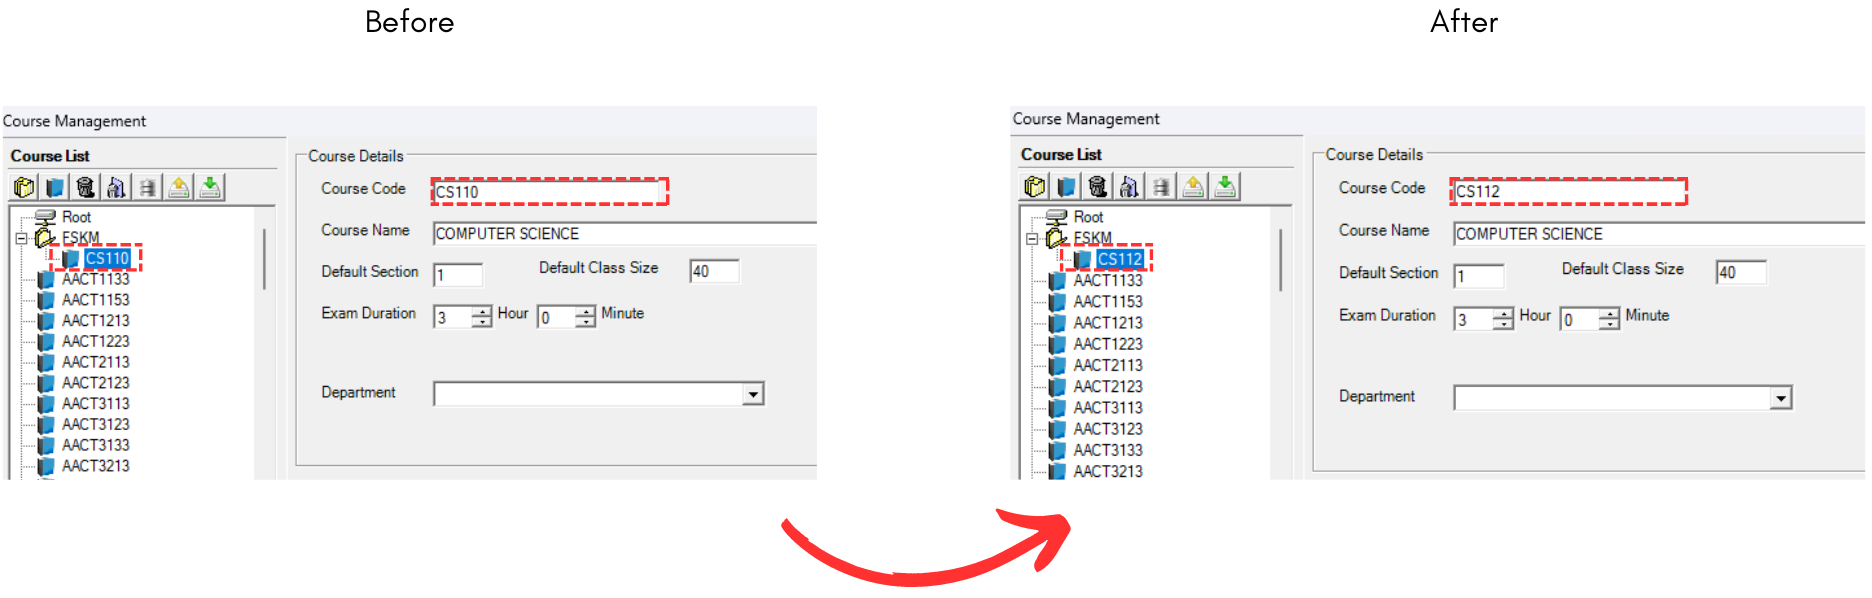
Diagram 2.1.11 Change Course Code Details
As you can see, the course code is changing on the left side as well.
STEPS 4: All done. You can simply close it as it is automatically updated inside Course Management.
3. Delete Course
There are 2 ways of delete the course. You can delete a course/folder OR you can delete All Courses.
ALTERNATIVE 1: To delete, select the course or the folder that you want to delete.

Diagram 2.1.12 Selected course
Click the Delete Folder or Course icon

 .
. After that, it will pop-up confirmation window on deleting the folder/group or the course. click Yes to proceed.


Diagram 2.1.13 Delete Group and Course Pop-up
ALTERNATIVE 2: To Delete All, select the Delete All icon 
 .
.
Confirmation window will pop-up and click Yes to proceed.


Diagram 2.1.14 Delete All Course Pop-up