1. Adding the Merge Group & Same Time Group
1.1. Merge Groups
To do merge group, you need to go to Data and select Merge Group List.

Diagram 1.1.1 Location of Merge Groups List
Before creating a merge group, you need to study the icons inside the Merge Group List.
![]()
| Click this icon to add section to merge group. | |
| Click this icon to manually add new merge group. | |
| Click this icon to manage merge group. | |
| Click this icon to view merge group properties. | |
| Click this icon to remove section from merge group. | |
| Click this icon to delete merge group. | |
| Click this icon to delete All merge group. | |
| Click this icon to refresh merge group. |
There are 2 ways of creating the merge group.
ALTERNATIVE 1: Click ![]() icon to add directly section to the merge group.
icon to add directly section to the merge group.
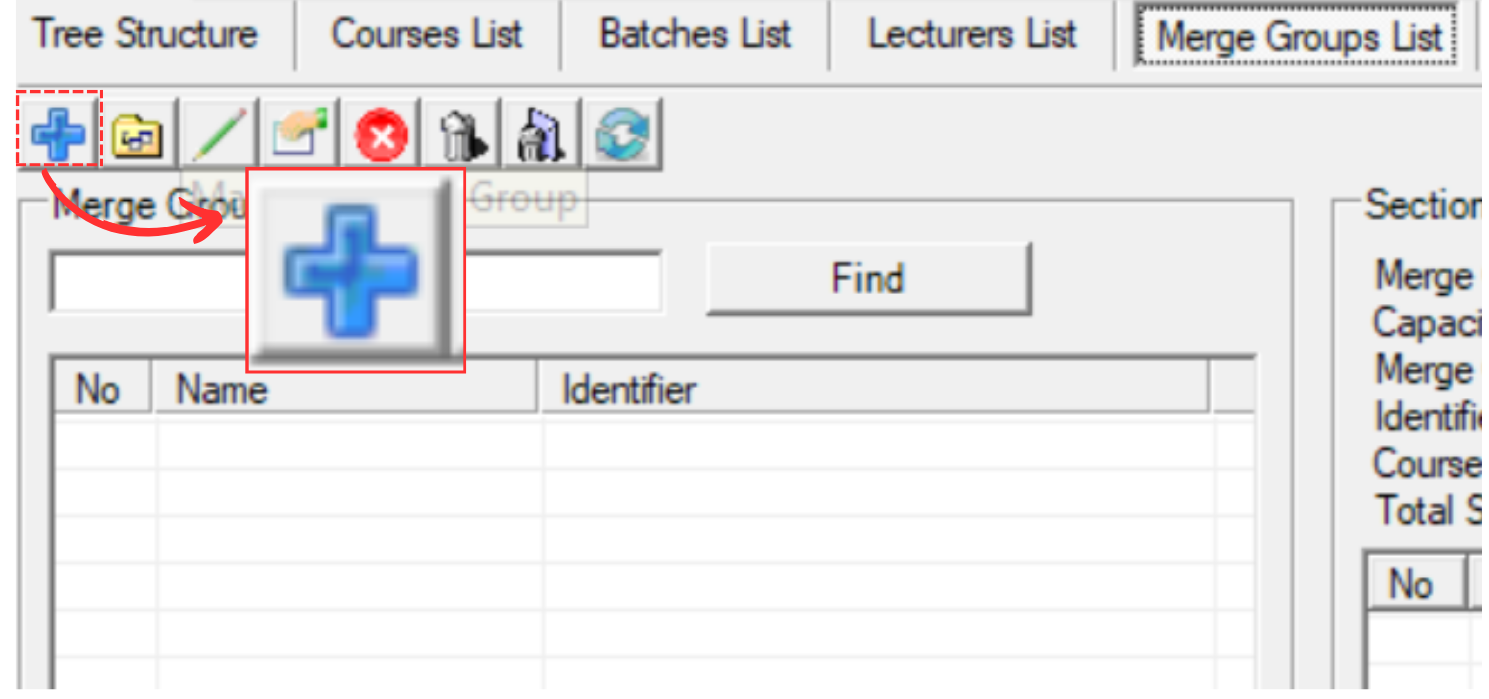
Diagram 1.1.2 Location of Add Directly Section to the Merge Group Icon
Once click, a new window will appear.
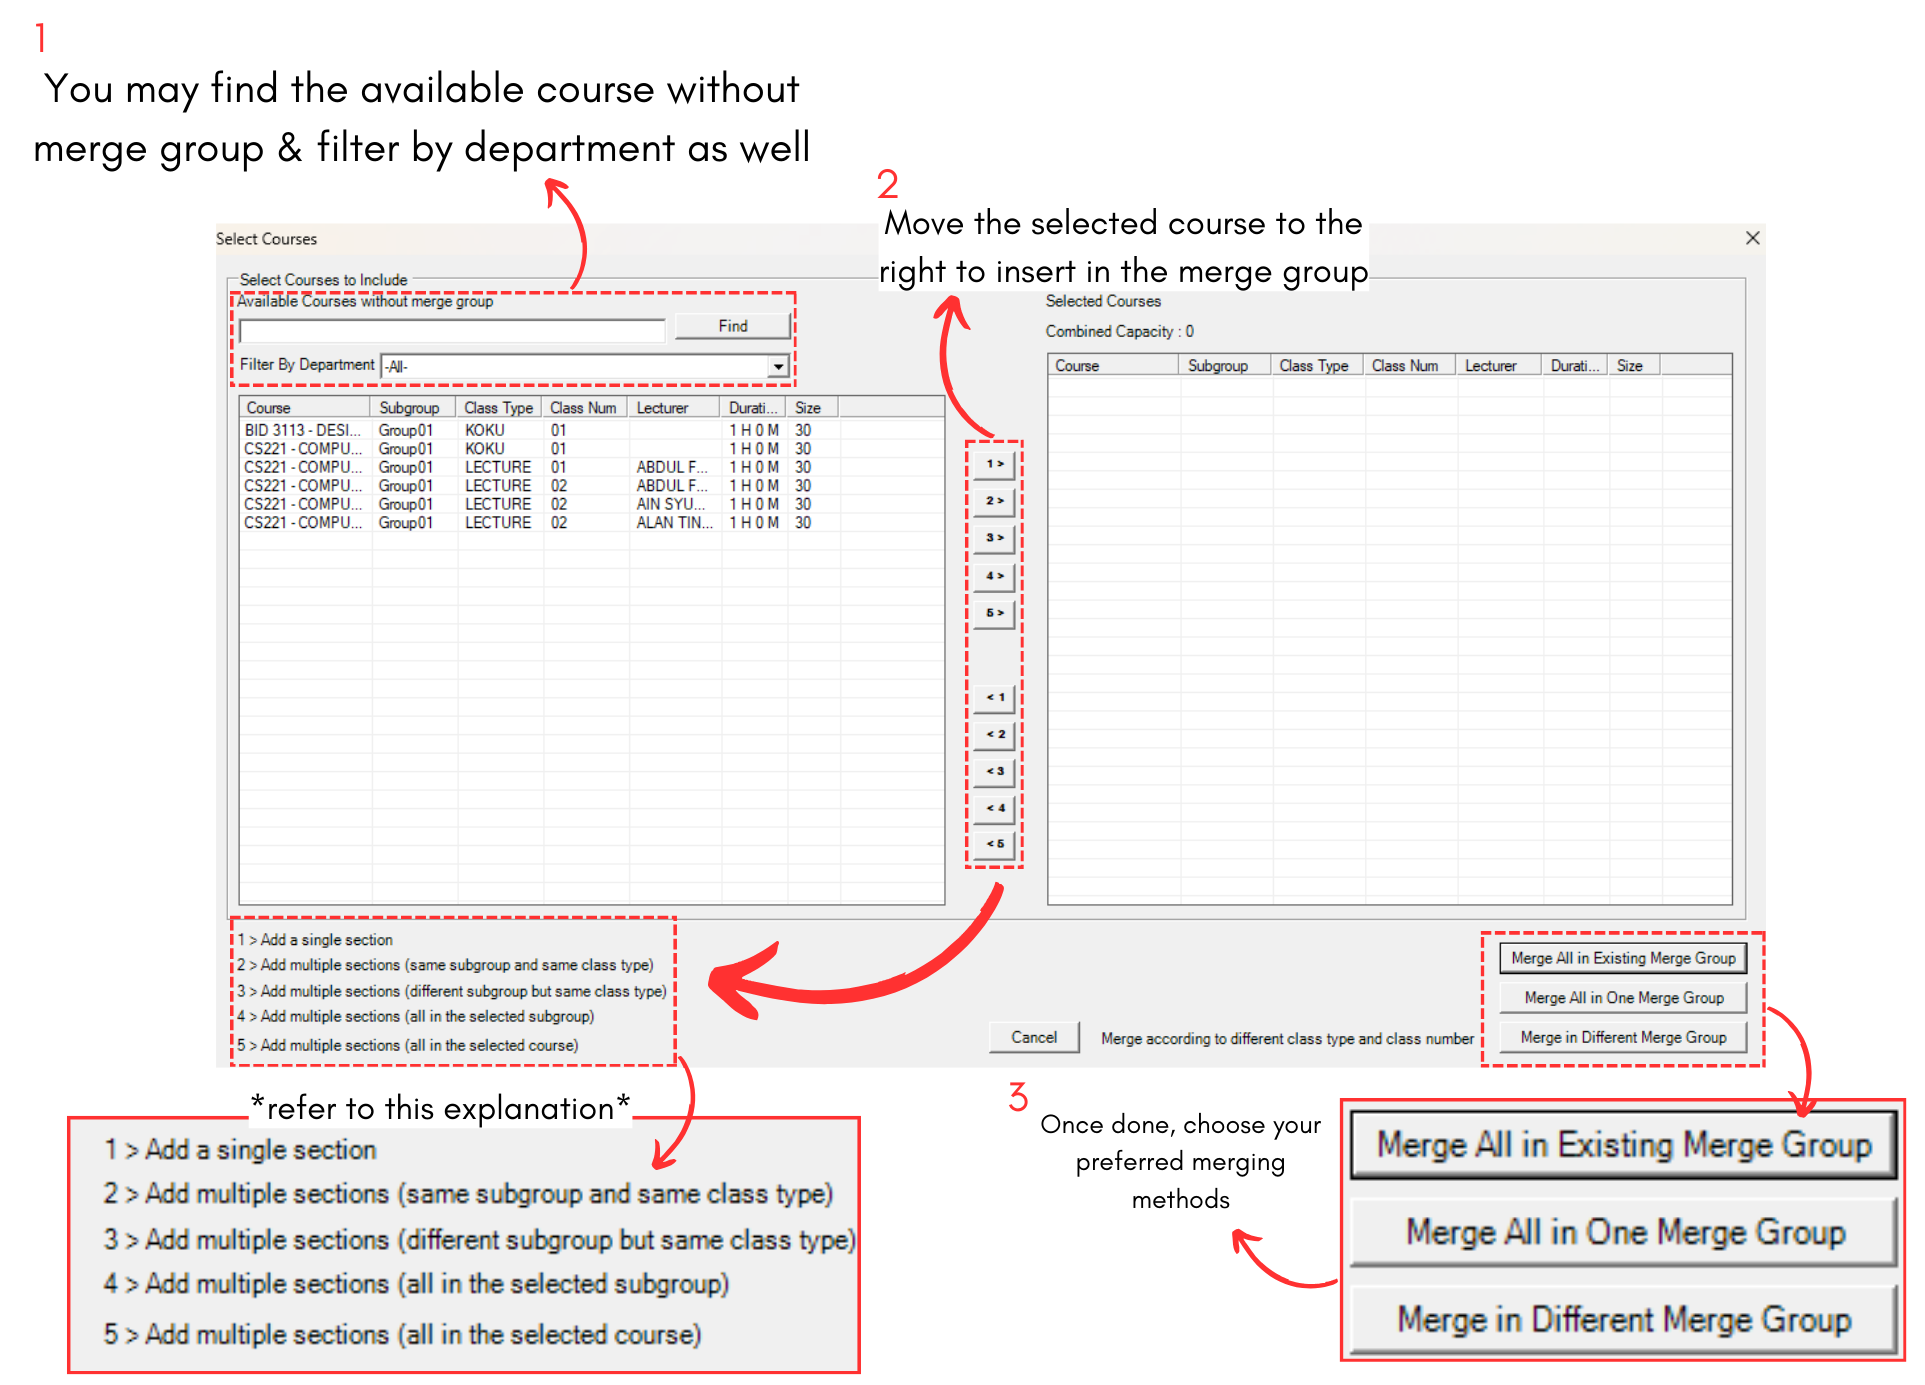
Diagram 1.1.3 Add Directly Section to the Merge Group
ALTERNATIVE 2: Click ![]() icon to manually add new group.
icon to manually add new group.
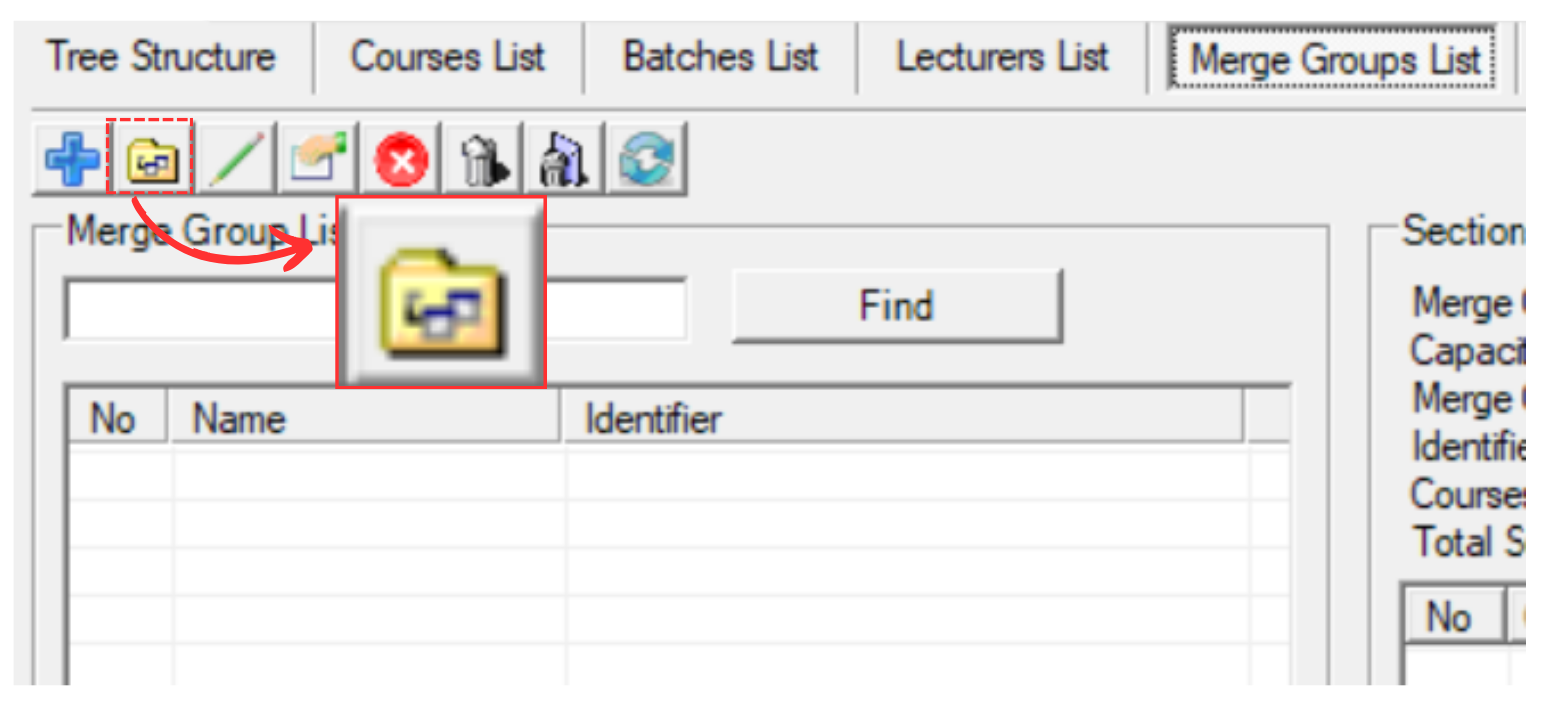
Diagram 1.1.4 Location of Manually Add New Group Icon
A popup will appear, asking you to write the Merge Group name. Once done, click Ok.

Diagram 1.1.5 Create New Merge Group
Once you have created the merge group, select the merge group and click manage merge group  icon to add sections inside it.
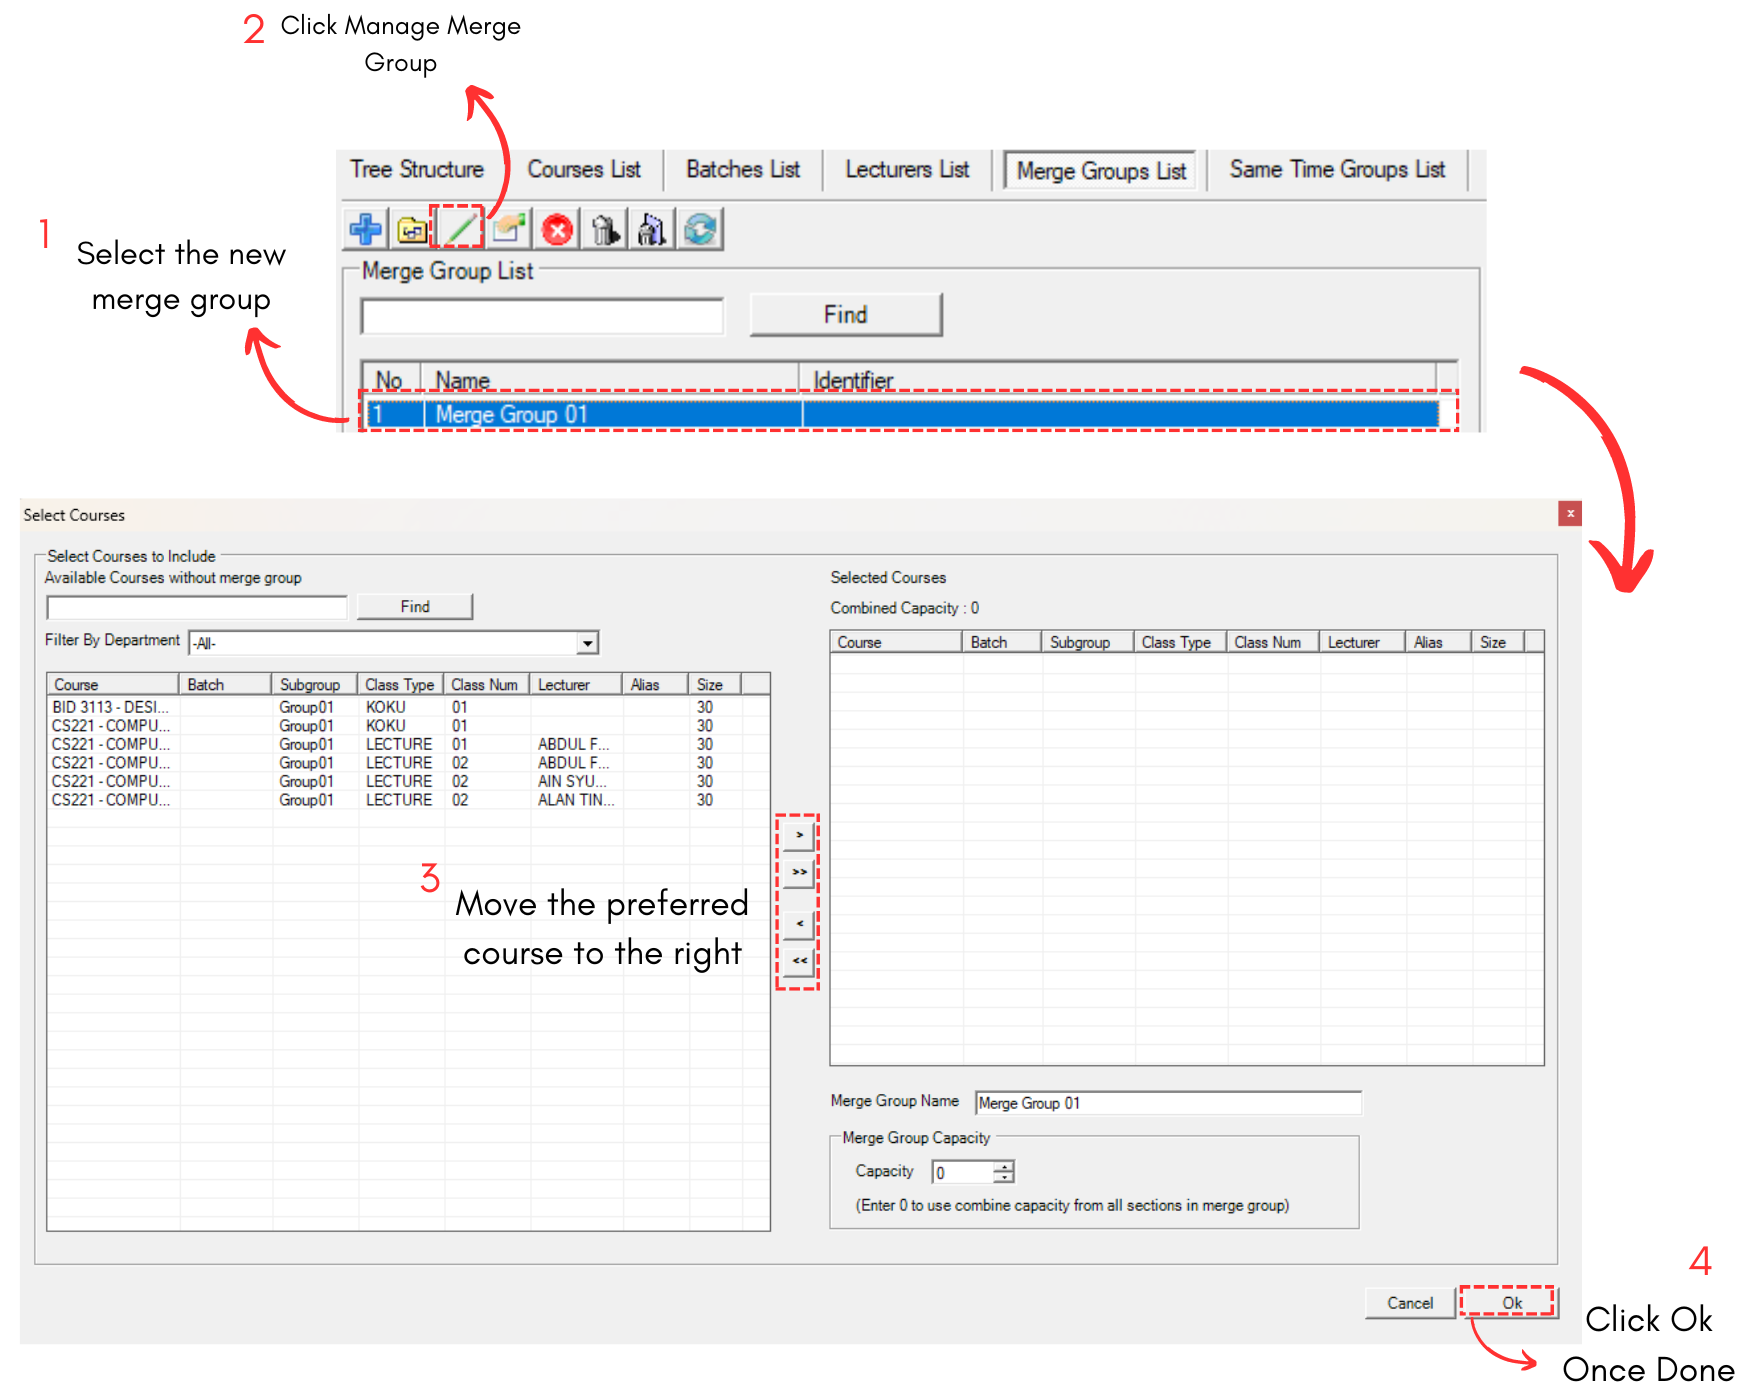
Diagram 1.1.6 Add Section Manually into the Merge Group
This is how it will looks like when you move courses to the right.
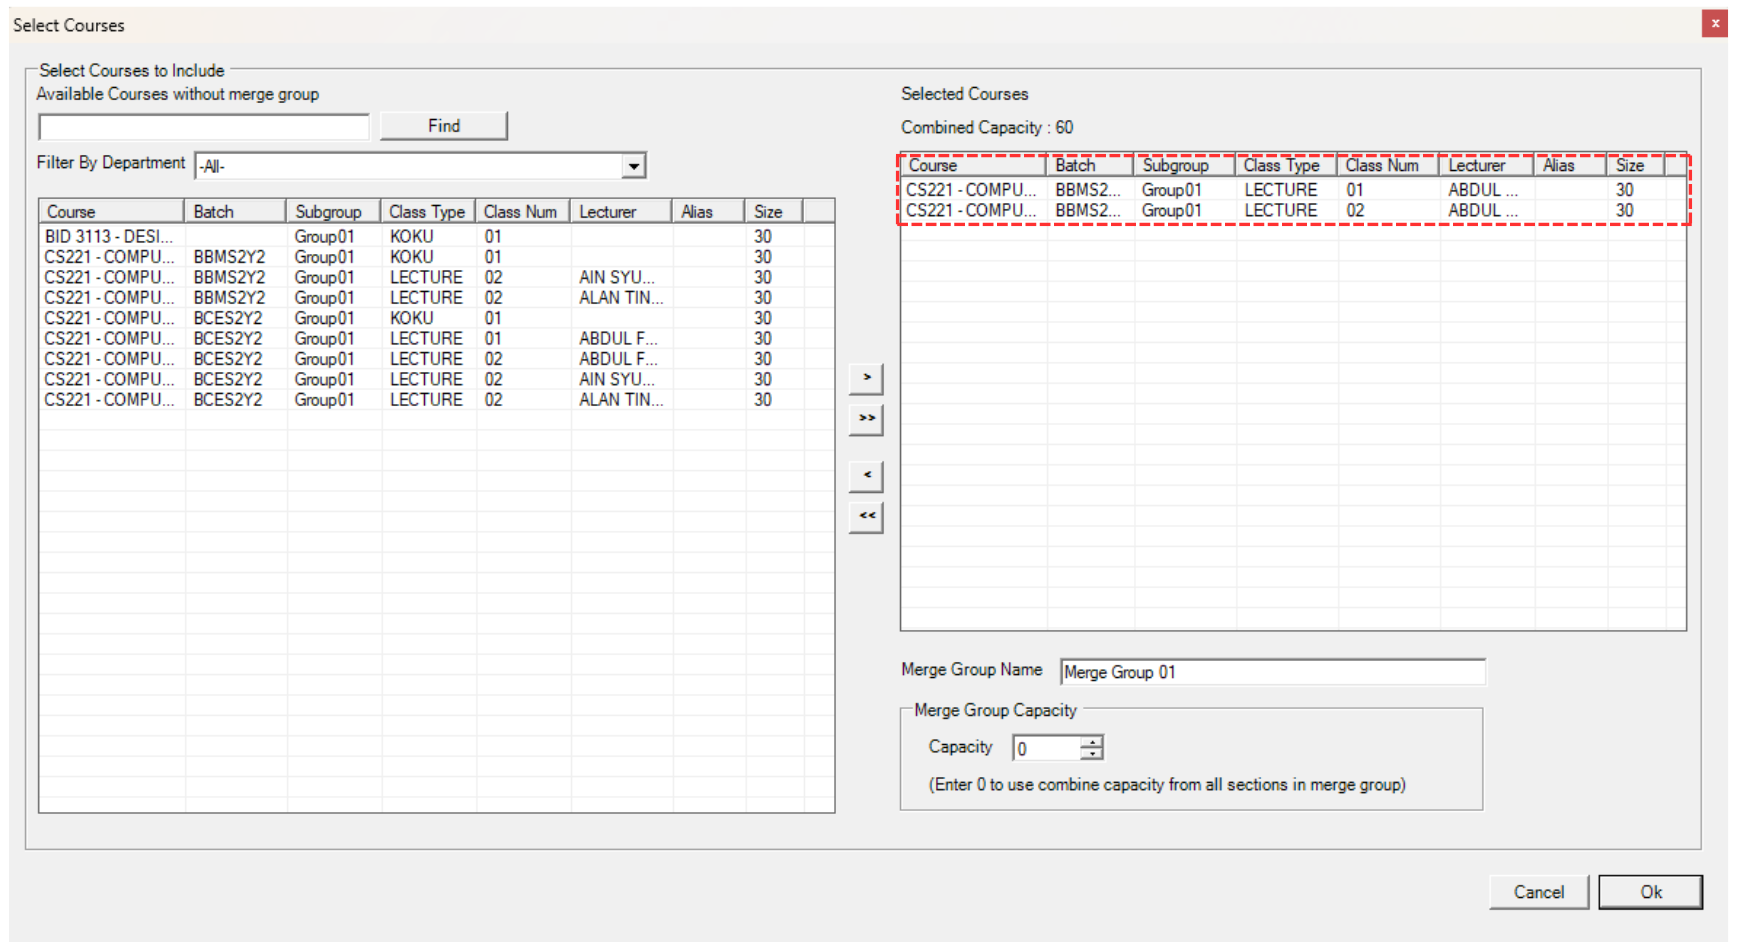
Diagram 1.1.7 Courses moved to the right
After you click Ok, the courses will appear under the selected merge group.
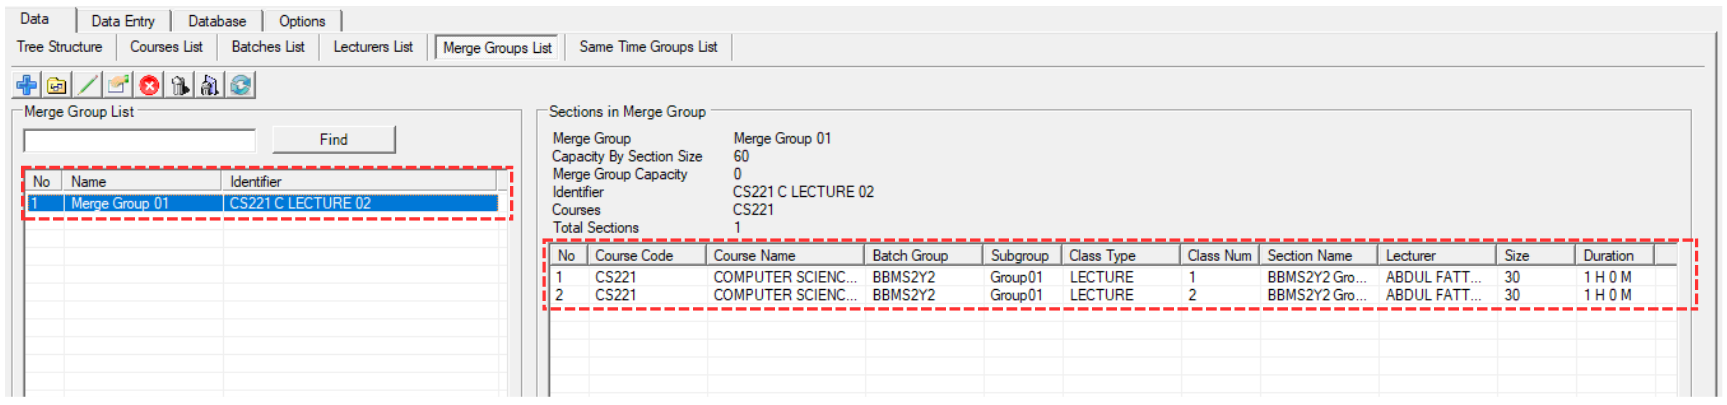
Diagram 1.1.8 Courses under a Merge Group