5. Generate Courses
5.1. Generate Included Courses
Once all constraints have been set and Double Checking has been completed, you can use the Generate Schedule function to Auto Assign the Included Sections (shown at "Not Assigned" at Course Status).
There 2 ways to Generate Courses:
ALTERNATIVE 1: Click on Generate Schedule Icon. ![]()

Diagram 4.1.1 Location of Generate Schedule Icon
ALTERNATIVE 2: Click the Timetable at menu bar then Click Generate Timetable.
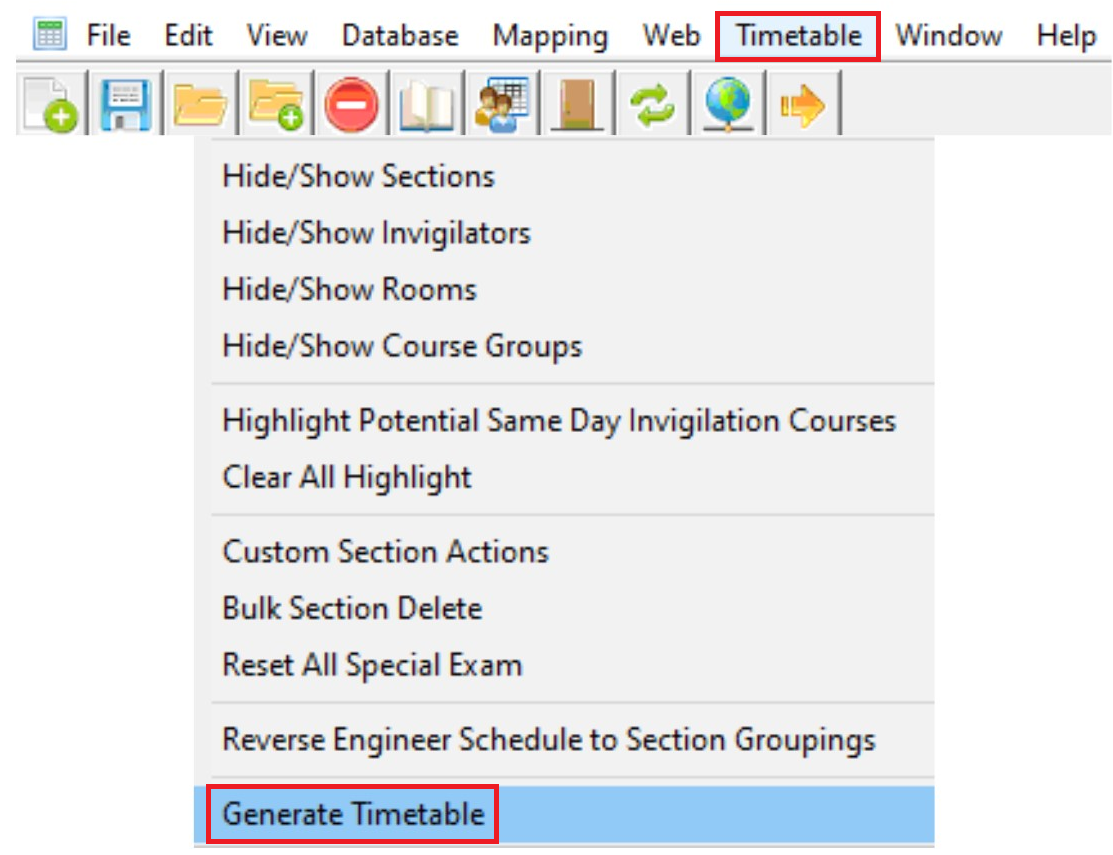
Diagram 5.1.2 Location of Generate Timetable in the file drop down menu
Generate Schedule Window will appear afterwards.
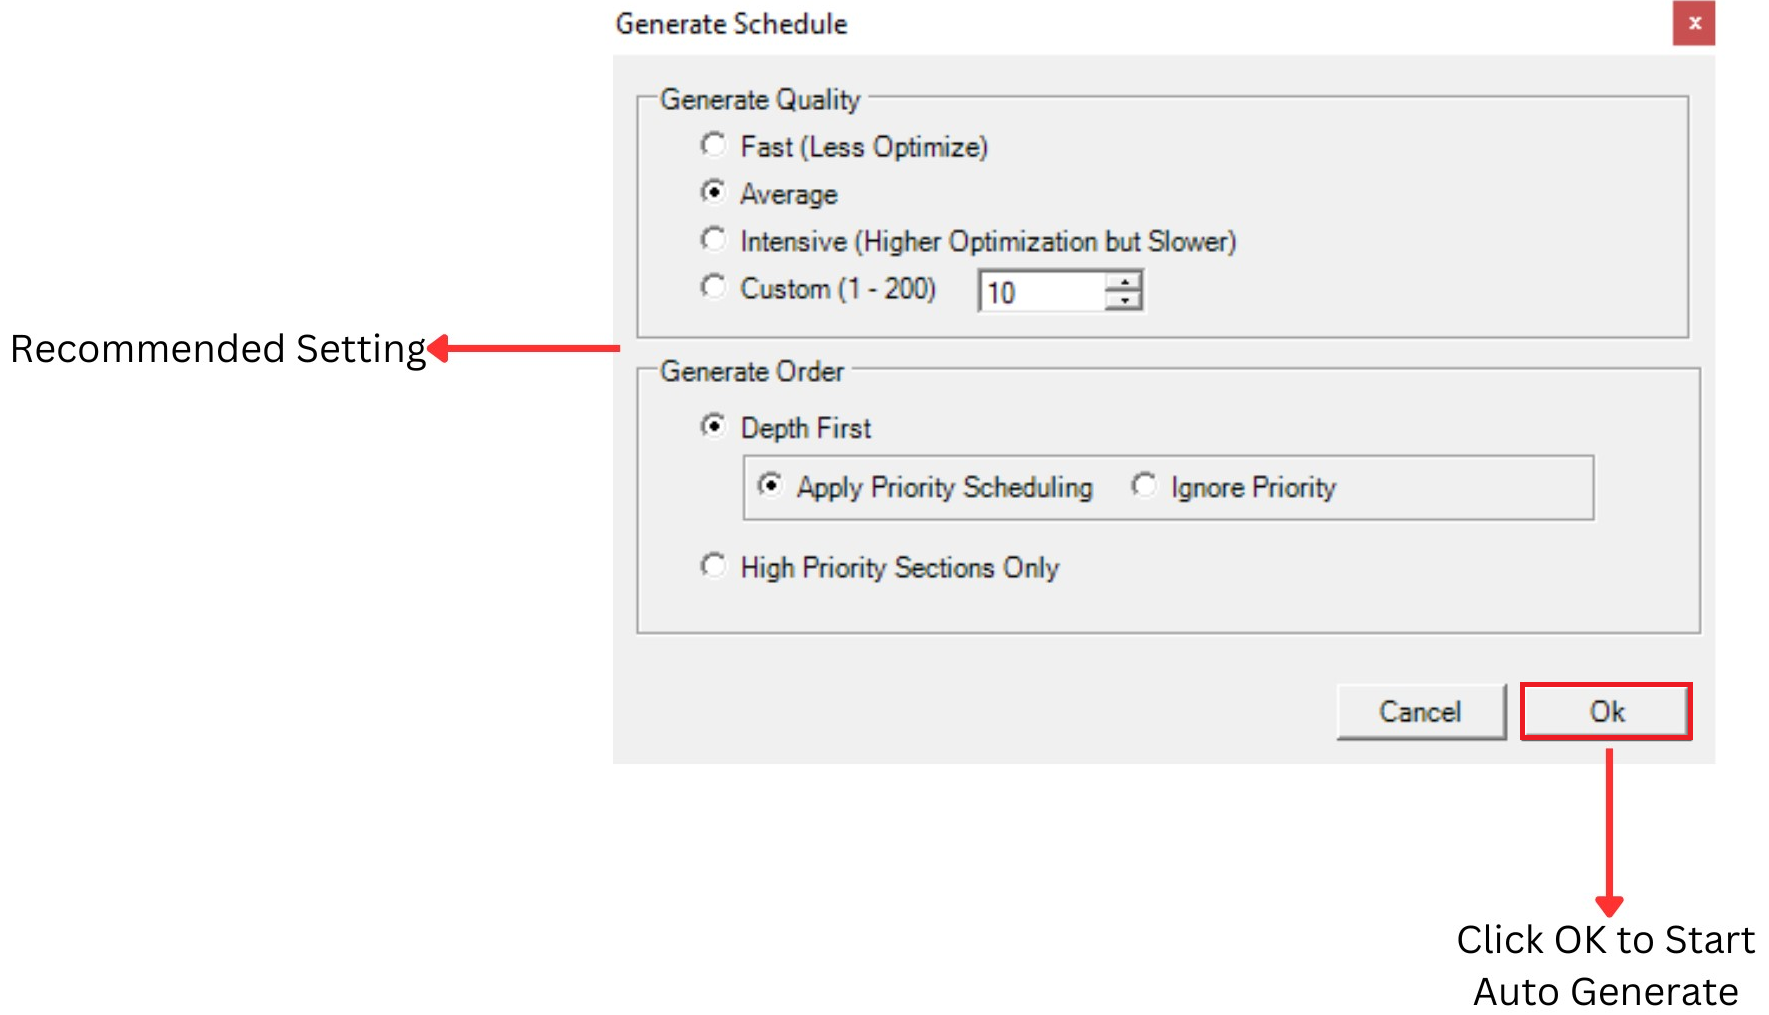
Diagram 5.1.3 Generate Schedule Window
You can determine the quality of the Generate Process by setting at the Generate Schedule. Recommended Setting is at the Average.
You also can choose between Depth First or High Priority Sections Only in Generate Order.
Note that, if all courses successfully slotted into the Timetable Output, a pop up will appear. Refer to the diagram below.
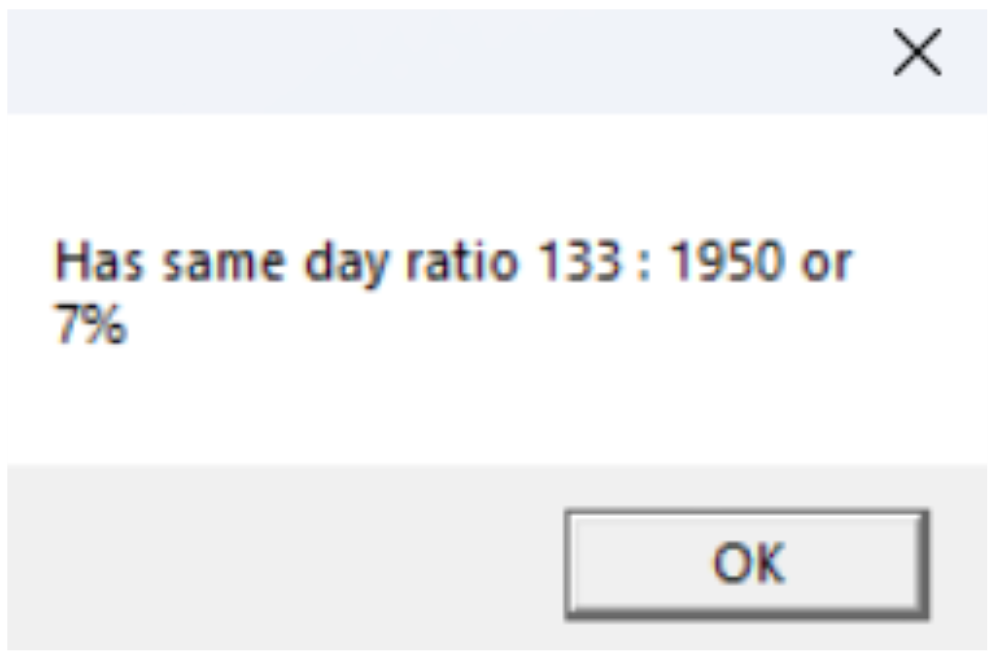
Diagram 5.1.4 Same Day Ratio Popup
Once you have generate schedule, you may view the generated courses at Timetable Output.
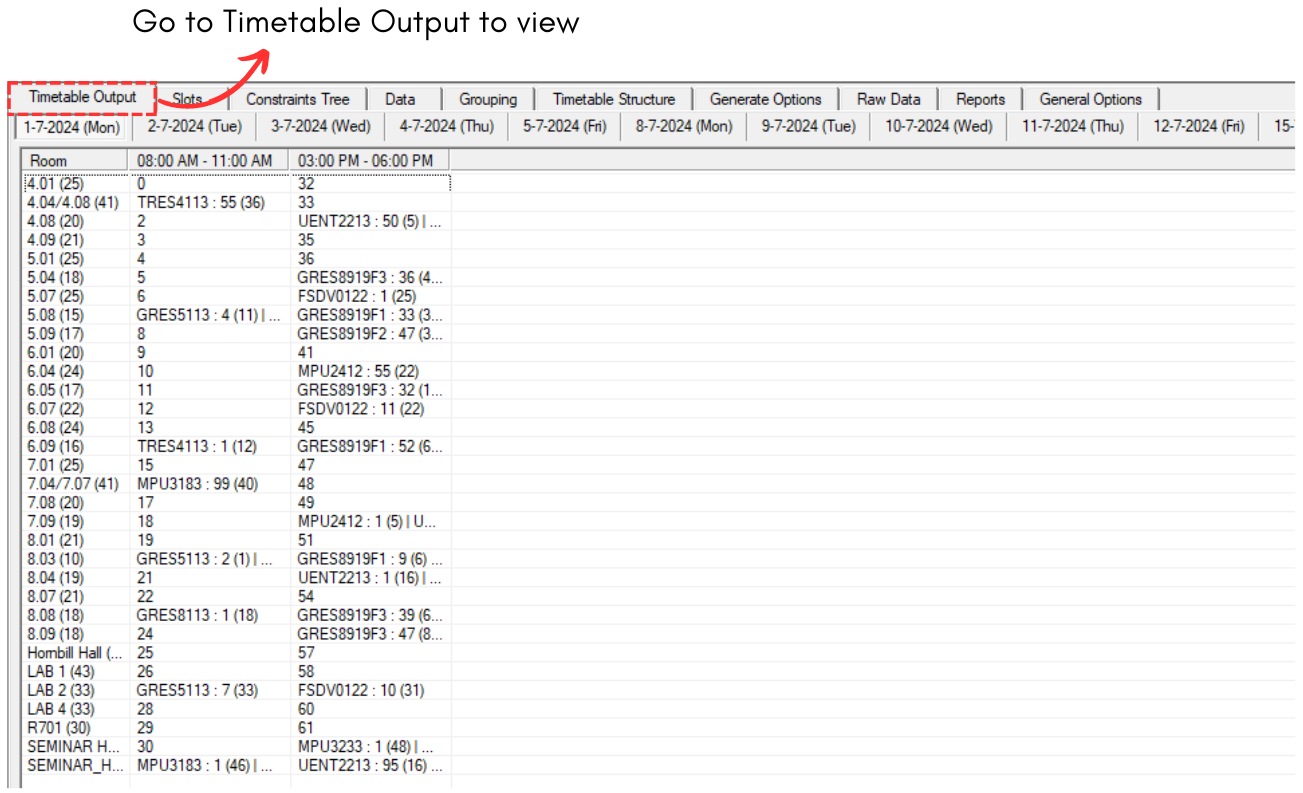
Diagram 5.1.5 Timetable Output
Note that, you may generate as many time as you want as the result may varies.
It is important for you to lock the courses that has been generated before you proceed to generate all other courses. To lock, refer to the diagram below.
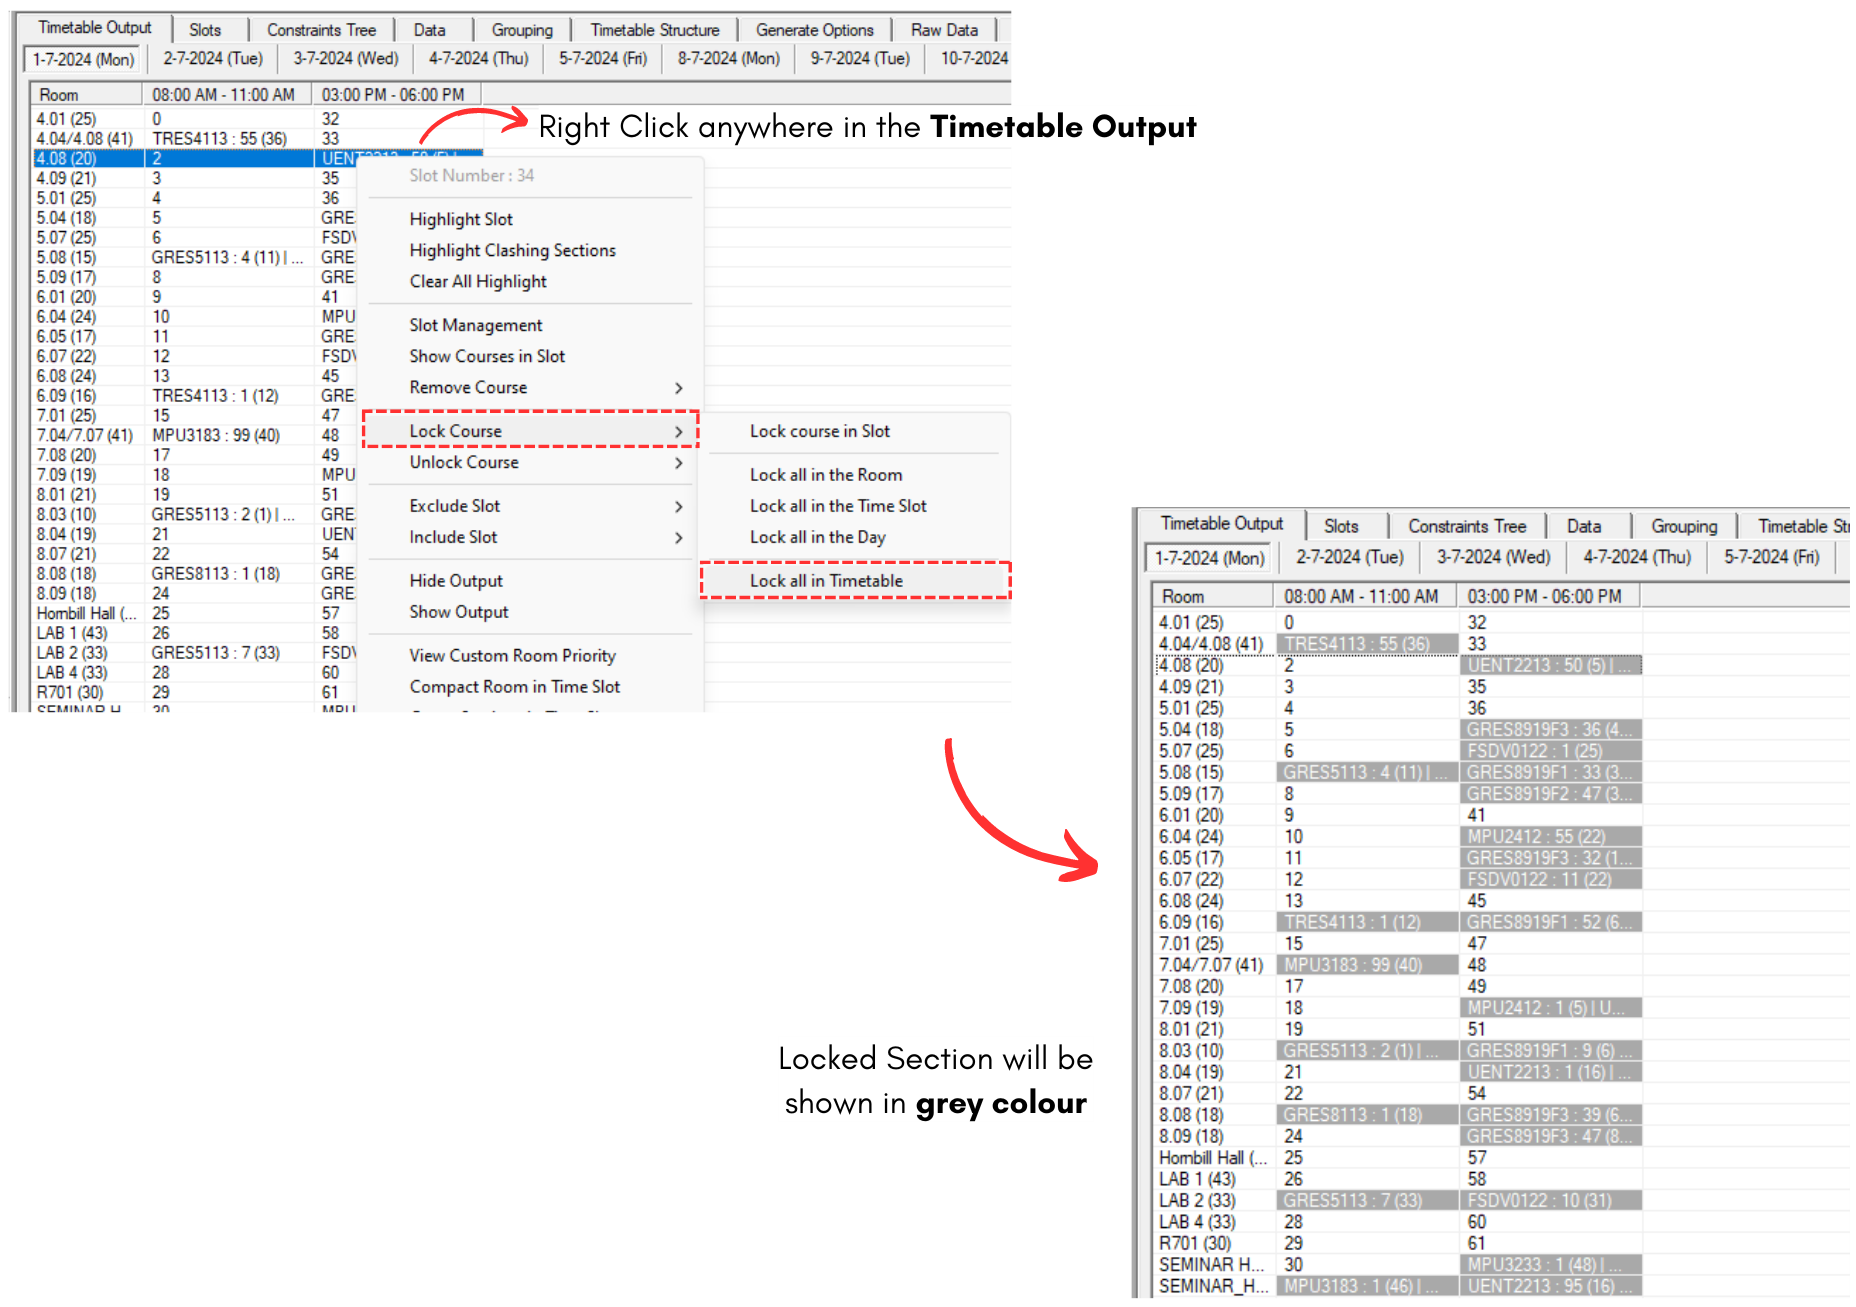
Diagram 5.1.6 Lock Section in Timetable Output