Stage 7: Export & Import
| Site: | Timetable Plus |
| Course: | Timetable Plus Data Entry |
| Book: | Stage 7: Export & Import |
| Printed by: | Guest user |
| Date: | Wednesday, 7 January 2026, 11:10 AM |
Description
-
1. Export
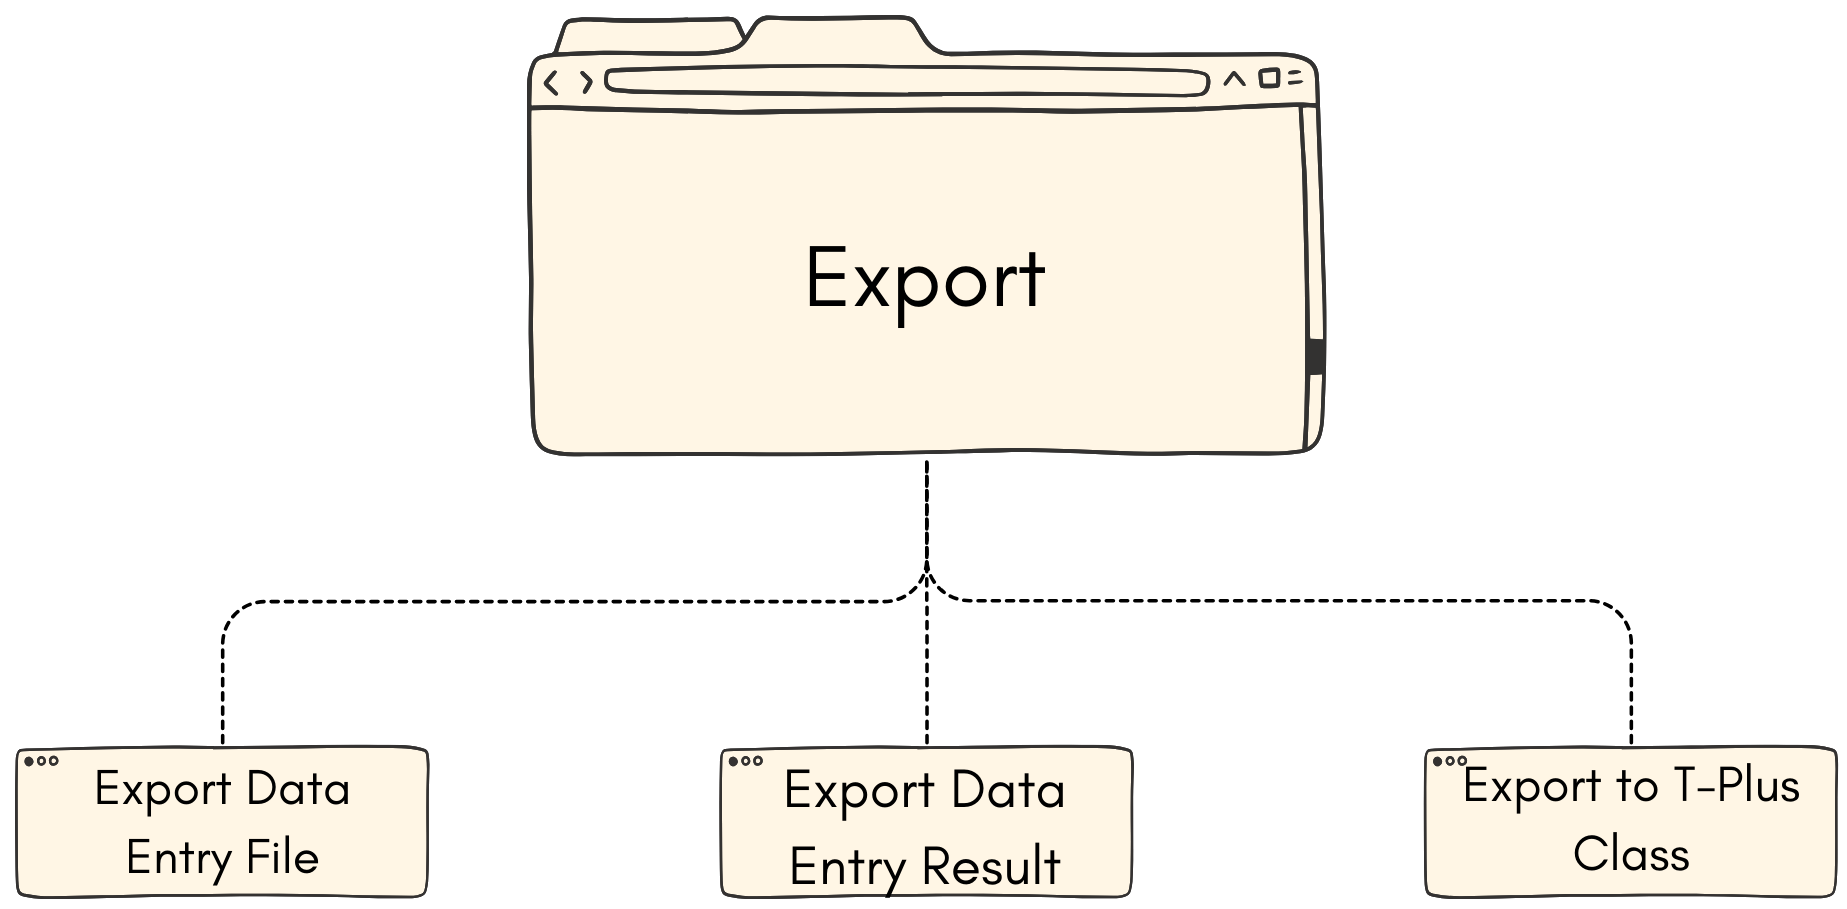
1.1. Export Data Entry File
Exporting Data Entry File will ONLY export the Data Entry and not exporting the result so it cannot be opened in another software such as T-Plus Class. The file extension for Data Entry File is .TDE
To export Data Entry File, there are 2 simple steps to do so.
STEPS 1: Go to File in Timetable Menu, select Export and click on Data Entry File.
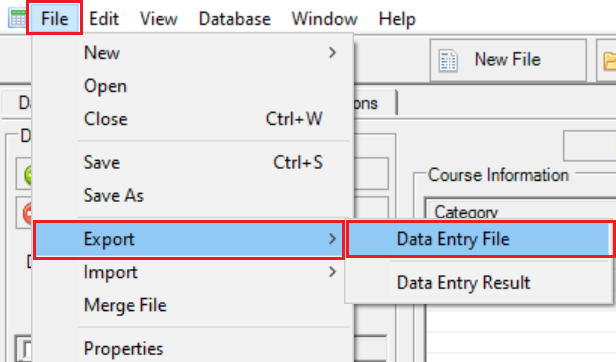
Diagram 1.1.1 Location of Data Entry File
A popup will appear.
STEPS 2: Write the file name according to your preferred and click Save.
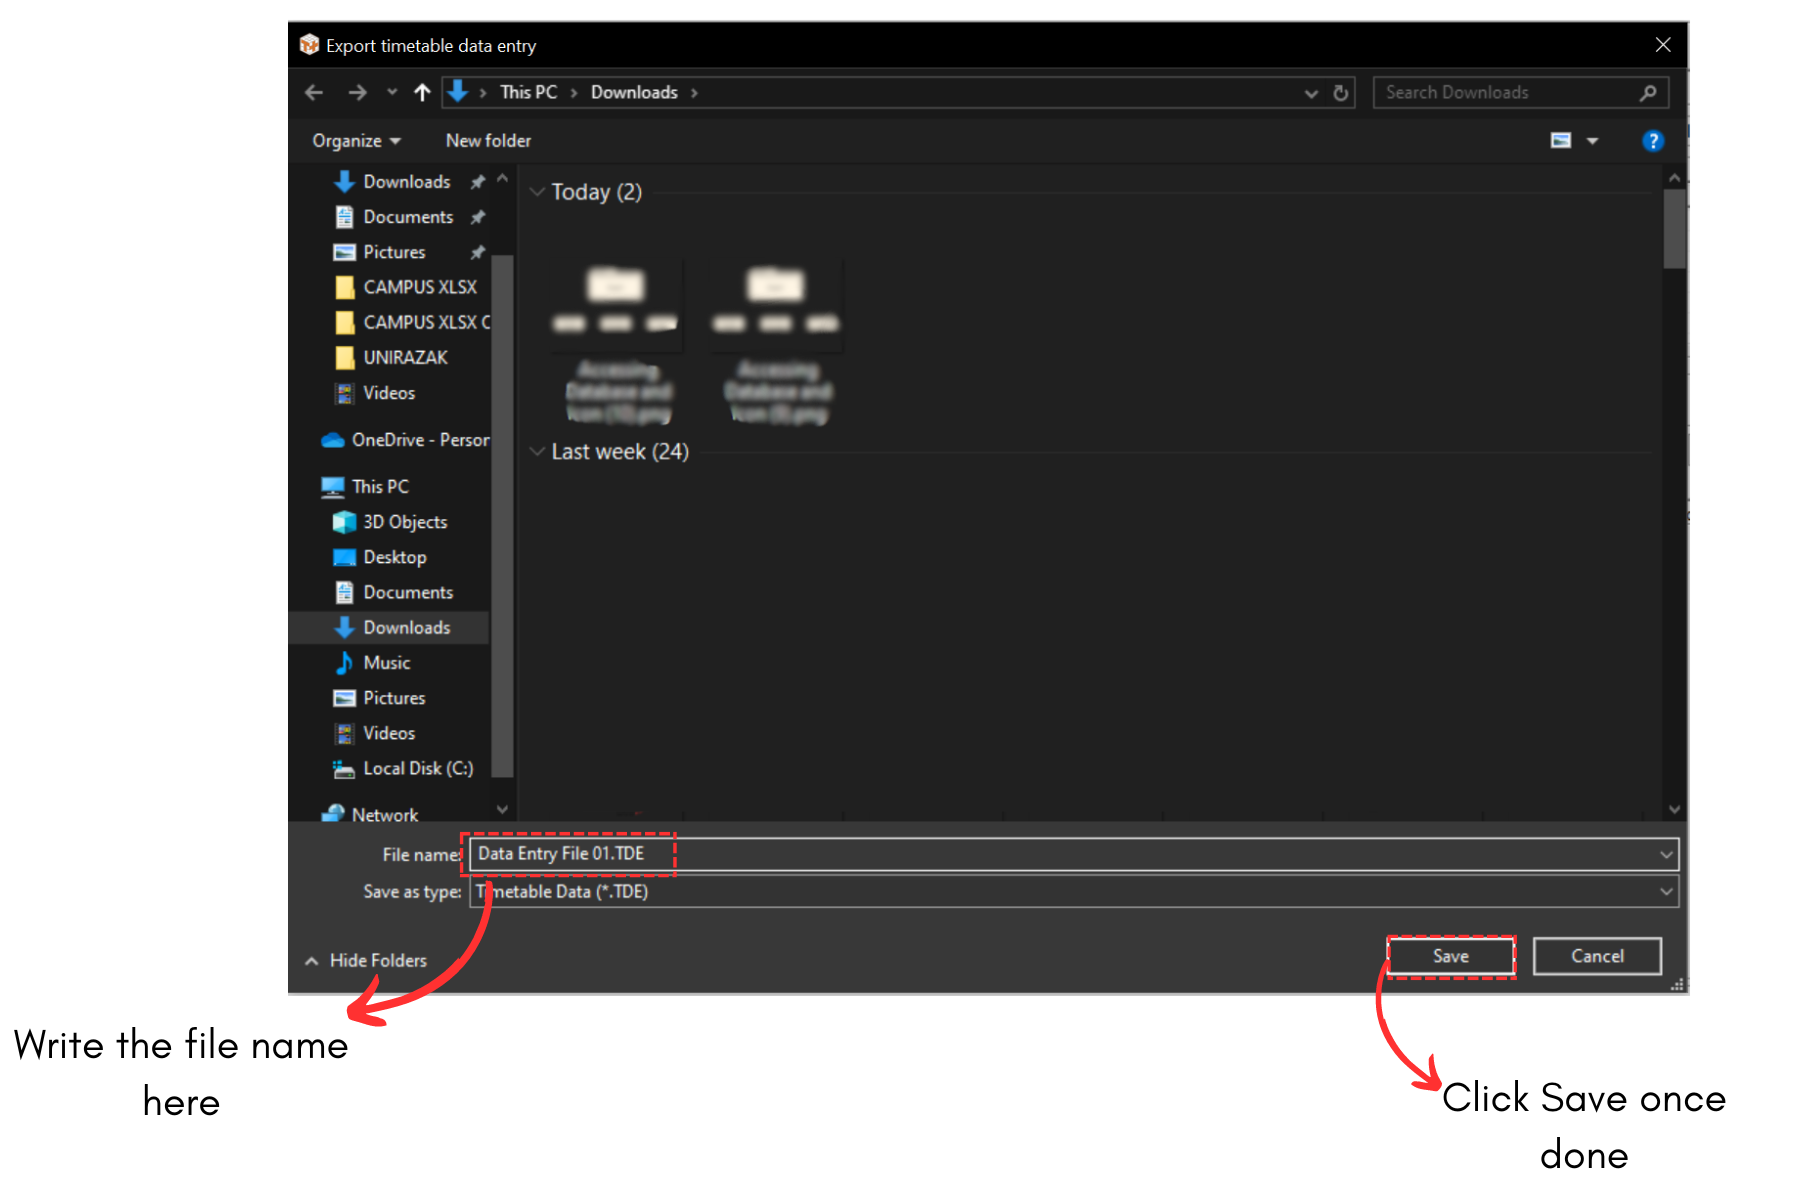
Diagram 1.1.2 Save Popup
Another popup will appear, saying Data Entry File successfully exported at the location that you have chosen.
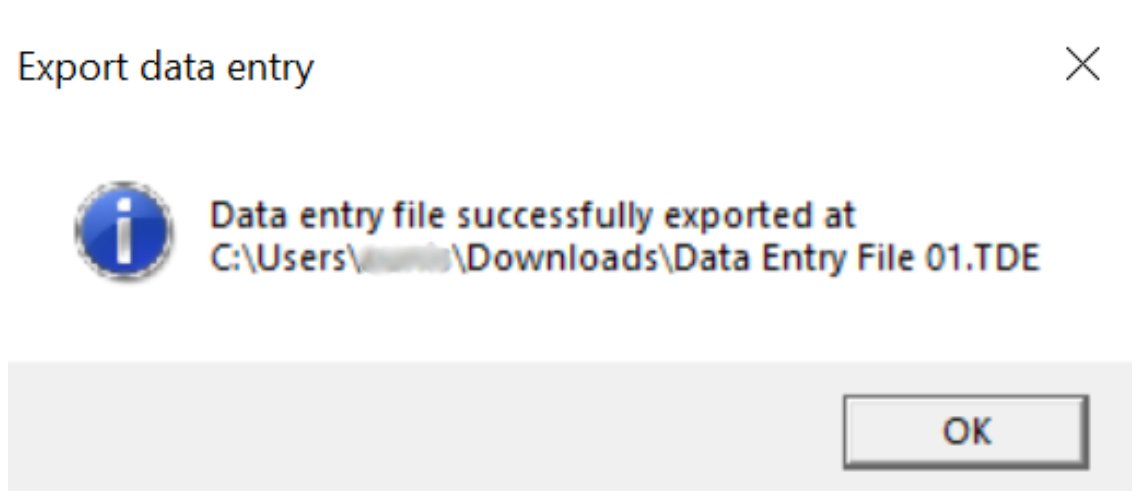
Diagram 1.1.3 Data Entry File Export Success
Your file will be saved into your devices.
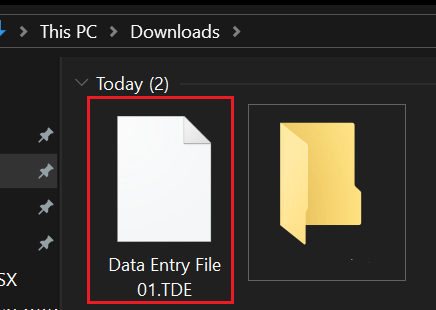
Diagram 1.1.4 Location of the file in the device
1.2. Export Data Entry Result
Exporting Data Entry Result will export both the data entry and also the result after it was being mark completed. This file can be opened in T-Plus Class. The file extension for Data Entry File is .TDER
To export Data Entry Result, there are 2 simple steps to do so.
STEPS 1: Go to File in Timetable Menu, select Export and click on Data Entry Result.
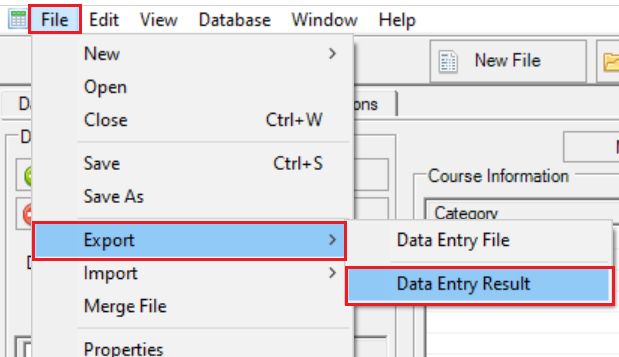
Diagram 1.2.1 Location of Data Entry Result
OR you can simply click Export Icon on the top middle of T-Plus Data Entry.

Diagram 1.2.2 Additional Location of Export button for Data Entry Result
A popup will appear.
STEPS 2: Write the file name according to your preferred and click Save.
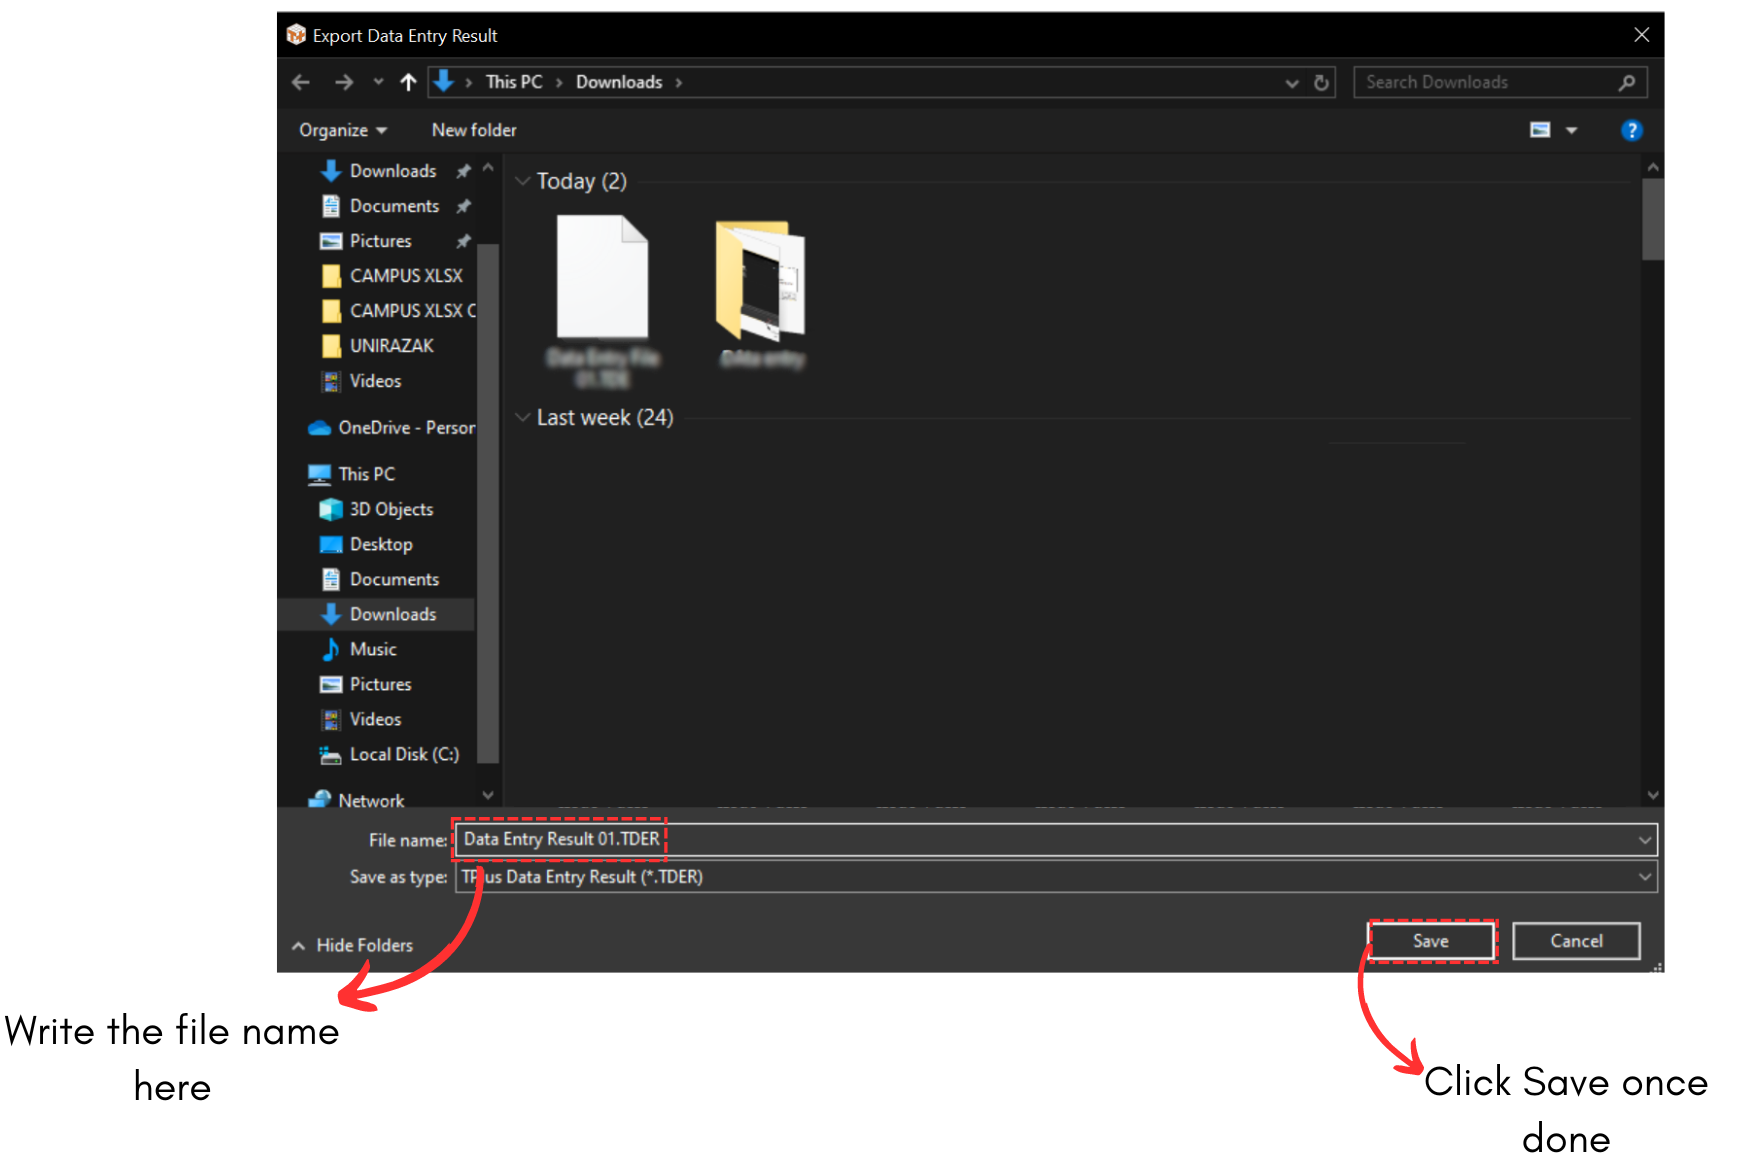
Diagram 1.2.3 Save Popup
Another popup will appear, saying Data Entry Result successfully exported.
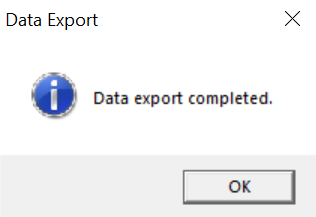
Diagram 1.2.4 Data Entry File Export Success
Your file will be saved into your devices.
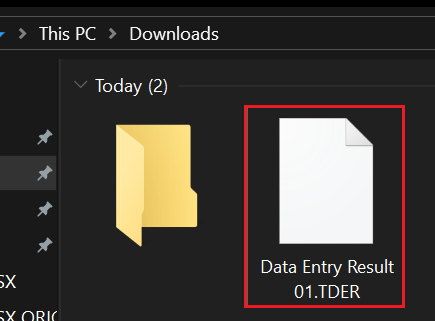
Diagram 1.2.5 Location of the file in the device
1.3. Export to T-Plus Class
The Data Entry Result can be exported and import to T-Plus Class SIS & Infiniti.
There are 5 simple steps to export Data Entry Result to T-Plus Class.
STEPS 1: On T-Plus Class SIS OR Infiniti, Click New Timetable Icon. ![]()
STEPS 2: Once done, go to Tree Structure and right click on the Timetable Name under it.
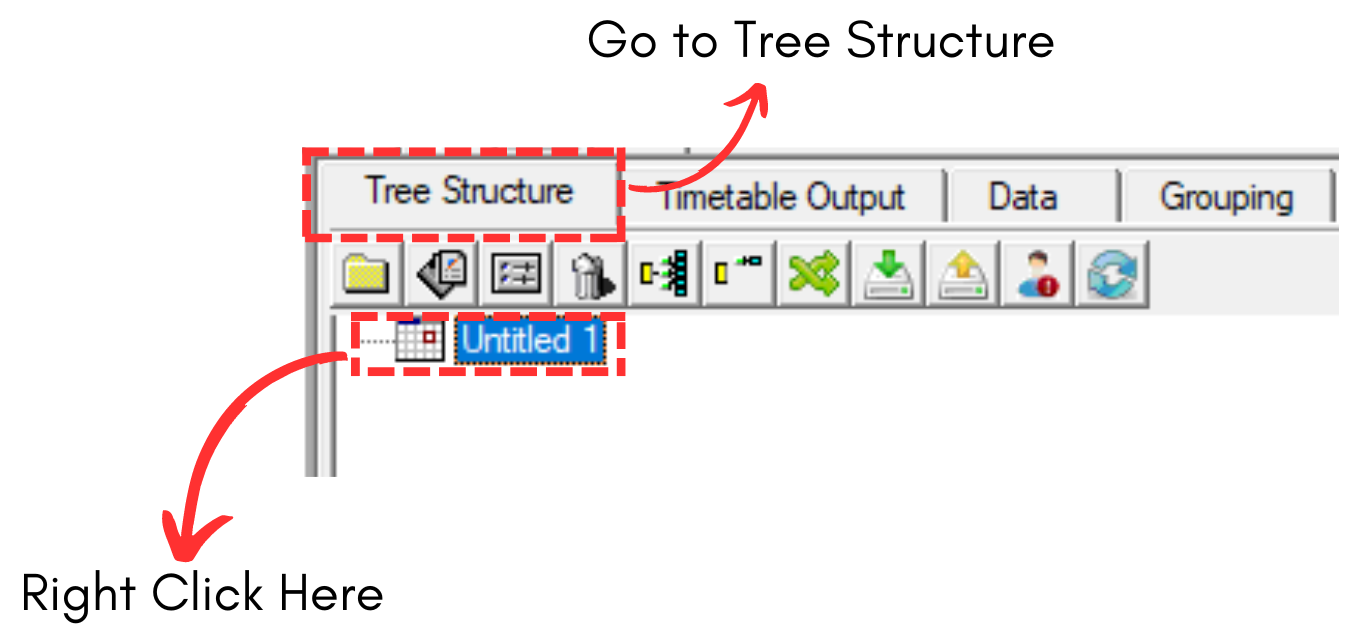
Diagram 1.3.1 Right Click Under Tree Structure
STEPS 3: In T-Plus Class SIS, select Data Entry and a drop down menu will appear. Select Import From Data Entry afterward.
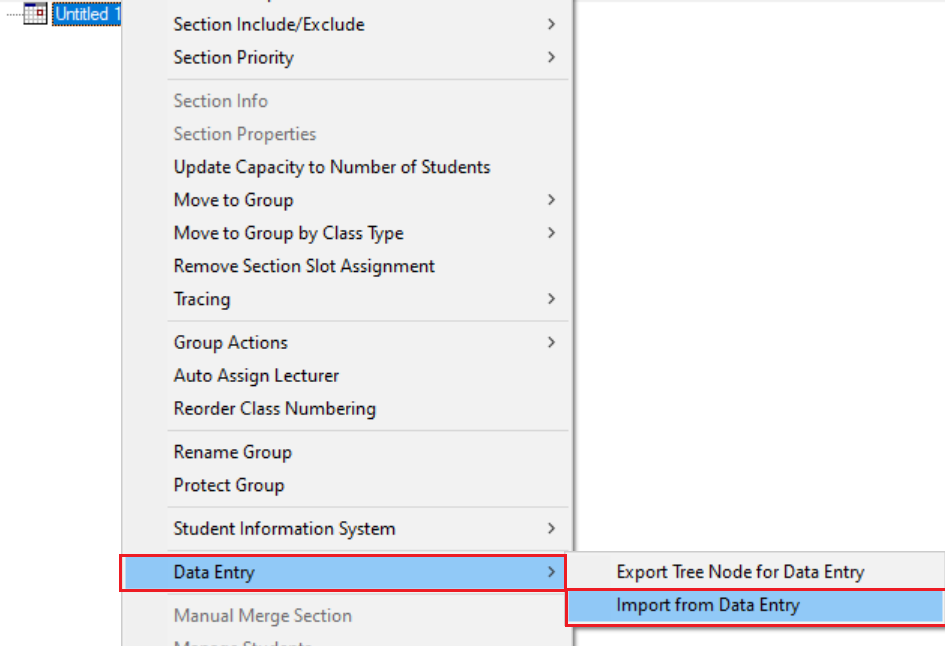
Diagram 1.3.2 Location of Import from Data Entry in T-Plus Class SIS
In T-Plus Class Infiniti, you can simply select Import from Data Entry.
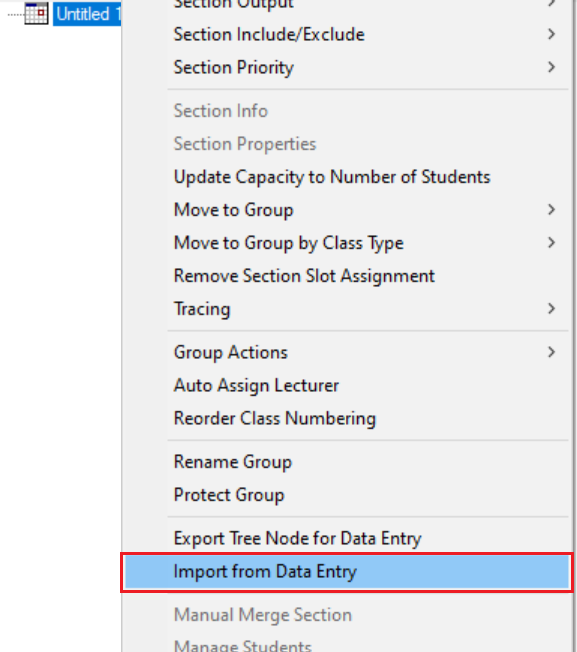
Diagram 1.3.4 Location of Import from Data Entry in T-Plus Class Infiniti
A Popup will appear afterward.
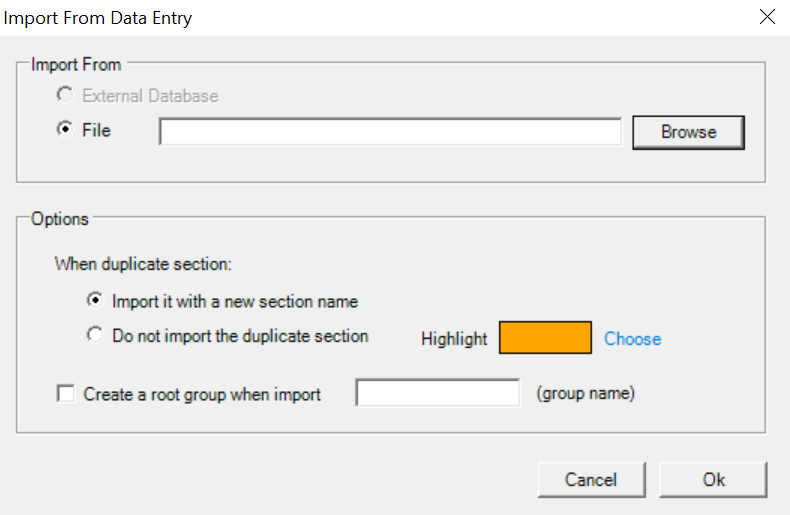
Diagram 1.3.5 Import From Data Entry Popup
STEPS 3: Click Browse. A popup will appear and select the .TDER file. And then click Open.
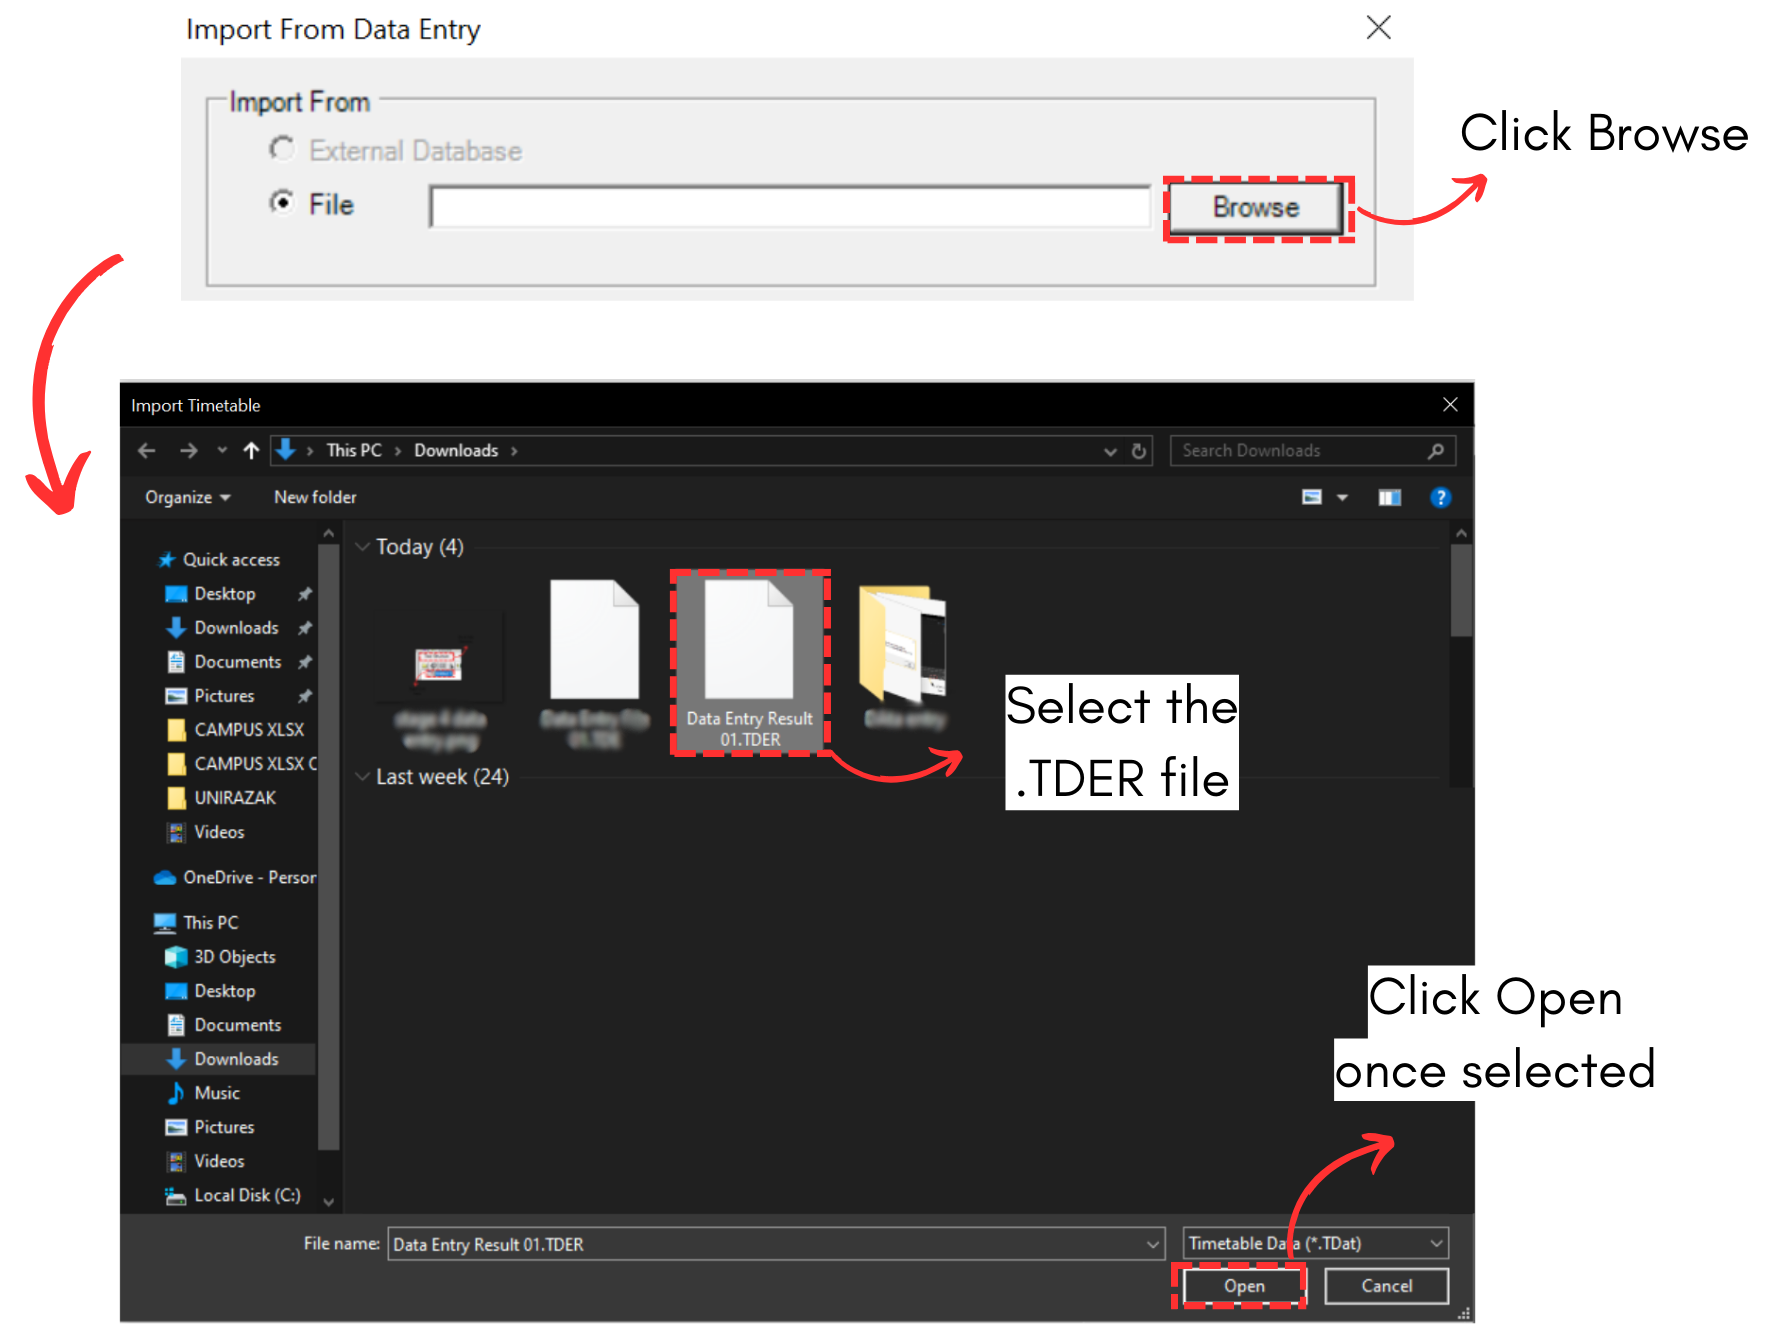
Diagram 1.3.6 Select Data Entry Result File
STEPS 4: Choose the preferred Options. Click Ok once done.
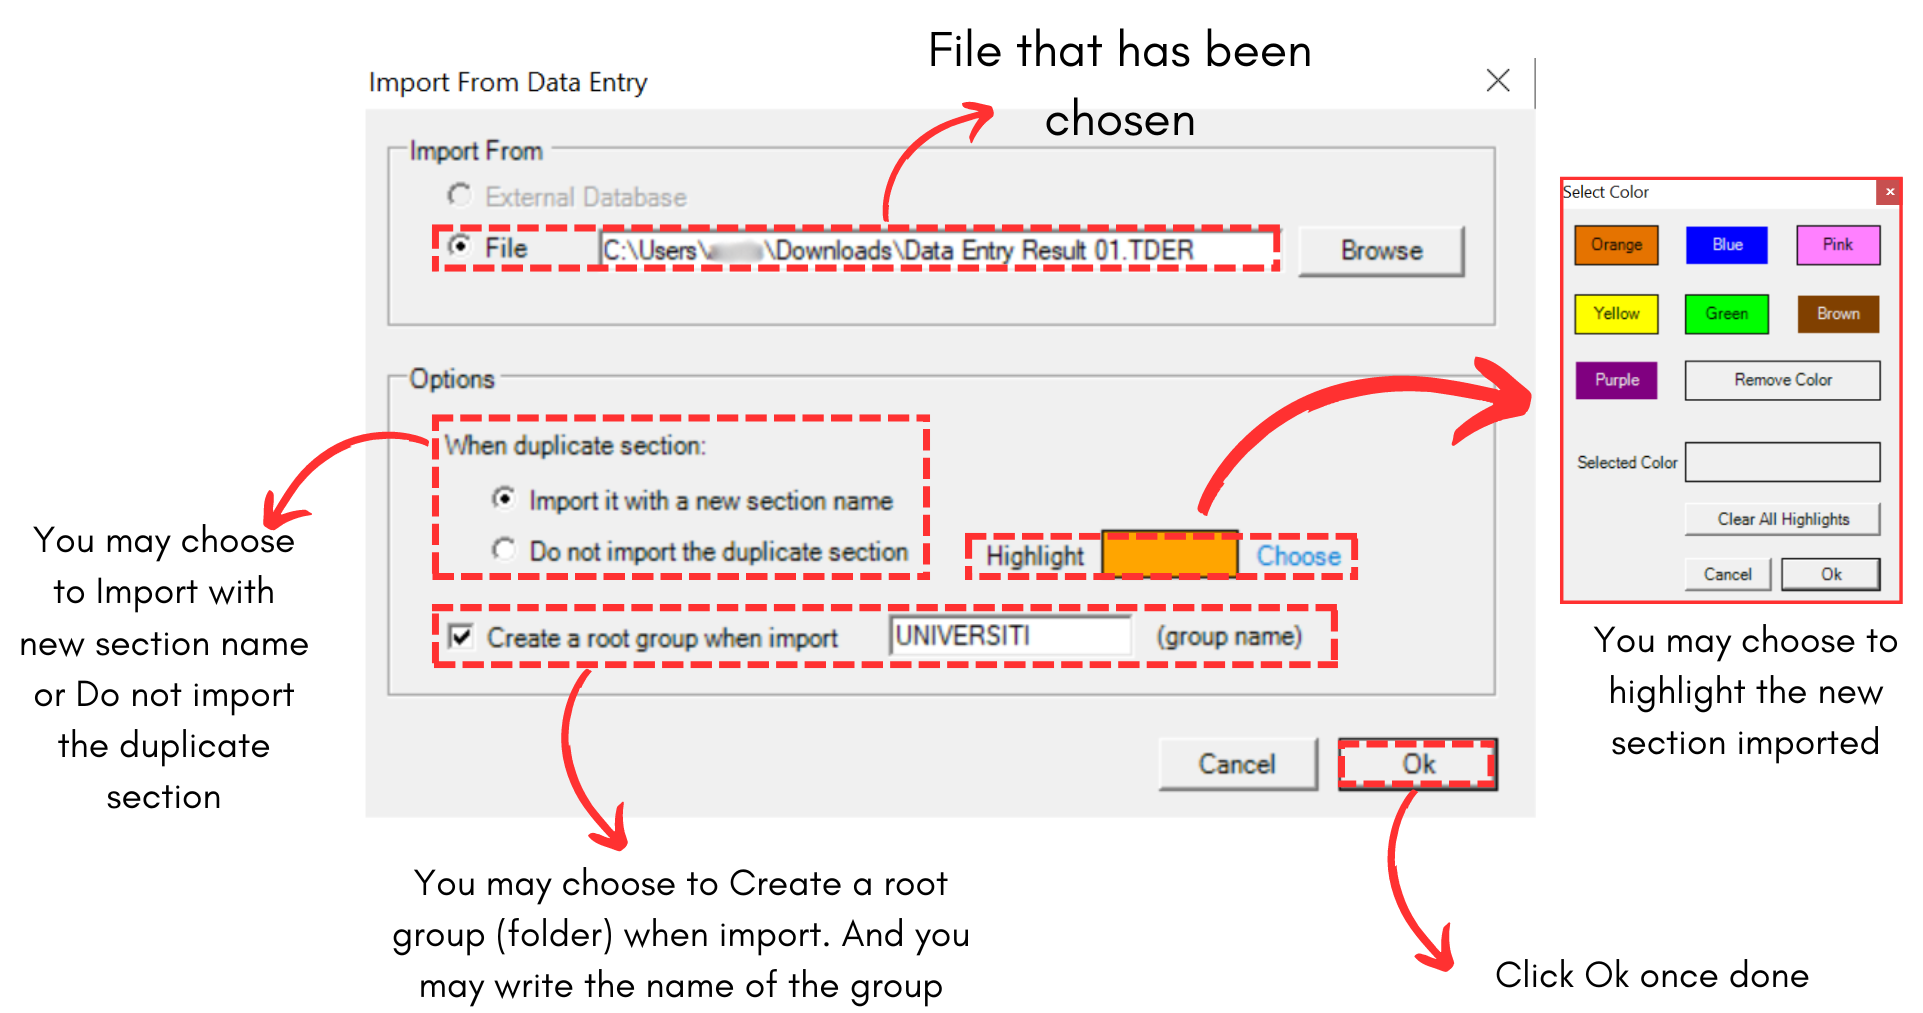
Diagram 1.3.7 Import From Data Entry Popup Explanation
A Syncrhonize Data Popup will appear.
STEPS 5: Choose the data to be synchronize. The best one is All. Click Ok afterwards.
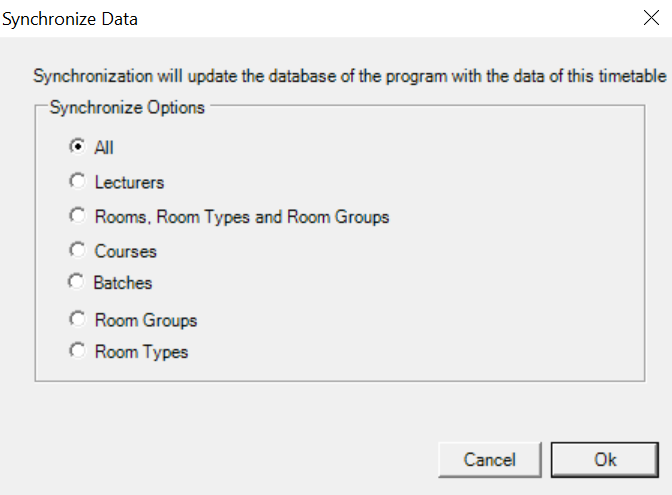
Diagram 1.3.8 Synchronize Data Popup
Synchronize Data Completed Popup appears afterwards.
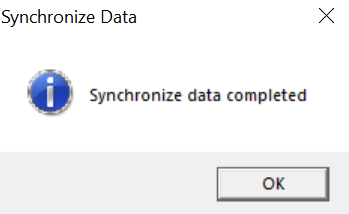
Diagram 1.3.9 Synchronize Data Completed Popup
You will be able to see the Data Entry Result file is appearing on the Tree Structure of T-Plus Class.
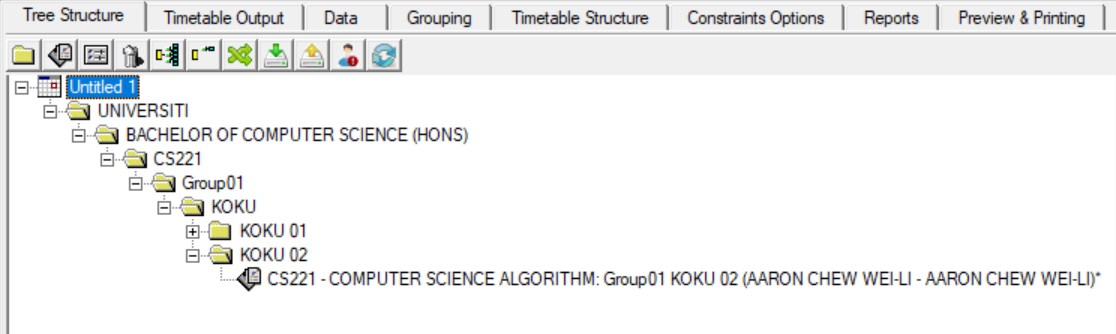
Diagram 1.3.10 Tree Structure in T-Plus Class
IMPORTANT NOTE: Make sure to save the file to avoid losing the data.
2. Import
2.1. Import Data Entry File
If you have the Data Entry File in your devices, you may import them into the T-Plus Data Entry. The Data Entry File extension is .TDE
To import, you may go to the File at Timetable Menu, select Import and then click Data Entry File.
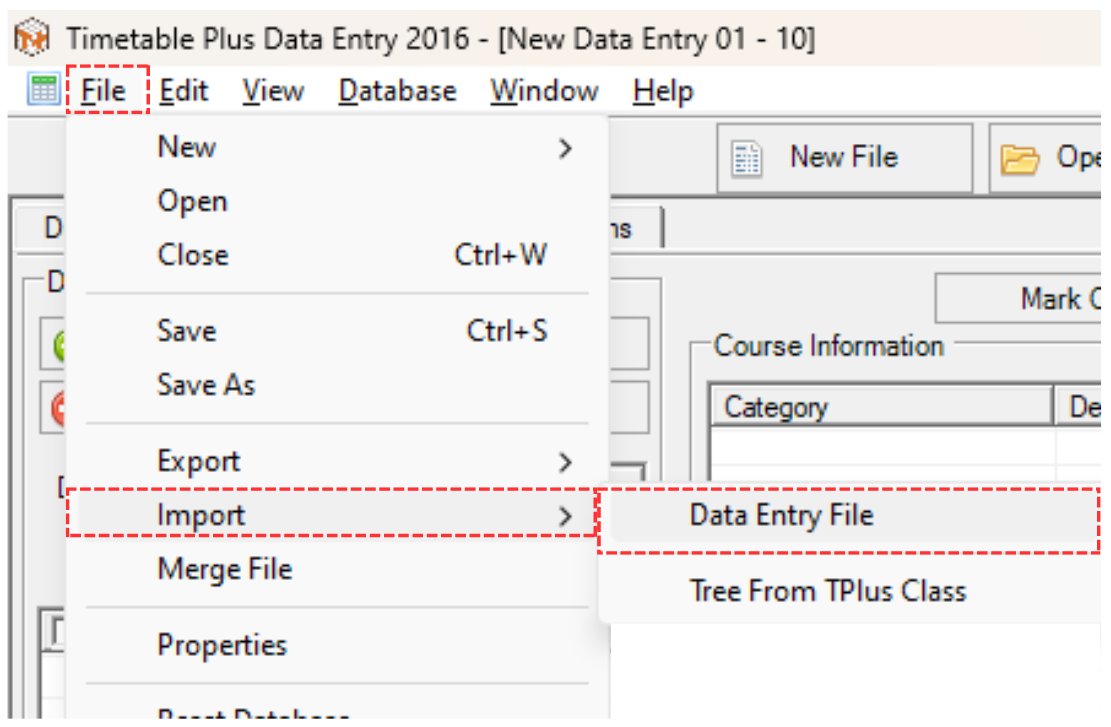
Diagram 2.1.1 Location of Import Data Entry File
Import Timetable pop-up will appear.
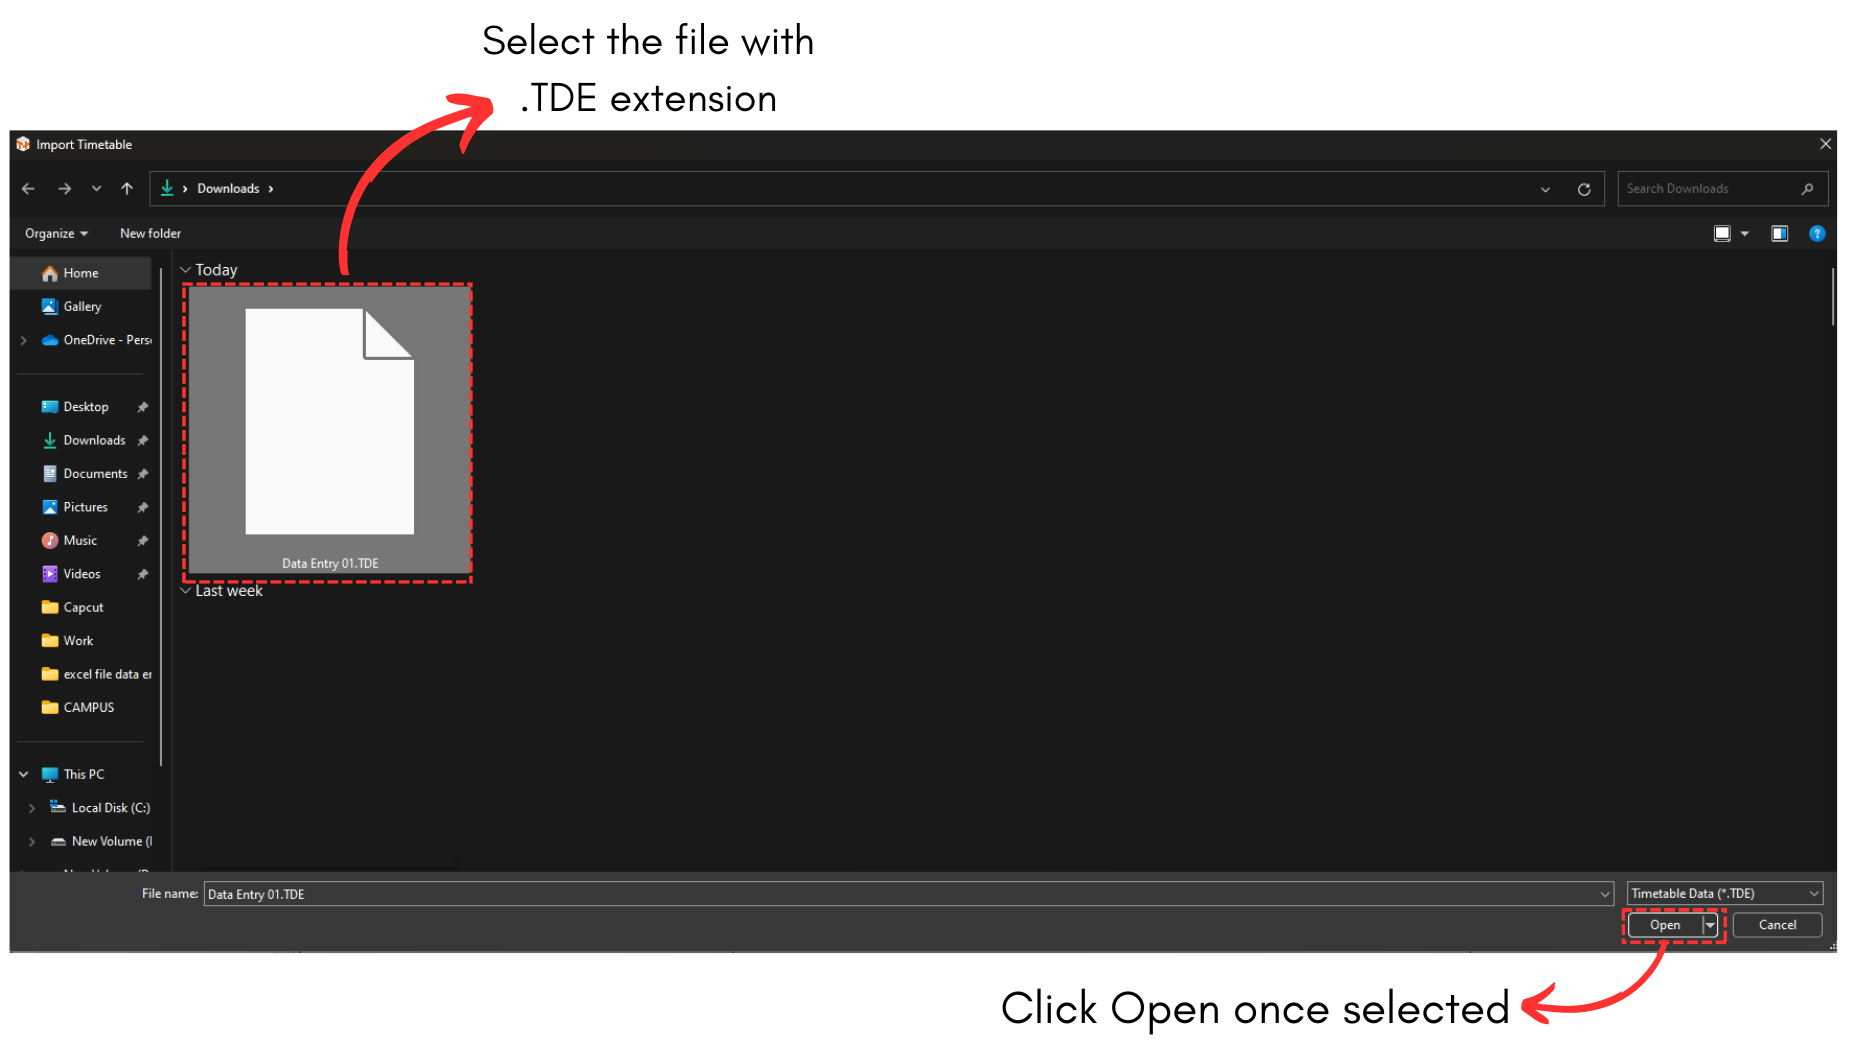
Diagram 2.1.2 Import Timetable Popup
Save Timetable Option will pop-up. Click Yes and then Save your file.
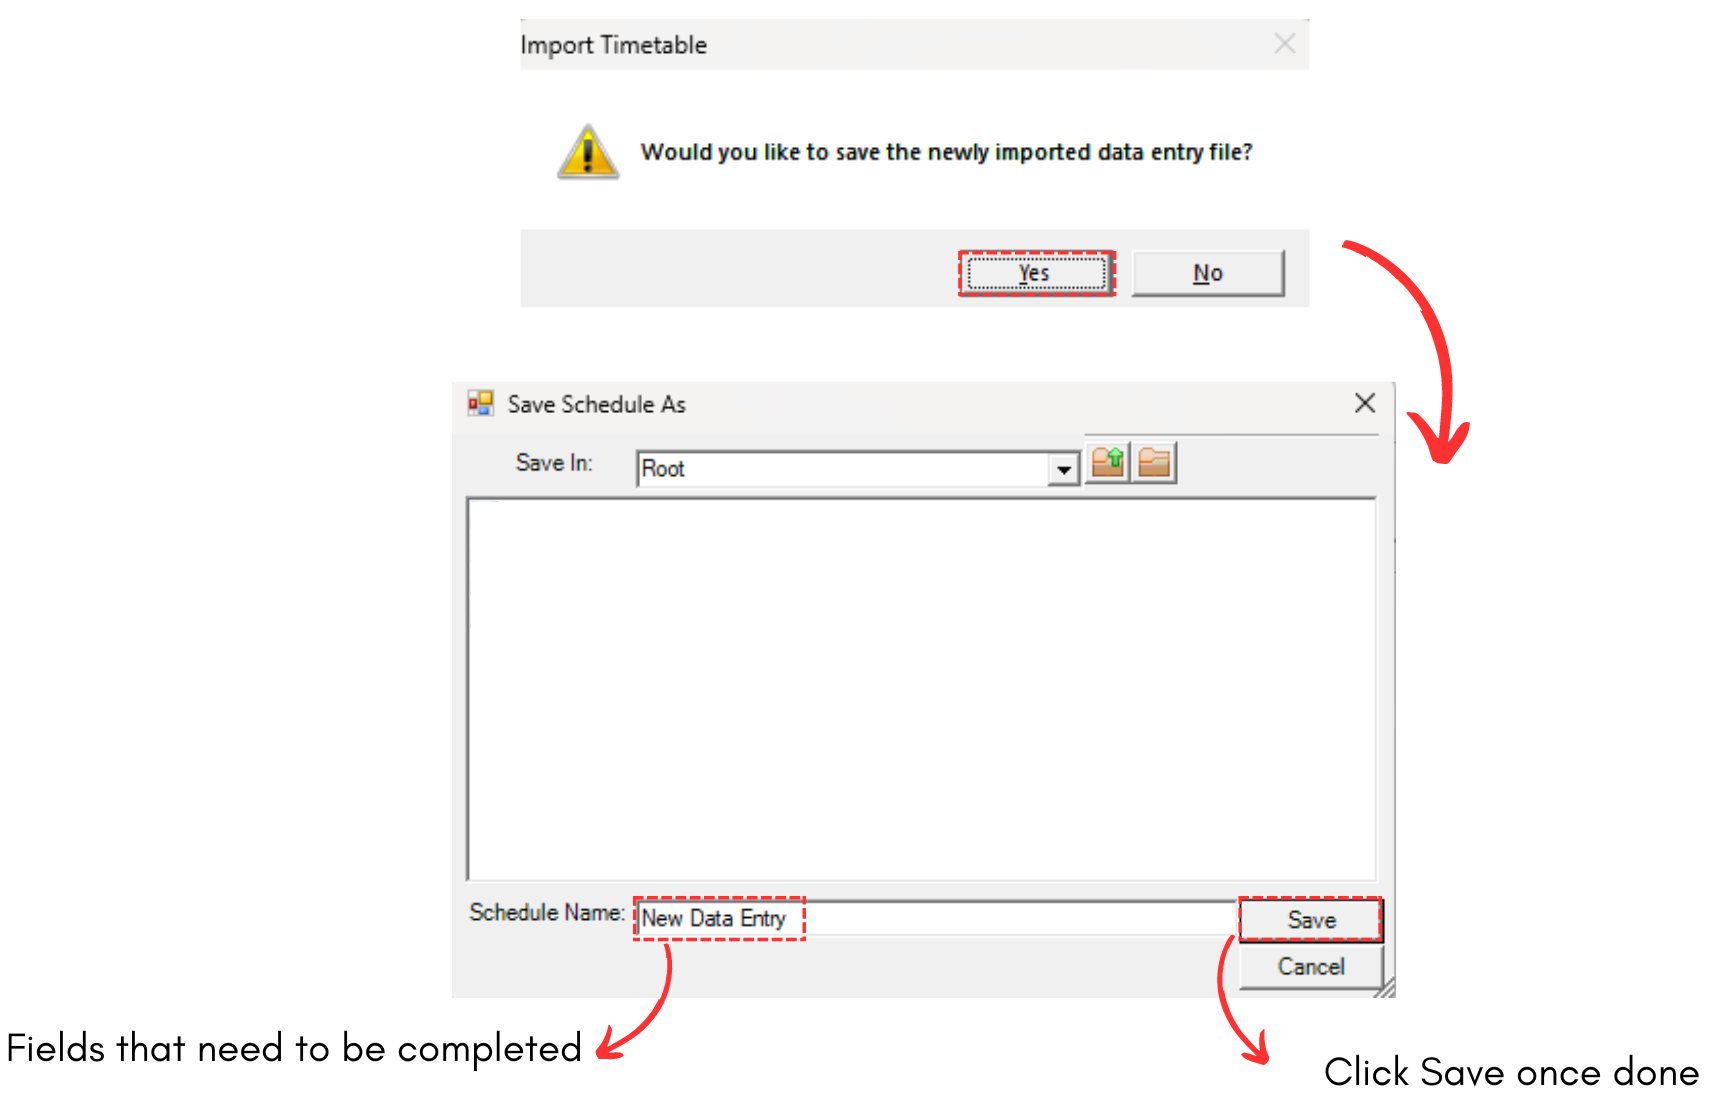
Diagram 2.1.3 Save the Data Entry File