1. COURSE LIST
Course List
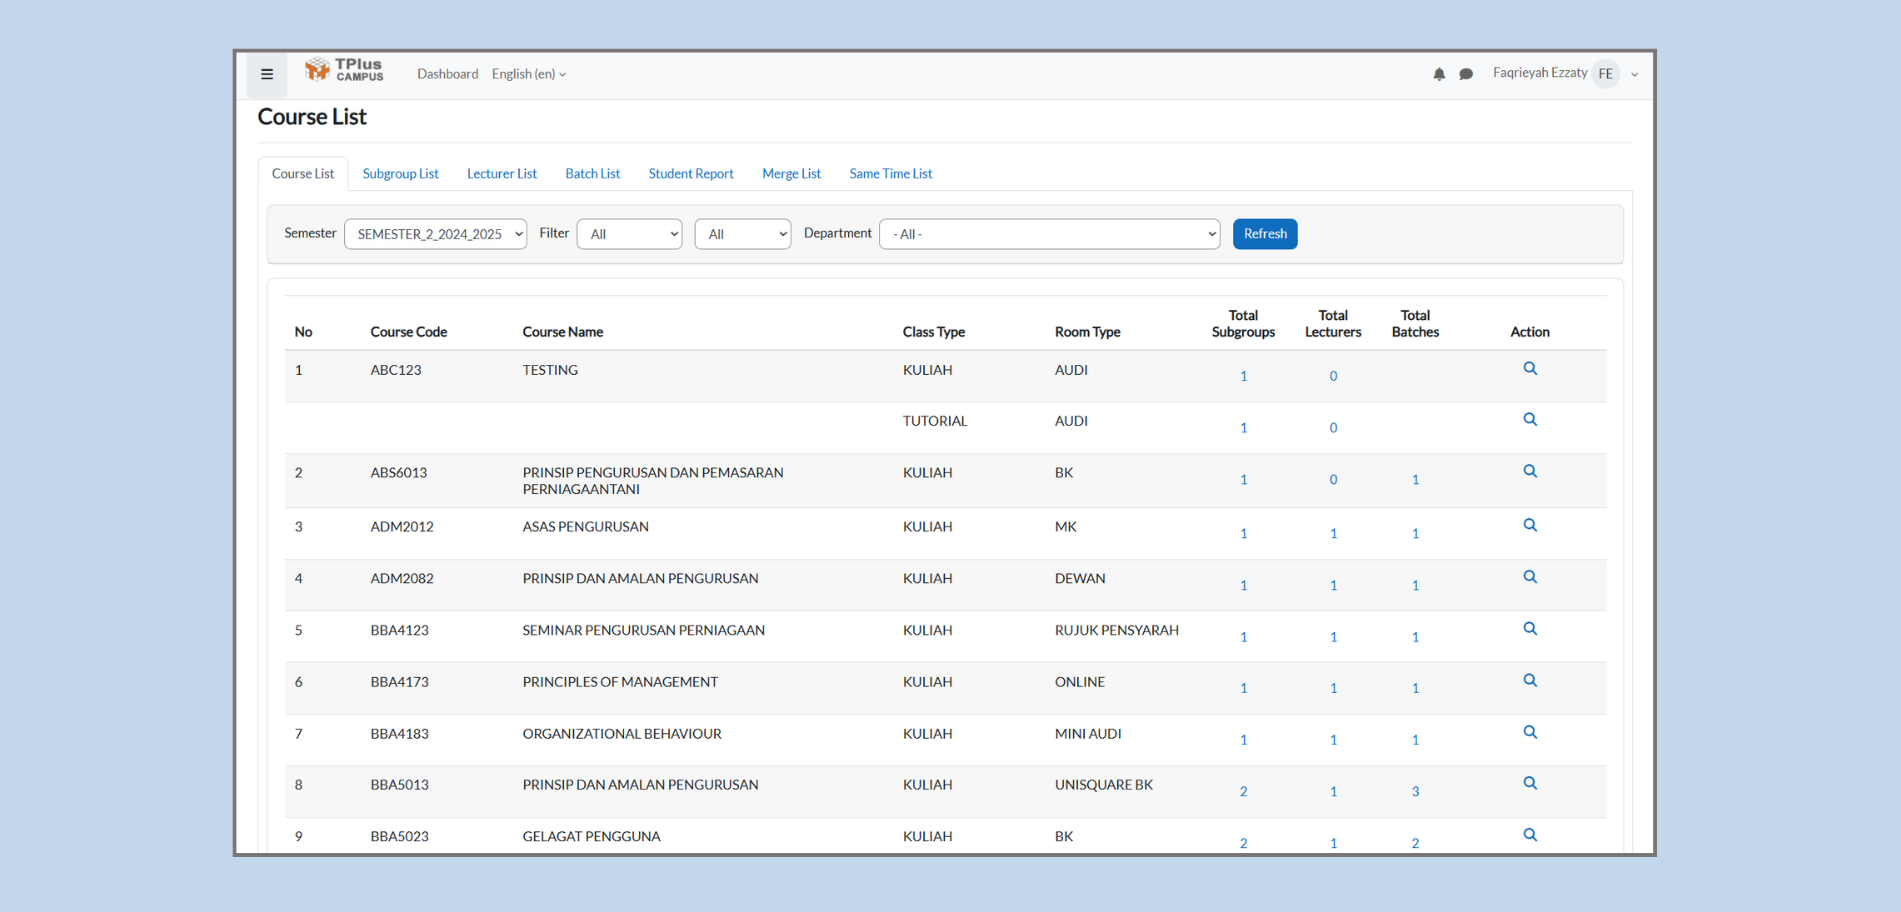
The Course List report provides a comprehensive overview of the courses offered within the system. Administrators can use this section to filter and view detailed information about each course, including associated data such as course code, class type, and number of subgroups and batches.

Accessing the Course List Report
To access the Course List Report:
-
Go to Reports: From the Dashboard, click on Reports in the navigation menu.
-
Select Course List: Under the Reports section, choose Course List to view the available courses.
Filter Options
At the top of the Course List page, there are multiple filter options to narrow down your search results:
-
Semester:
-
Use the dropdown to select the semester for which you want to view courses (e.g., BEATRISYIA, Faqrieayah, SHAHIN, etc.).

-
-
Filter:
-
Choose from options like My Courses, which will filter courses that you are personally associated with.

-
-
Department:
-
Select a department from the dropdown (e.g., UNIT PROGRAM ASASI, BAHAGIAN HAL EHWAL) or choose All to view courses from all departments.

-
Course List Columns
The Course List report displays several key columns:
-
No:
-
The row number of the course in the list.
-
-
Course Code:
-
The unique code assigned to each course (e.g., BBA4123).
-
-
Course Name:
-
The full name of the course (e.g., SEMINAR PENGURUSAN PERNIAGAAN).
-
-
Class Type:
-
The type of class (e.g., KULIAH, TUTORIAL).
-
-
Room Type:
-
The type of room used for the course (e.g., BK, AUDI).
-
-
Total Subgroups:
-
The total number of subgroups for that course.
-
-
Total Lecturers:
-
The total number of lecturers assigned to teach the course.
-
-
Total Batches:
-
The total number of batches for the course.
-
-
Action:
-
Option to view more details about each course. This section includes a magnifying glass icon to click for more in-depth information.
-
Refreshing the Report
To refresh or update the report after changing any filter:
-
Click Refresh:
-
After selecting the desired filters (Semester, Filter, or Department), click Refresh to apply the changes and update the displayed courses.
-
Adding a New Subgroup
To add a new subgroup:

-
Click on Action:
-
Click the Action dropdown menu for the course you want to add a subgroup for.
-
-
Select Add Subgroup/Class Type:
-
From the dropdown, select Add Subgroup / Class Type to open the Add Subgroup window.
-
-
Fill in Subgroup Details:
-
Class Type: Select the class type (e.g., KULIAH, TUTORIAL).
-
Subgroup: Enter a unique name for the subgroup (e.g., G01).
-
Room Type: Select the room type (e.g., AUDI for auditorium).
-
Room Group: Choose the room group (if applicable).
-
Campus: Choose the campus (e.g., All for all campuses).
-
Capacity: Enter the capacity (e.g., 30 for 30 students).
-
Category: Select the category, if applicable (e.g., No Category).
-
-
Click Add Subgroup:
-
Once you’ve entered the details, click Add Subgroup to add it to the course.
-
Accessing Subgroup Details:

-
Click on the Magnifying Glass Icon:
-
Locate the new subgroup under the course listing.
-
In the “Action” column, click the magnifying glass icon next to the subgroup. This will open the Subgroup Details page.
-
Editing the Class

-
Edit Class:
-
Once you are on the Subgroup Details page, look for the “Action” section at the bottom of the page.
-
Click the Edit icon nest to the class you want to modify. This will open the “Edit Class” window where you can make changes to the class schedule.
-
-
Edit Class Details:
-
Duration: Set or modify the class duration (e.g., 01 H 00 M, 02 H 00 M).
-
Lecturer: Choose the lecturer from the dropdown menu. This assigns the lecturer to the class.
-
Visible: Select “Yes” if you want the class to be visible to students, or “No” if you want to hide it.
-
In Workload: Select “Yes” to include this class in the lecturer’s workload, or “No” if you want to exclude it.
-
Team Teaching: If applicable, select the team teaching option from the dropdown menu, or choose “None” if team teaching is not involved.
-
-
Save the Changes:
-
After filling in or update the details, check the Update Schedule button to save the changes.
-
You can also cancel the editing by clicking the Cancel button.
-
Editing or Deleting a Subgroup
To edit or delete a subgroup:
-
Edit Subgroup:
-
Click the edit icon under the Action column to make changes to the subgroup details.
-
-
Delete Subgroup:
-
Click the delete icon under the Action column to remove the subgroup from the course. You will be asked to confirm the deletion.
-
Managing Subgroups & Assigning Batches
Once a subgroup has been created, administrators can further manage it by assigning batches of students. Thus ensures that the correct students are allocated to the appropriate subgroup.
Accessing Subgroup Details

-
Navigate the course in the Course List Report.
-
In the Action column, click the magnifying glass icon next to the subgroup.
-
This open the Subgroup Details page, where you can view and manage assgined batches, enrolled students, and other subgroup options.
-
Example: Clicking the magnifying glass for G01 opens the details for that subgroup.
-
Viewing Subgroup Batches
-
On the Subgroup Details page, click the Subgroup Batches tab.
-
This tab displays all the batches currently linked to the subgroup.
-
You can remove a batch by clicking the Delete (trash) icon under the Action column.
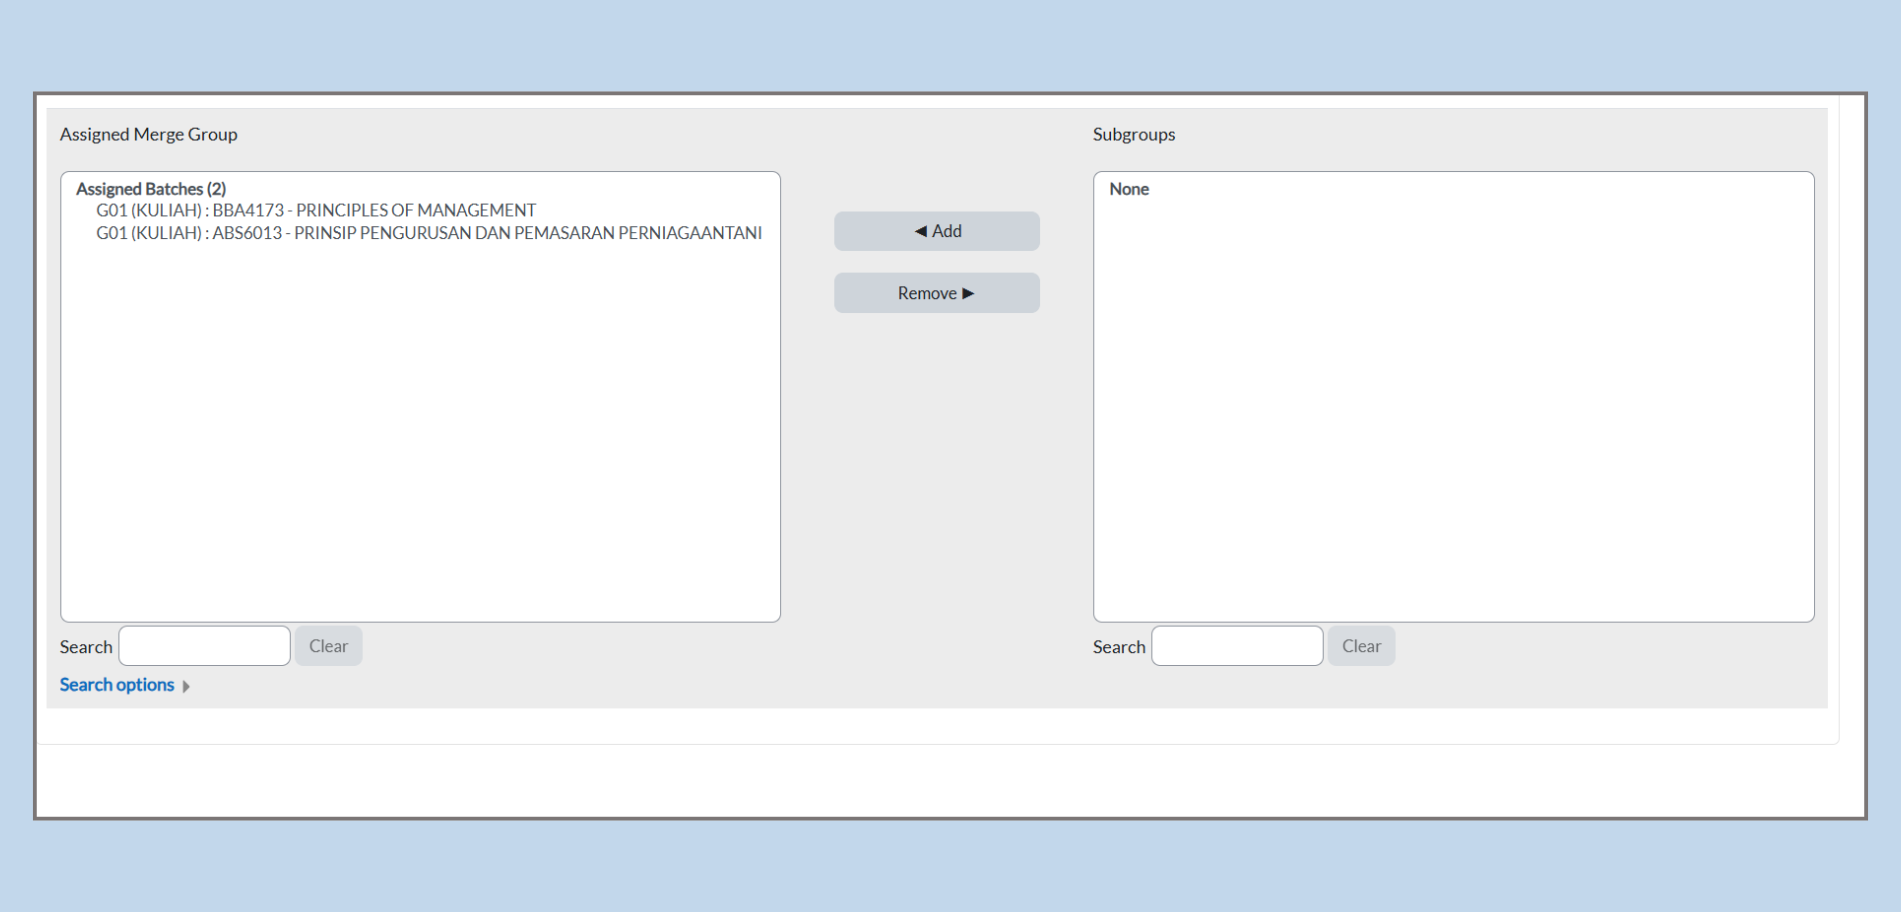
Assigning Batches to a Subgroup

-
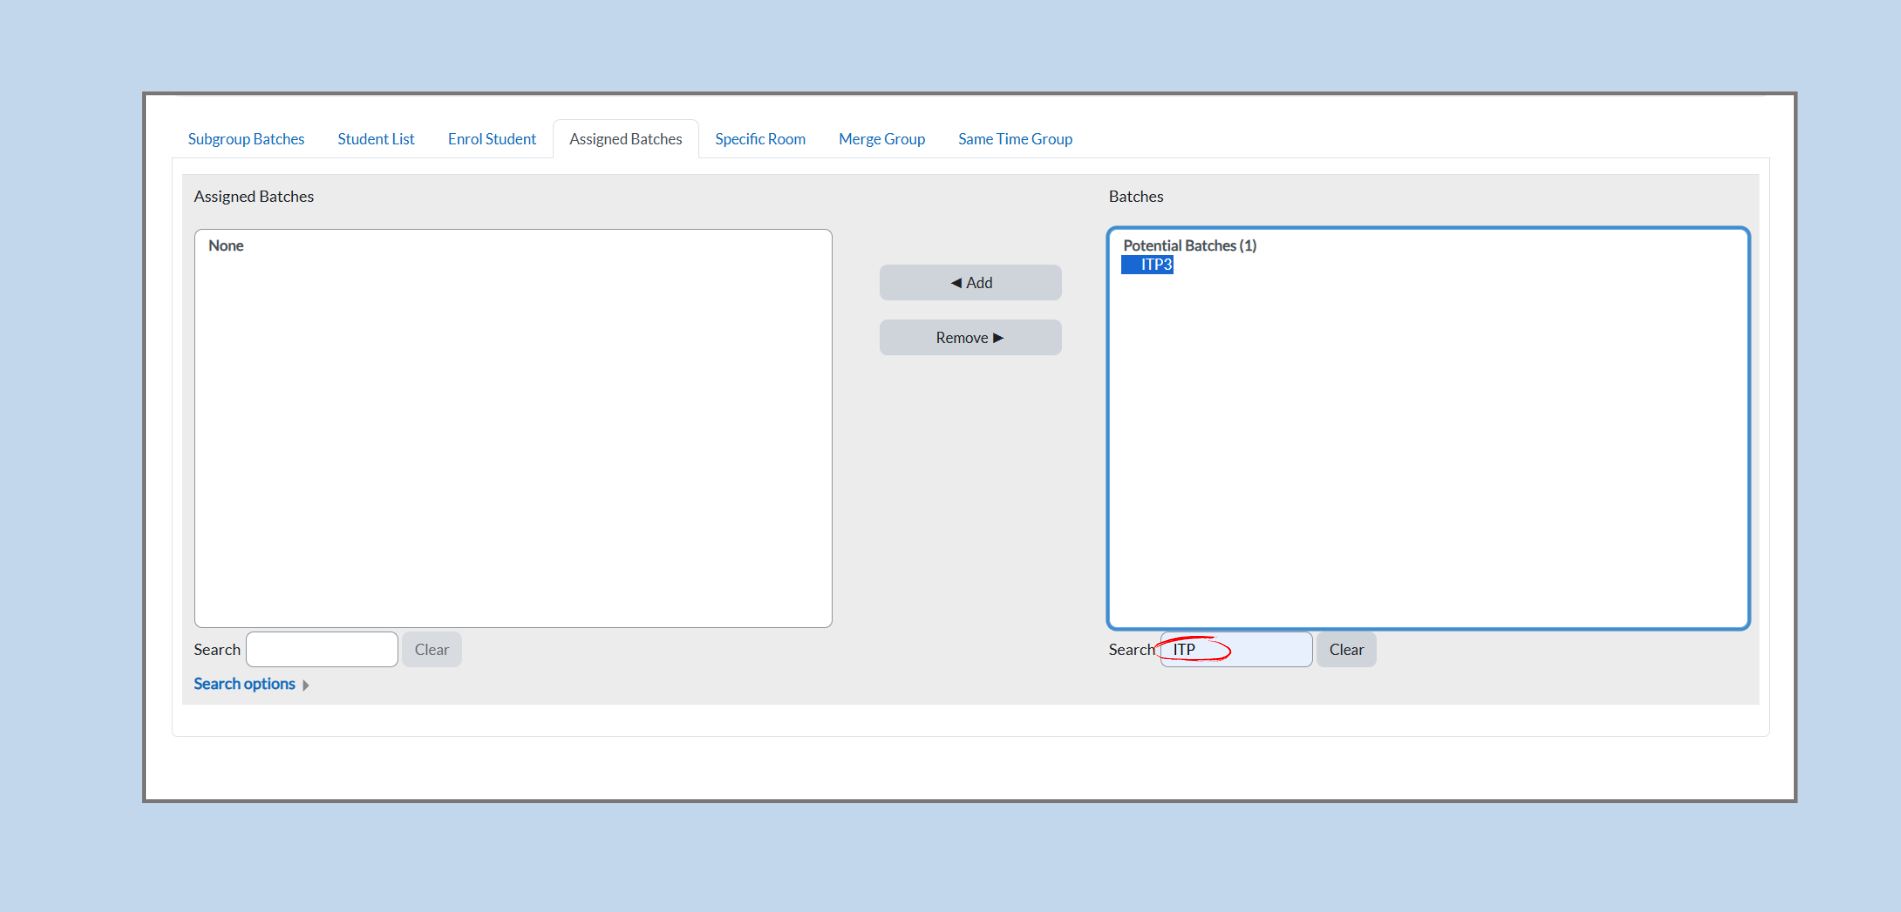
From the Subgroup Details page, click on the Assigned Batches tab.
-
Two lists will appear:
-
Assigned Batches: Displays batches already linked to the subgroup.
-
Batches: Shows all available batches that can be assigned.
-
-
If the list is too long, use the Search box to filter by batch code or name.
-
Example: Typing “ITP” will filter and display only the batches that match the keyword.
-
-
Select the desired batch from the Batches list.
-
Click the Add button to assign the batch to the subgroup.
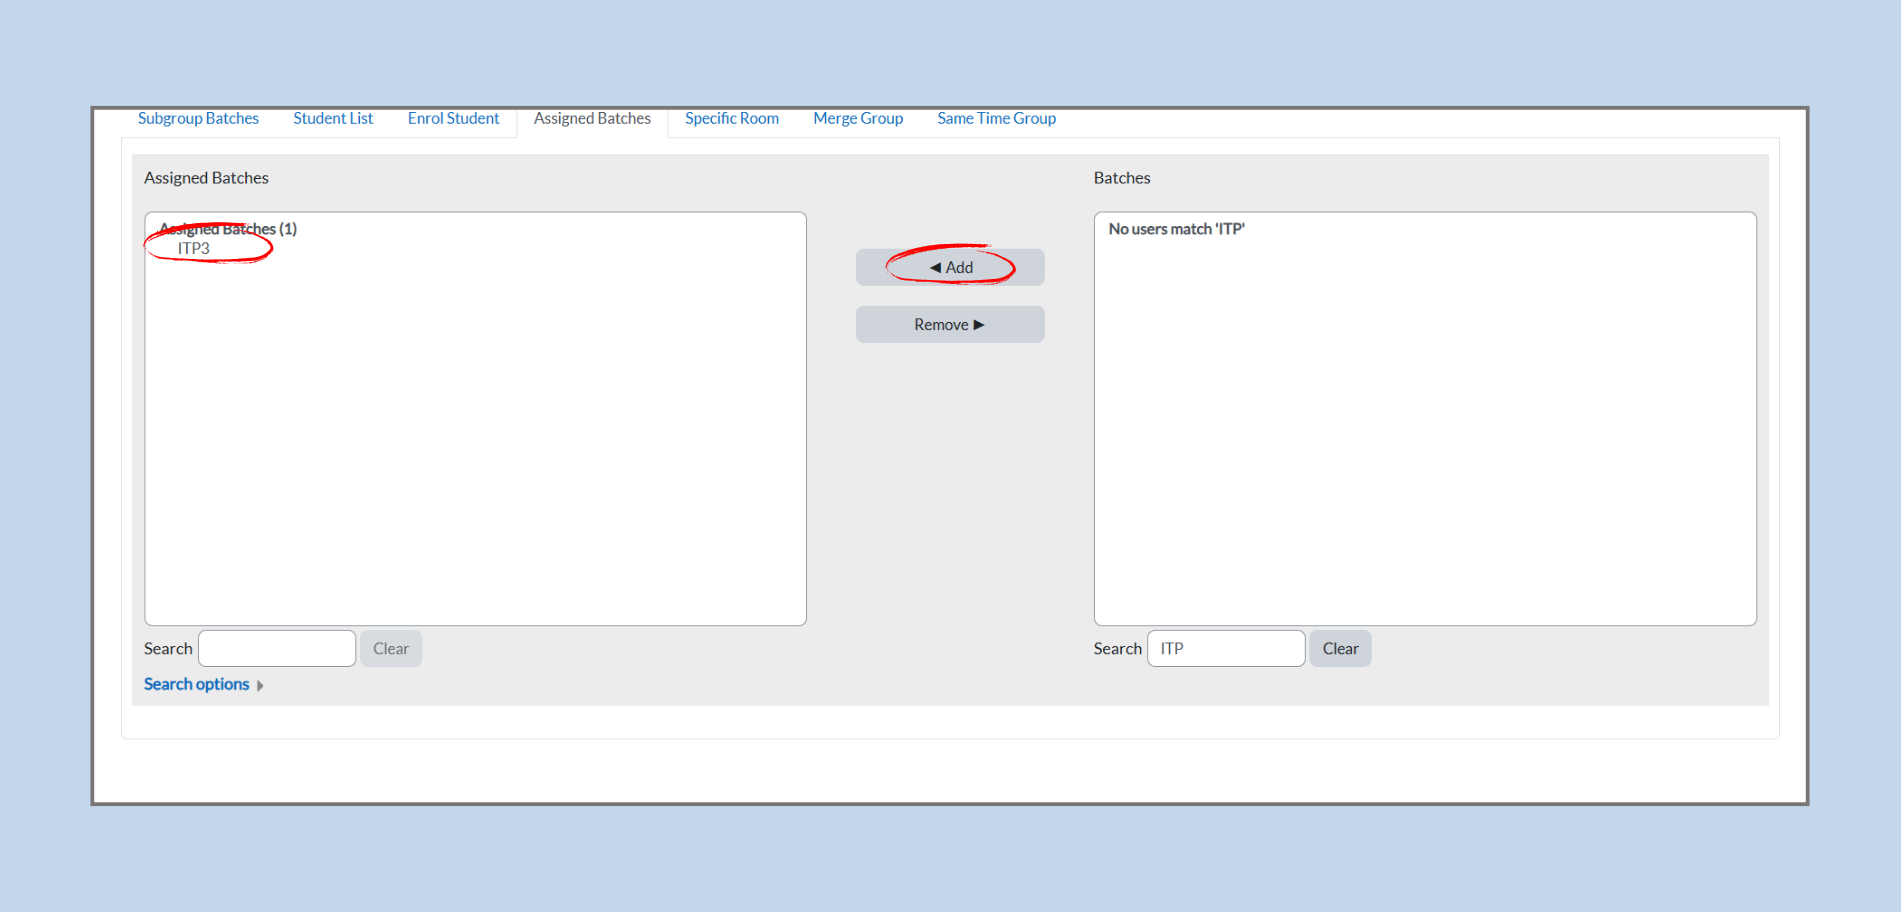
- The batch will now appear under Assigned Batches.
Removing Assigned Batches
-
To remove a batch, select it from the Assigned Batches list.
-
Click the Remove button.
-
The batch will be removed from the subgroup and moved back to the available batch list.
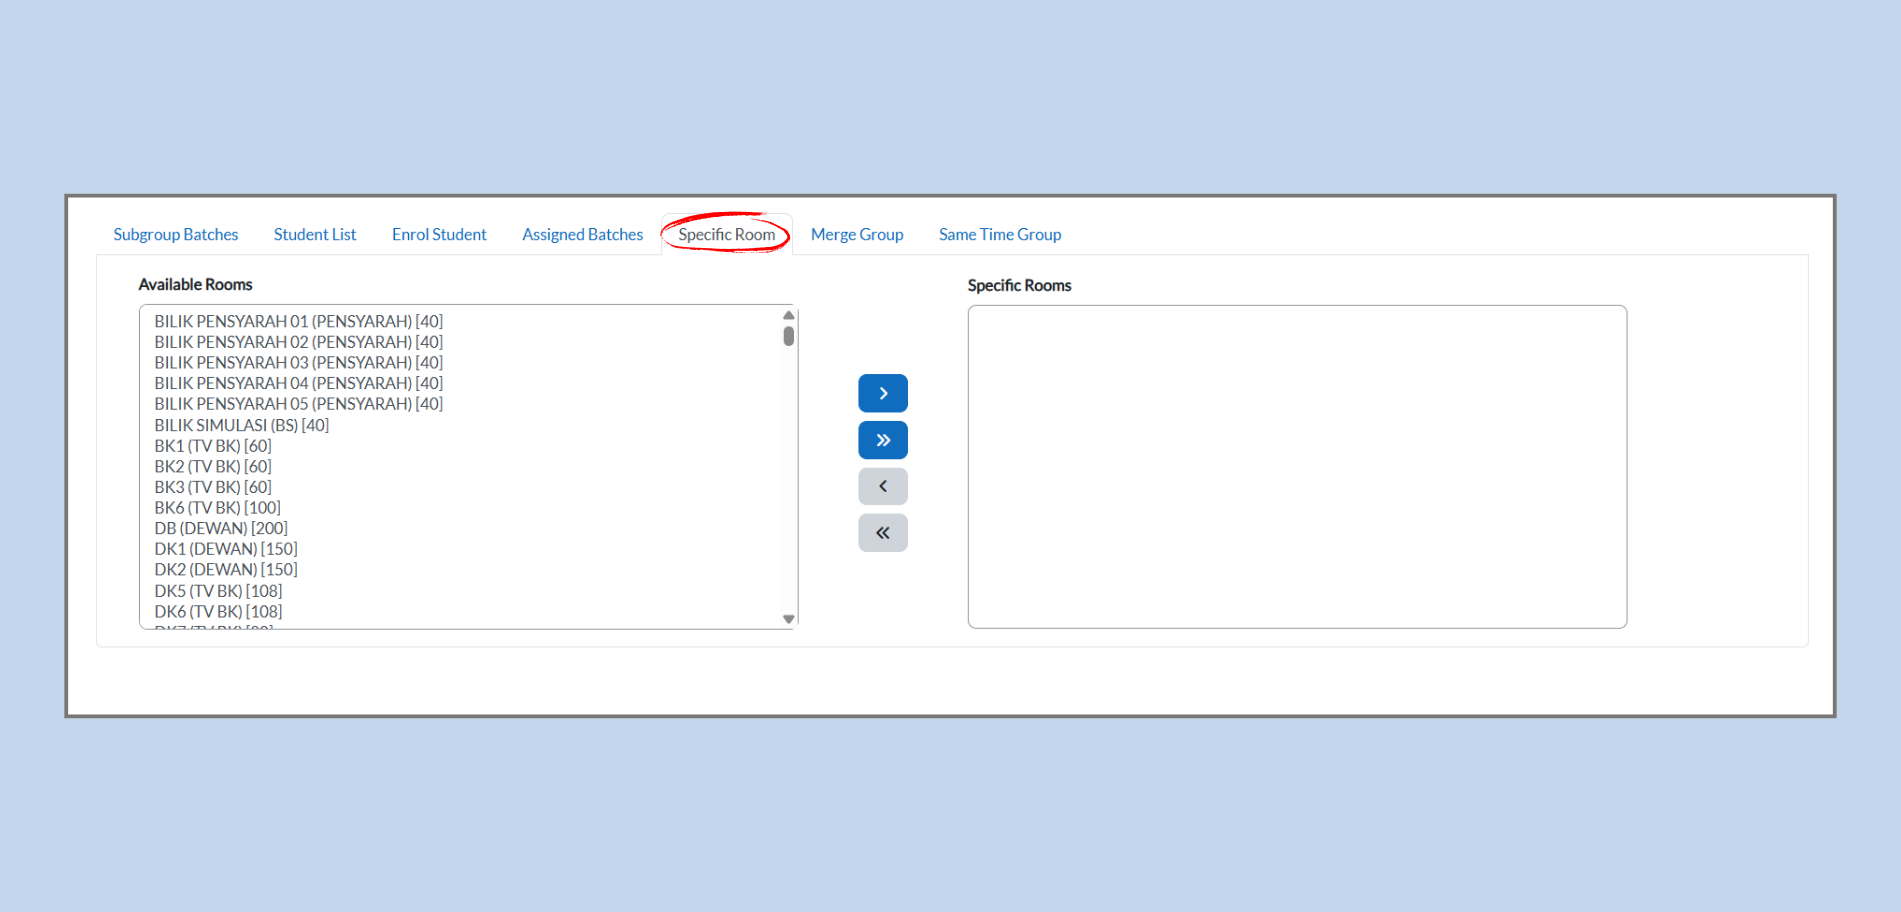
Assigning Specific Rooms to a Subgroup
Sometimes, a course or subgroup requires a fixed room. The Specific Room tab allows administrators to allocate one or more specific rooms to the selected subgroup.
Accessing the Specific Room Tab
-
From the Subgroup Details page, click on the Specific Room tab.
-
The page will display two lists:
-
Available Rooms: All rooms available in the system (e.g., lecture halls, tutorial rooms, labs).
-
Specific Rooms: The rooms currently assigned to this subgroup.
-
Assigning a Room

-
Select the desired room from the Available Rooms list.
-
Click the Right Arrow ( > ) button to move the selected room to the Specific Rooms list.
-
Example: Selecting BK A17 (BK) [40] and clicking the arrow will assign that room to the subgroup.
-
-
To assign multiple rooms at once, click the Double Right Arrow ( » ) button to move all rooms from the left to the right list.
Removing a Room
-
To unassign a room, select it from the Specific Rooms list.
-
Click the Left Arrow ( < ) button to move it back to the Available Rooms list.
-
To remove all rooms at once, click the Double Left Arrow ( « ) button.
Assigning Specific Rooms to a Merged Group
This process ensures that each merged group has a designated room for their sessions. Here's the full method, including course and class type selection, based on your images:
Step 1: Select the Course and Class Type
-
Choose the Course:

-
From the Merge Group section, you will first need to select the Course you wish to assign rooms to.
-
There will be a dropdown menu labeled Merge Course (as shown in your images).
-
Click on the dropdown and select the course you want to work with (e.g., ABS6013 - PRINSIP PENGURUSAN DAN PEMASARAN PERNIAGAANTANI).
-
-
Select the Class Type:

-
After selecting the course, proceed to choose the Class Type.
-
Click on the Class Type dropdown menu and select the appropriate class type (e.g., KULIAH for a lecture class).
-
Step 2: Access the Specific Room Tab
-
Navigate to the Specific Room Tab:
-
After selecting the course and class type, go to the Subgroup Details page.
-
Click on the Specific Room tab to assign rooms to the merged group.
-
-
View the Lists:

-
On this page, you'll see two lists:
-
Available Rooms: All rooms available in the system (e.g., lecture halls, tutorial rooms, labs).
-
Specific Rooms: The rooms currently assigned to this merged group.
-
-
Step 3: Assign a Room to the Merged Group
-
Select a Room:
-
From the Available Rooms list, select the room you want to assign to the merged group.
-
-
Move the Room:
-
Click the Right Arrow ( > ) button to move the selected room to the Specific Rooms list.
-
Example: If you select BK A17 (BK) [40] and click the arrow, that room will be assigned to the merged group.
-
-
Assign Multiple Rooms:
-
To assign multiple rooms at once, click the Double Right Arrow ( » ) button to move all rooms from the Available Rooms list to the Specific Rooms list.
-
Step 4: Remove a Room from the Merged Group
-
Select the Room to Unassign:
-
If you need to unassign a room, select the room from the Specific Rooms list.
-
-
Move the Room Back:
-
Click the Left Arrow ( < ) button to move it back to the Available Rooms list.
-
-
Remove All Rooms:
-
If you want to remove all rooms at once, click the Double Left Arrow ( « ) button to return all rooms to the Available Rooms list.
-