1. Semester
TPlus Campus for Administrators
This manual serves as a comprehensive guide for administrators using the TPlus Campus system. Follow this step-by-step guide to navigate through the system, perform various tasks, and understand the purpose and function of each setting.
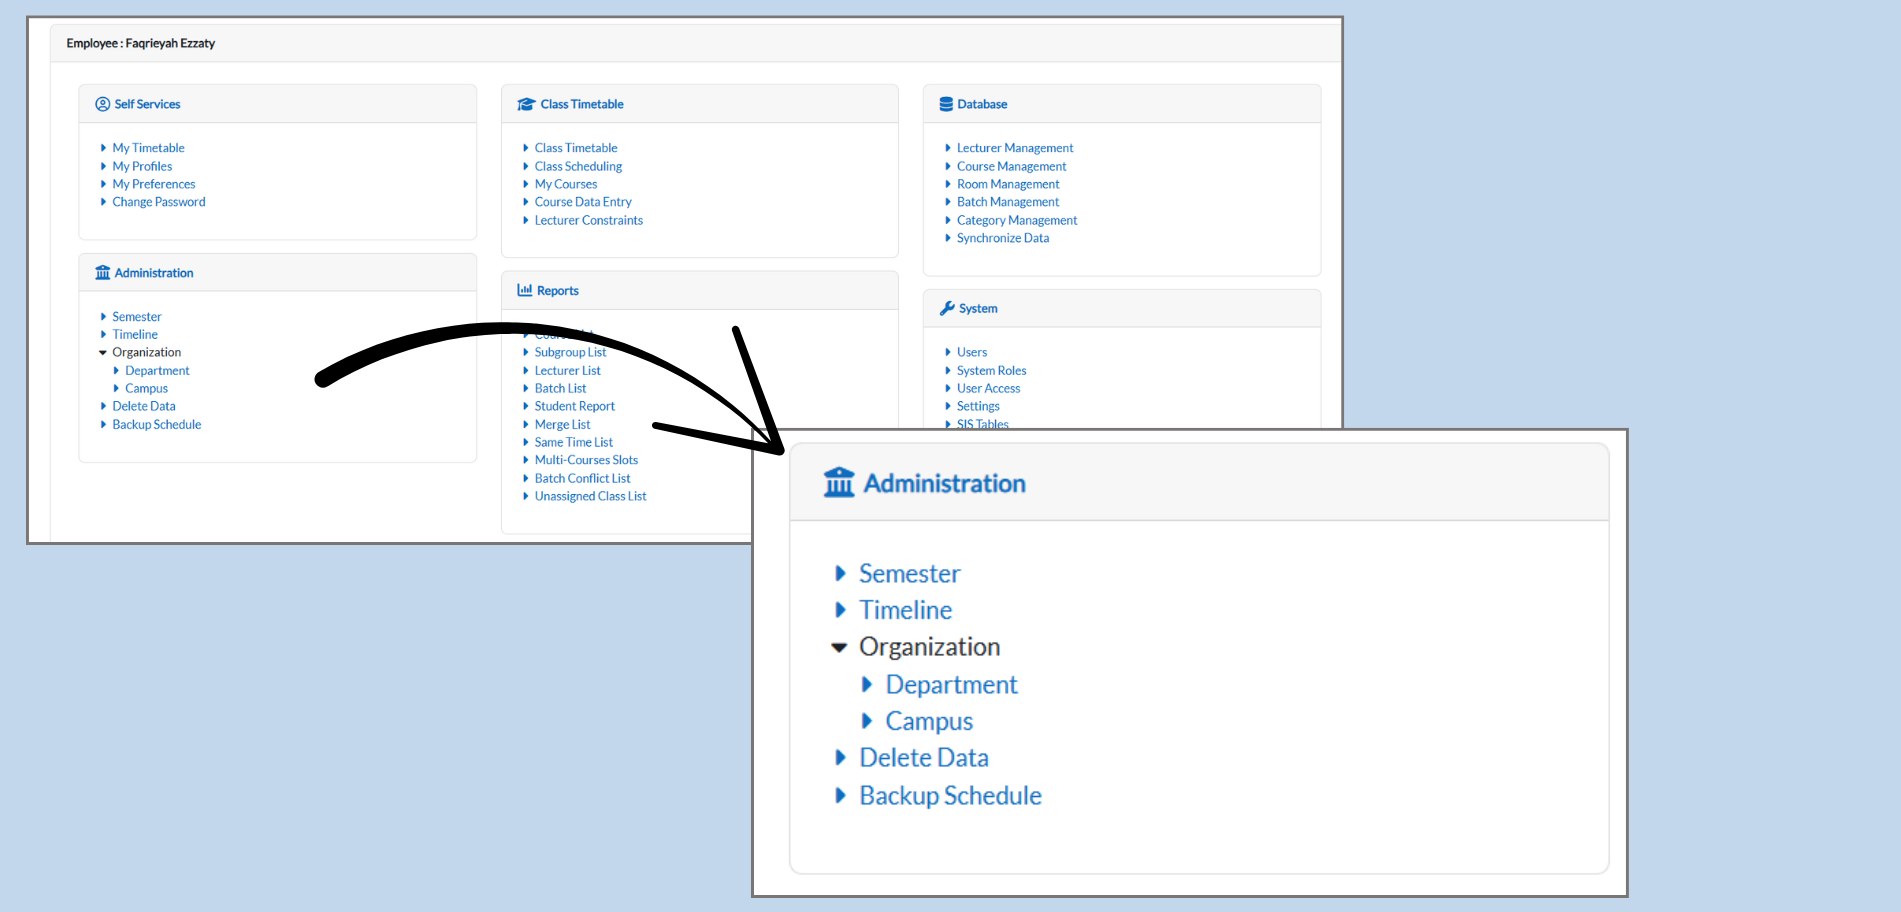
1. Administration Section
The Administrators section is central for managing the core academic elements like semesters, departments, and user access.
Purpose: To configure the overall settings for the system, including Semesters, Departments, Timetable, and other organizational settings.
How to Access:
-
Go to the Dashboard: Once logged into the system, locate the Administration section directly in the left navigation panel.
-
View Available Options: The Administration section will already display option like Semesters, Timeline, Departments, Campus, and Delete Data without needing to expand.
1.1 Managing Semesters
Purpose: Manage semester details, including adding, updating, or deleting semesters.
1.1.1How to Add a Semester:

-
Navigate to Administration > Semester: From the dashboard, click on Semester under the Administration section.
-
Click “ Add Semester”: In the same page, click the Action button and select Add Semester.
-
Enter Semester Details:
-
Semester Name: Enter the semester name (e.g., “UBC2024”).
-
Description: Add a description for the semester.
-
Number: Enter the semester number (e.g., 1).
-
Year: Select the year for the semester.
-
Start and End Dates: Set the semester’s start and end dates.
-
-
Click “Save Changes”: After filling out the information, click Save Changes to add the semester.
Why It’s Important: Adding semesters allows you to define the academic calender and ensure accurate scheduling.
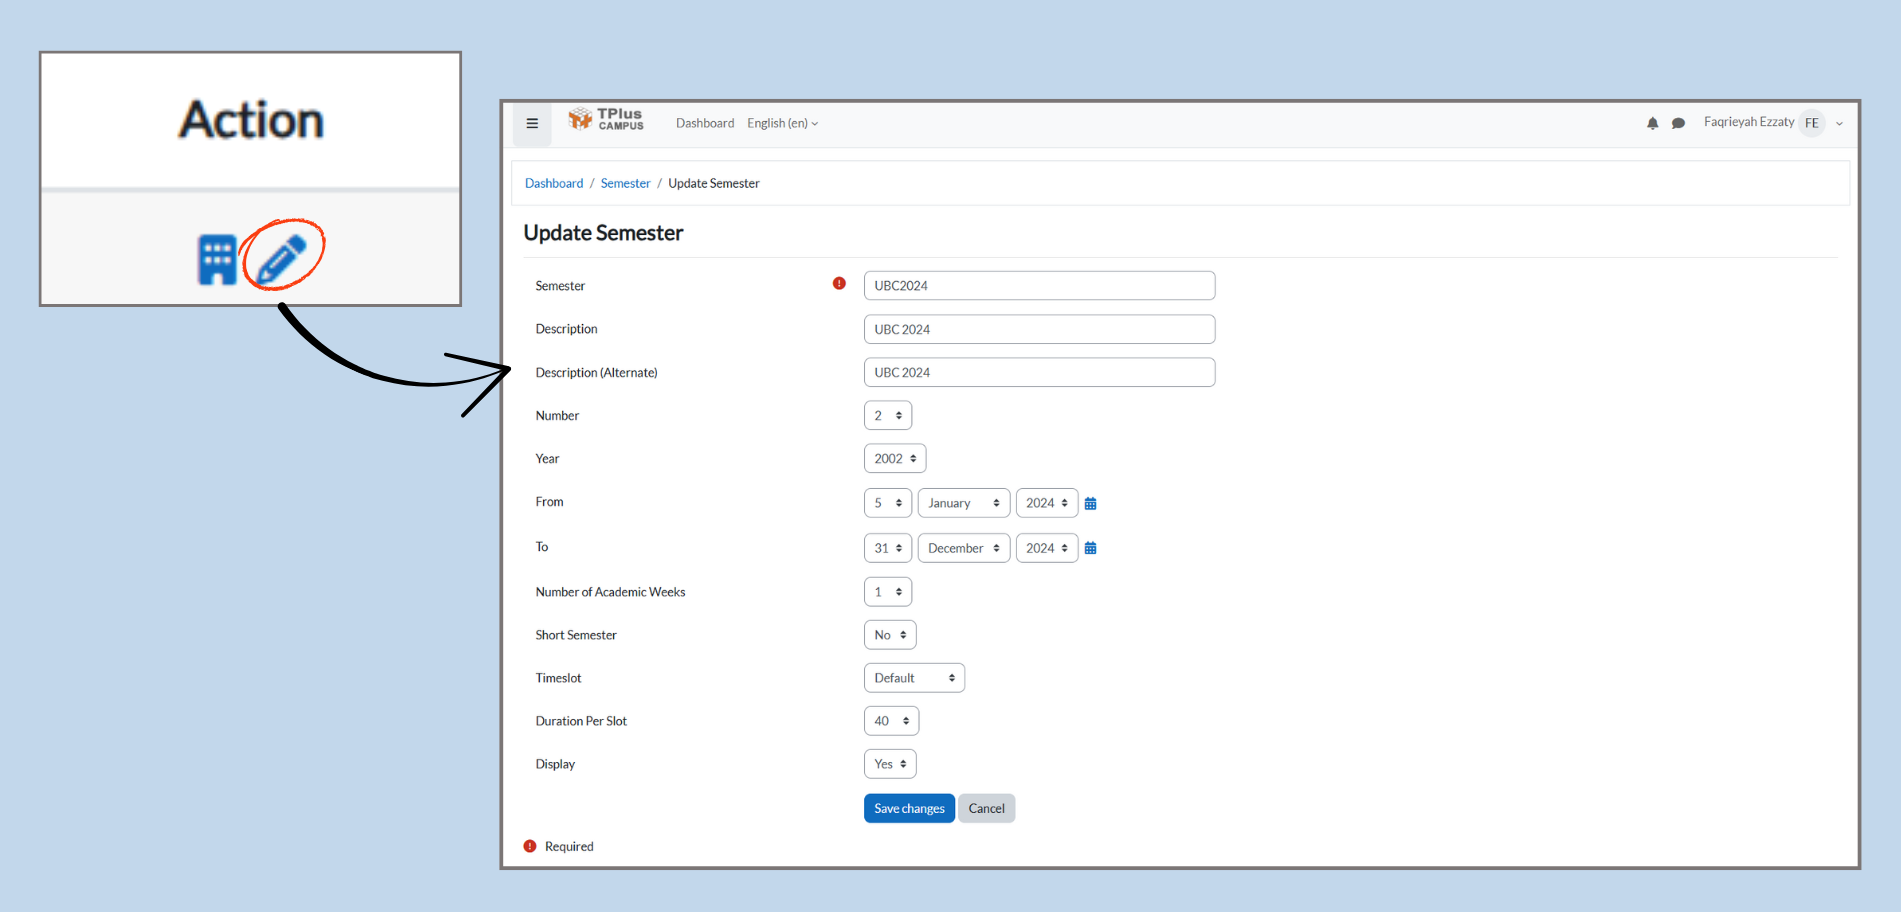
1.1.2How to Update an Existing Semester:
-
Locate the Semester: On the semester list page, find the semester you want to update.
-
Click the Edit Icon: Next to the semester, click the Edit icon.
-
Modify Details: Update any neccessary fields like Description, Dates, or Semester Number.
-
Click “Save Changes” to update the semester.
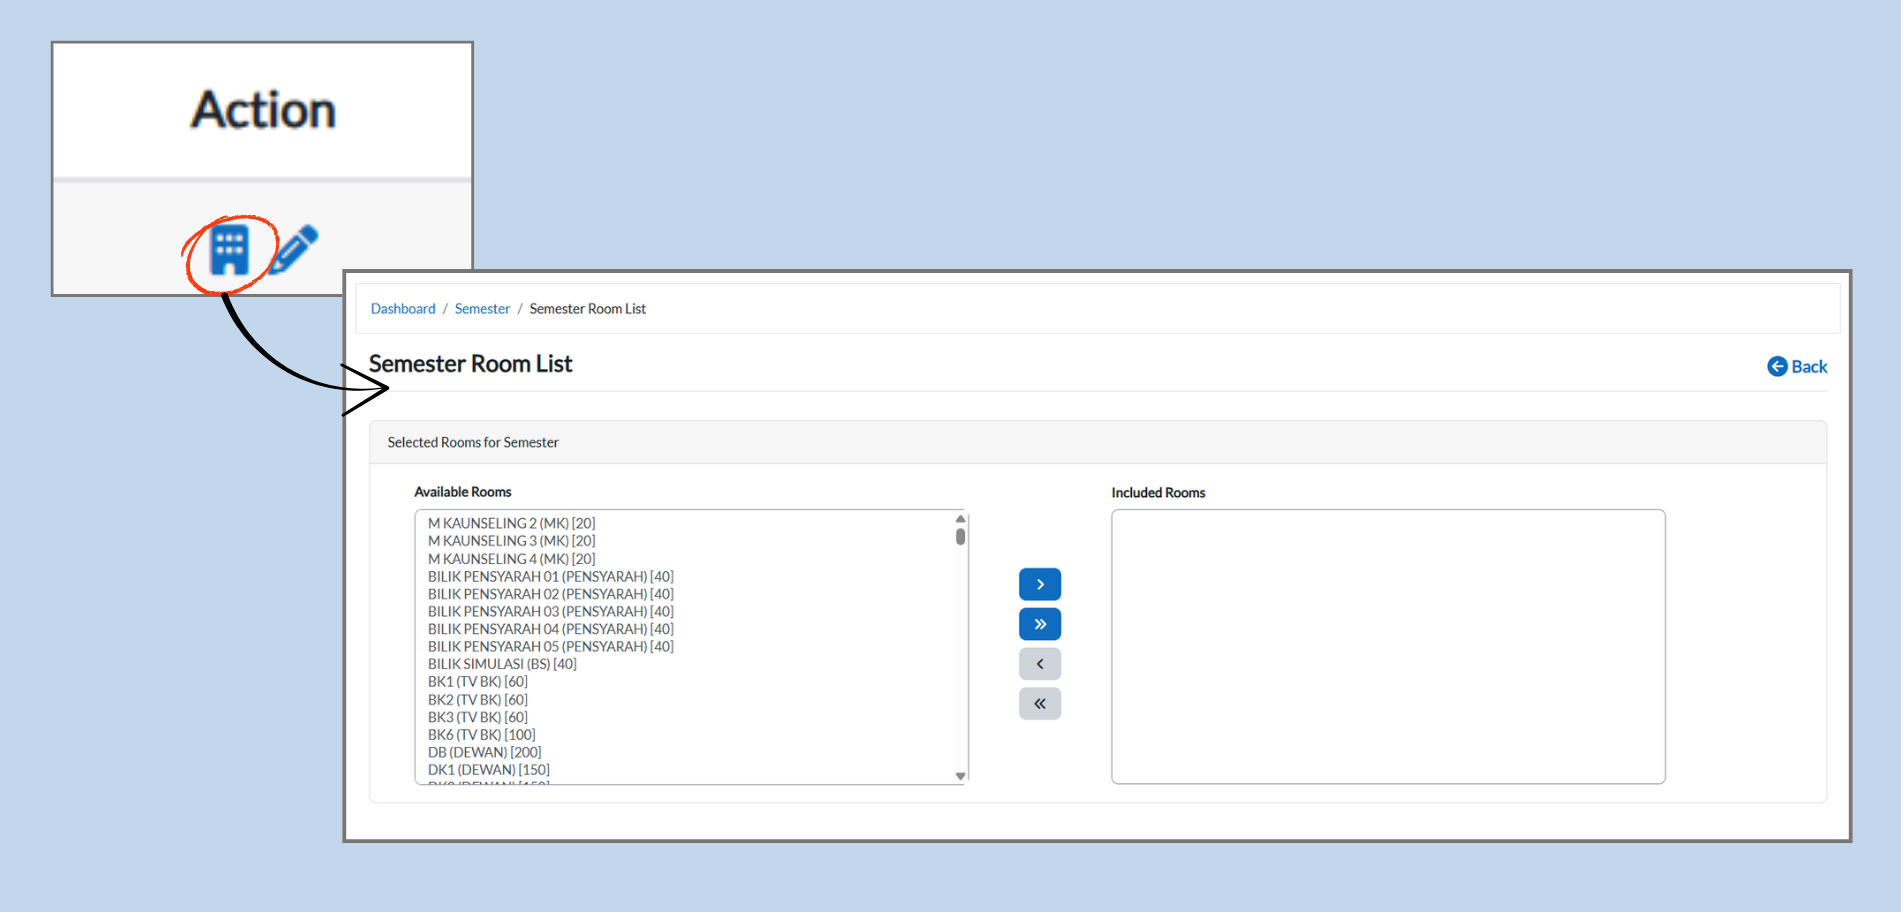
1.2 Managing Semester Rooms:
Purpose: Allocate rooms to specific semesters for class schedules and events.
1.2.1How to Assign Rooms:
-
Navigate to Semester Room List: Under the Semester section, click Semester Room List.
-
Select Rooms for the Semester:
-
Available Rooms (Left Box): From the list, select rooms you want to assign.
-
Move to Included Rooms (Right Box): Use the right arrow button to move rooms from Available Rooms to Included Rooms.
-
-
Click “Save Changes”: Once rooms are selected, click Save Changes.
Why It’s Important: This ensures proper allocation of physical spaces for classes or events, preventing scheduling conflicts.