Opening Up and Getting Used to Timetable Plus Exam
| Site: | Timetable Plus |
| Course: | Timetable Plus Exam |
| Book: | Opening Up and Getting Used to Timetable Plus Exam |
| Printed by: | Guest user |
| Date: | Sunday, 19 April 2026, 8:43 PM |
Description
s
1. Opening T-Plus Exam

Diagram 1.1 Timetable Plus Exam Folder
Steps 1: Open the Timetable Plus Exam Folder.
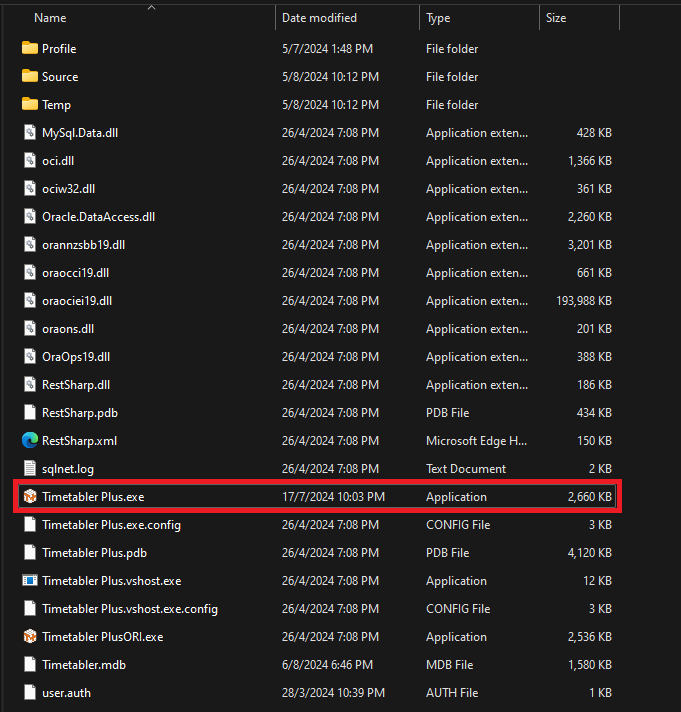
Diagram 1.2 Timetable Plus EXE Location
Steps 2: Double click the Timetable Plus.exe.
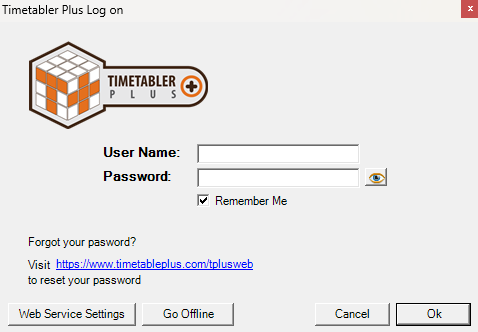
Diagram 1.3 Timetable Plus Exam Login Window
A window will pop-up and required user to login. Below is the explanation on buttons of login window.
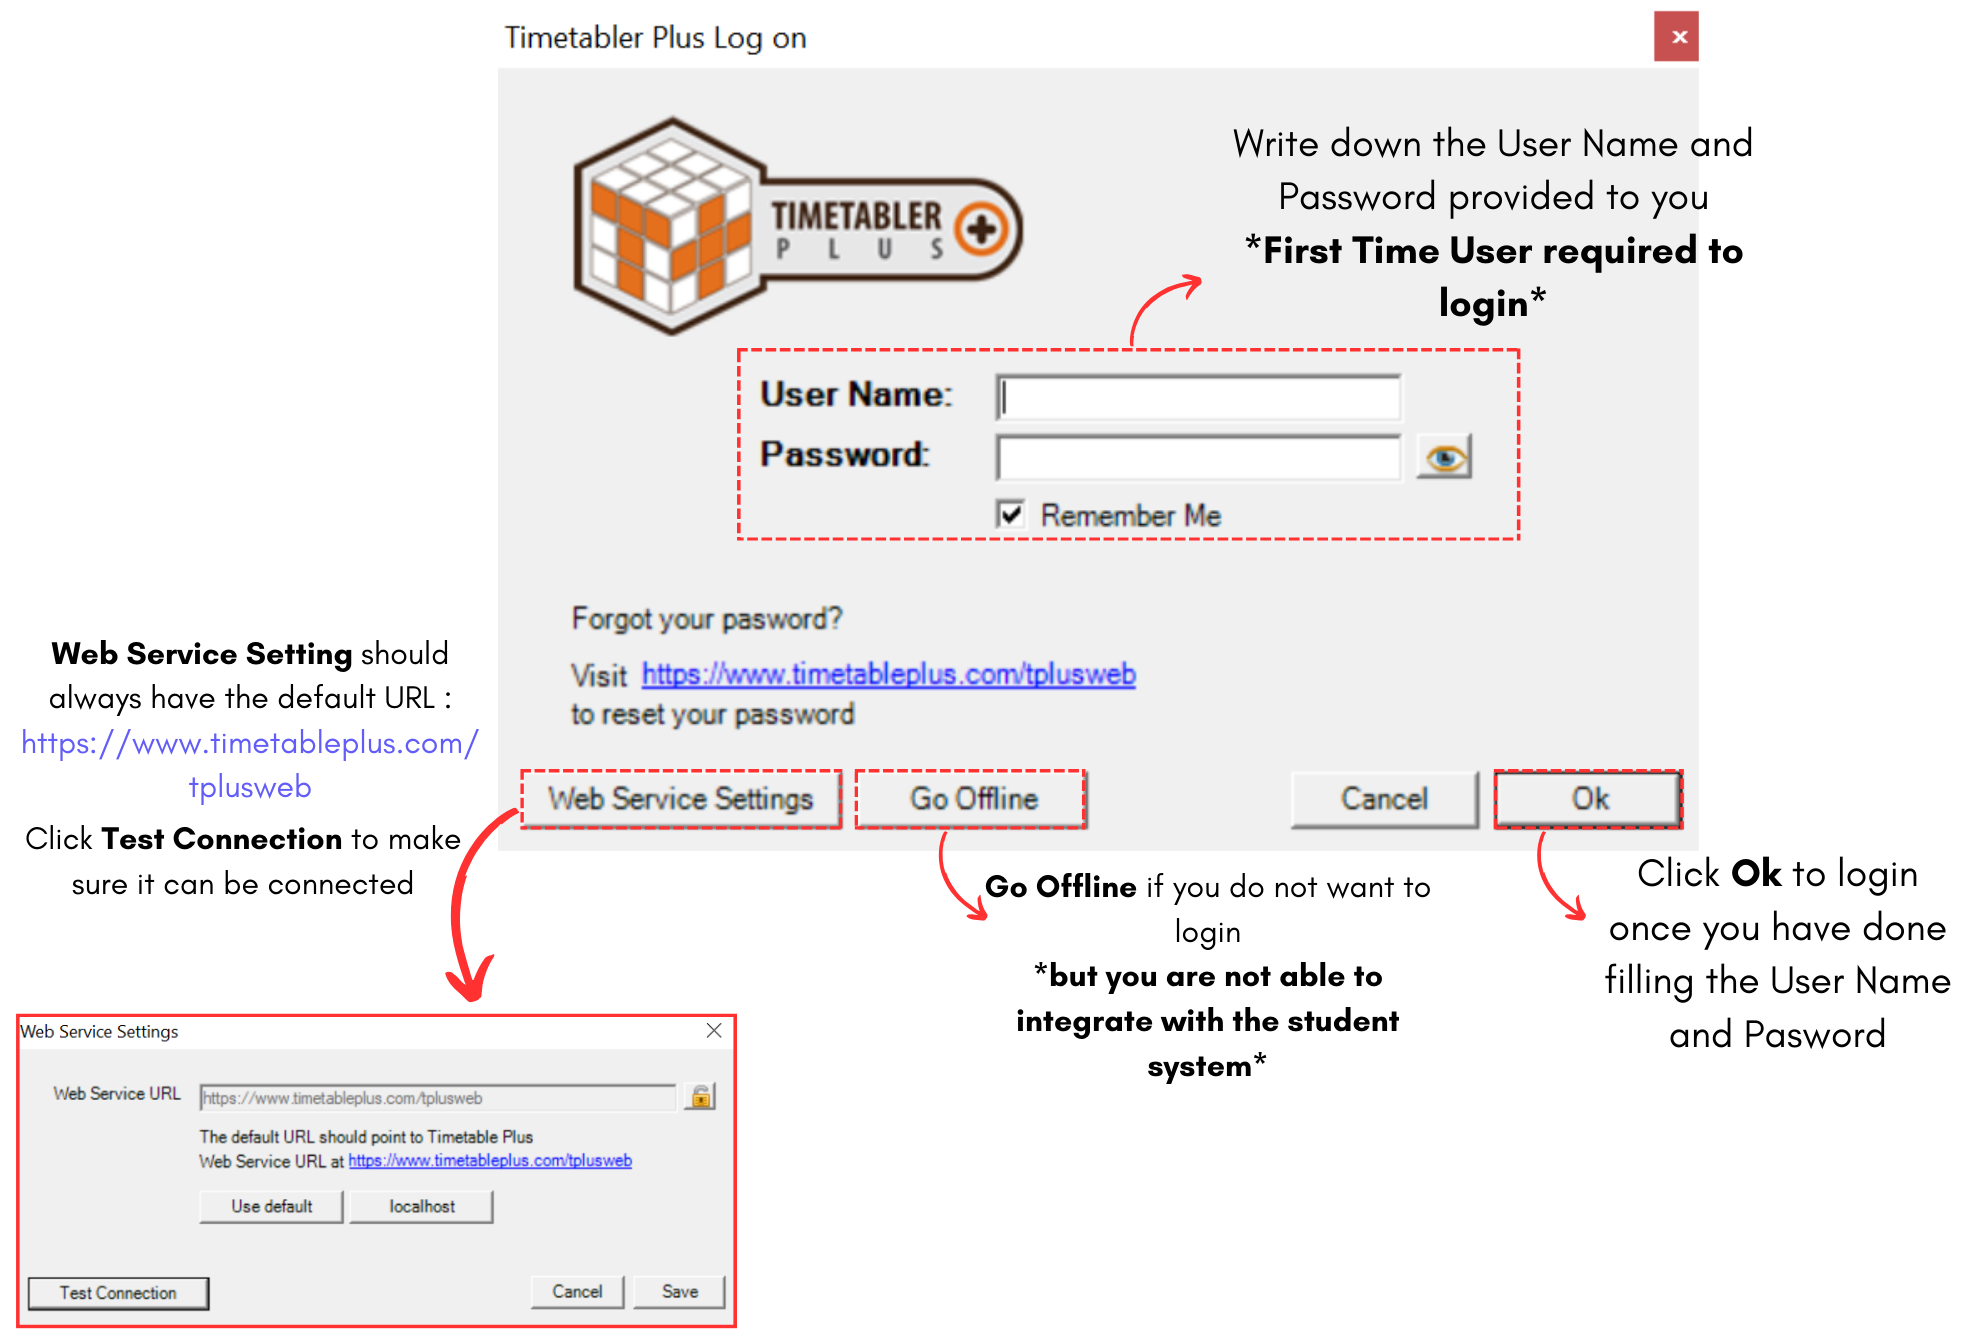
Diagram 1.4 Login Window explanation
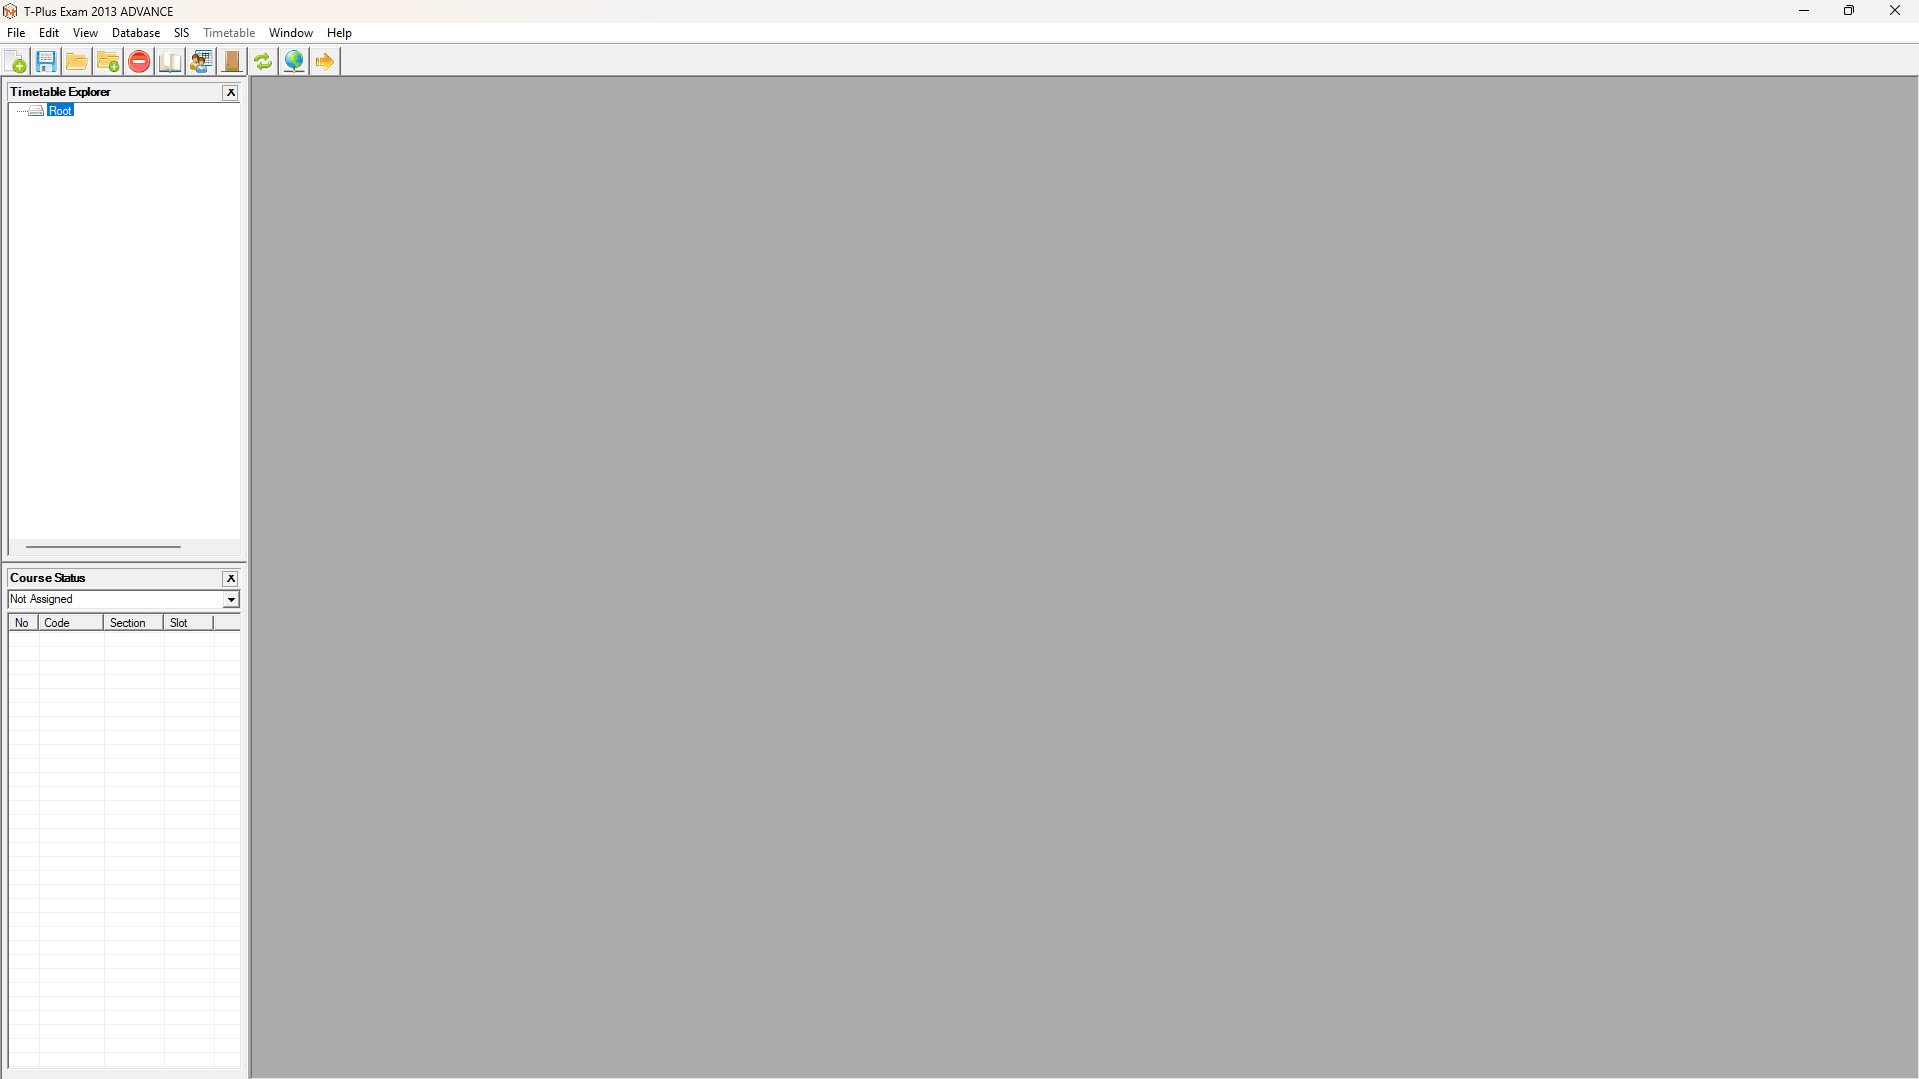
Diagram 1.5 Timetable Plus Exam Application
This is how it will looks like when you open the Timetable Plus Exam.
2. Opening New Timetable & Folder
To open New Timetable, select New Timetable icon ![]()
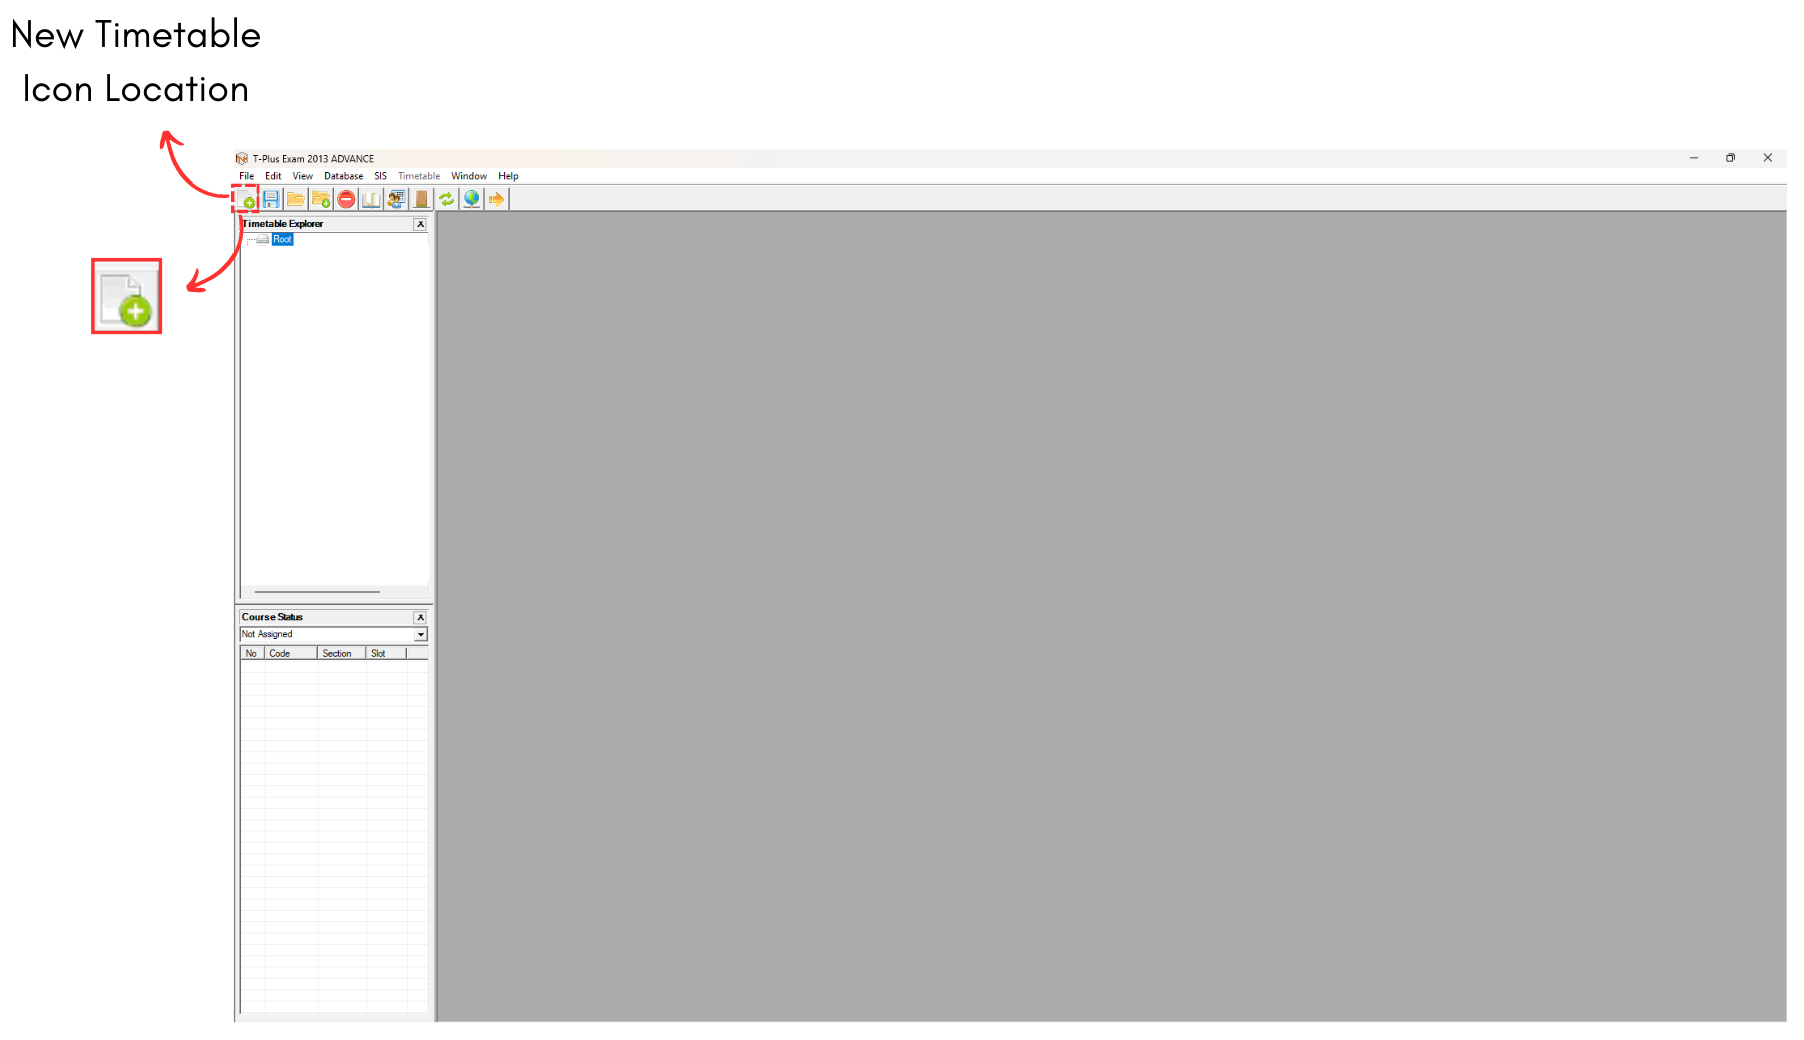
Diagram 2.1 Location of New Timetable
Once clicked, an untitled file appear on the screen.
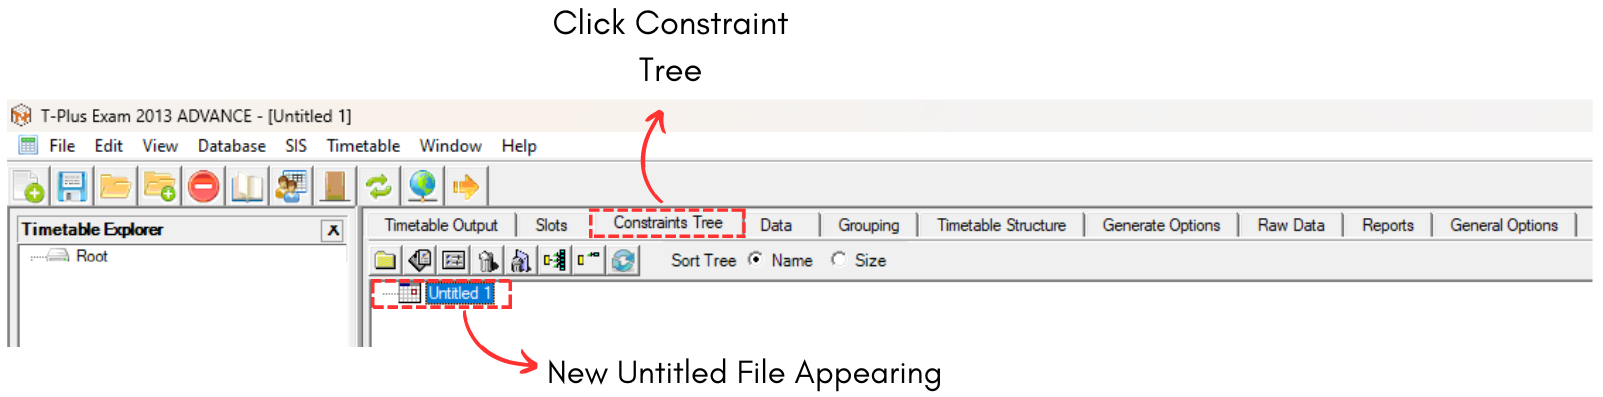
Diagram 2.2 New Untitled File
Note that it is IMPORTANT to click Save after opening a new timetable to avoid losing the file.
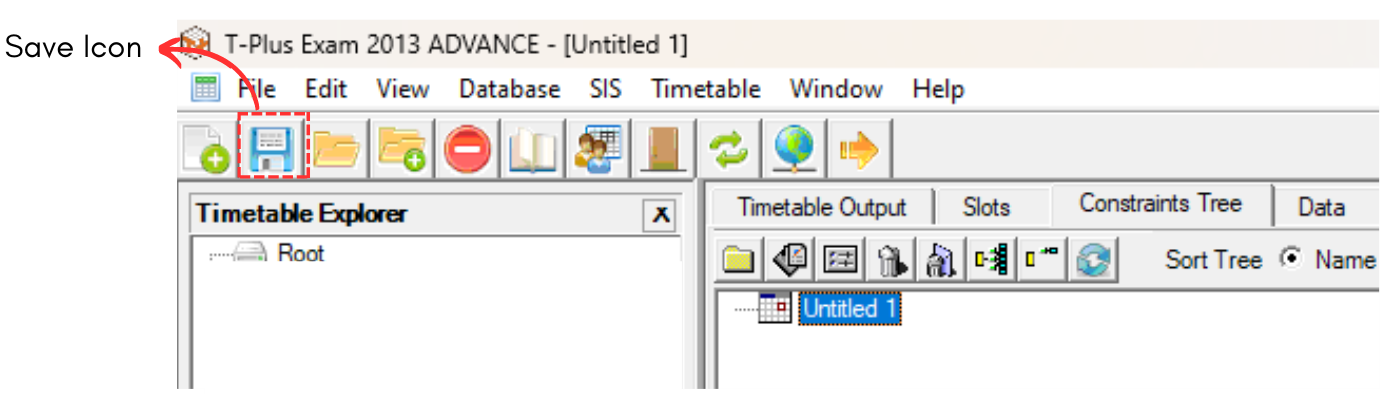
Diagram 2.3 Location for Save Icon
A pop up will appear, rename the file as desired and click Save.
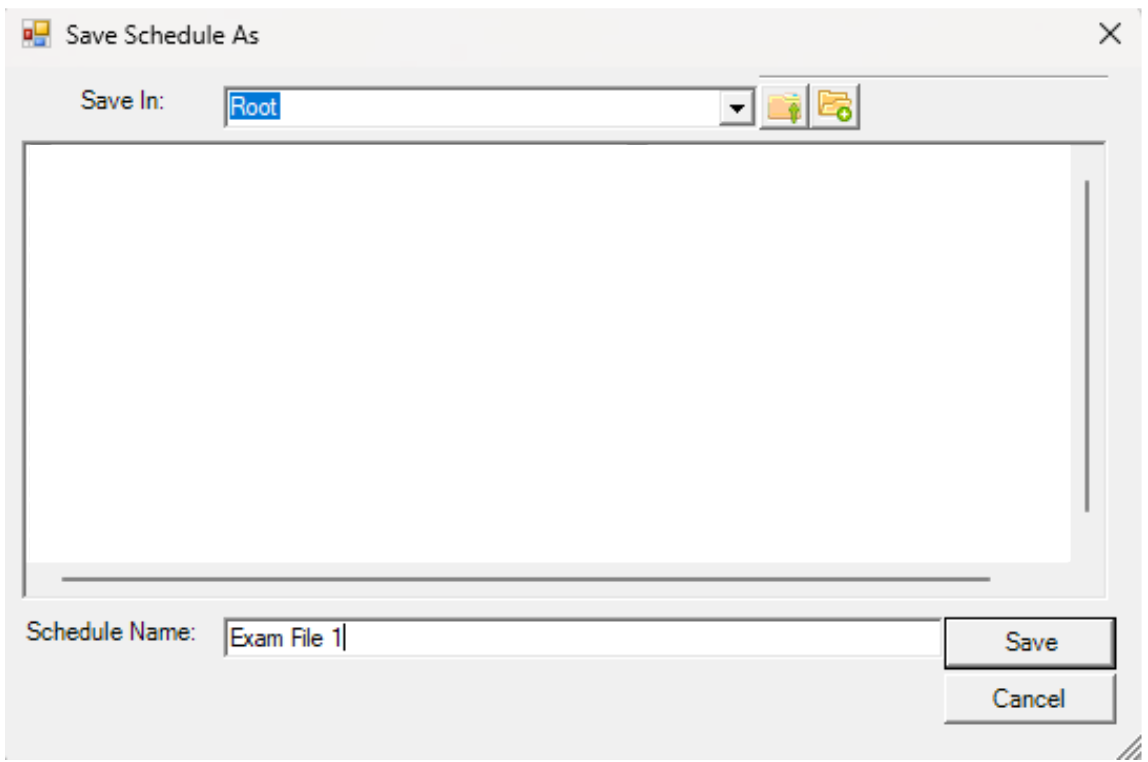
Diagram 2.4 Save File Pop Up
Optional: Organize your file into respective folder (Non-Compulsory)
Once you have multiple files, you may want to organize them into folders. For example, folder is organized by year.
To open new folder, select New Folder icon ![]()
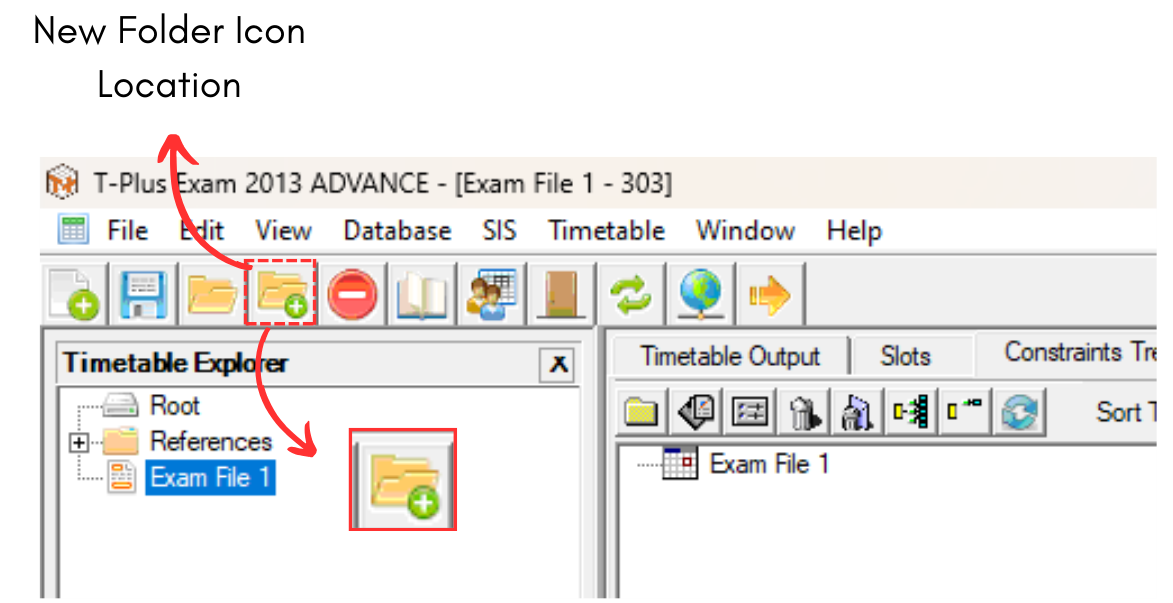
Diagram 2.5 Location of New Folder
A new folder will appear on Timetable Explorer.
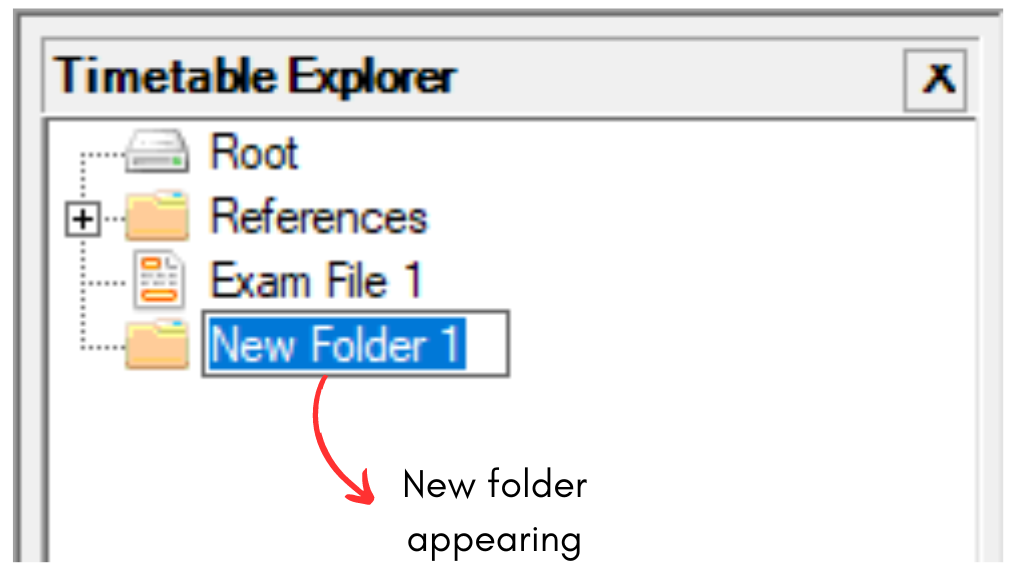
Diagram 2.6 New Folder
You can rename the folder as desired. For Example, "2024".
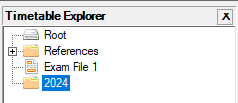
Diagram 2.7 Renamed Folder
Select a file and drag into the folder and drop.
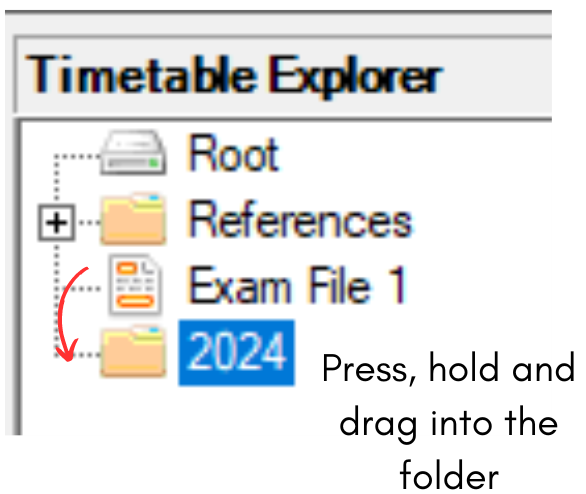
Diagram 2.8 Selected File
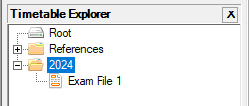
Diagram 2.9 File dragged inside the folder
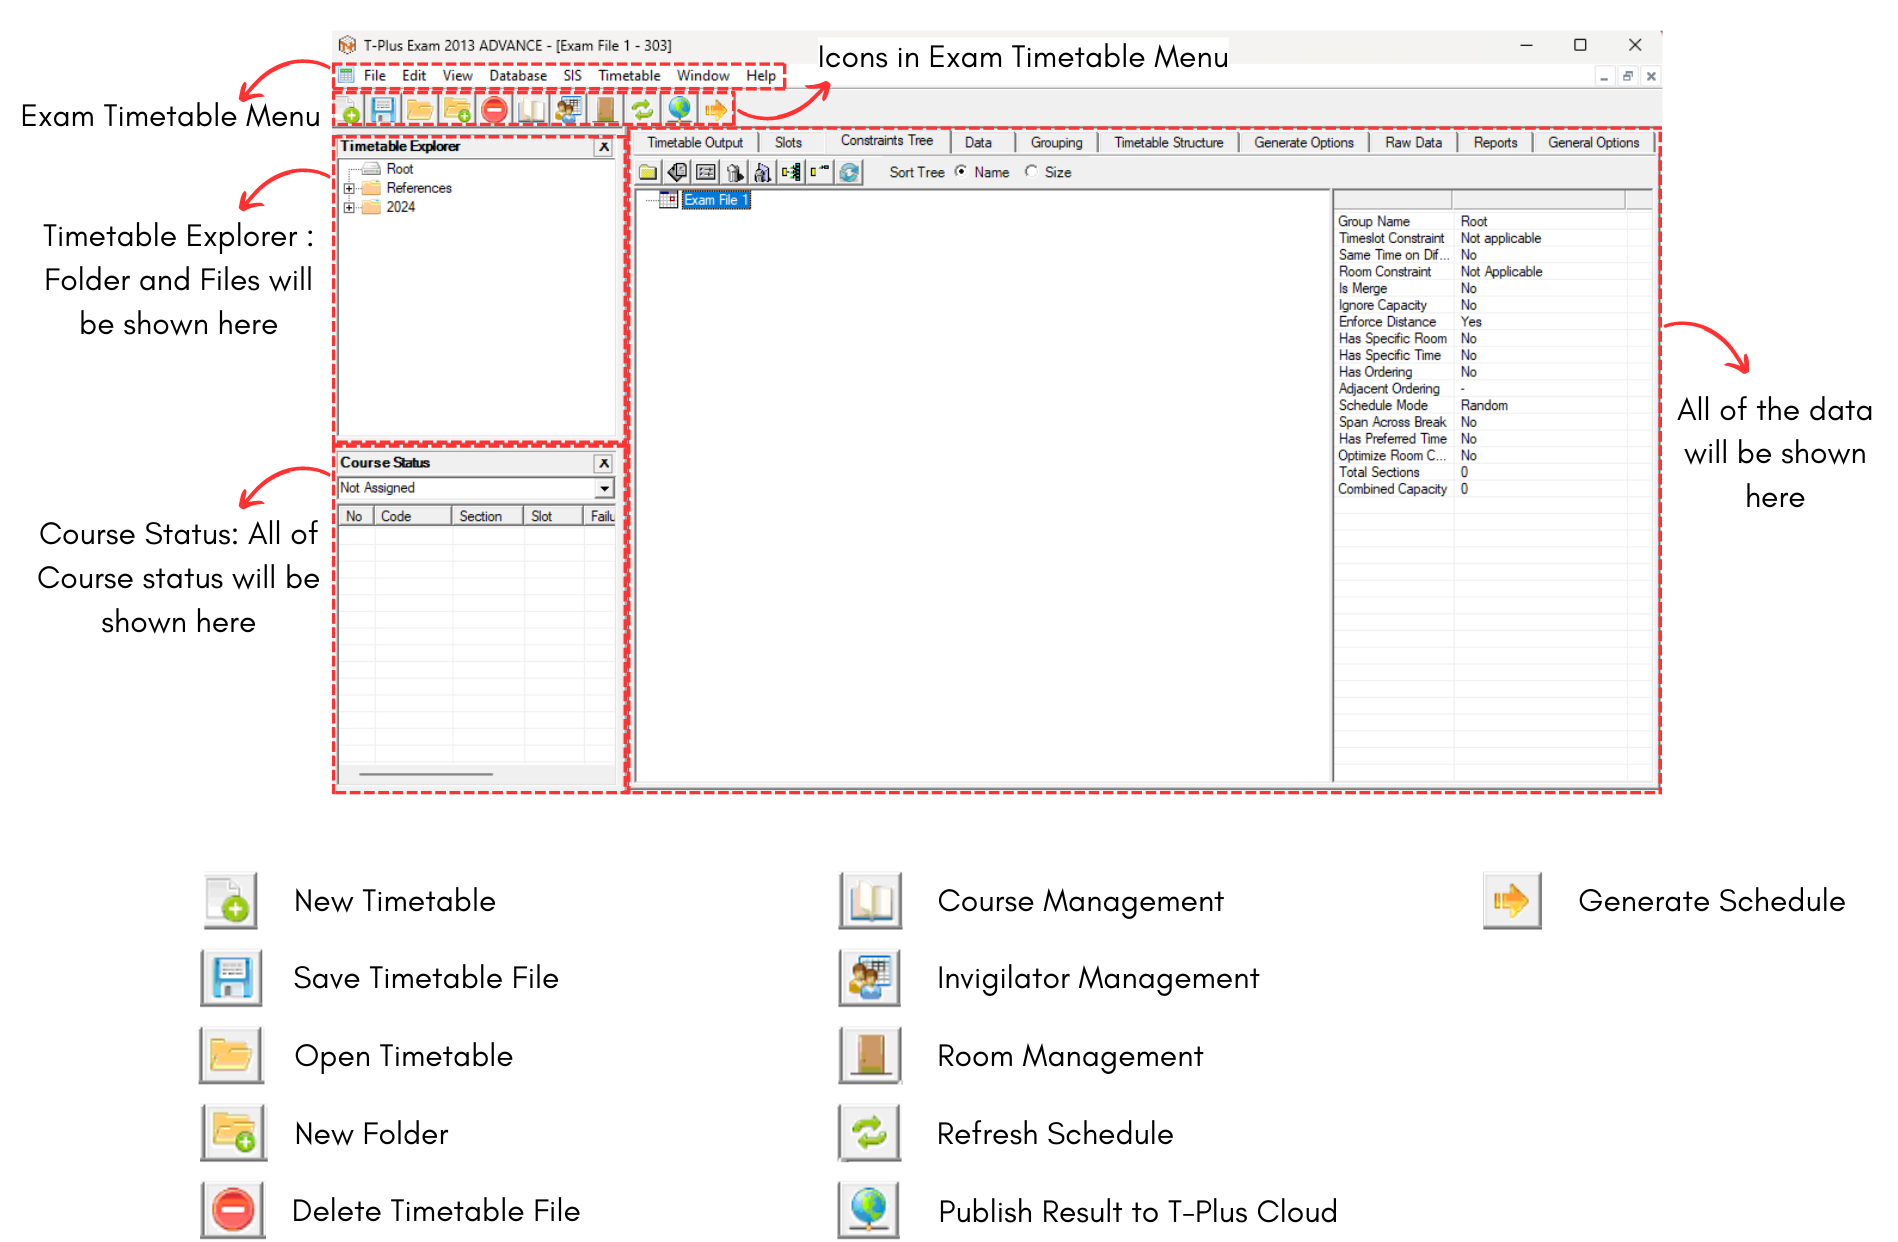
3. Icons & Menu
Below is the Icons and Menu in Timetable Plus Exam
4. SIS Settings (To Import Database)
To import database using SIS or known as Student Information System, first you need to know about SIS Setting.
Go to the Database Menu and select SIS. 
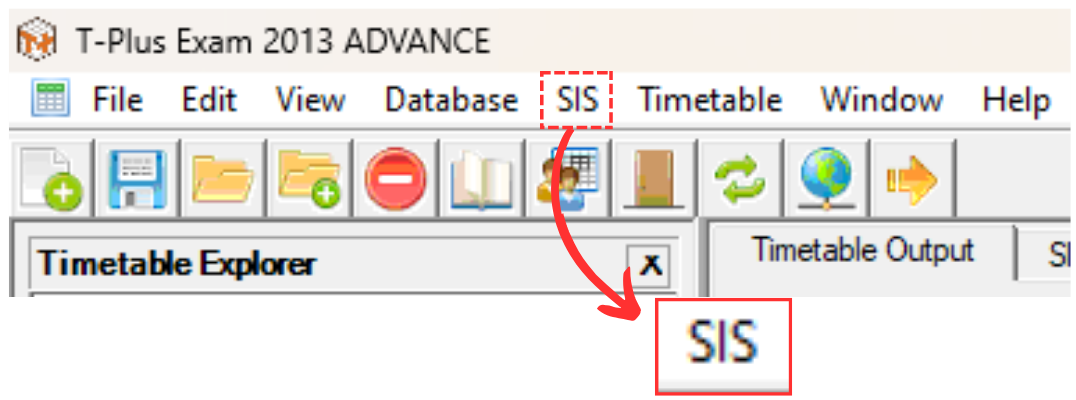
Diagram 4.1 Location of SIS
You will see a drop-down menu under SIS. Click on SIS Setting.

Diagram 4.2 Location of SIS Setting
SIS Settings Window will pop-up.
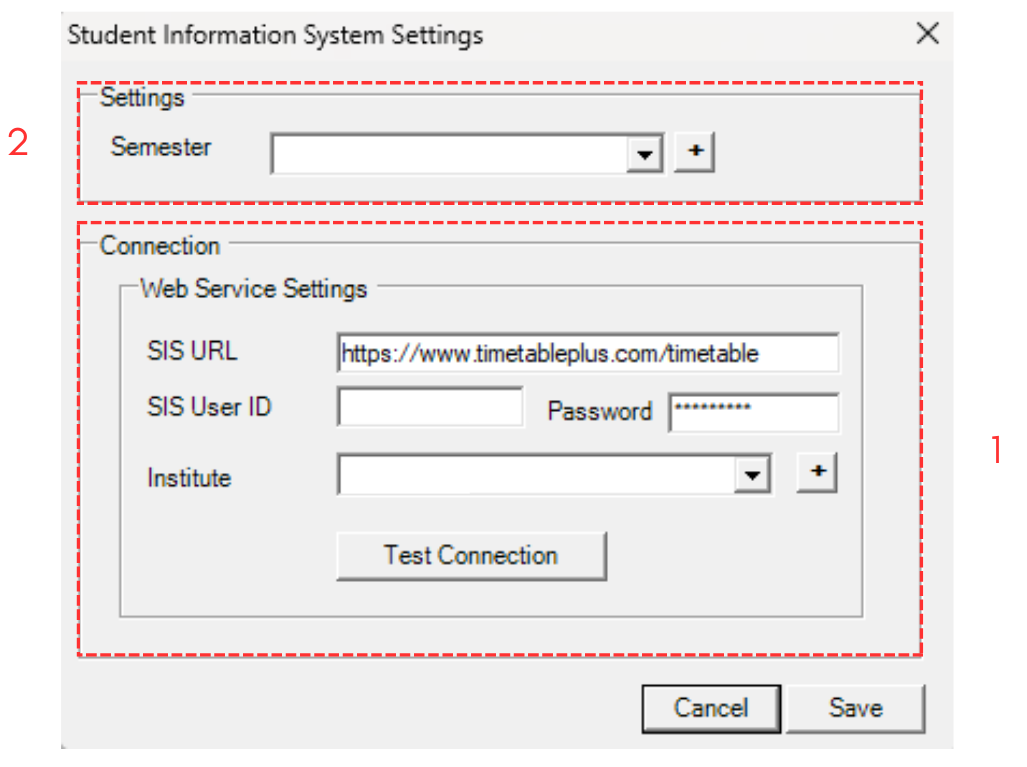
Diagram 4.3 SIS Settings Window
1. Connection
First you need to connect your T-Plus Class with your T-Plus Campus Student Information System.

Diagram 4.4 SIS Settings Connection WIndow
To know on how to fill in the empty slots, refer to the table below.
|
SIS URL |
Always fixed to the website where it containt the online database. Default is https//www.timetableplus.com/timetable. |
|
SIS User ID |
User ID used in online database. Example : Admin99 |
|
Password |
Password used in online database |
|
Institute |
Your institute. You may click the drop down menu to choose your institure. If there is none, you can click add sign  to add your institure. to add your institure. |
Table 4.1 Fill In Information in Connection
After done filling the slots, click Test Connection
A pop-up message will appear, stating that it has been successful.

Diagram 4.5 Pop-up Success
Warning! If you fill the slots incorrectly, an error connection pop-up will appear.

Diagram 4.6 Pop-up Error Connection
2. Settings

Diagram 4.7 Settings
You may select the preferred semester of the data that will be imported from SIS.
Once everything has been filled and connected, you may click Save  .
.