Stage 6: Constraint Settings
| Site: | Timetable Plus |
| Course: | Timetable Plus Data Entry |
| Book: | Stage 6: Constraint Settings |
| Printed by: | Guest user |
| Date: | Friday, 5 June 2026, 6:06 PM |
Description
w
1. Set Constraint
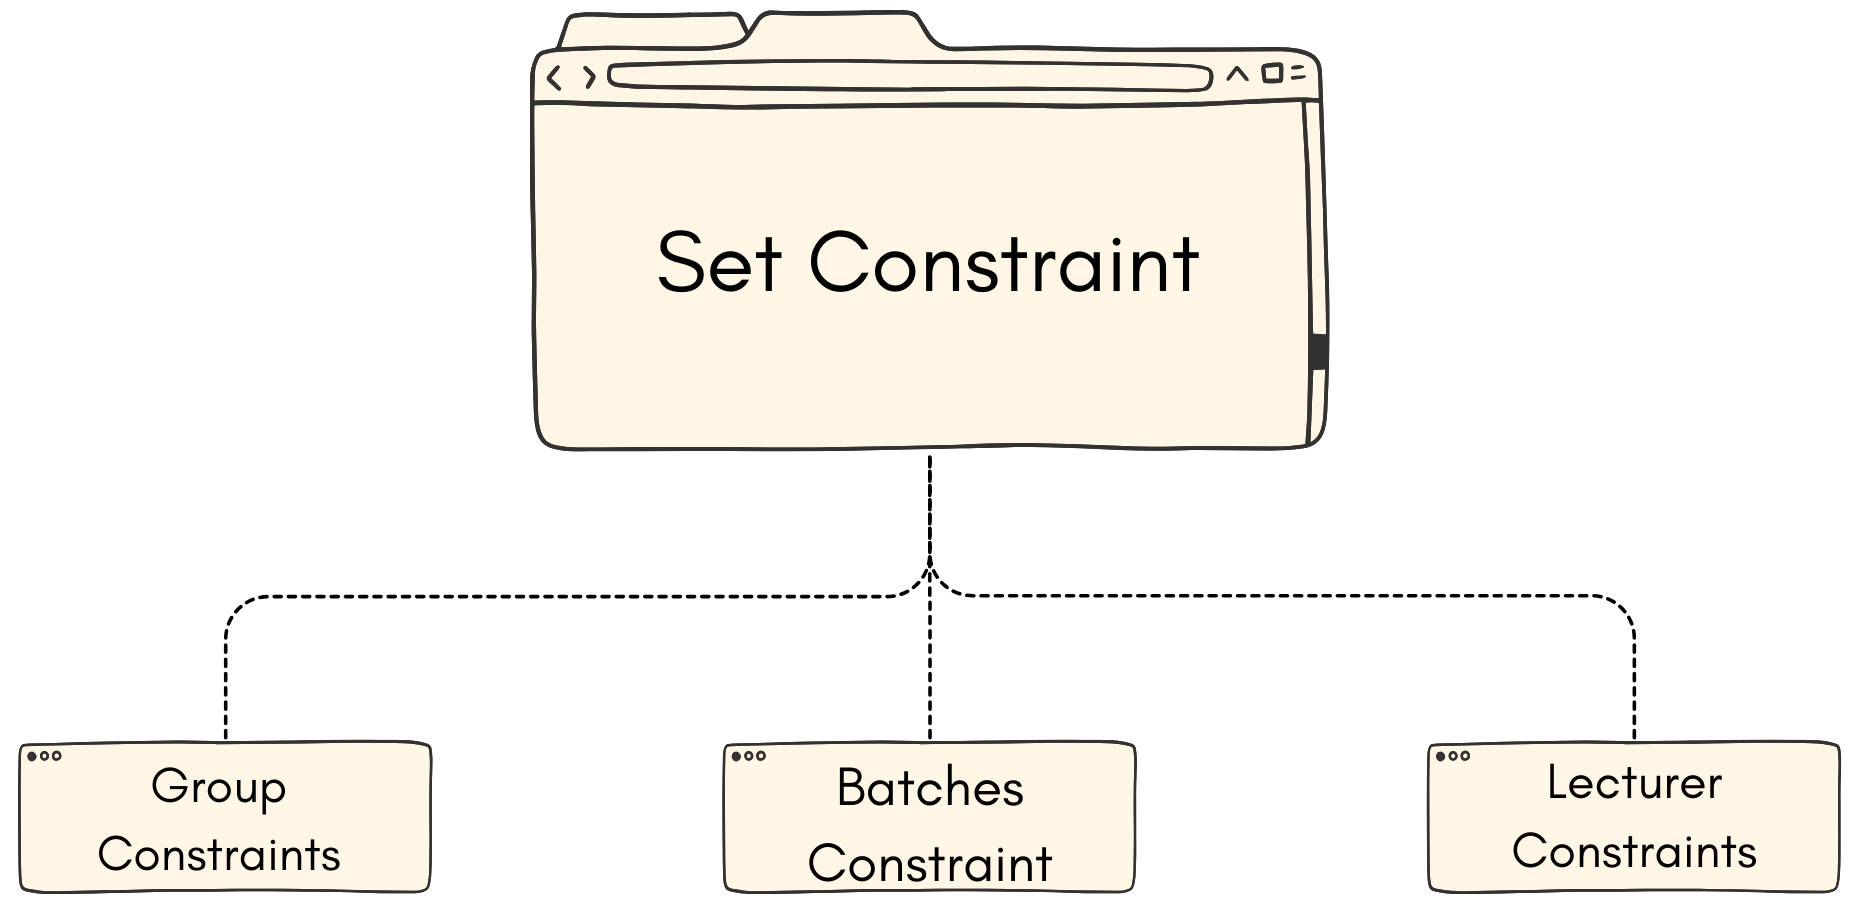
After we are done with the data entry, it is important to set the constraints according to the specified demands.
User can set constraints according to the following:
- Group Constraints
- Batch Constraints
- Lecturer Constraints
1.1. Group Constraints
You can set constraints at the Data under Tree Structure. In Group Constraints, you can set constraints from Parent folder to child folder in which settings set at Parent will automatically inherit by the child folder.
To open Group Constraints, double click on a constraints folder under the tree structure.
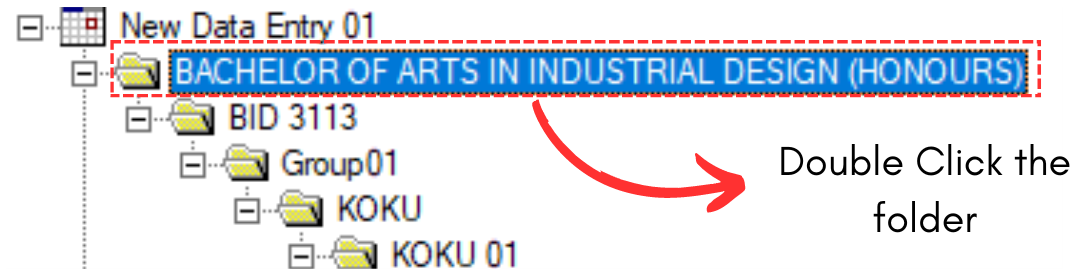
Diagram 1.1.1 Double Click the Constraints Folder
Set Constraints Window will appear.
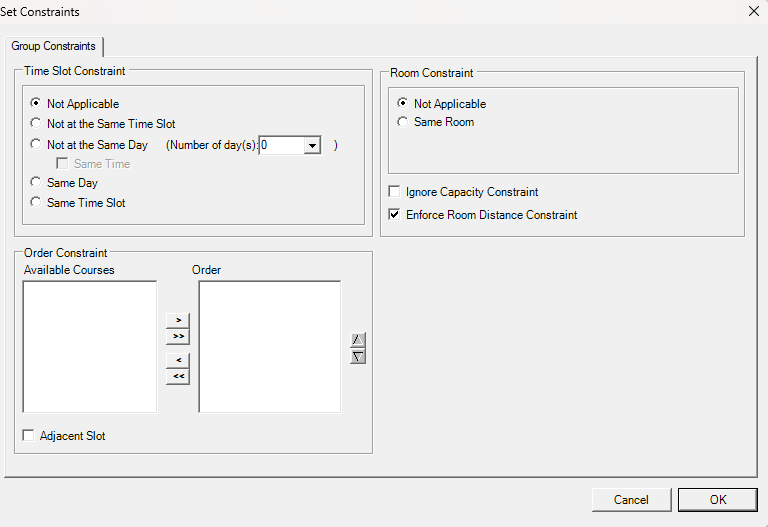
Diagram 1.1.2 Group Constraints Window
Refer to the table below to know on IMPORTANT constraint setting at group constraints.
|
Not at the Same Day |
User normally set these constraints for courses that prefer to have the classes in different days. Example, 1st Lecture and 2nd Lecture prefer to be in different days. |
|
Same Time + Same Room + Ignore Capacity Constraint |
User normally check these 3 settings for team teaching. Alternatively, user can set team teaching at Merge Group. |
|
Same Room |
You can use this constraint setting if group of courses prefer to be slotted into same room (Parent). |
Table 1.1.1 Important Constraints Settings Explanation
1.2. Batch Constraints
You can set constraint for the batch at Batches List under the Data.

Diagram 1.2.1 Location of Batches List
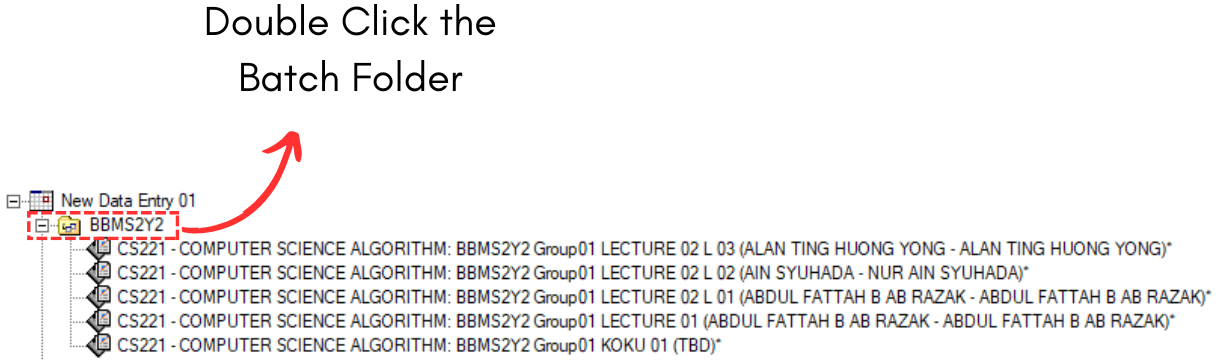
Diagram 1.2.1 Double Click the Constraints Folder
Batch Constraints Window will appear.
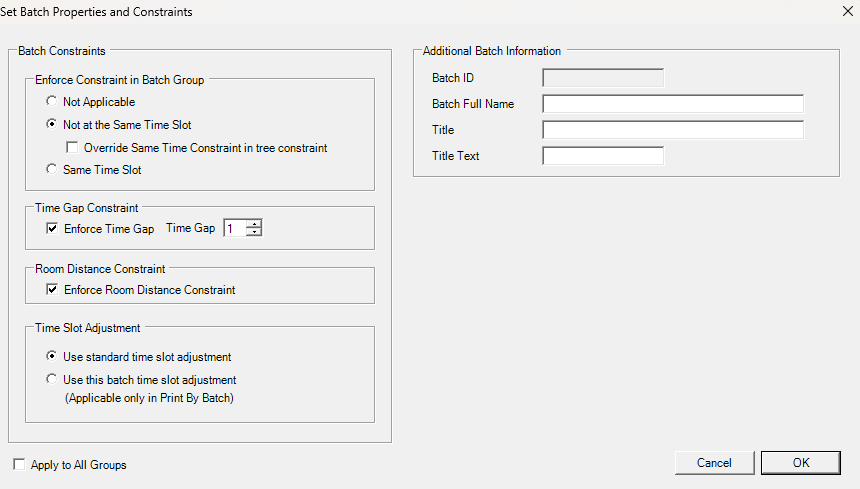
Refer to the table below to know on IMPORTANT constraint setting at group constraints.
|
Not at the Same Time Slot |
User normally set these constraints for courses that prefer to have the classes in different time slot. Example, 1st Batch and 2nd Batch prefer to be in different time slot. |
|
Time Gap Constraint |
User normally enforce time gap constraint to avoid overlapping between batches. |
|
Room Distance Constraints |
You can use this constraint setting if you want to consider the Room Distance Constraints between batches. |
Table 1.2.1 Important Constraints Settings Explanation
1.3. Lecturer Constraints
You can set constraint OR preferences for lecturers at Lecturer List under the Data.

Diagram 1.3.1 Location of Lecturer List

Diagram 1.3.2 Double Click the Lecturer
Lecturer Constraints Window will appear.
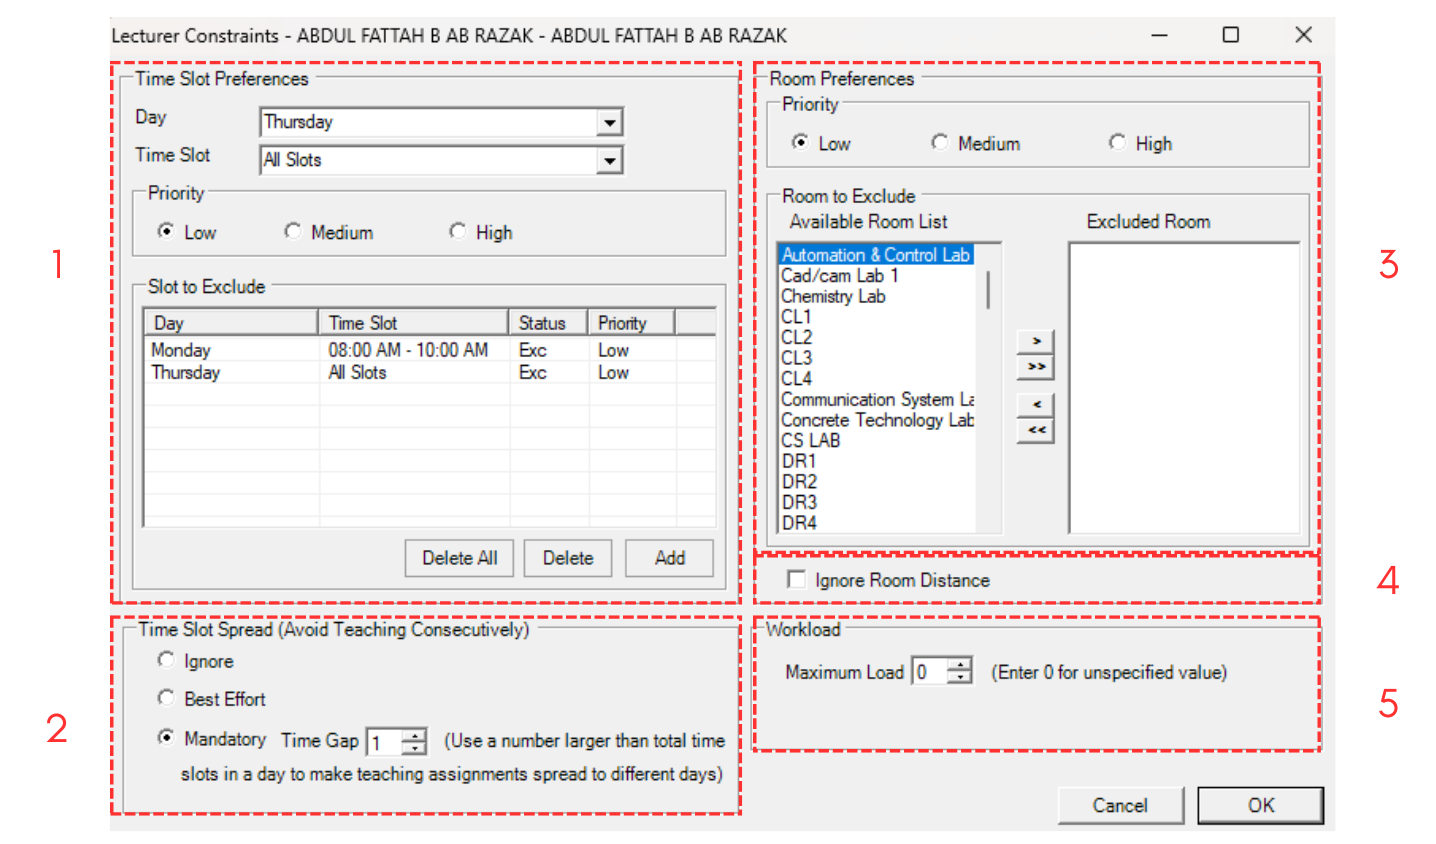
Diagram 1.3.3 Lecturer Constraints Window
1. Time Slot Preferences

Diagram 1.3.4 Time Slot Preferences
You can choose Day and Time Slot and Click Add to list the Day and Time that want to be EXCLUDED.
2. Time Slot Spread

Diagram 1.3.5 Time Slot Spread
You have the Option to Ignore, Best Effort and Mandatory with Time Gap to Avoid Teaching Consecutively. Use Mandatory option if you do not want the lecturer to have Back to Back classes.
3. Room Preferences
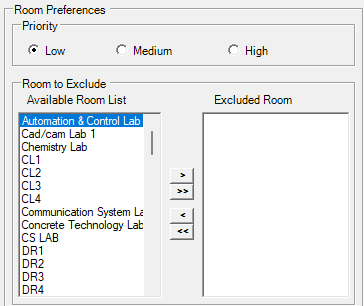
Diagram 1.3.6 Room Preferences
You can choose by click on the Available Room List (left) and click the right intended arrow  to move to the Excluded Room List (right). Double arrow is to move all in the list. Only move room to be EXCLUDED.
4. Ignore Room Distance

Diagram 1.3.7 Ignore Room Distance
You can allow lecturer to follow the constraints set at the Room Grouping for distance between One Room to another Room. Normally applies for big campus.
5. Workload
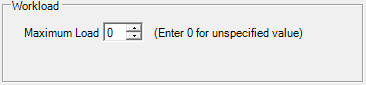
Diagram 1.3.8 Workload
You can set the Maximum Load (Total). Load means the number of classes.