Stage 7: Seating Arrangement
| Site: | Timetable Plus |
| Course: | Timetable Plus Exam |
| Book: | Stage 7: Seating Arrangement |
| Printed by: | Guest user |
| Date: | Sunday, 31 May 2026, 8:11 AM |
1. Set Constraint at Generate Option

Diagram 1.1 Location of Seating Arrangement in Generate options
Click Generate Option tab and then click Seating Arrangement to set Seating Arrangement Constraint.

Diagram 1.2 Seating Arrangement Window
1. Seat Numbering

- Continuous = Continuous numbering from 1 to the last seat. For example the seat numbering would be : 1,2,3.....90.
- Excel Row-Colum Layout = The numbering will be based on the layout of Excel Row-Column. Please refer to the picture given as the sample.
2. Student Exam Venue Display
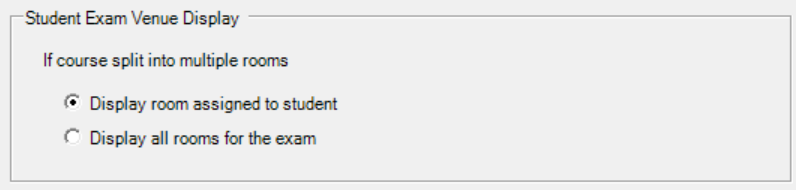
Diagram 1.4 Student Exam Venue Display
If the courses split into multiple rooms due to the capacity, you may choose to display room assigned to student or display all rooms for the exam. This can be seen at Slot and Course-Student List
3. Seating Arrangement Options

Diagram 1.5 Seating Arrangement Options
4. Numbering Gap Between Courses

Diagram 1.6 Numbering Gap Between Courses
5. Allocate and Reset Seat

Diagram 1.7 Allocate and Reset Seat
- Allocate Seat = Assign Seat to the student.
- Reset Seat = Reset or remove seat after has been assigned.
2. Allocate Seat
To Allocate Seat, click Allocate Seat icon at Seating Arrangement under Generate Options Tab.
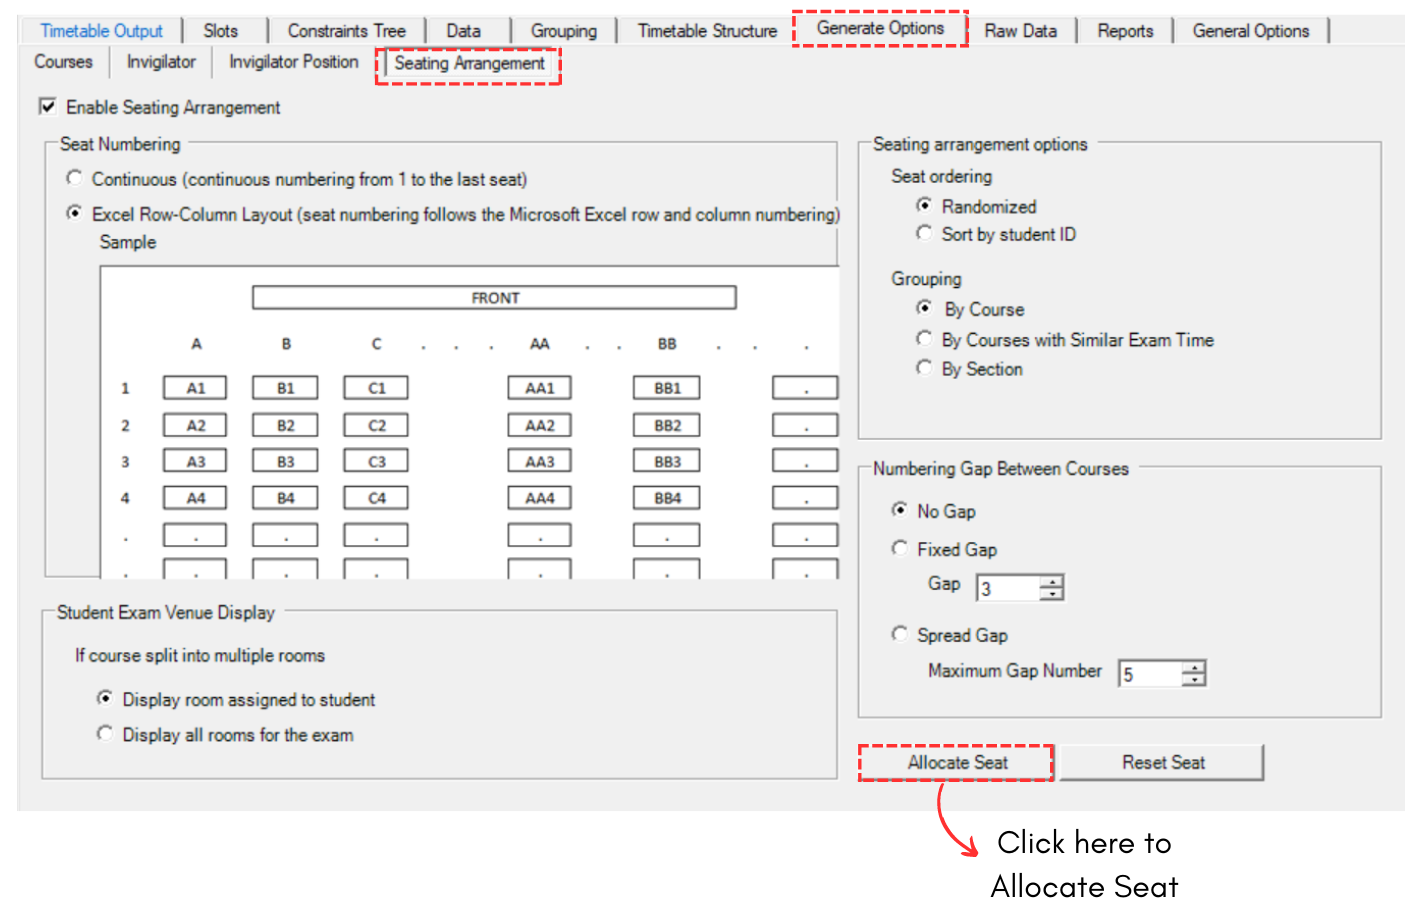
Diagram 2.1 Allocate Seat Location
IMPORTANT: Make sure to set all constraints under Generate Option first. Refer to Set Constraints at Generate Option.
A popup will appear. Saying it has been completed.
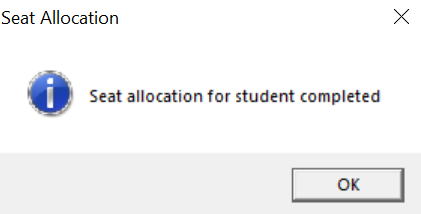
Diagram 2.2 Completed Popup
Once done, you can go to Data and select Student List to view seat.
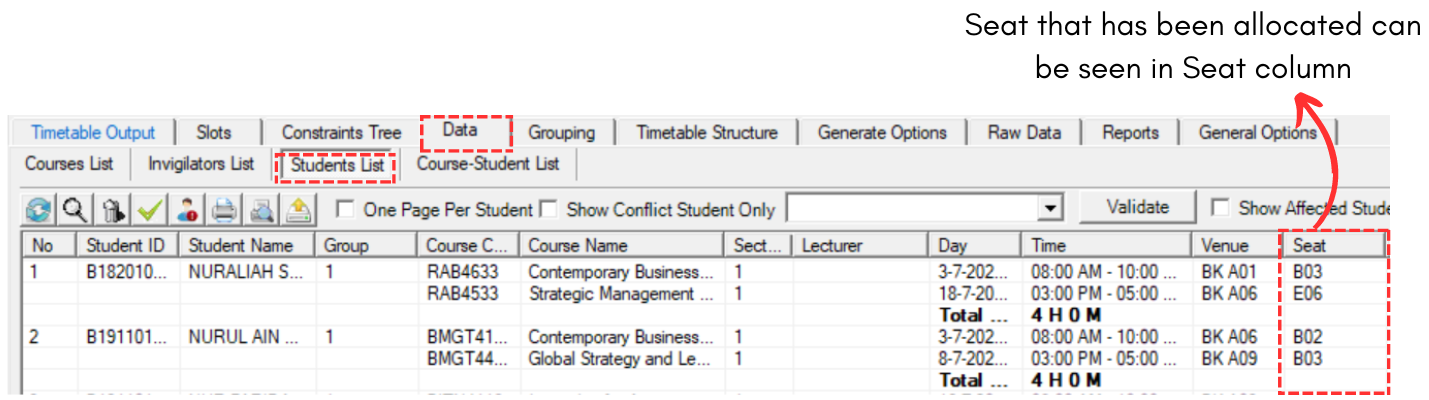
Diagram 2.3 Student List
You can also go to Slots to view Seat Range.
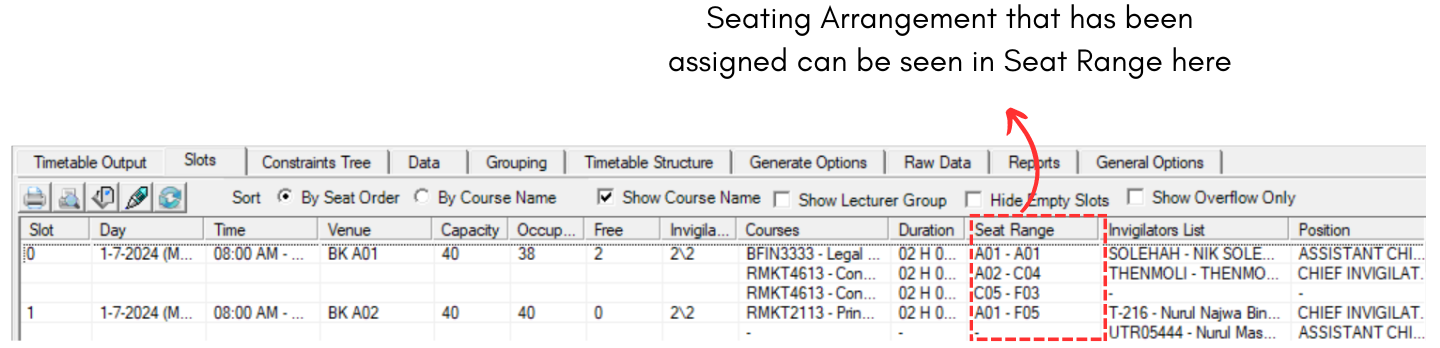
Diagram 2.4 Slots
3. Analysis
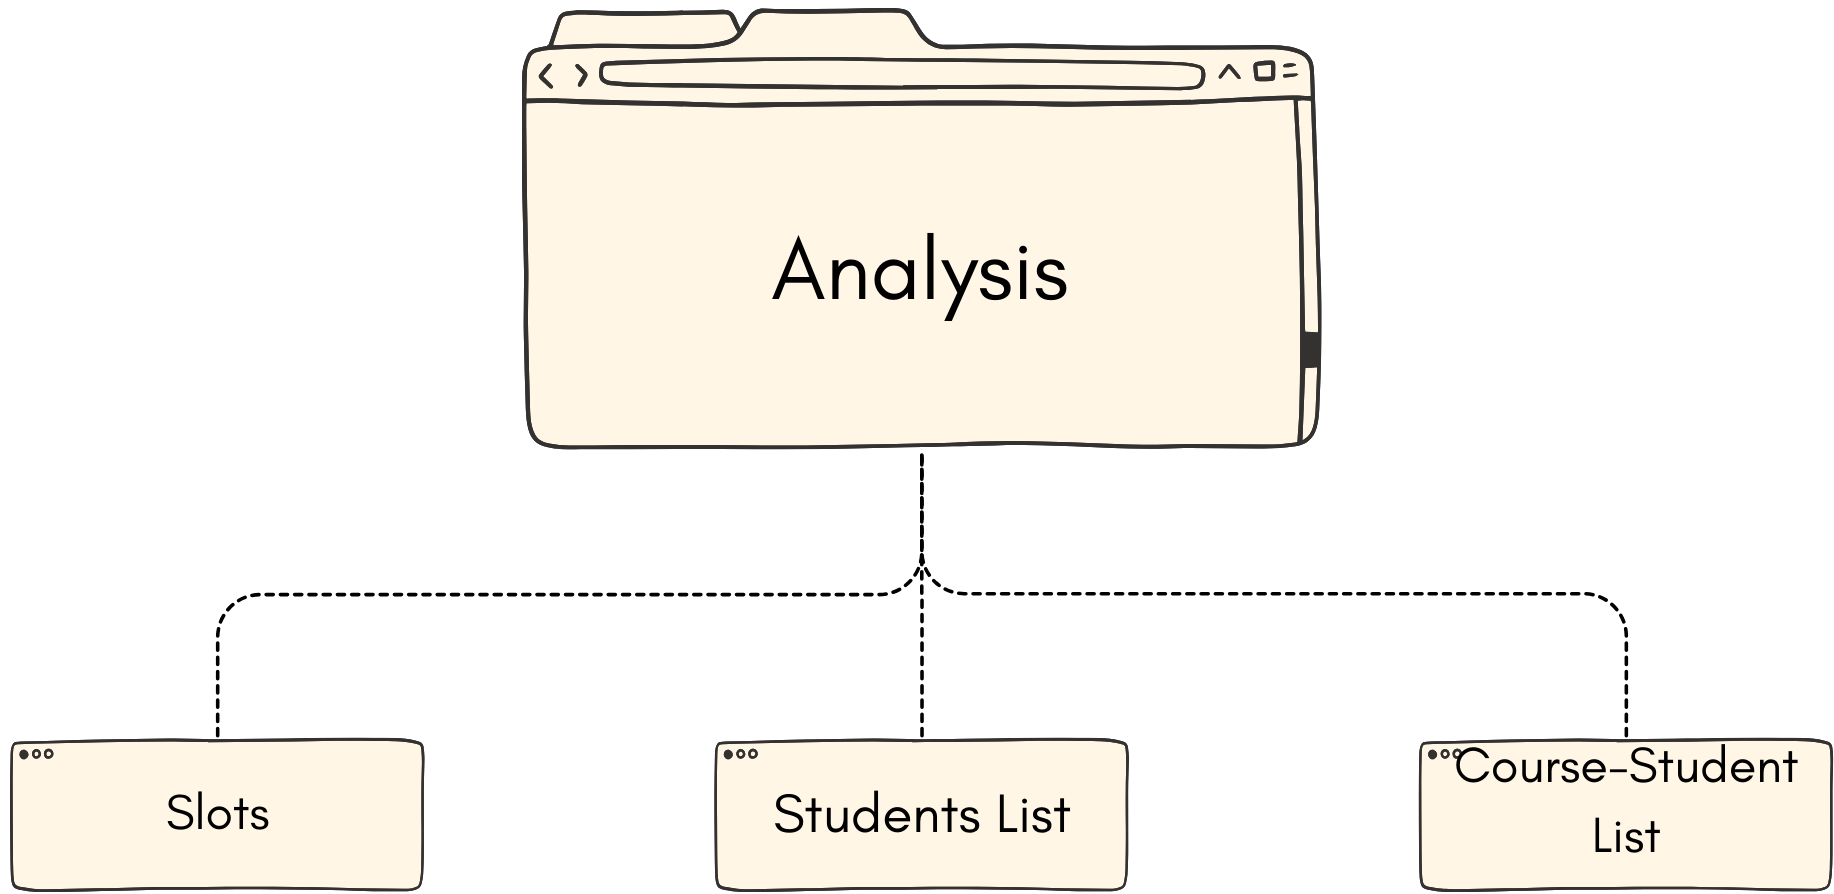
3.1. Slots
You may analyze the Slot to know if the seating number has been distributed accordingly.

Diagram 3.1.1 Slots Analyzation
To edit, you can locate the seat to Course-Student List. Refer to the diagram below.
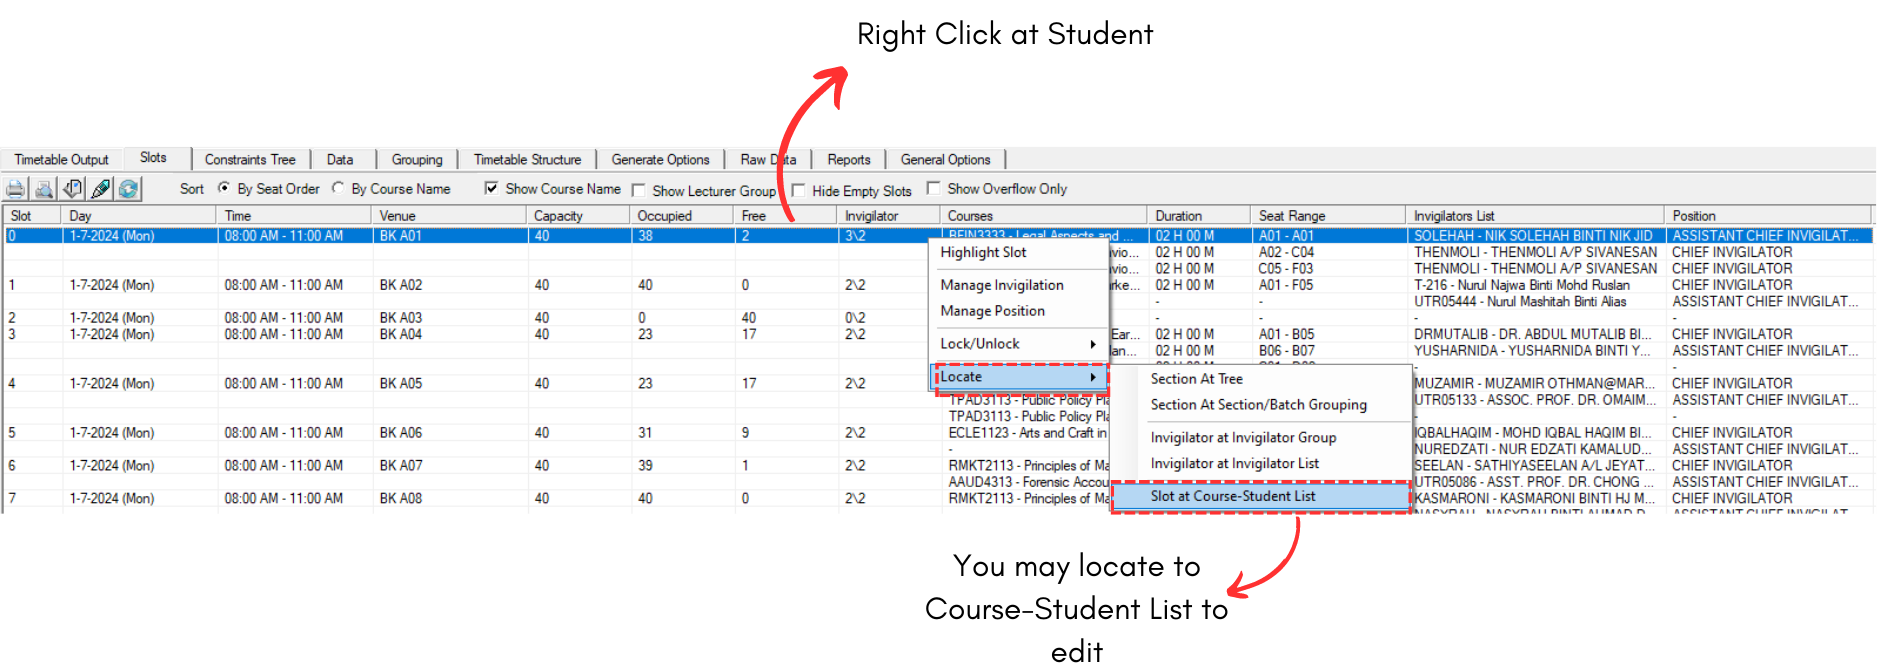
Diagram 3.1.2 Locate Seat
To edit, you may refer to the Stage 7: Seating Arrangement (Editing Seat)
3.2. Student List
You may analyze the Student List to know if the seating number has been distributed accordingly.
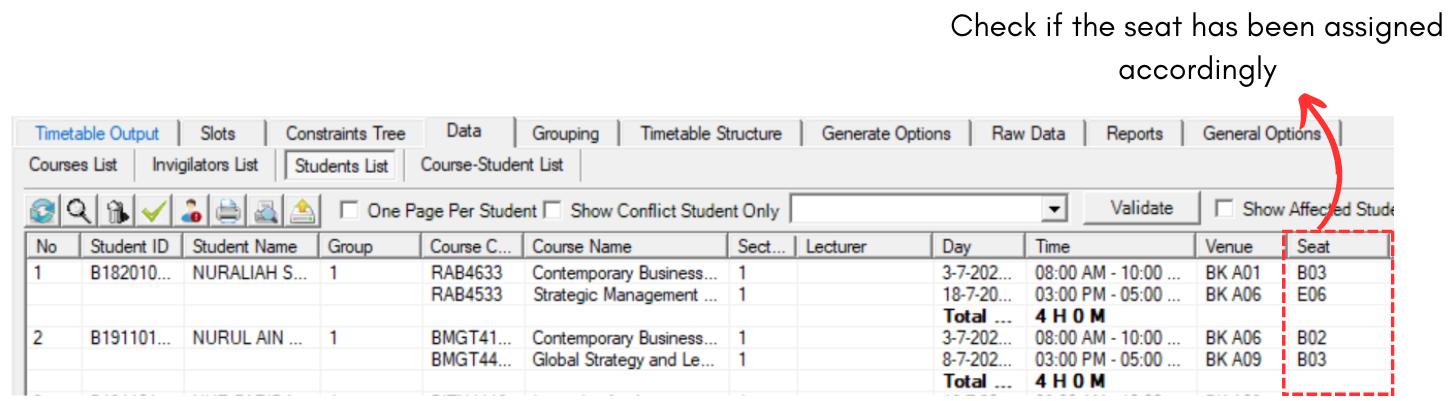
Diagram 3.2.1 Student List Analyzation
To edit, you can locate the seat to Course-Student List. Refer to the diagram below.
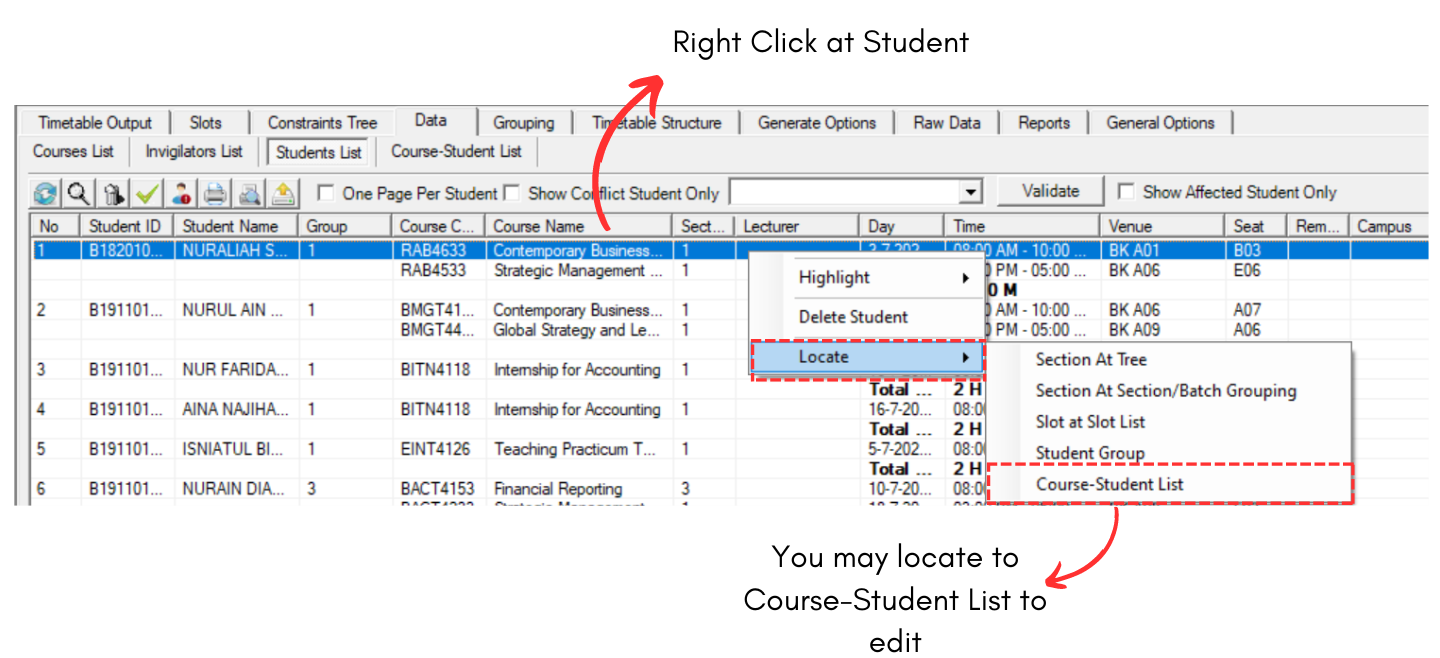
Diagram 3.2.2 Locate Seat
To edit, you may refer to the Stage 7: Seating Arrangement (Editing Seat)
3.3. Course Student List
You may analyze the Course-Student List to know if the seating number has been distributed accordingly.
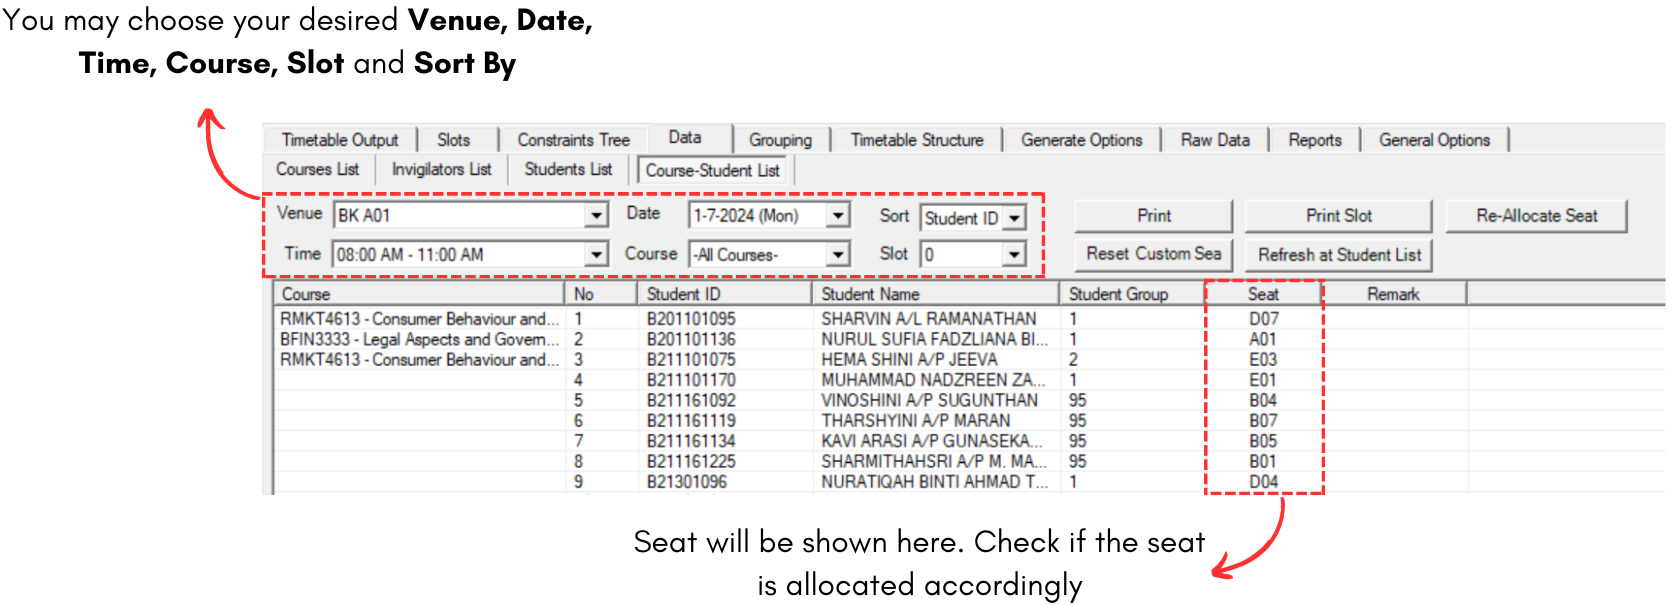
Diagram 3.3.1 Course-Student List Analyzation
To edit, you may refer to the Stage 7: Seating Arrangement (Editing Seat)
4. Editing Seat
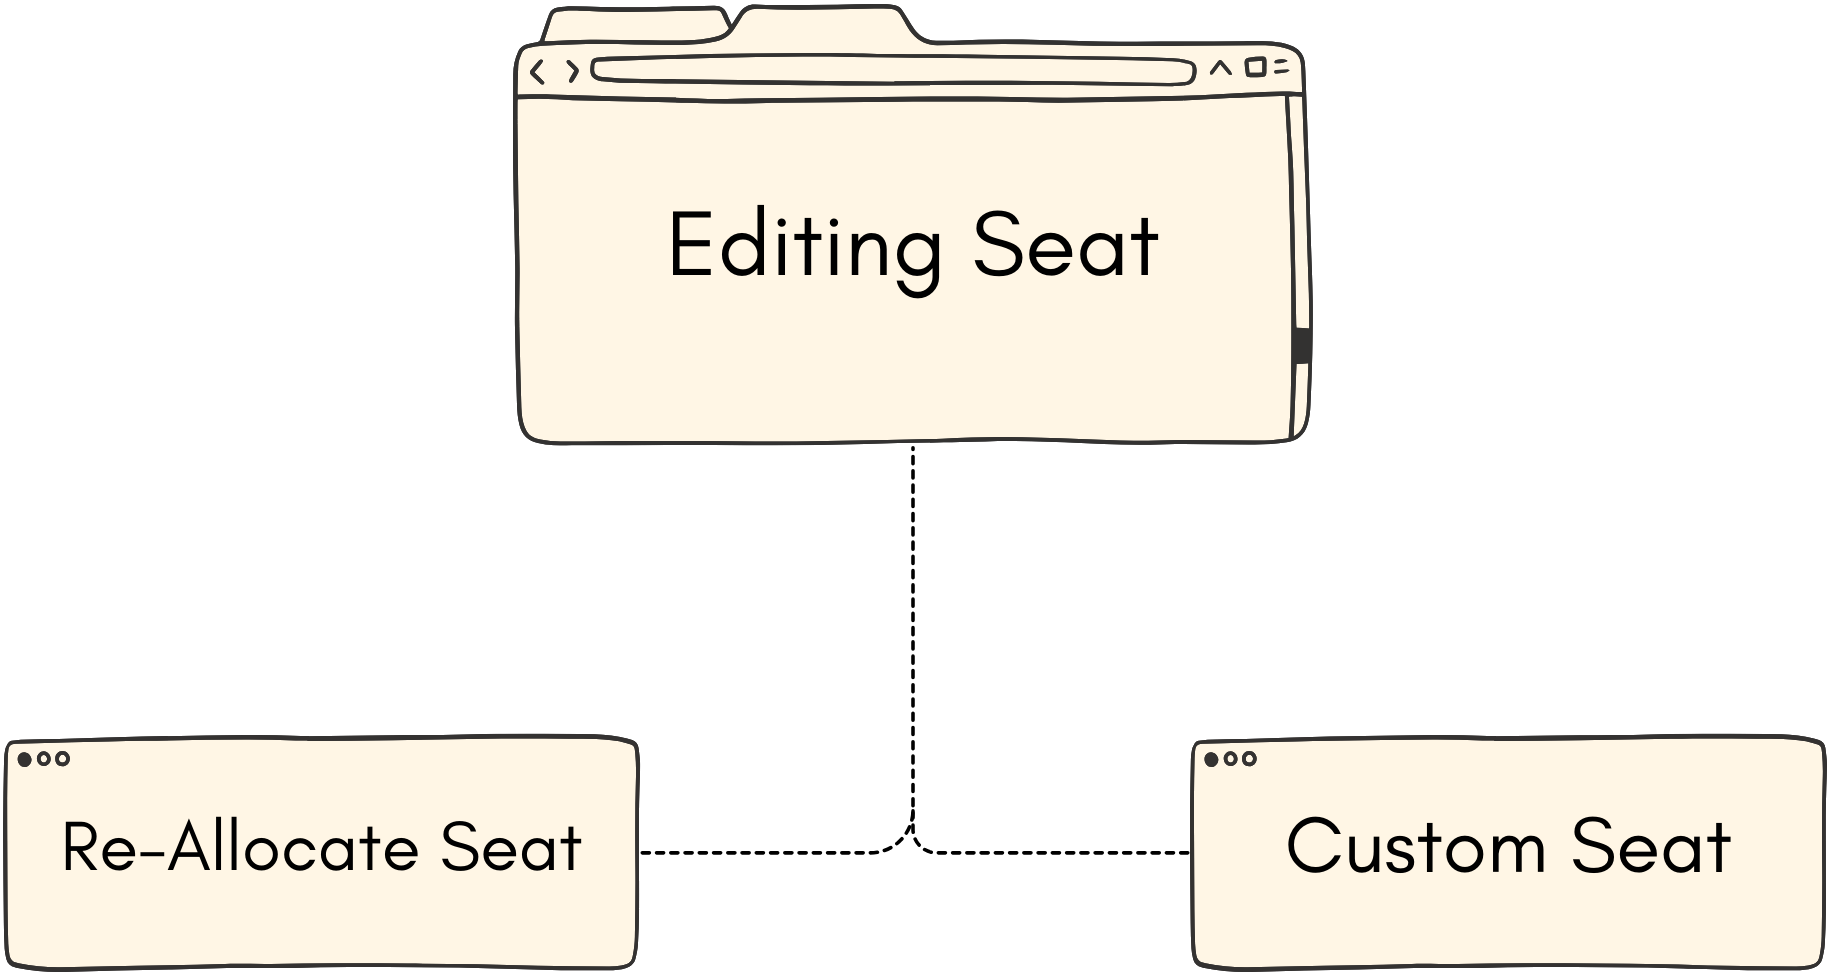
4.1. Re-Allocate Seat
You may Re-Allocate Seat of a slot by going to the Course-List Student under the Data.
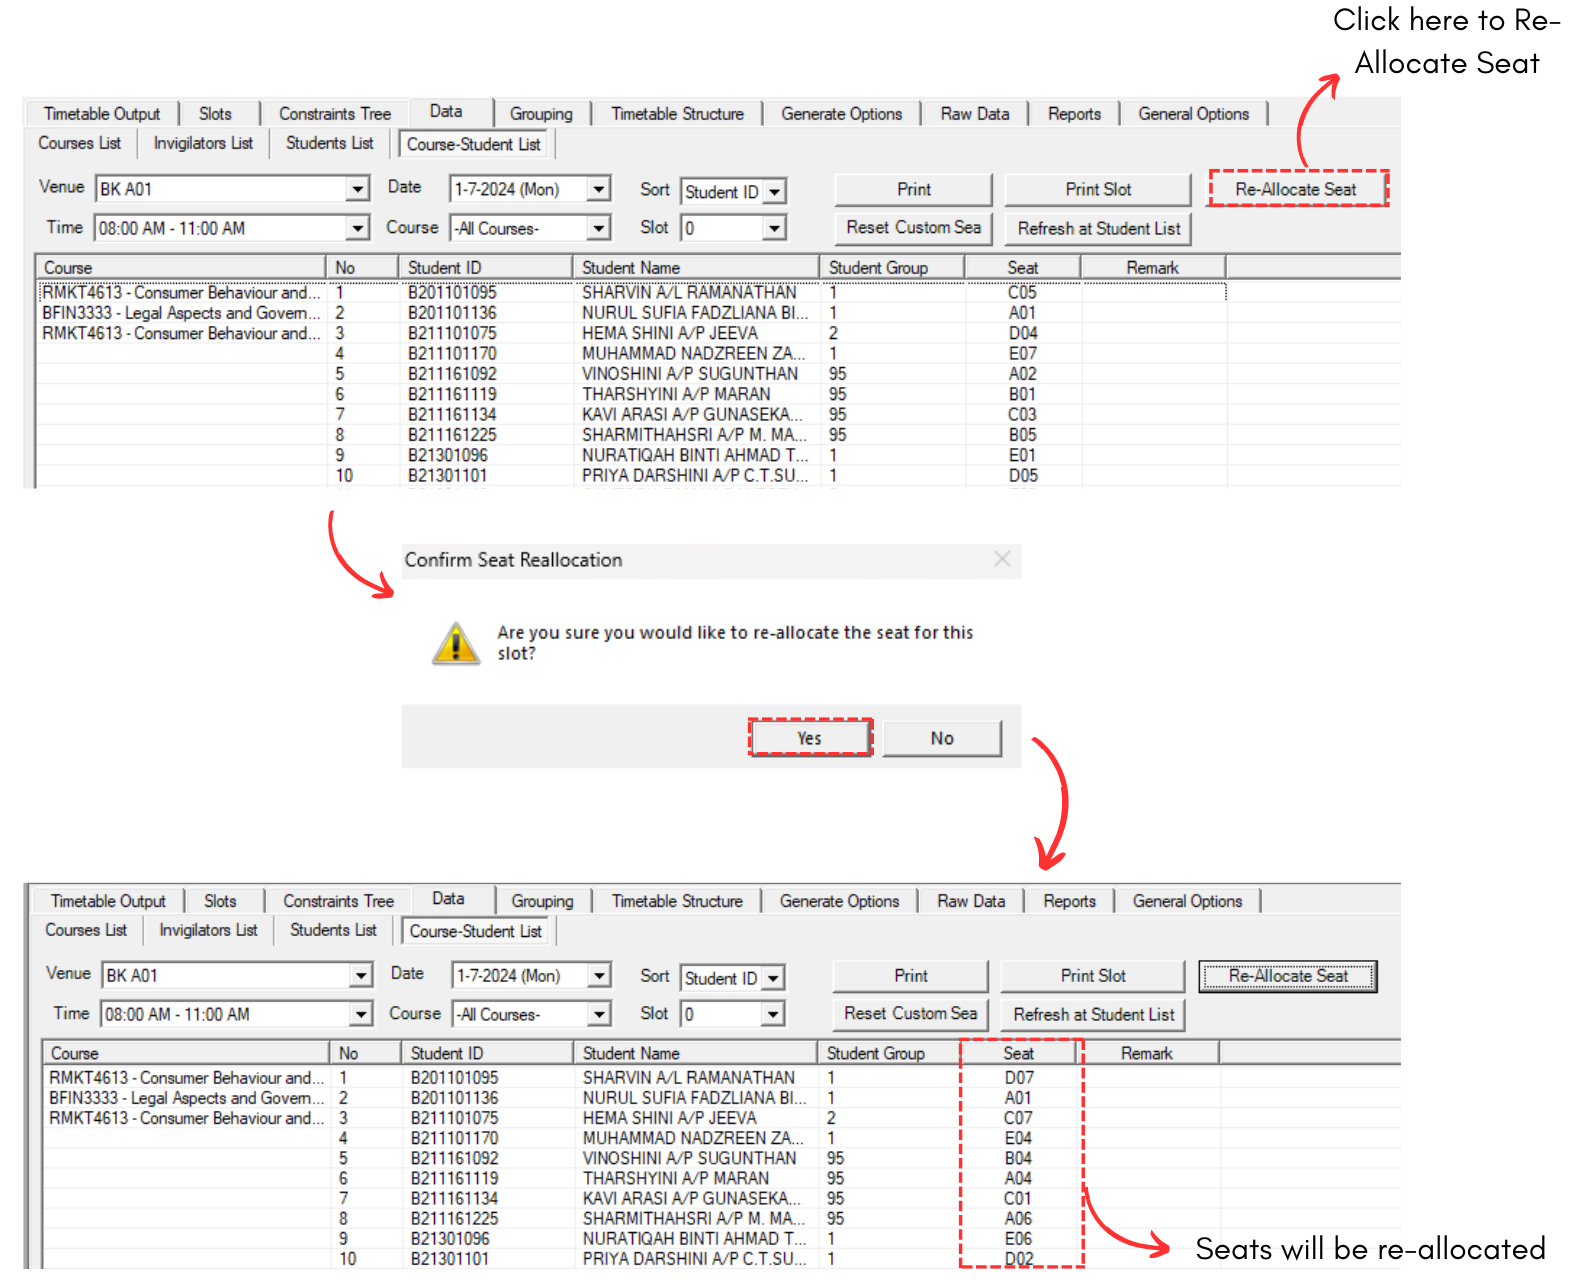
Diagram 4.1.1 Re-Allocate Seat
4.2. Custom Seat
To do the custom seat, you can easily double click the seat on a student and edit them. Refer to the diagram below.
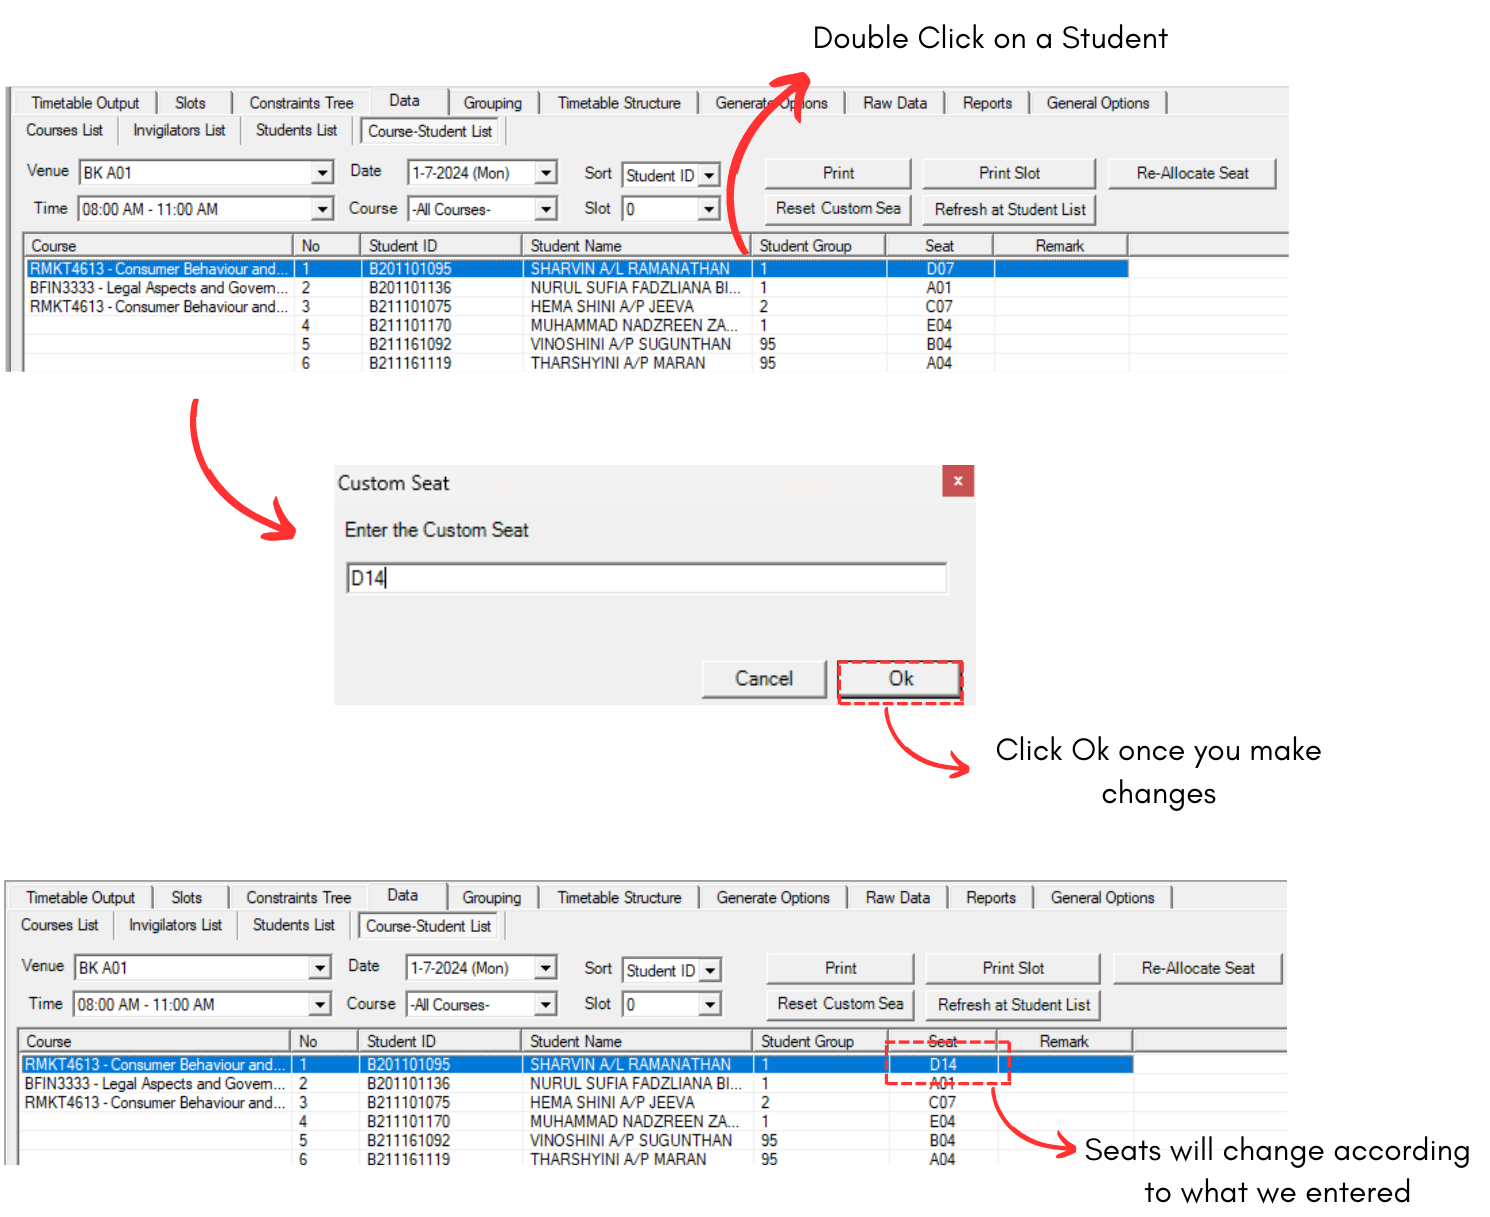
Diagram 4.2.1 Custom Seat