Stage 2: Data Entry
| Site: | Timetable Plus |
| Course: | Timetable Plus Data Entry |
| Book: | Stage 2: Data Entry |
| Printed by: | Guest user |
| Date: | Thursday, 23 April 2026, 4:26 PM |
Description
-
1. Introduction
1.1. Data Entry Options
Before you proceed with the Data Entry, you have to fill in and examine the Data Entry Options to make sure Data Entry process will be smooth later on.
To open Data Entry Options, go to Options Tab.
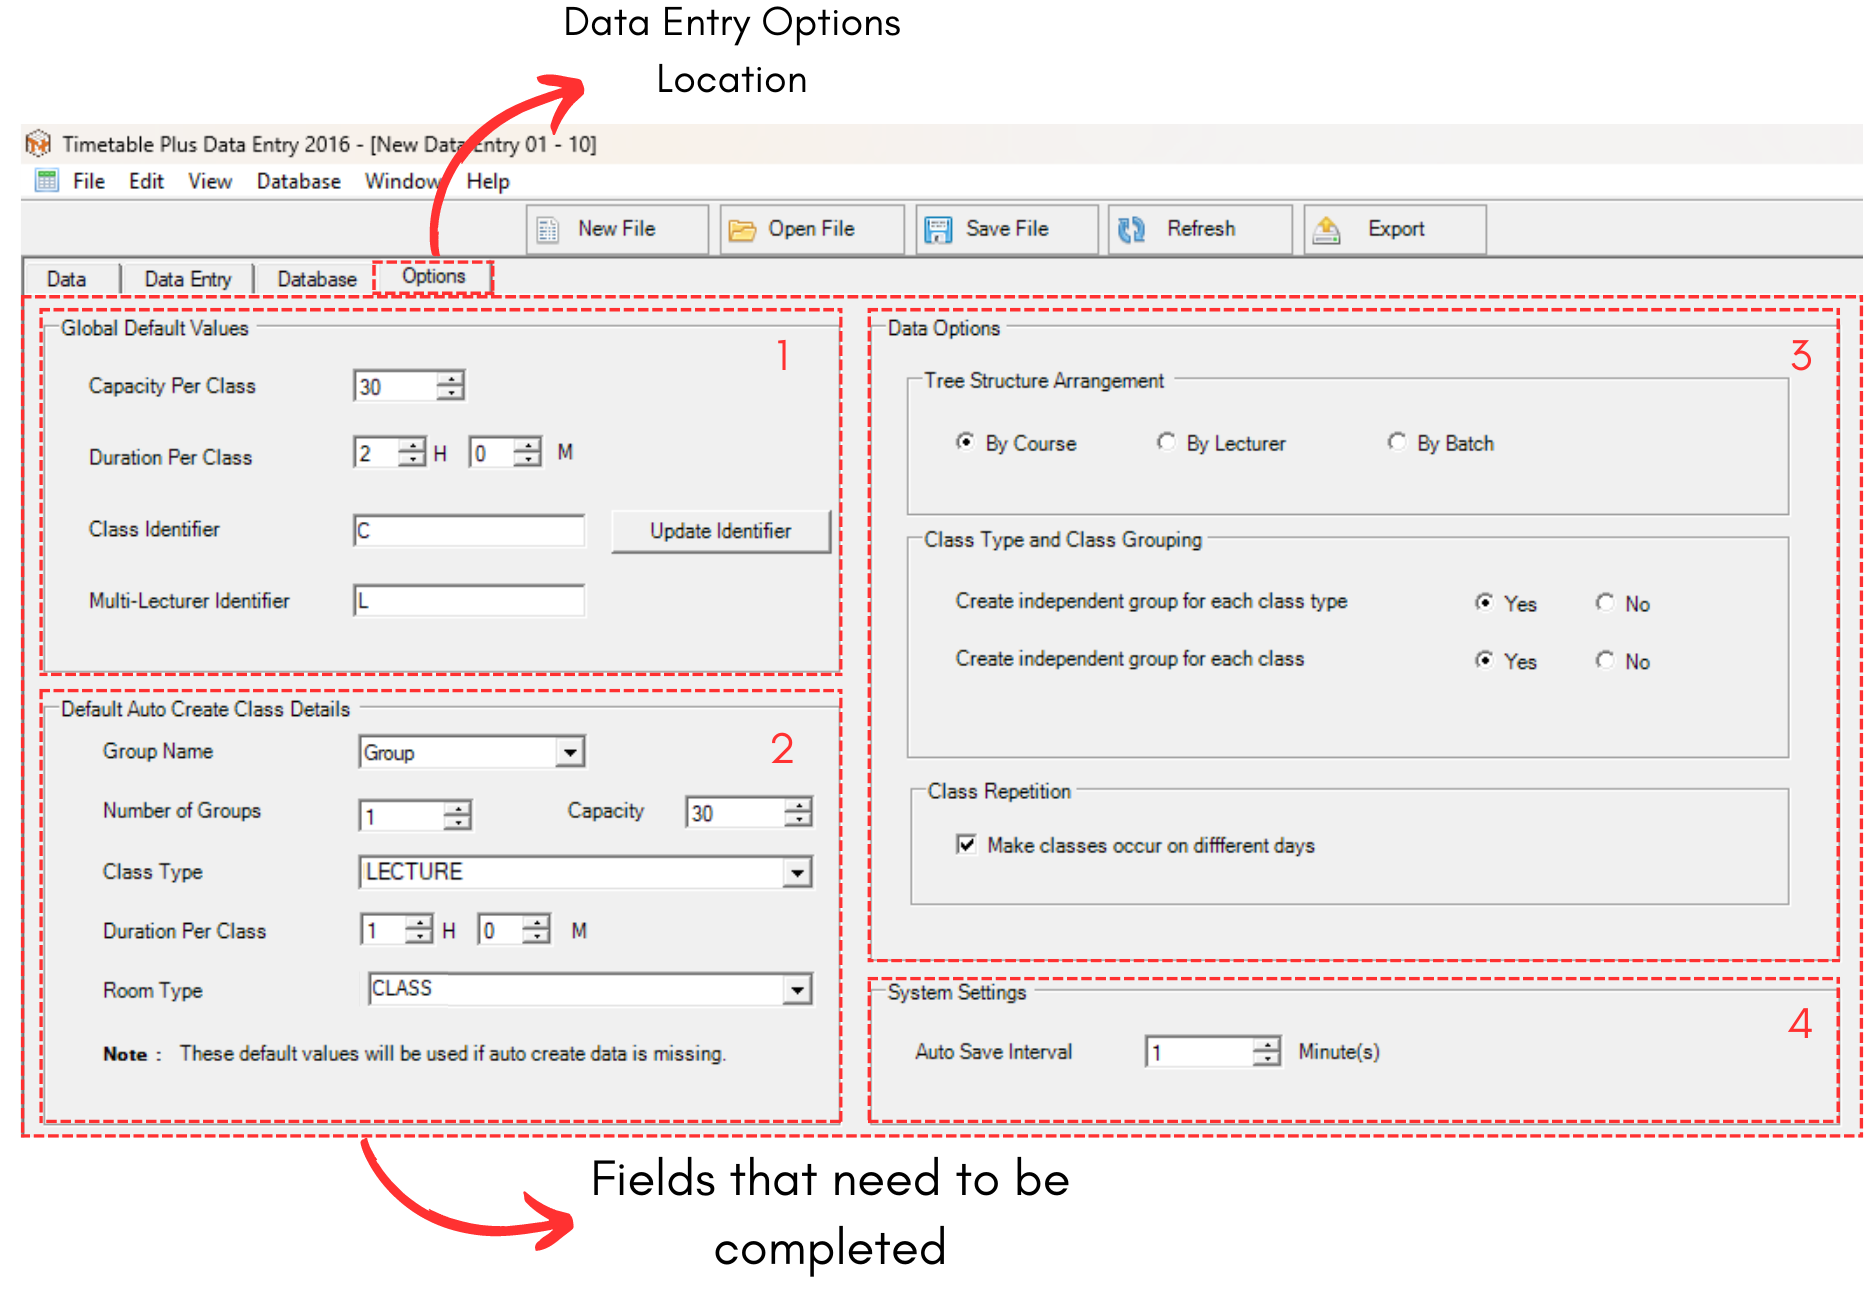
Diagram 1.1.1 Data Entry Options
Options has been divided into 4 sections.
1. Global Default Value
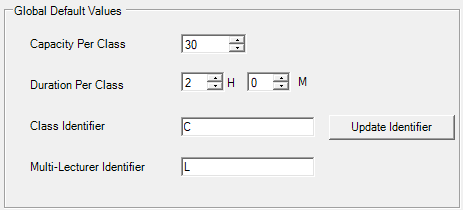
Diagram 1.1.2 Global Default Value
For better understanding, refer to the table below.
|
Capacity Per Class |
Number of students per class.
|
|
Duration Per Class |
Time taken for the class. |
|
Class Identifier |
The alphabet used to describe the class. |
|
Multi-Lecturer Identifier |
The alphabet used to describe the Multi-Lecturer. |
Table 1.1.1 Global Default Value Explaination
Once you are done making changes, click on
 to update Class and Multi-Lecturer Identifier.
2. Default Auto Create Class Details
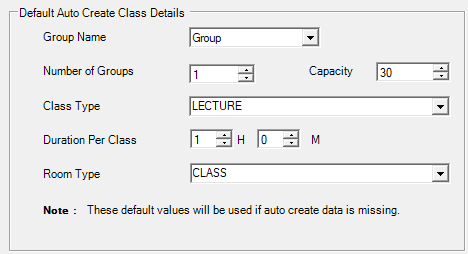
Diagram 1.1.3 Default Auto Create Class Details
For better understanding, refer to the table below.
|
Group Name |
Default Group Name (Can be added in Group Management).
|
|
Number of Groups |
Default Number of Groups that will be available for Data Entry. |
|
Class Type |
Default Class Type for the Data Entry. |
|
Duration Per Class |
Default Time taken for the class. |
|
Room Type |
Default Room Type for the Data Entry. |
Table 1.1.2 Default Auto Create Class Details
3. Data Options
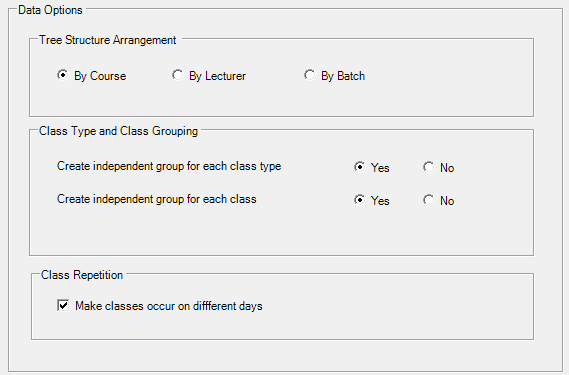
Diagram 1.1.4 Data Options
In Data Options, there are 3 more separated sections that need to be considered.1. Tree Structure Arrangement
You may choose your preferred tree structure arrangment by course, lecturer or batch. Tree Structure can be viewed once you have done the data entry at Data Entry tab.
2. Class Type and Class Grouping
You may choose to create independent group for each Class Type and also Class.
3. Class Repetition
You may tick if you want the classes occur on different days. If you don't tick this, the classes might will be placed under the same day.
4. System Settings

Diagram 1.1.5 System Settings
You may set the auto save interval to your preferred duration. Default and the best would be 1 minute as the data will keep on being automatically updated in short period time.
2. Data Entry
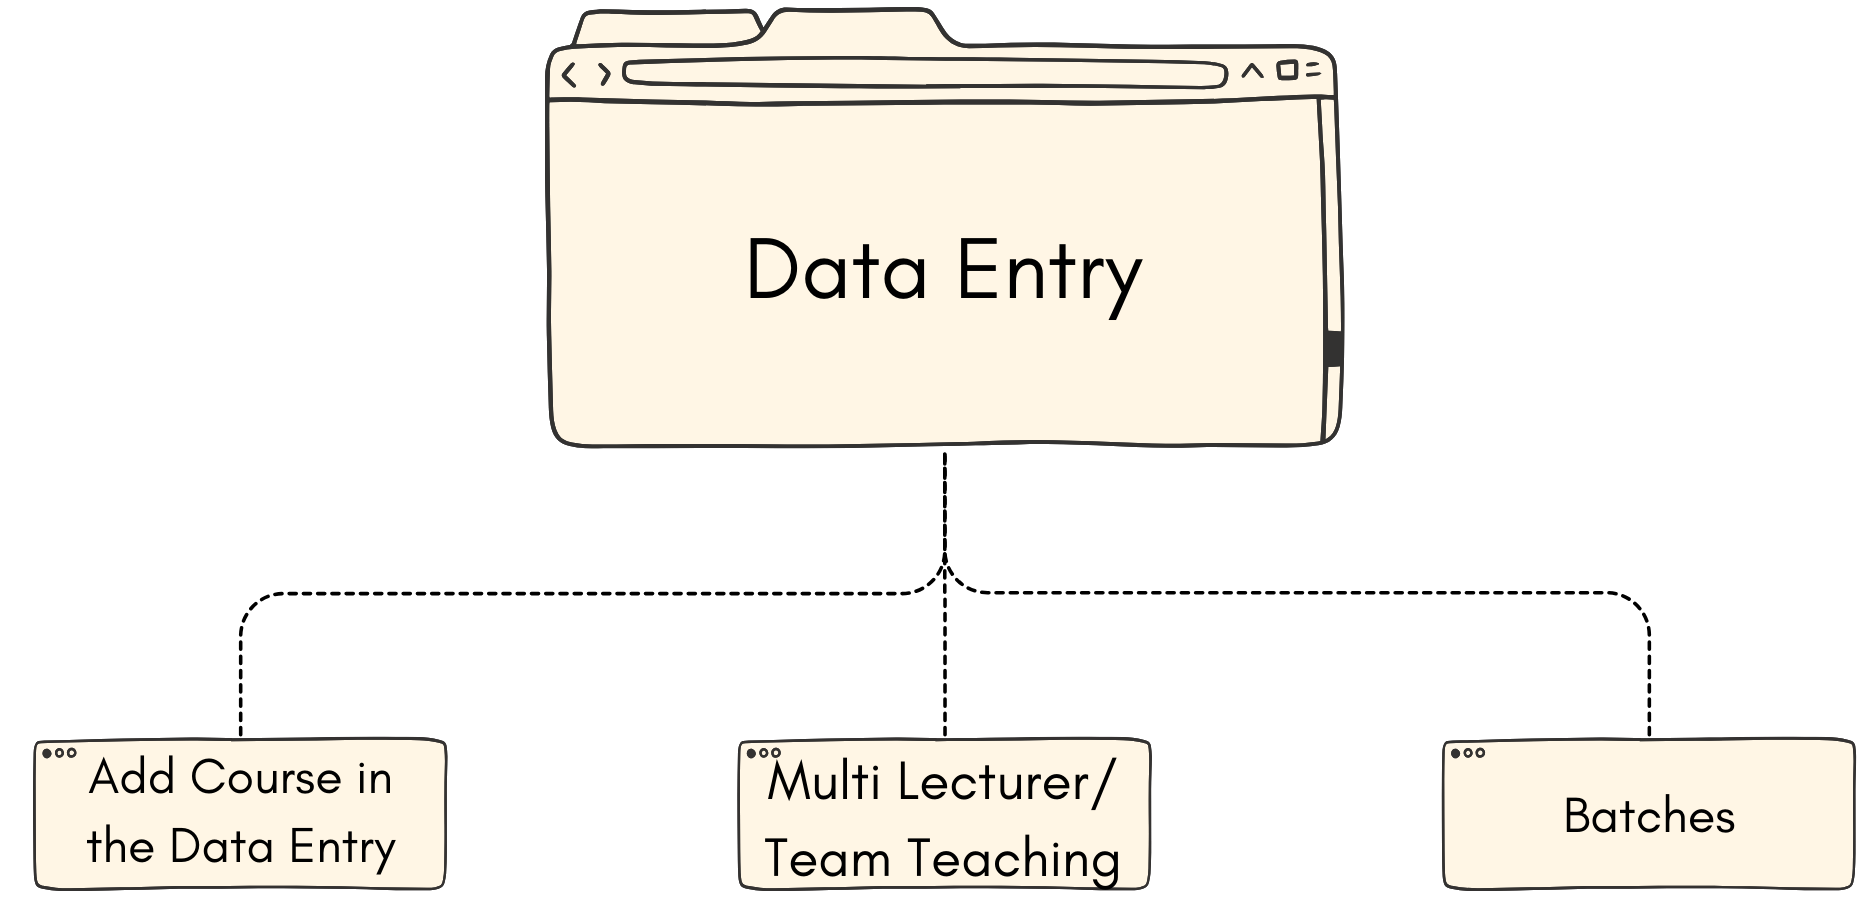
2.1. Add Course in Data Entry
In this chapter, you will learn about:
- Add Data Entry Using Add Course Button
- Add and Duplicate Group Inside the Course
- Add and Duplicate Class Inside the Group
To do that, first you need to open the Data Entry tab.
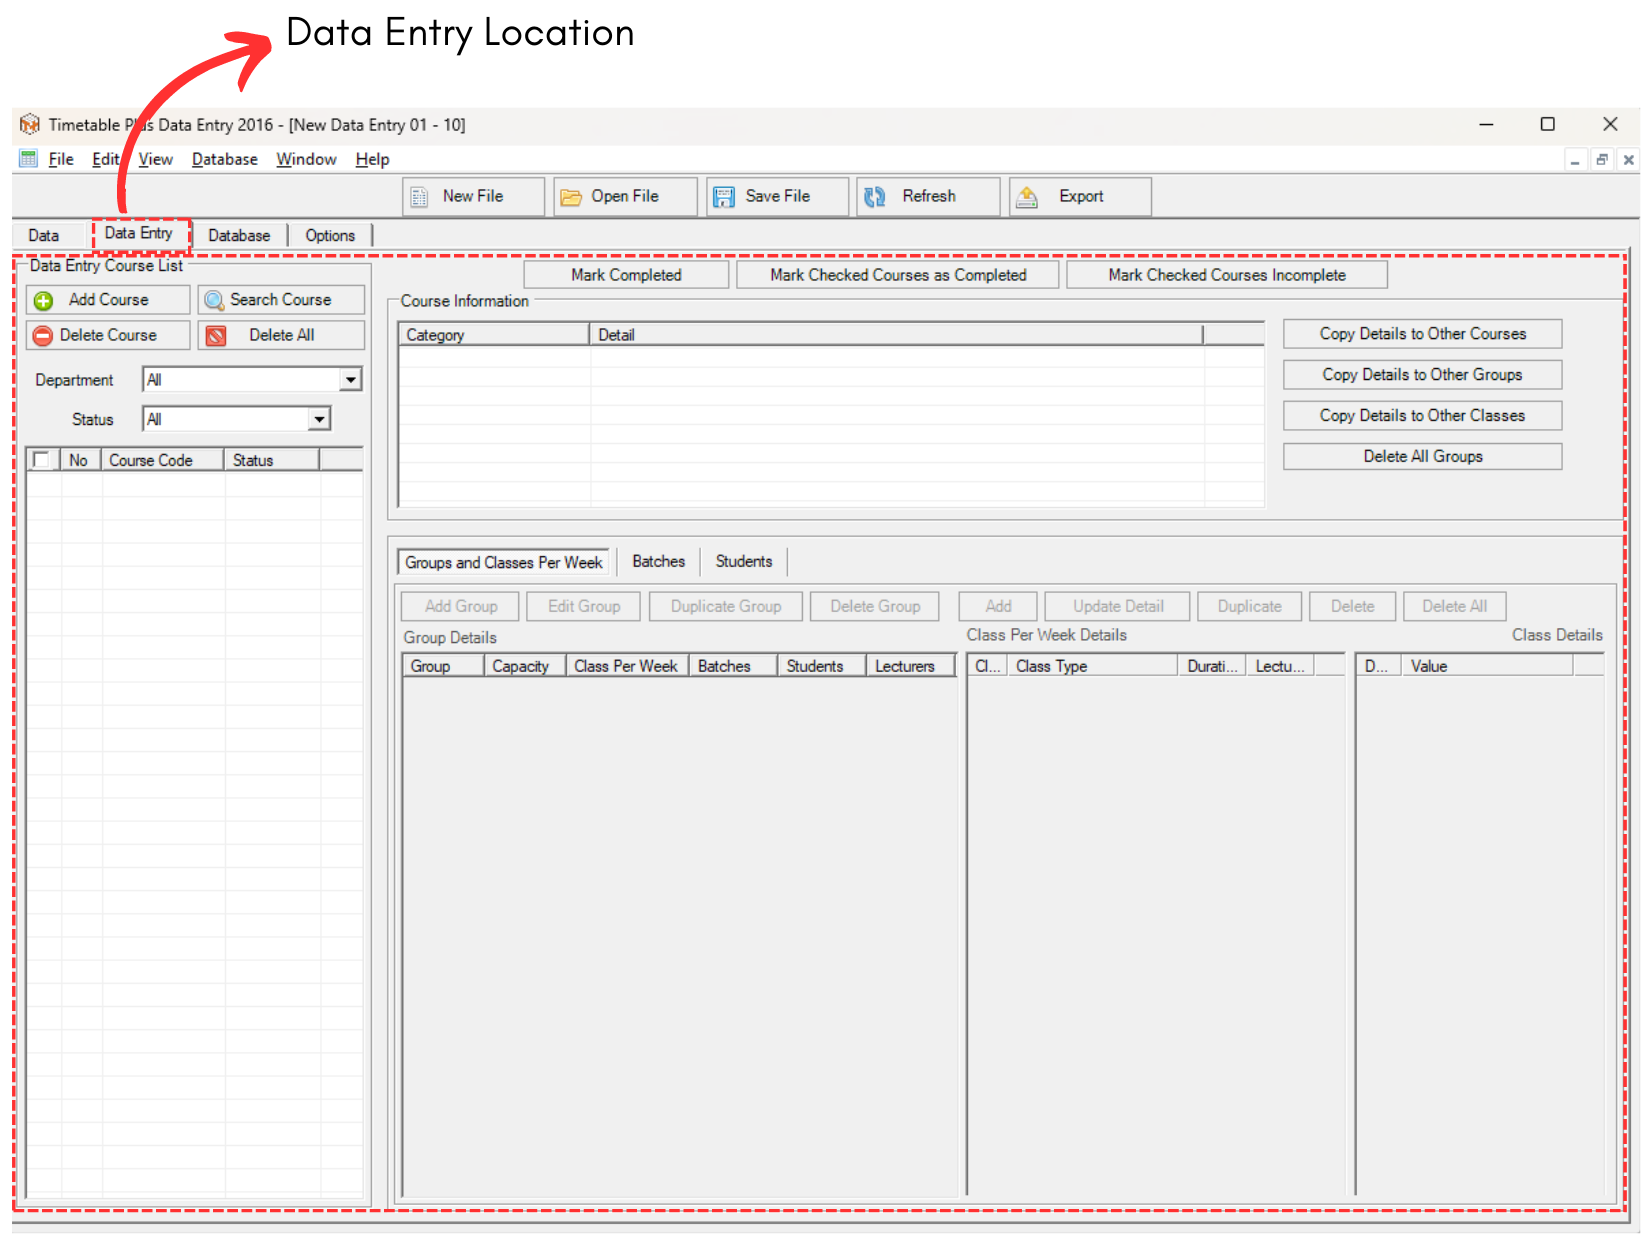
2.1.1 Data Entry Tab Location
1. Add Data Entry using Add Course Button
There are 3 simple steps in adding the data entry.
STEPS 1: Click on Add Course 
A pop up will appear.
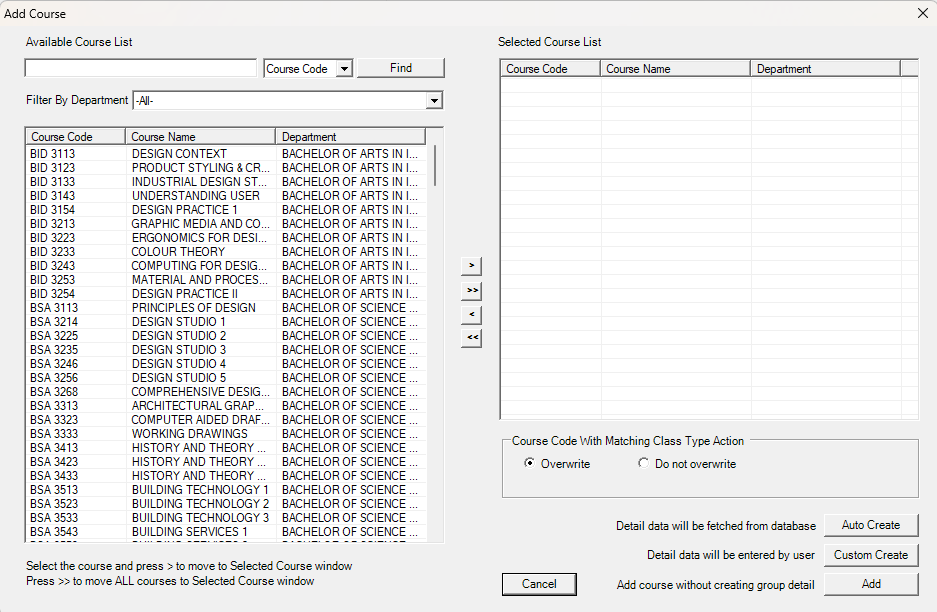
2.1.2 Add Course Popup
STEPS 2: Move the selected course to the right.
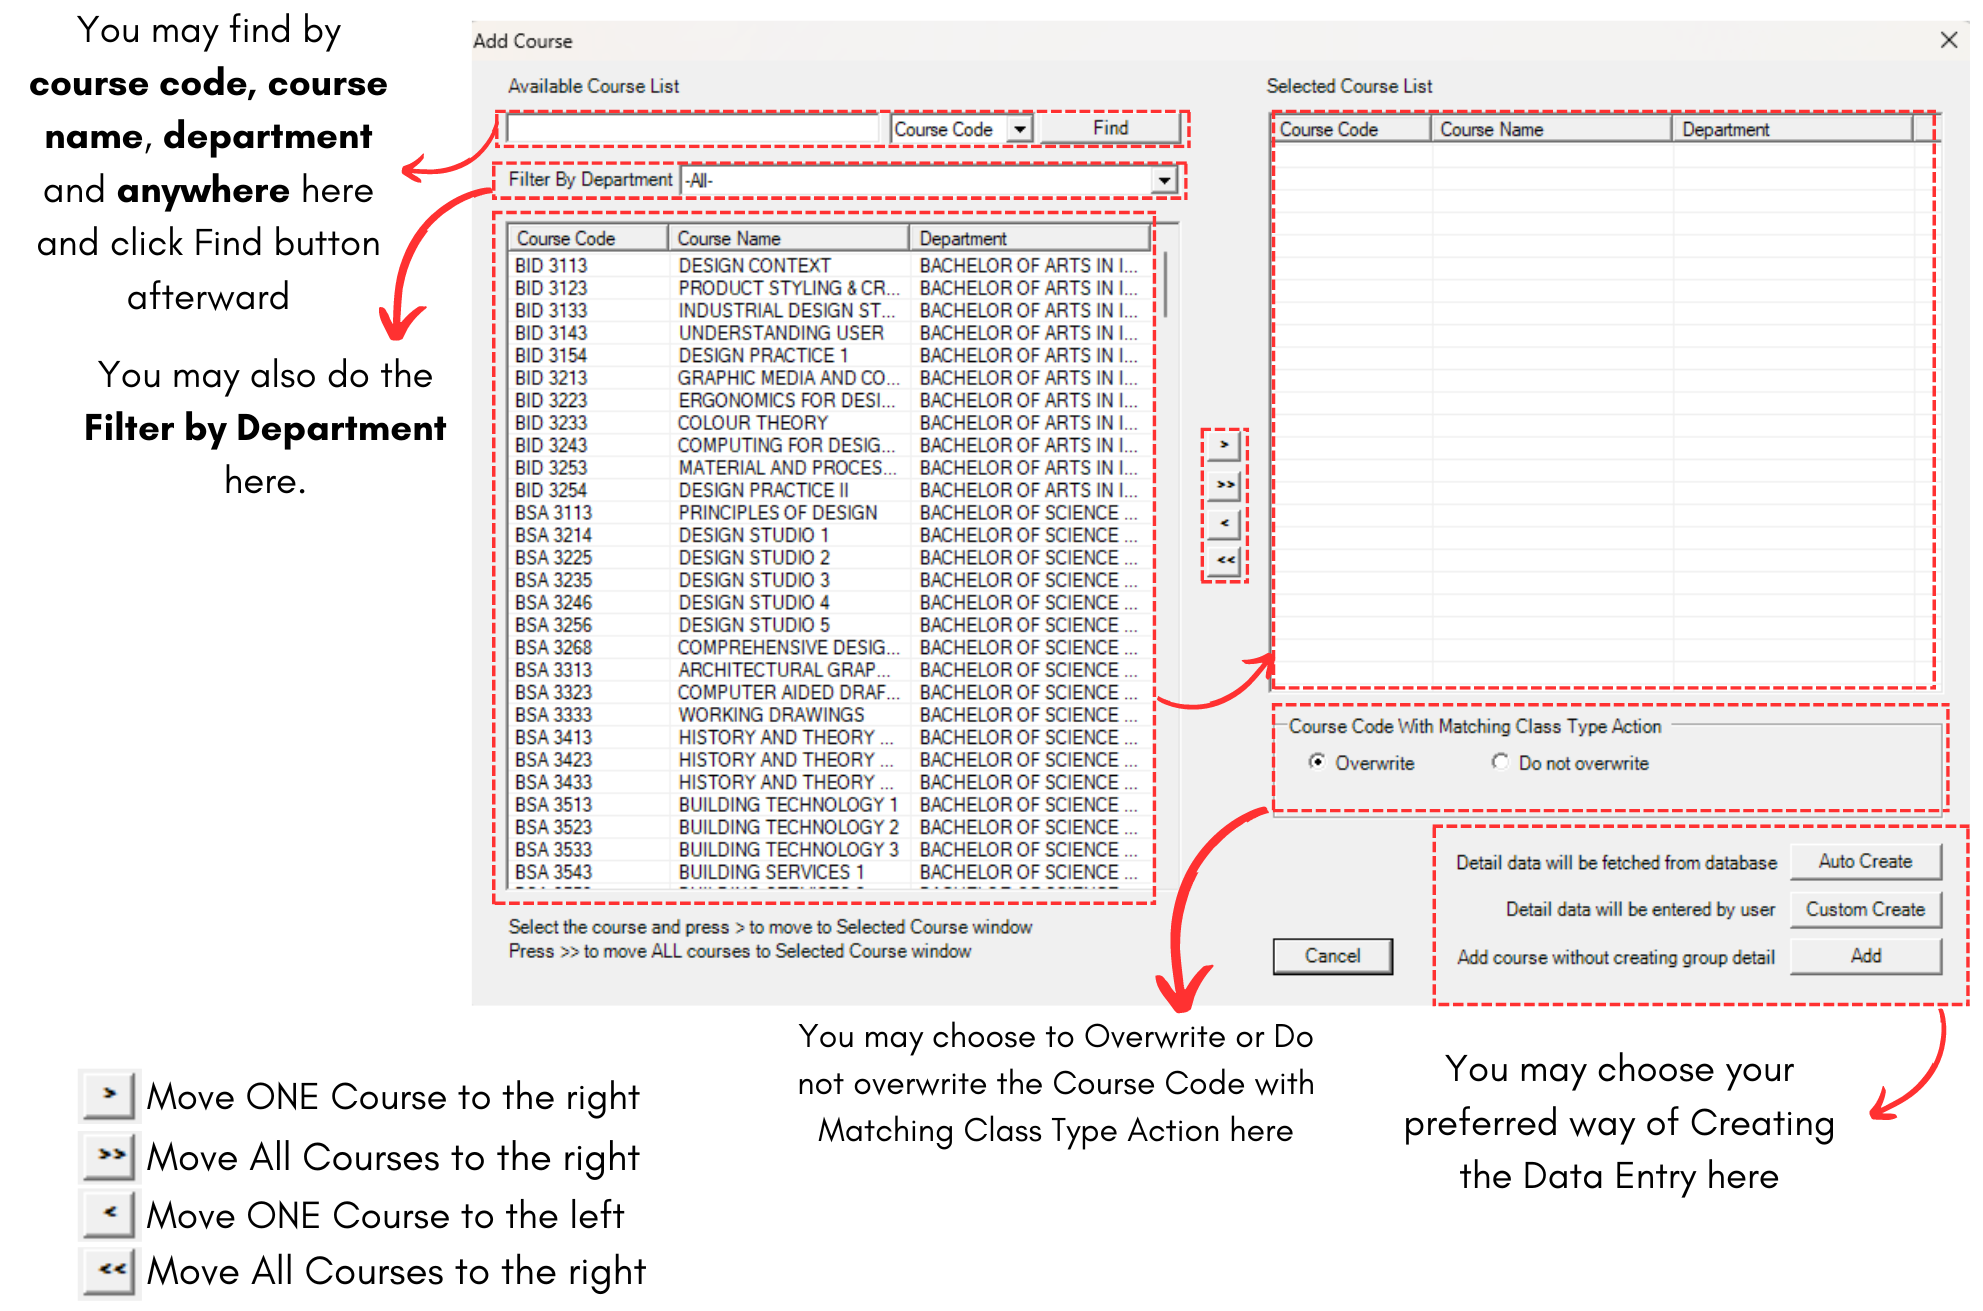
Diagram 2.1.3 Add Course Popup Explanation
For example, we choose Course Code CS221.
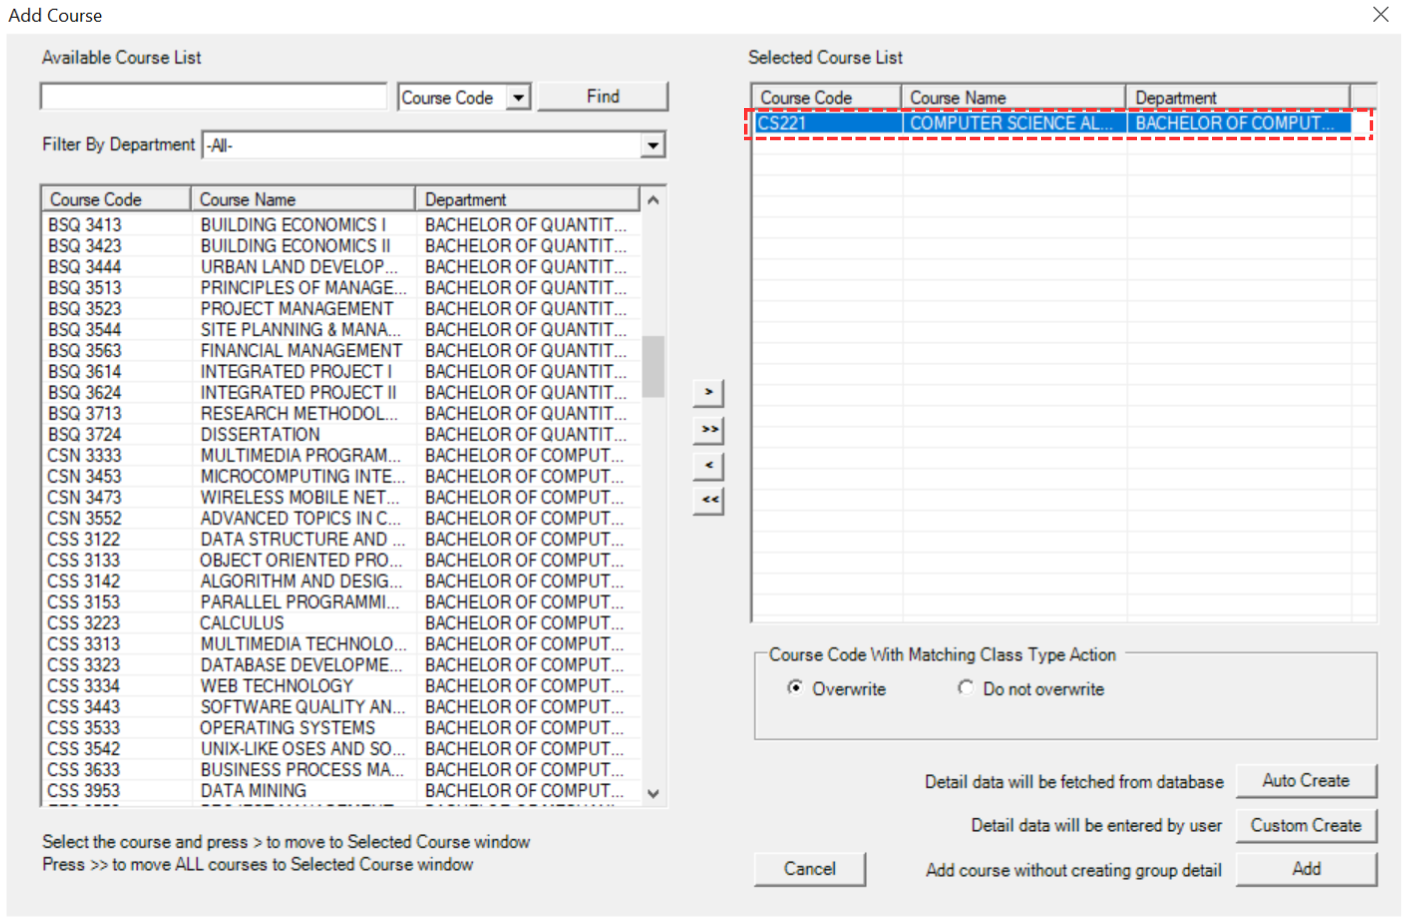
Diagram 2.1.4 Selected Course
STEPS 3: Choose to Auto Create OR Custom Create OR Add.
Refer to the explanation text on the right side of the buttons.
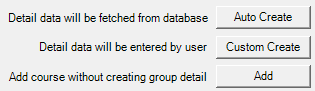
Diagram 2.1.5 Auto Create, Custom Create and Add Button
OPTION 1: If you choose Auto Create  , a popup will appear. Click Ok.
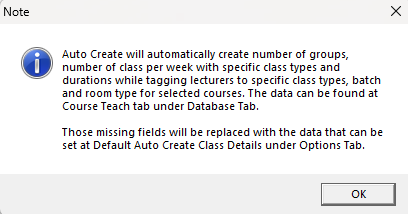
Diagram 2.1.6 Auto Create Popup
Once done, you will see the data appear in Data Entry. The data created will be based on Default Auto Create Details that you have set at Data Entry Options.
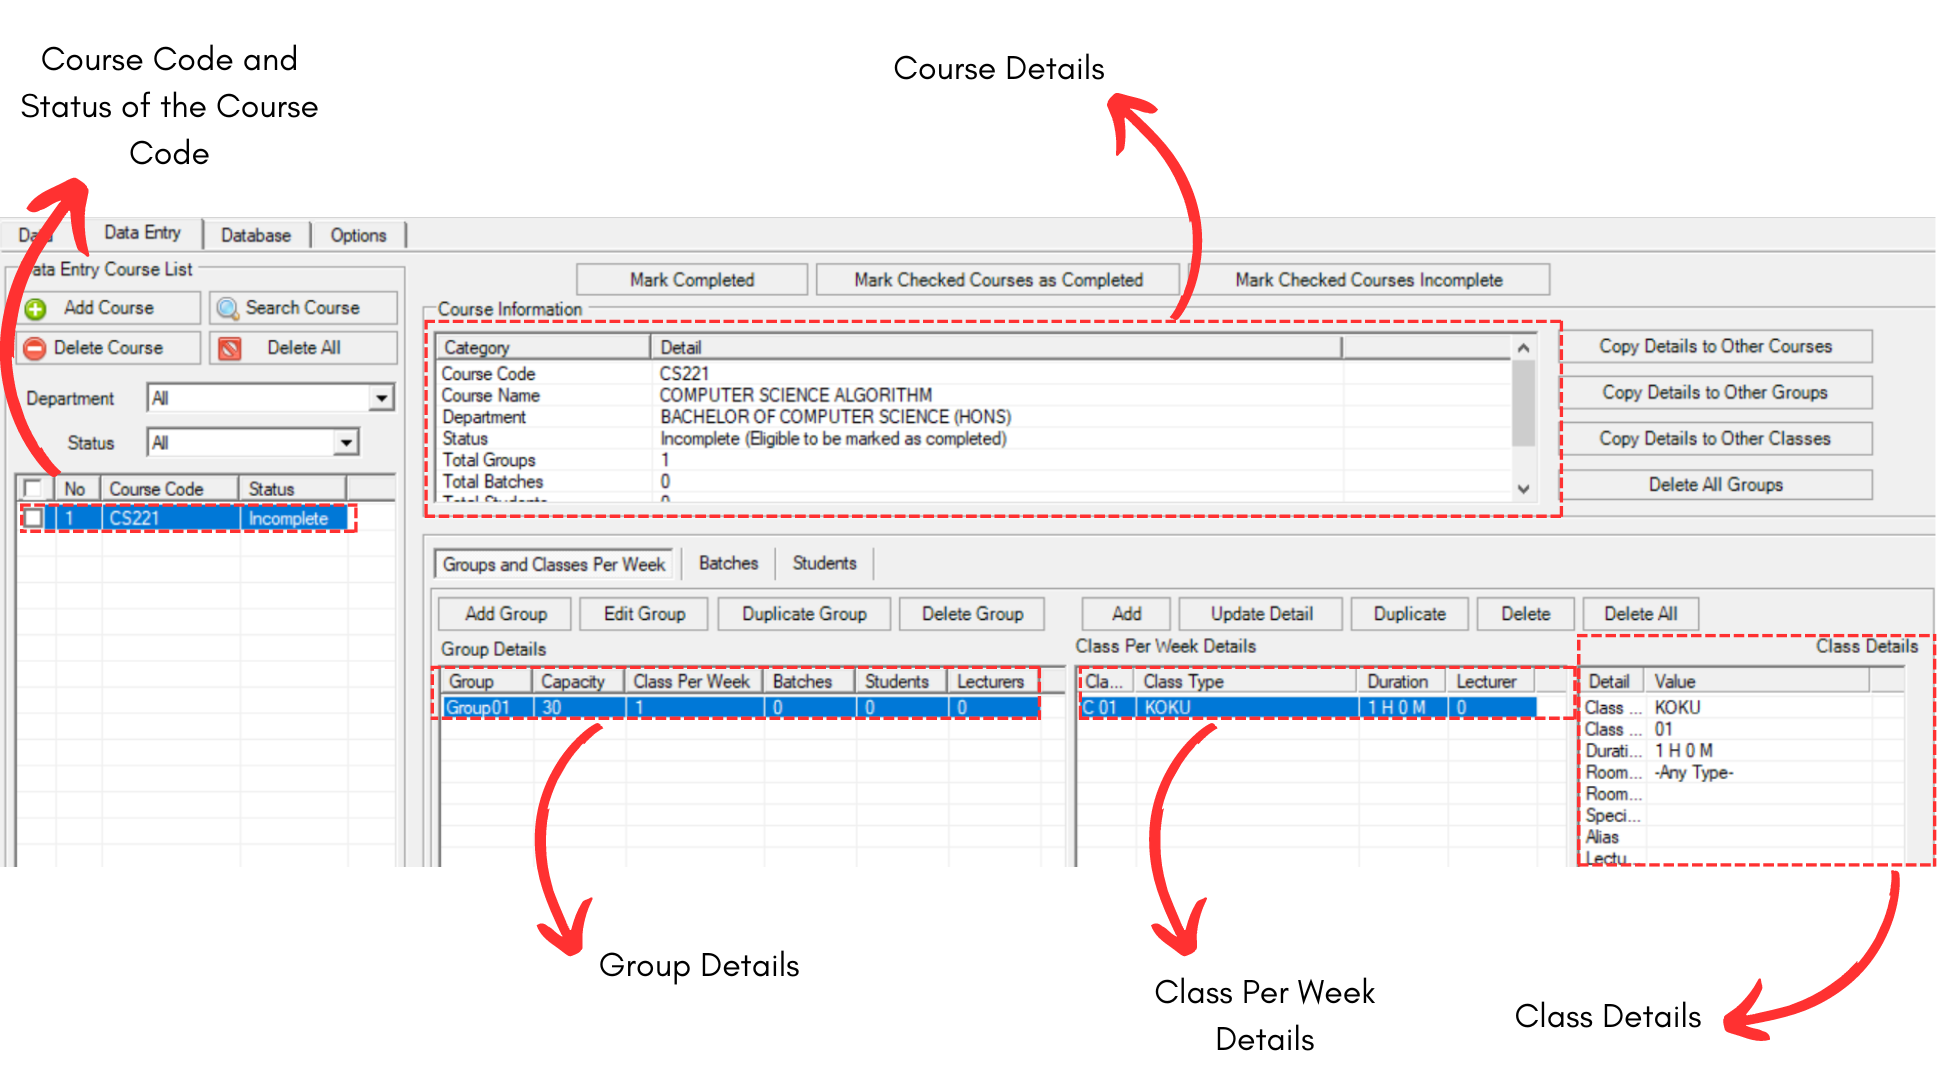
Diagram 2.1.7 Auto Create Data at Data Entry
OPTION 2: If you choose Custom Create  , a popup will appear. You may fill the fields.
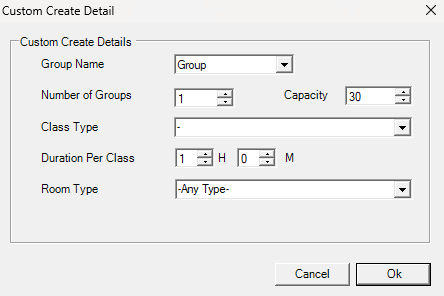
Diagram 2.1.8 Custom Create Details
To fill in the fields, refer to the table below.
|
Group Name |
Default Group Name (Can be added in Group Management).
|
|
Number of Groups |
Number of Groups that will be available for Data Entry. (Compulsory) |
|
Class Type |
Class Type for the Data Entry. (Compulsory) |
|
Capacity |
Capacity for the Class (Compulsory) |
|
Duration Per Class |
Default Time taken for the class. (Compulsory) |
|
Room Type |
Default Room Type for the Data Entry. (Compulsory) |
Table 2.1.1 Custom Create Details Explanation
Below is the example of filled fields.
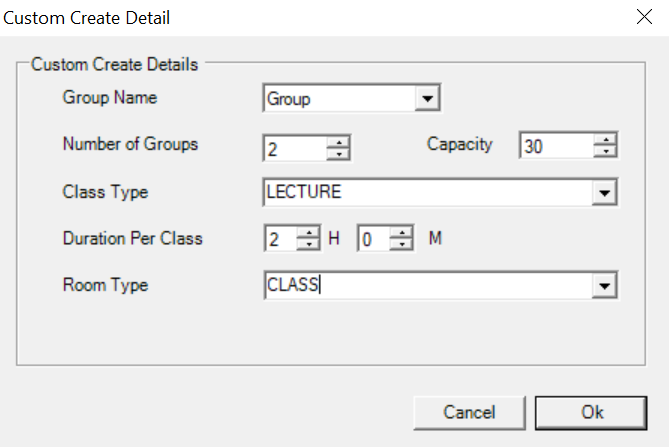
Diagram 2.1.9 Filled Custom Create Details
Click Ok once done. Once done, you will see the data in Data Entry. It will be created based on what you have chosen in Filled Custom Create Details.
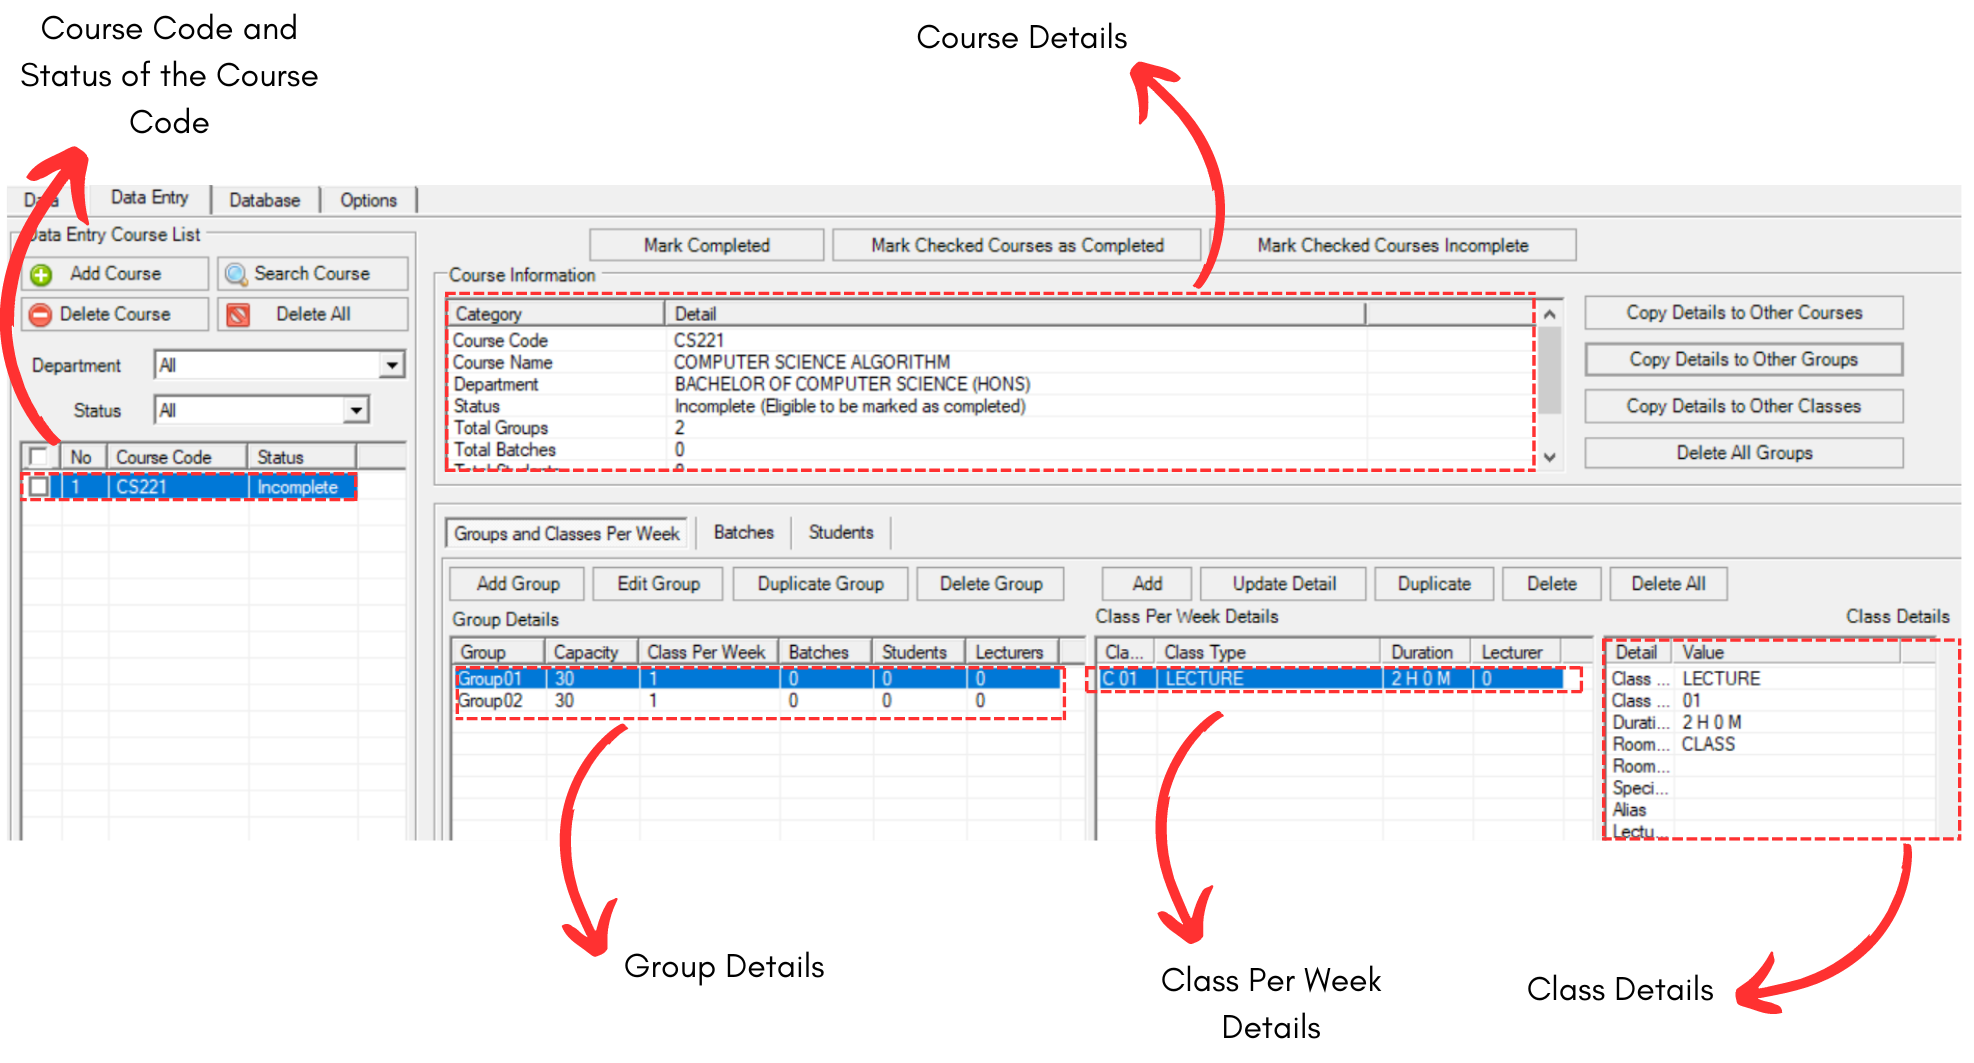
Diagram 2.1.10 Custom Create Data at Data Entry
OPTION 3: If you choose Add![]() , it will only create course on the left side and no groups details will be created.
, it will only create course on the left side and no groups details will be created.
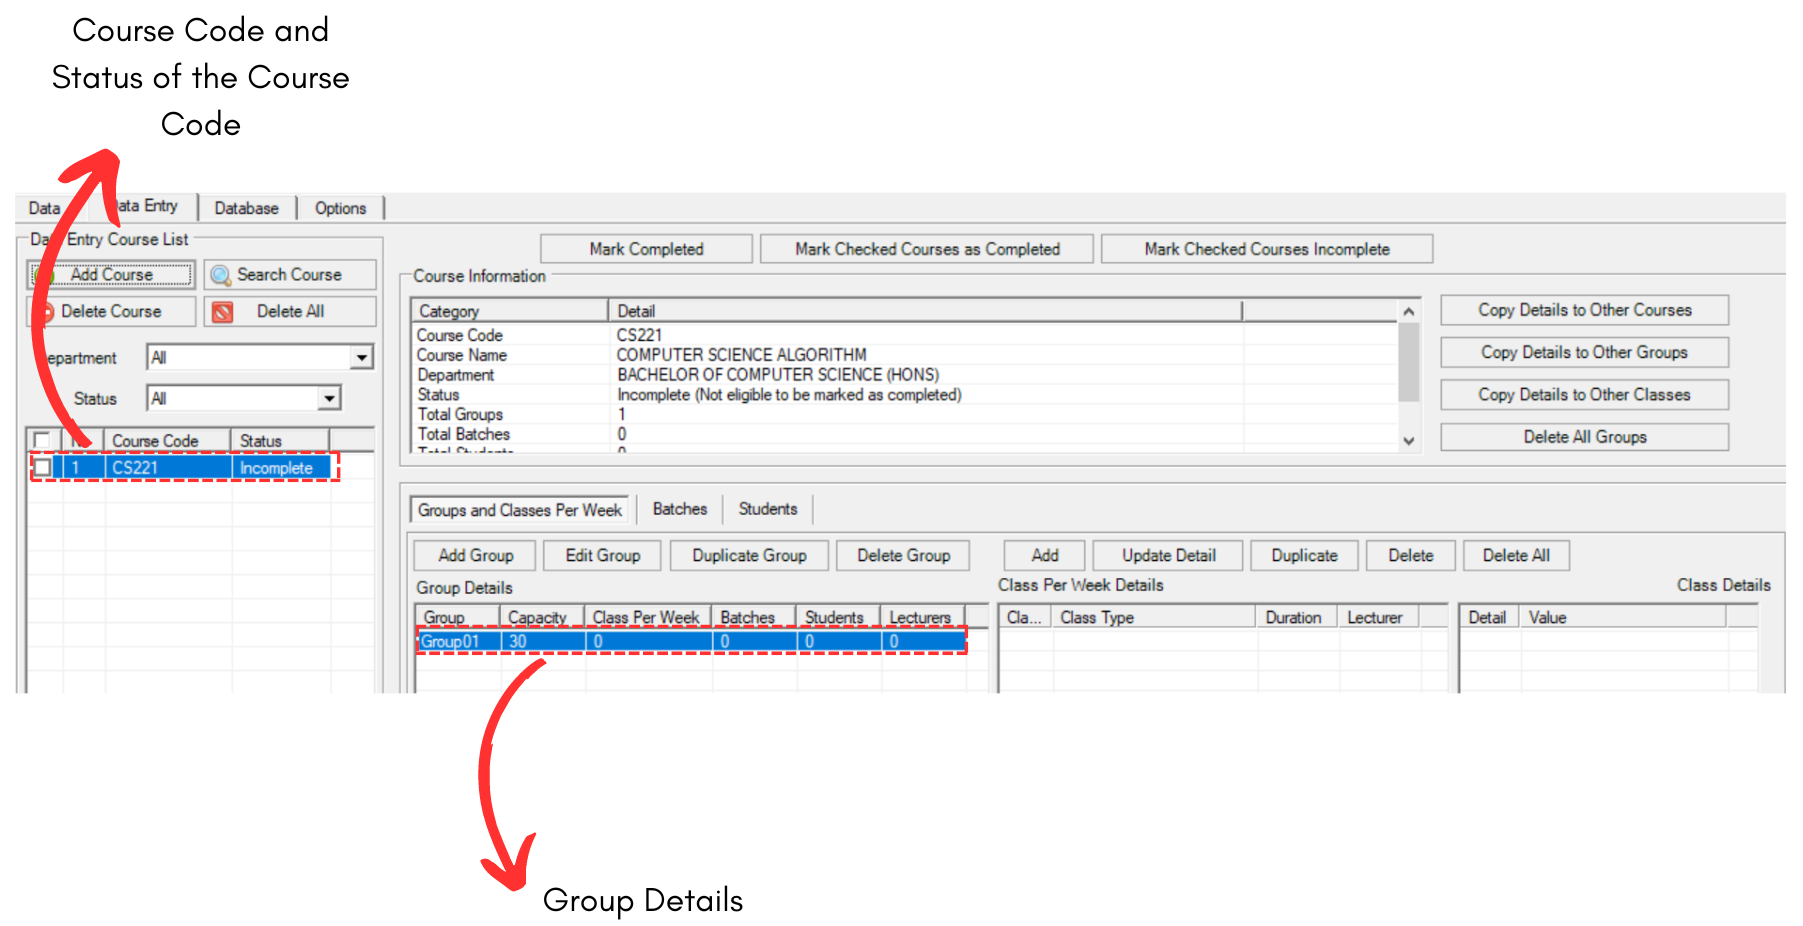
Diagram 2.1.11 Add Only Data at Data Entry
2. Add and Duplicate Group Inside the Course
You may add group in the course if you have already added course in the data Entry.
There are 3 simple steps in adding group in the course.
STEPS 1: Click on the Add Group under your chosen course. ![]()
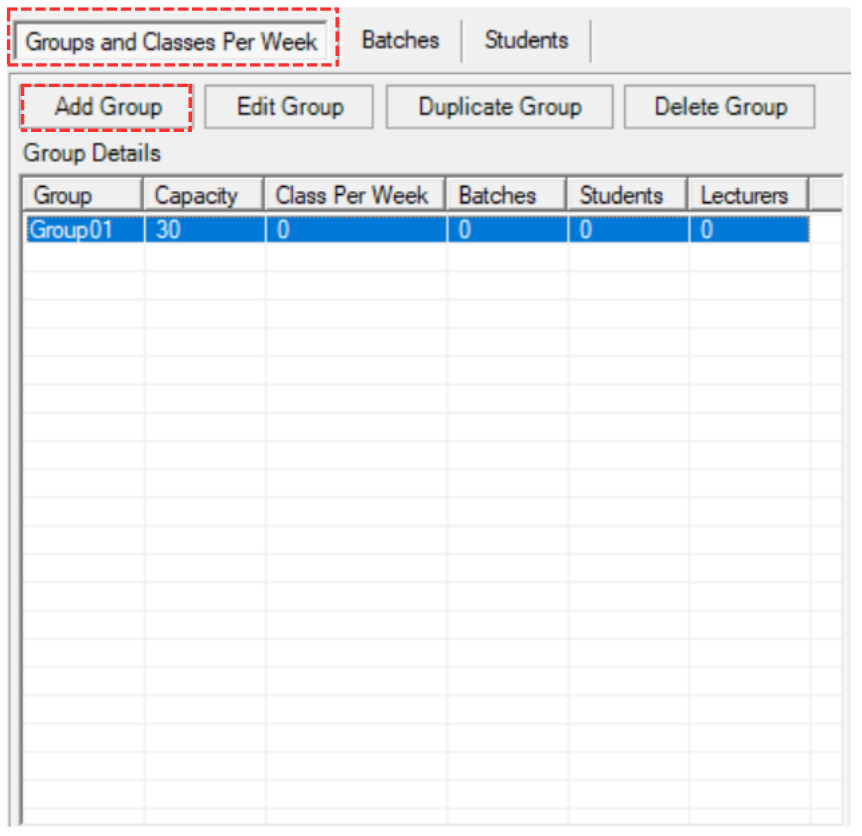
Diagram 2.1.12 Location of Add group
STEPS 2: Fill in the fields of Add Group Popup.
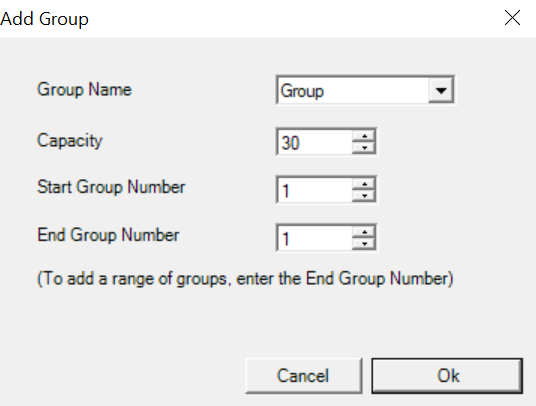
Diagram 2.1.13 Add Group Popup
To understand how to fill the field, refer to the table below.
|
Group Name |
Choose the Group Name (Can be added in Group Management).
|
|
Capacity |
Capacity of the group. |
|
Start Group Number |
The first group number. |
|
End Group Number |
The last group number (This is optional if you want to add a range of groups) |
Table 2.1.2 Add Group Explanation
For Example, we change the End Group Number as 3. This will add up to total 3 groups under the course code.

Diagram 2.1.14 Changed End Group Number
STEPS 3: Click Ok once done. You will see the group will be added under the course.
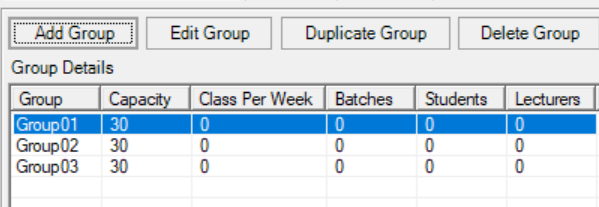
Diagram 2.1.15 Added Groups under the Course
There are 3 simple steps in duplicating the group. Refer to the picture below.
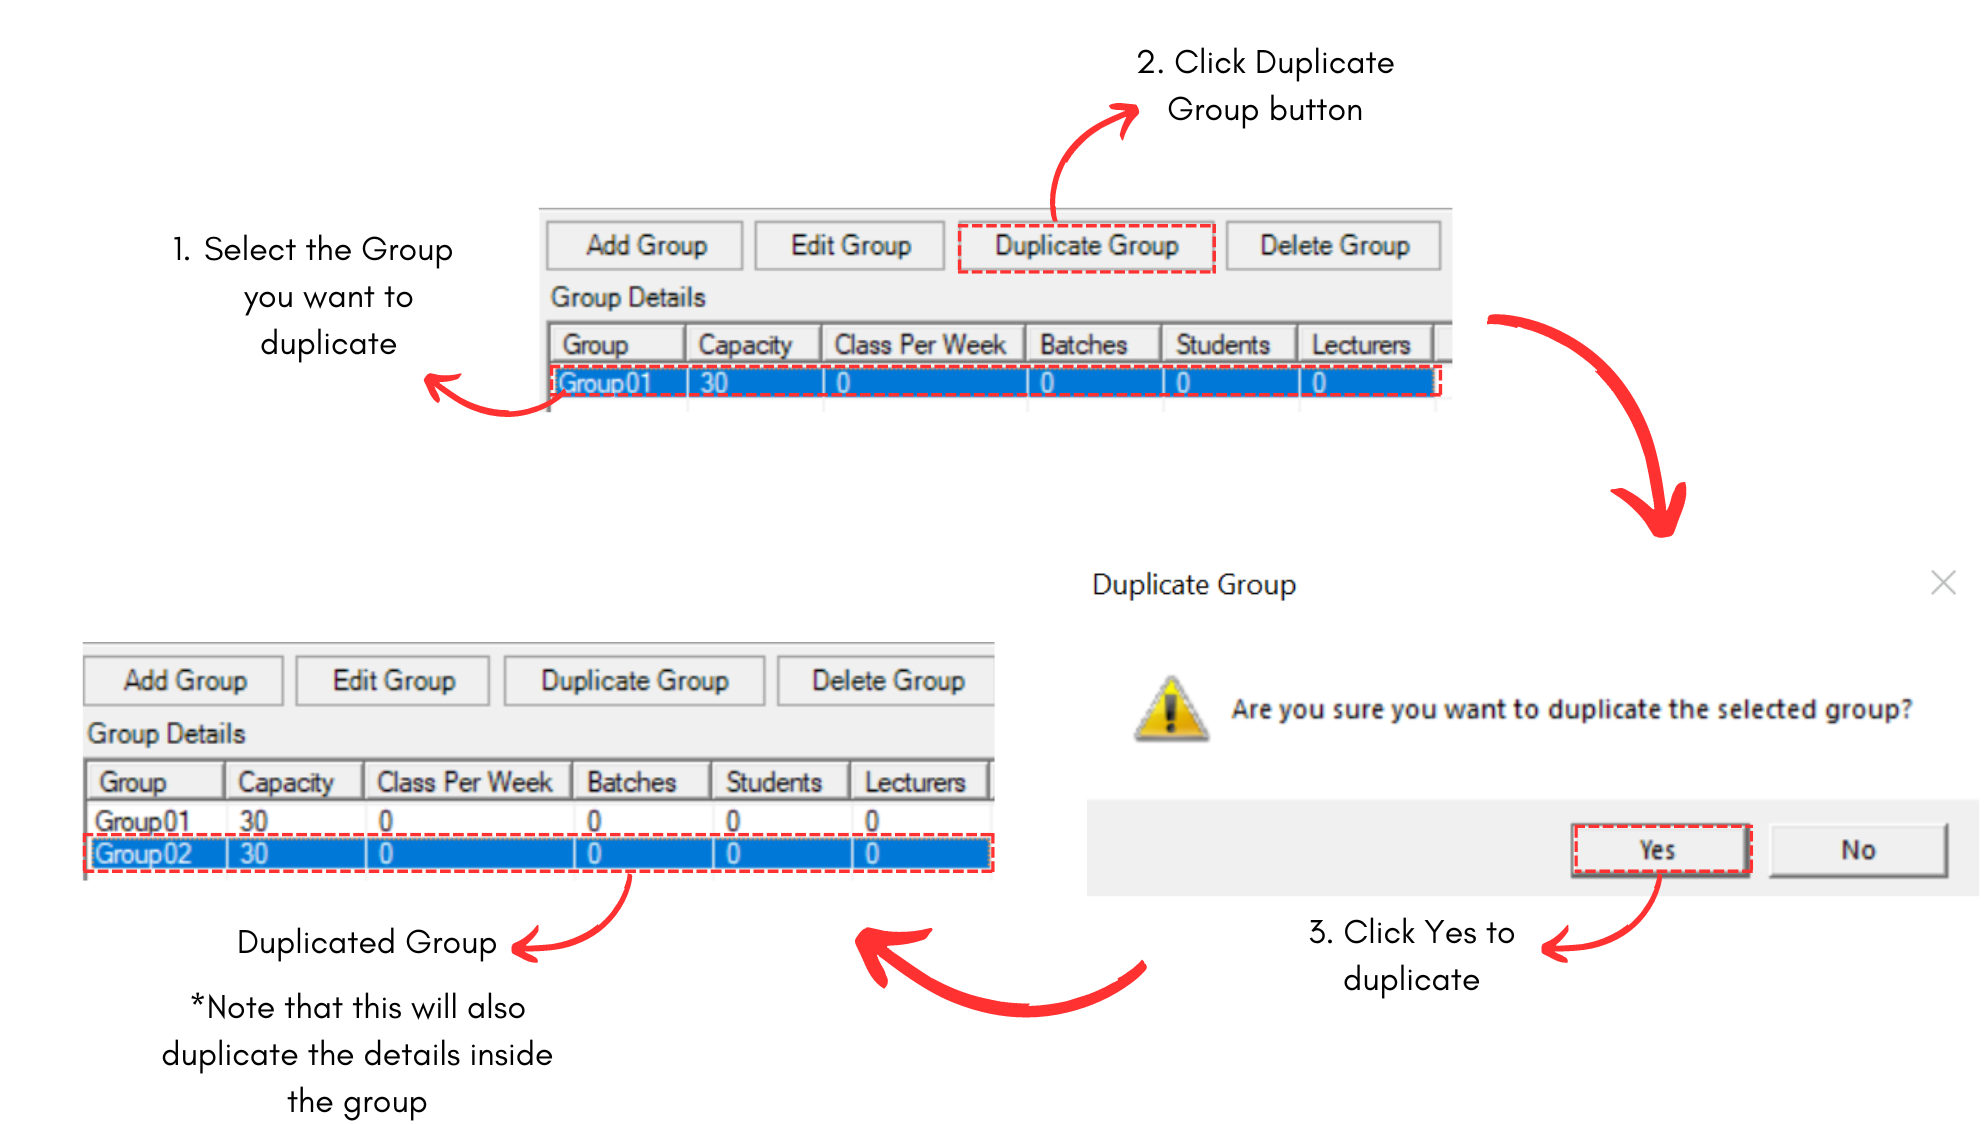
Diagram 2.1.16 Duplicated Group Under Course
3. Add and Duplicate Class Inside the Group
You may add class inside the group if you have already added groups in the course at Data Entry.
There are 3 simple steps in adding class inside the group.
STEPS 1: Click on the Add under your chosen group. ![]()
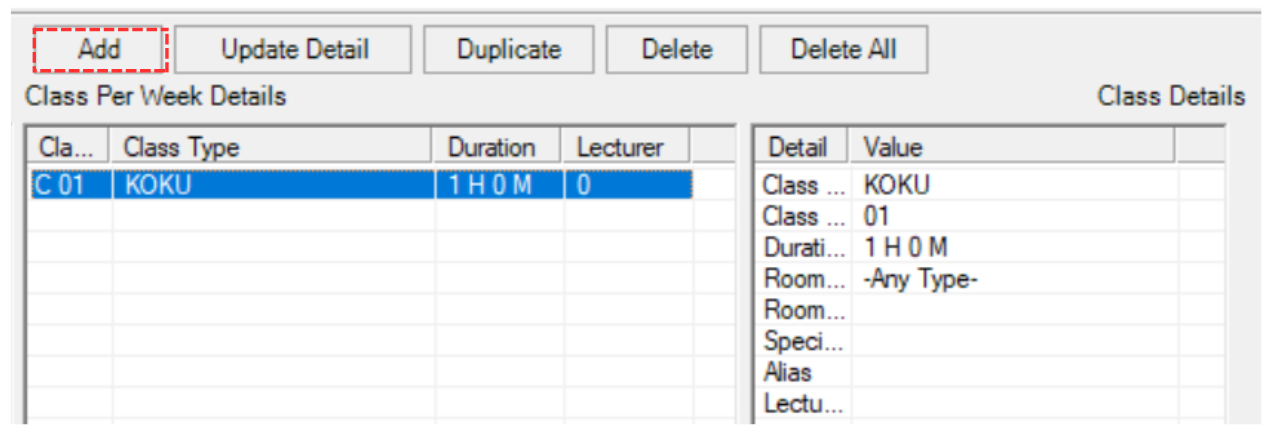
Diagram 2.1.17 Location of Add Class
STEPS 2: Fill in the fields of Add Class to Course Popup.
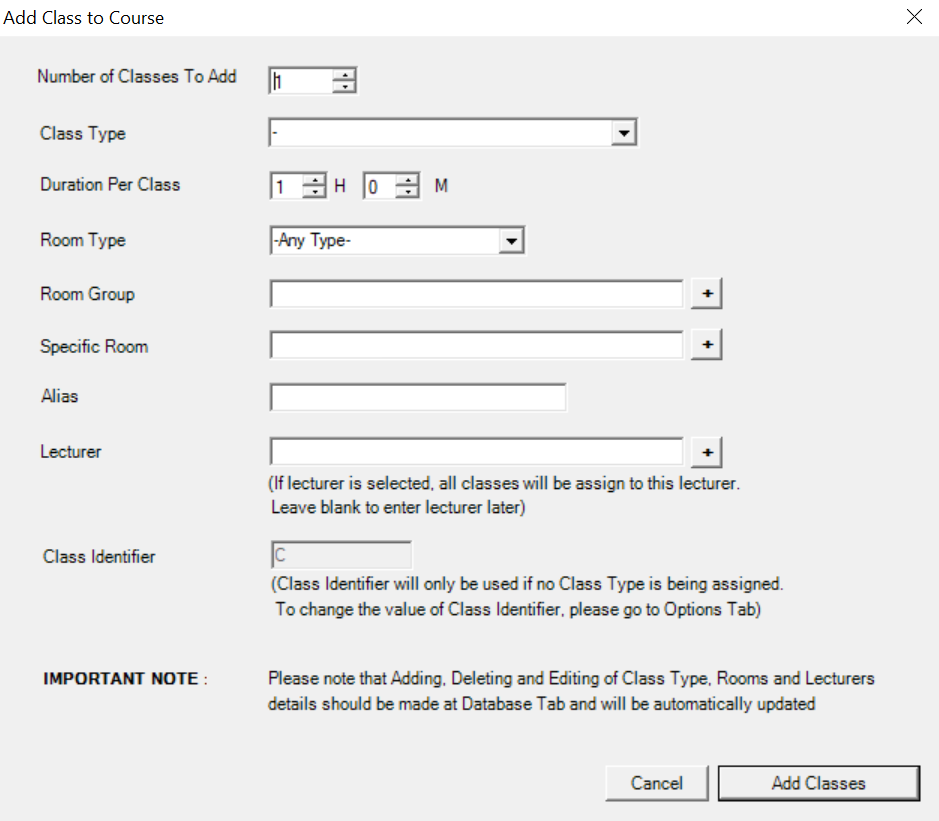
Diagram 2.1.17 Add Class to Course Popup
To understand how to fill the field, refer to the table below.
|
Number of Classes to Add |
Choose the number of classes you want to add.
|
|
Class Type |
Type of class that will be added. (compulsory) |
|
Duration Per Class |
Time taken for the class. (compulsory) |
|
Room Type |
Room Type for the class. (compulsory) |
|
Room Group |
The Group of the Room for the Class. (non-compulsory) |
|
Specific Room |
Specific Room for the Class (non-compulsory) |
|
Alias |
Alias of the Class (non-compulsory) |
|
Lecturer |
The lecturer that will teach the class (compulsory) |
Table 2.1.2 Add Class Explanation
Below is the example of fields been filled.
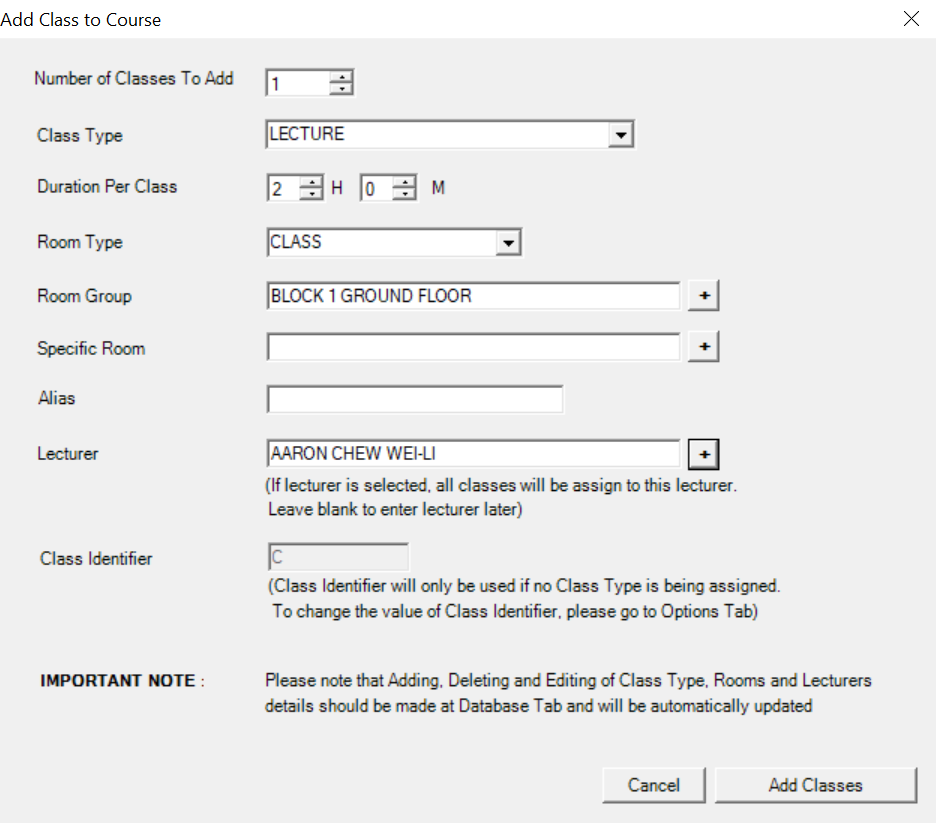
Diagram 2.1.18 Class Details Filled
STEPS 3: Click Add Classes once done. You will see the group will be added under the course.
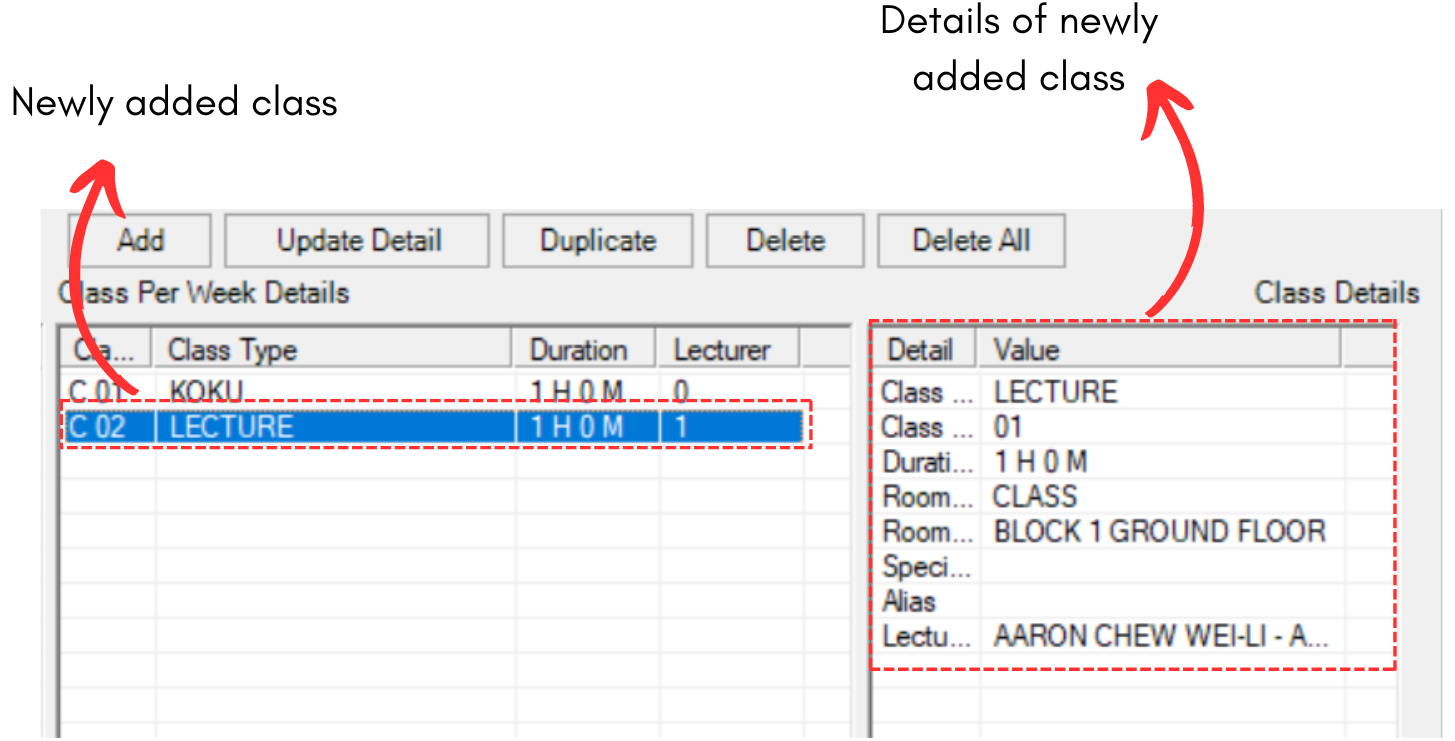
Diagram 2.2.19 Added Class under Class
There are 3 simple steps in duplicating the class. Refer to the picture below.
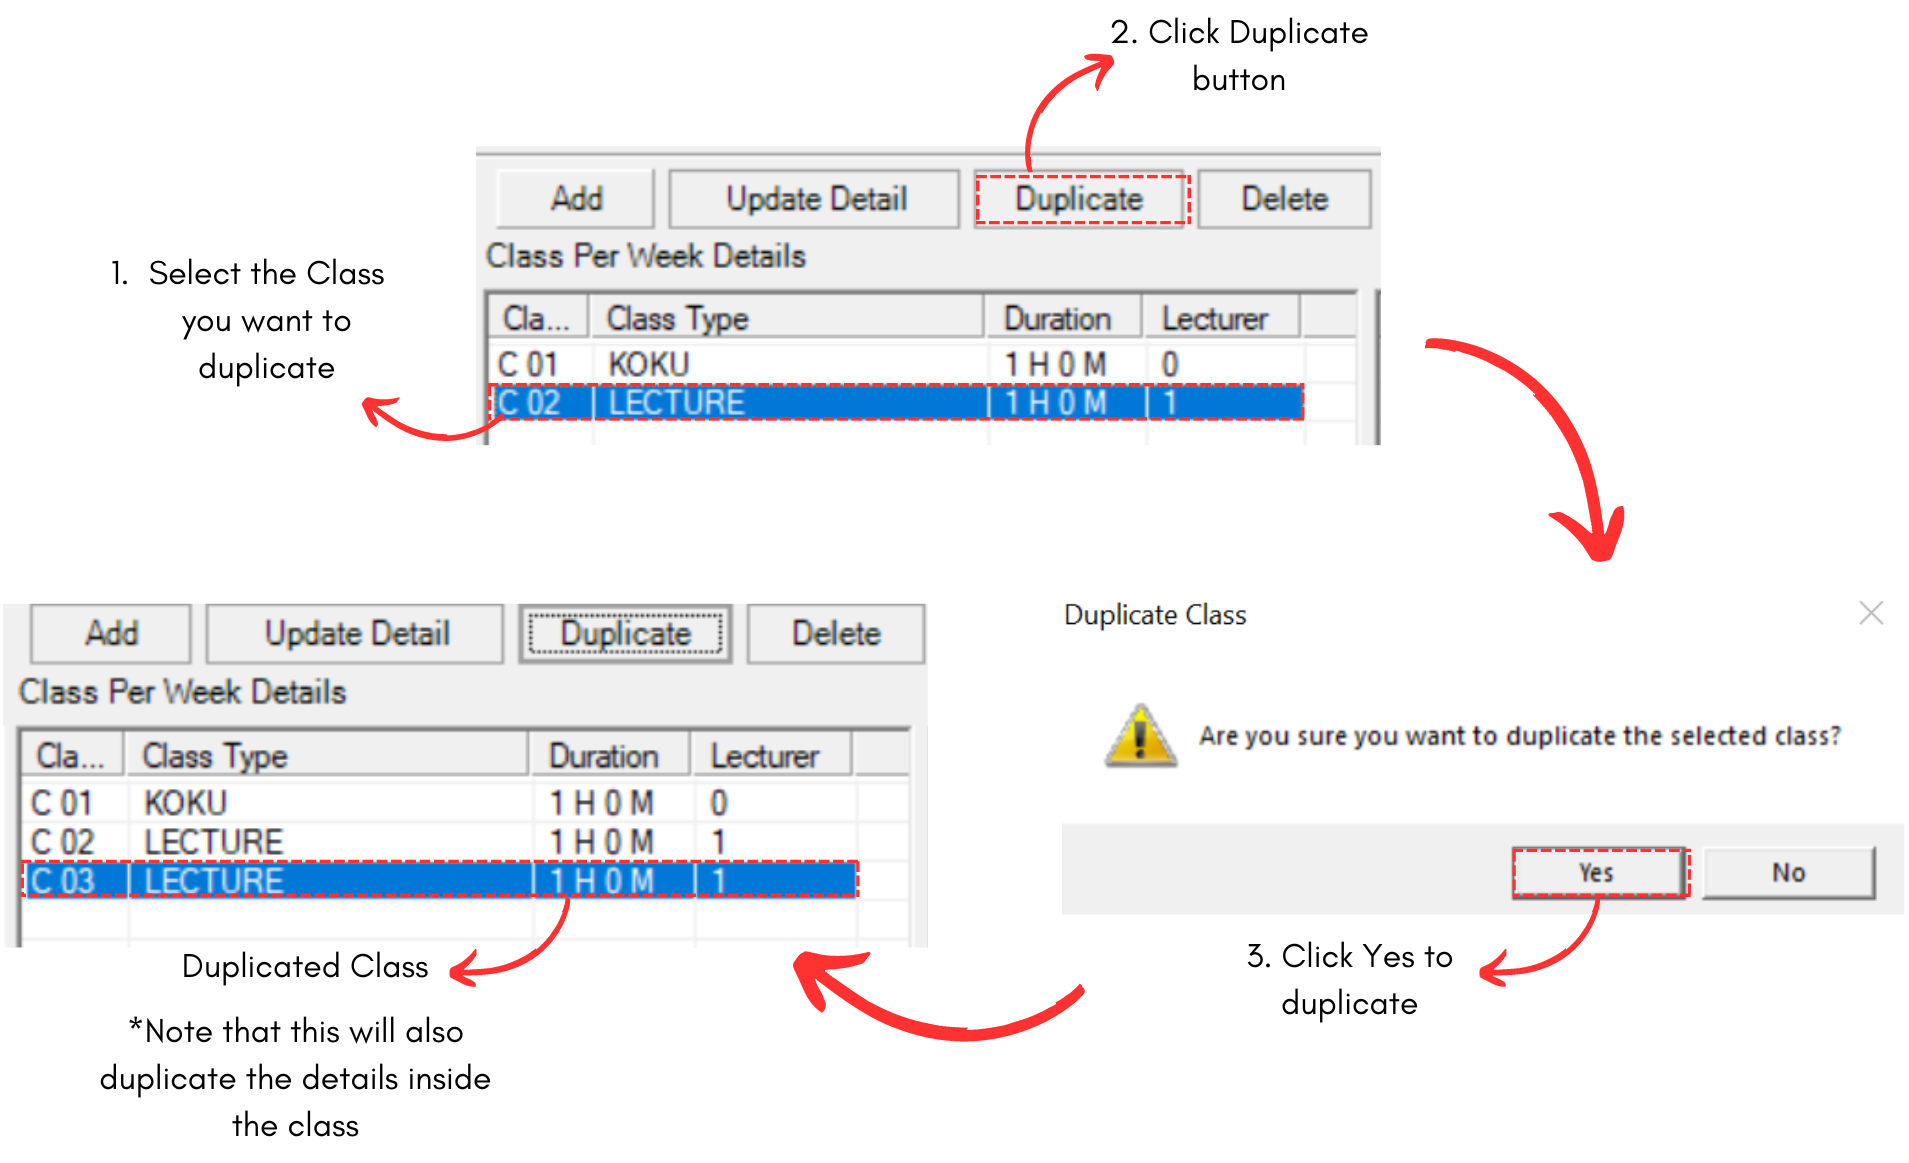
Diagram 2.1.16 Duplicated Class Under Course
2.2. Multi Lecturer/Team Teaching
To do Multi Lecturer or Team Teaching, there are 6 simple steps.
STEPS 1: Select on the class that you want to add Multi Lecturer.
STEPS 2: Click on Update Details.
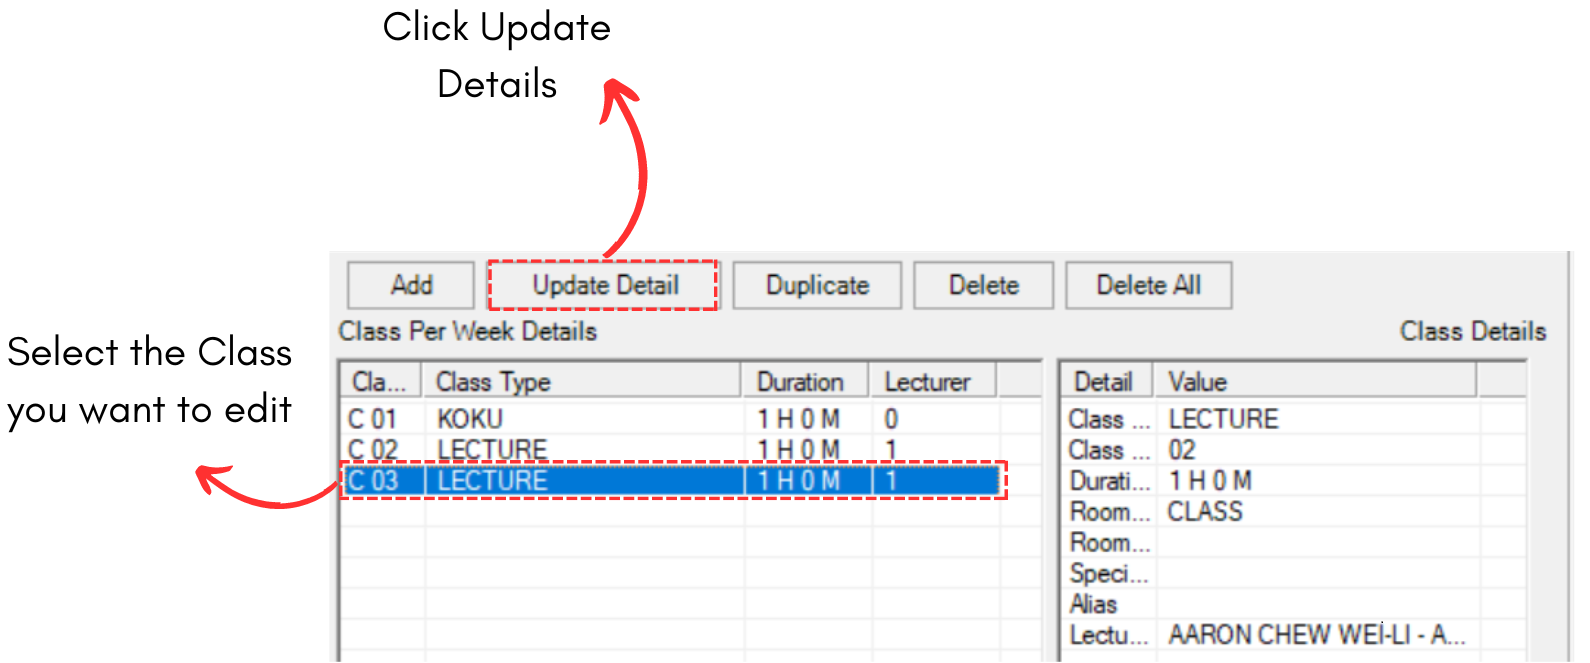
Diagram 2.2.1 Location of Update Details button
STEPS 3: Click on Add icons to add lecturer.
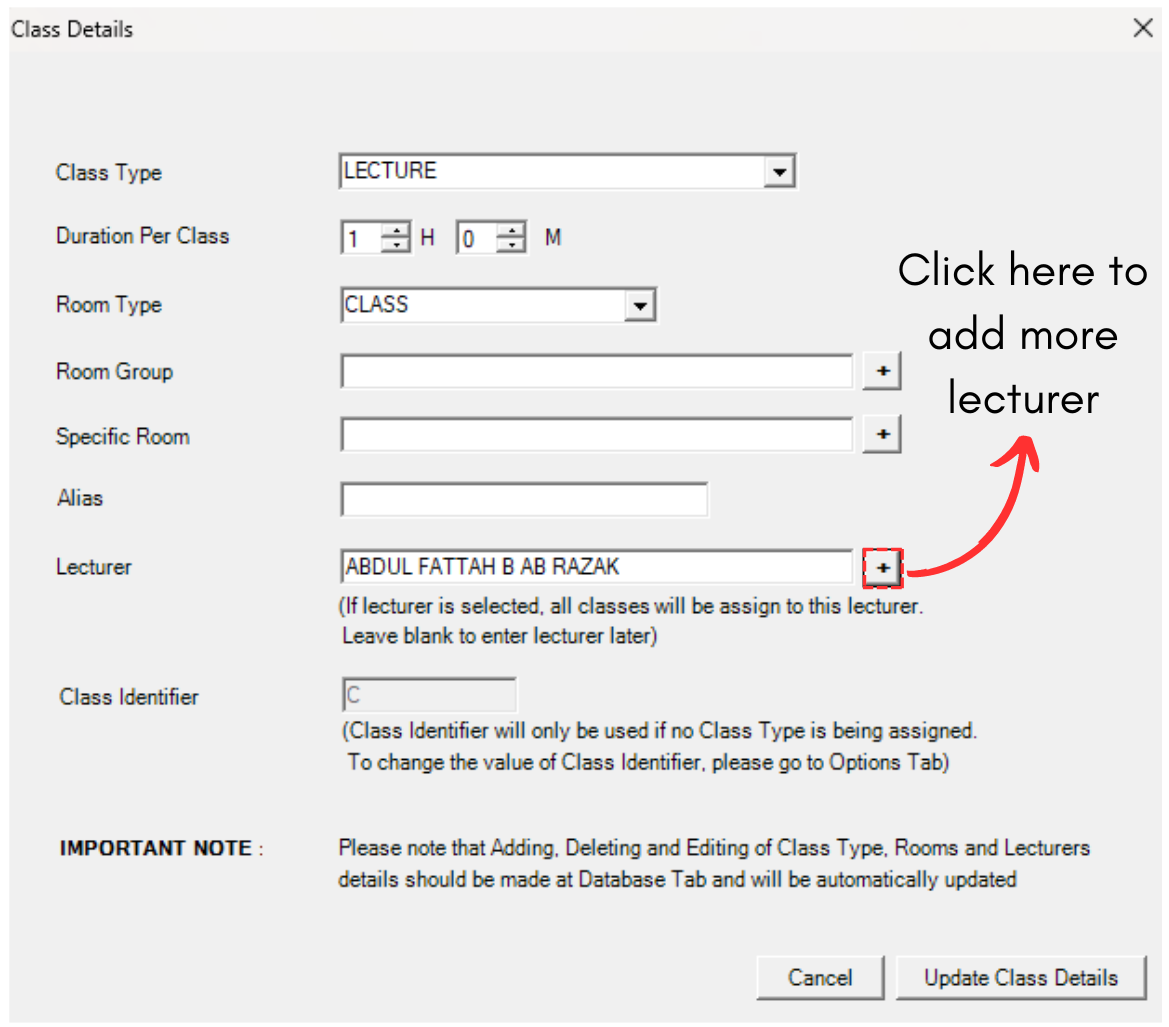
Diagram 2.2.2 Add Lecturer Icon
STEPS 4: You may select more lecturer to bring to the right side.
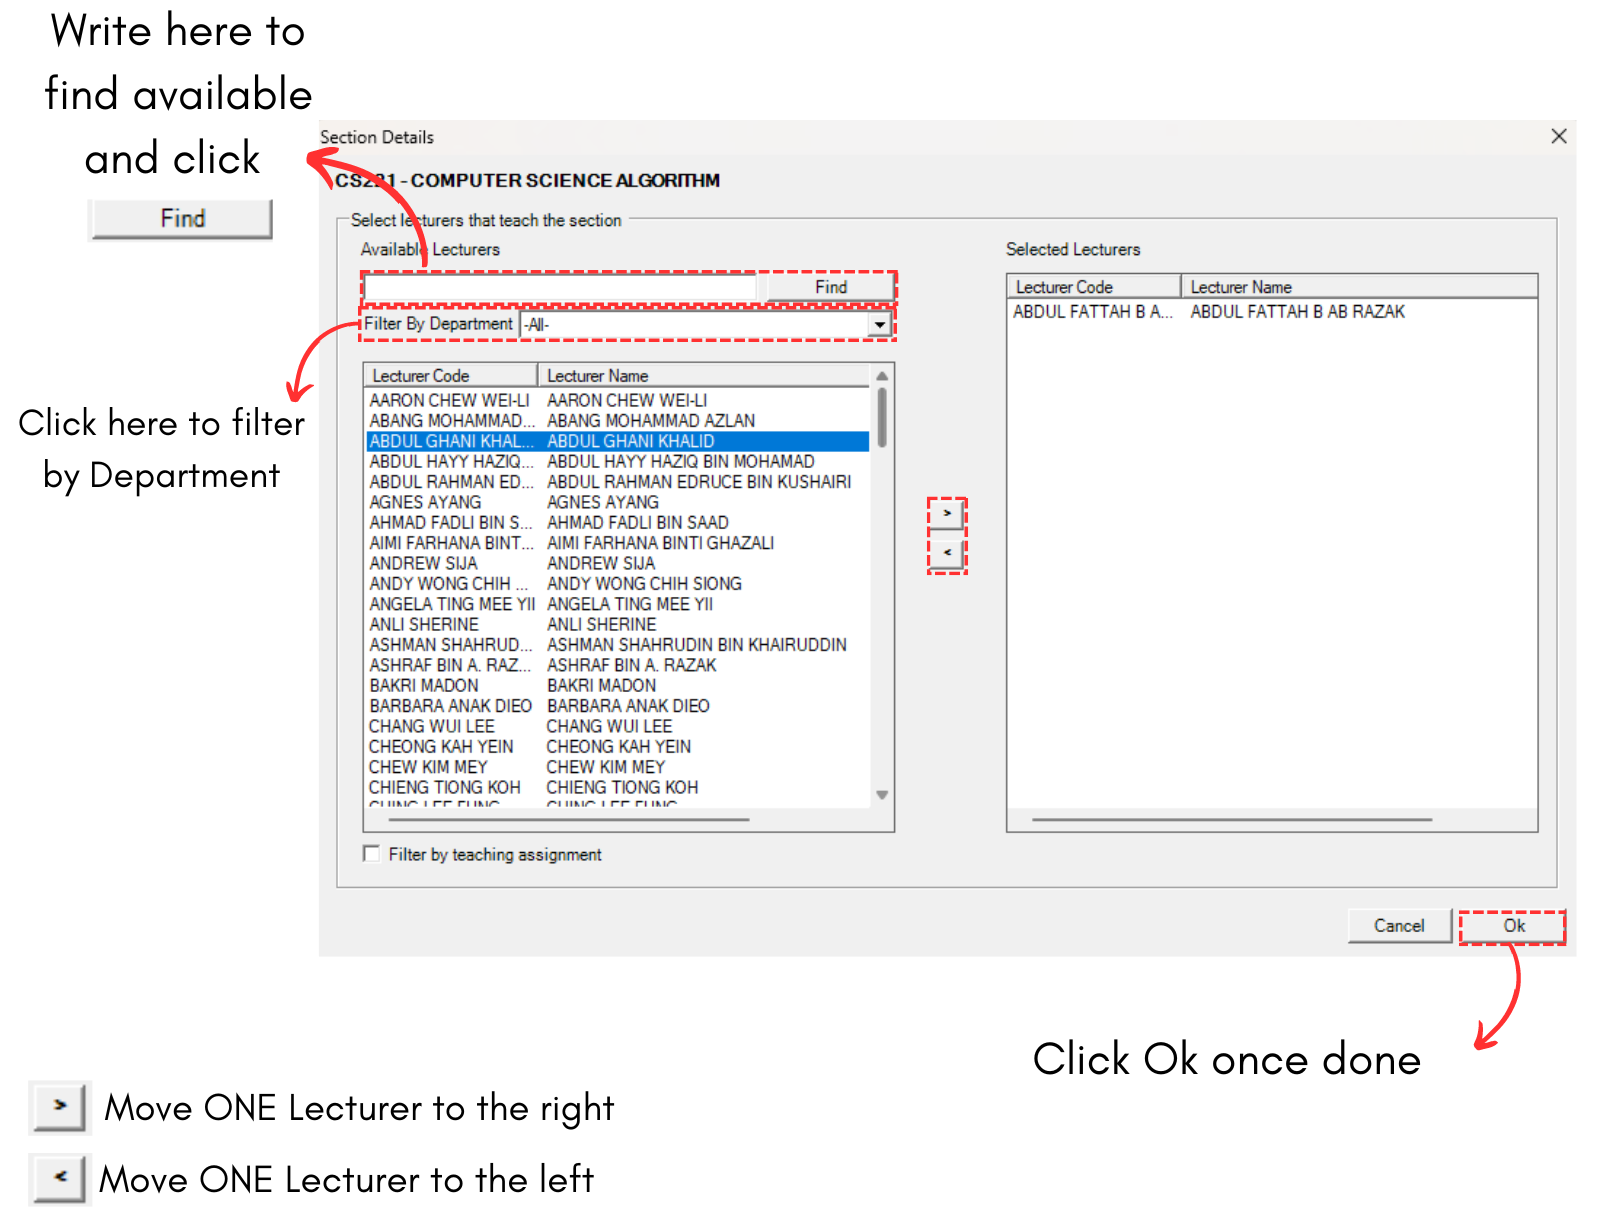
Diagram 2.2.3 Lecturer Popup
Below is the example of multiple lecturers selected.
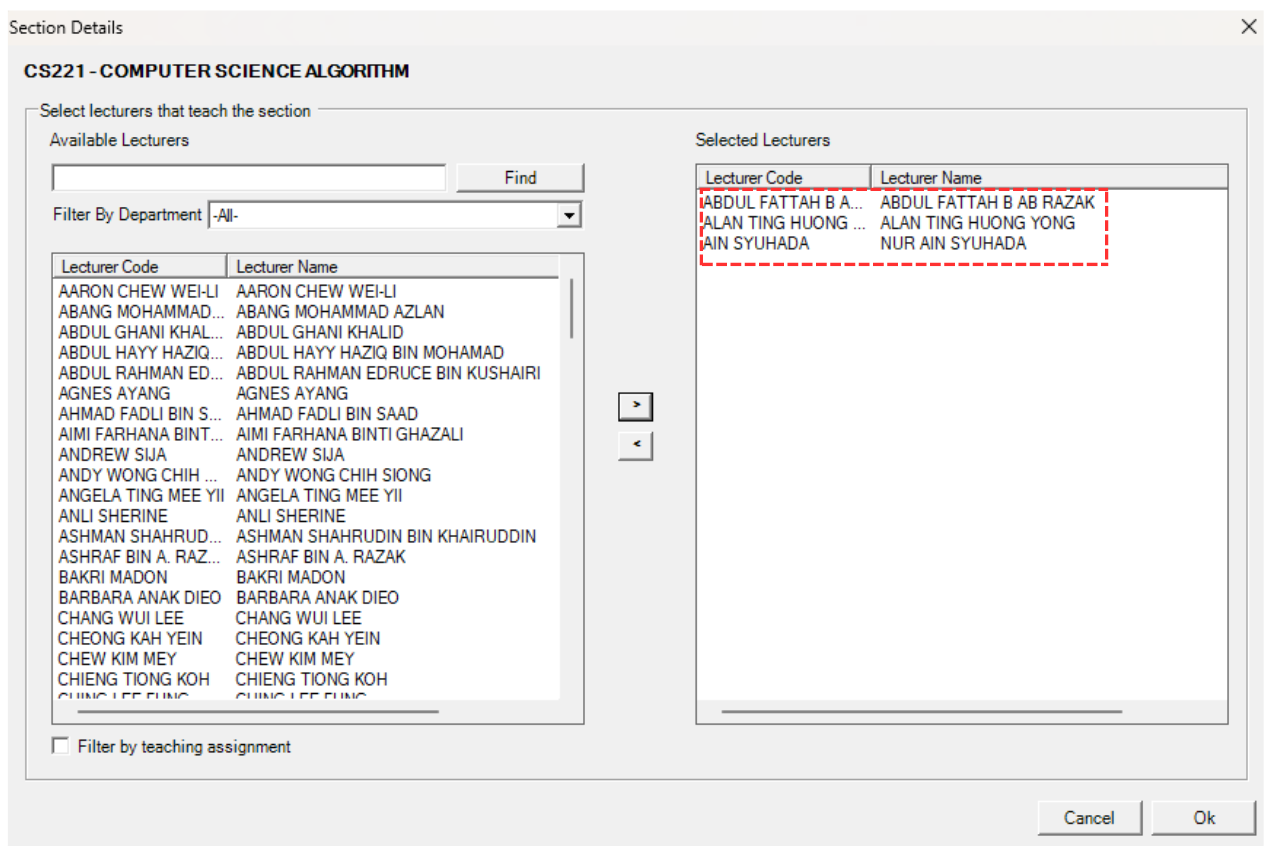
Diagram 2.2.4 Added in Lecturer Popup
STEPS 5: Click Ok.
STEPS 6: Click Update Class Details.

Diagram 2.2.5 Click Update Class Details
This is how it will looks like when there are multiple lecturers in the class.

Diagram 2.2.6 Multi Lecturers in the Class
2.3. Batches
To add Batches, you may simply go to Batches that is located next to Group and Classes Per Week.
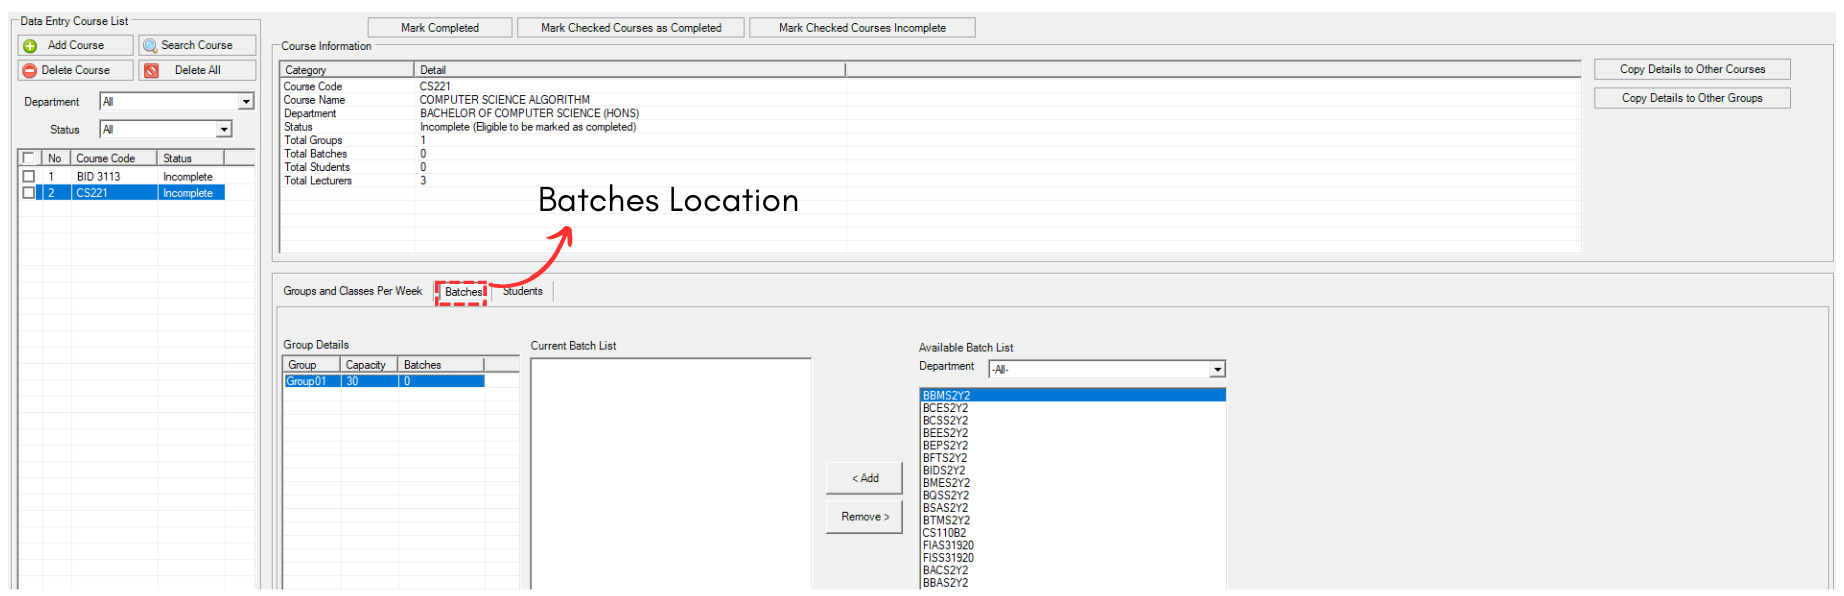
Diagram 2.3.1 Location of Batches
To add batches, refer to the diagram below.
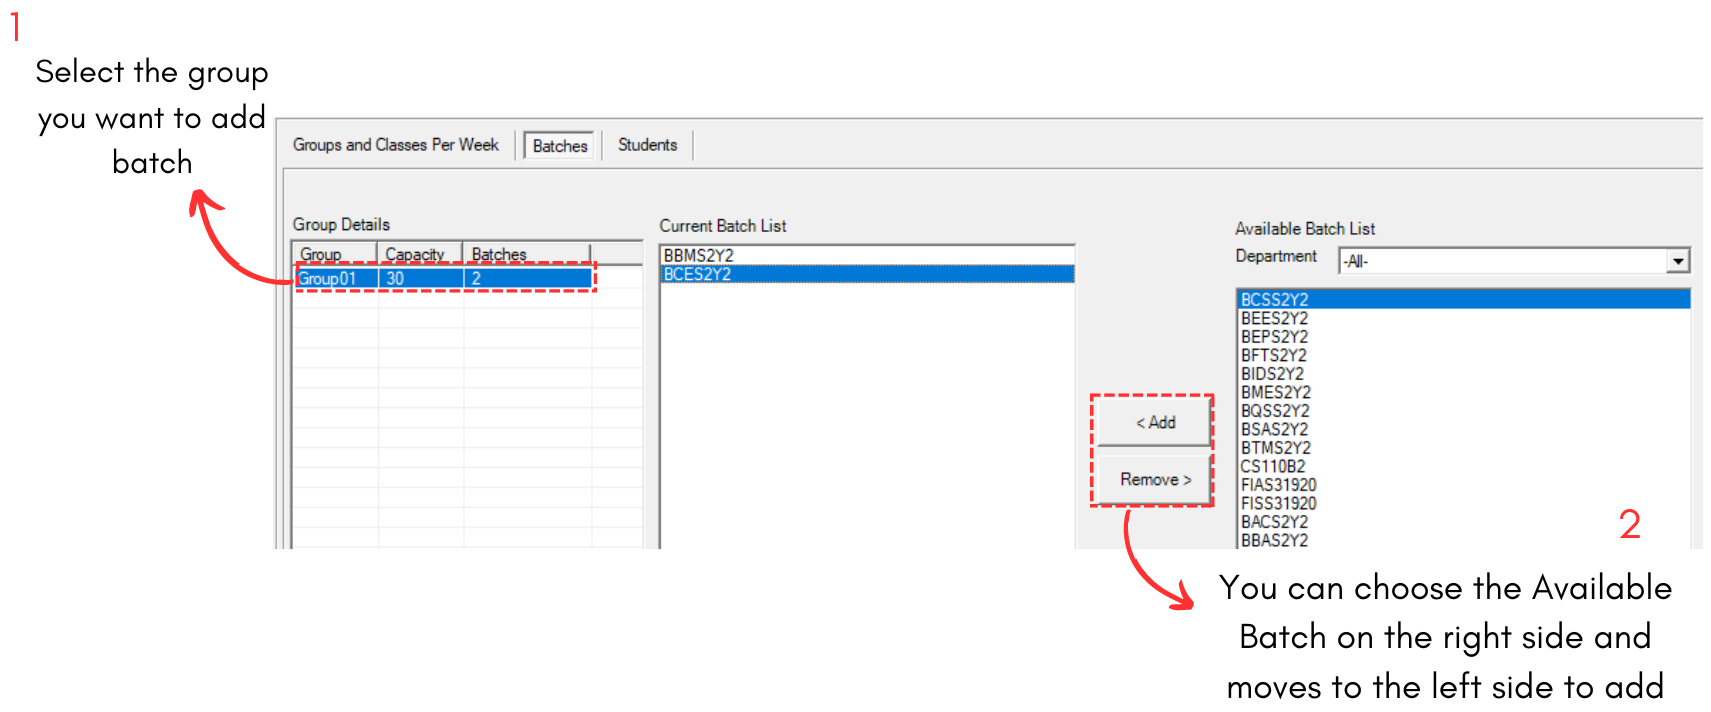
Diagram 2.3.2 Add Batch