Stage 5: Generate & Manual Allocation
| Site: | Timetable Plus |
| Course: | Timetable Plus Spring |
| Book: | Stage 5: Generate & Manual Allocation |
| Printed by: | Guest user |
| Date: | Sunday, 3 May 2026, 1:23 AM |
1. Before Auto Generate
Before using the Auto Generate function, there are few things user to remember Before Generate- Icons
- Generate Constraint at Group folder (at Tree).
- Constraint Options.
- Exclude Sections that Do Not want to be Generated. Include Sections that want to be Generated first. This is for those who practice Priority Generate/Slot in.
- Double Check Section Status.
- Exclude Slots at Timetable Output.
1.1. Exclude All Section
Exclude All Sections. The easiest way is to go to Timetable Menu and Click Include/Exclude Sections and then Exclude All Section.
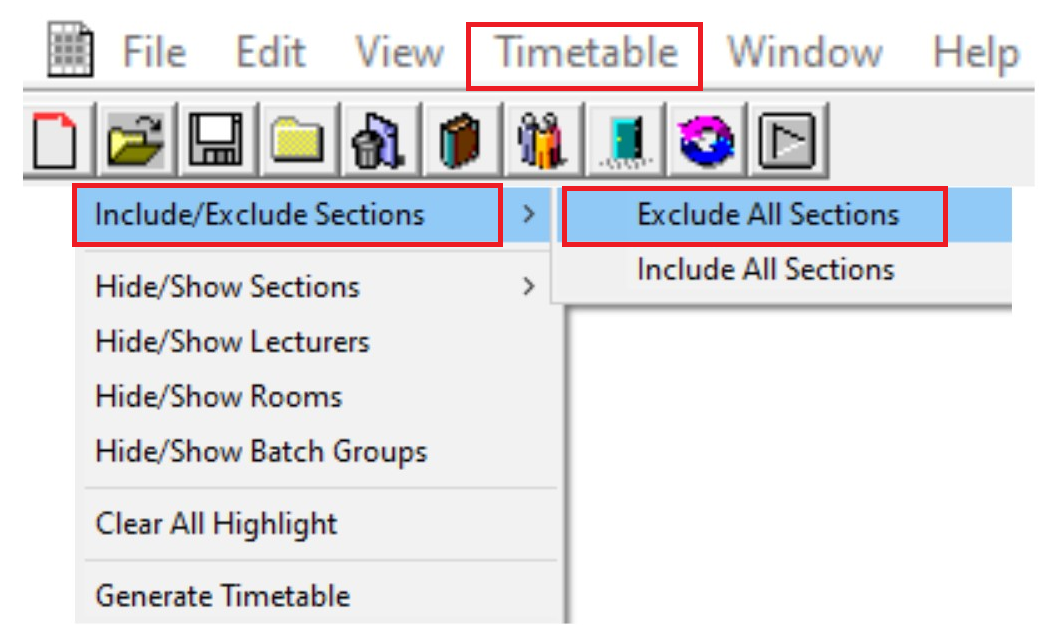
Diagram 1.2.1: Exclude All Section
Note:
- Include Sections has Black Colour font and Ready to be slotted in the Timetable
- Exclude Sections has Blurry font and will not be slotted into the Timetable
This is how it will looks like at tree before and after you Exclude All Sections
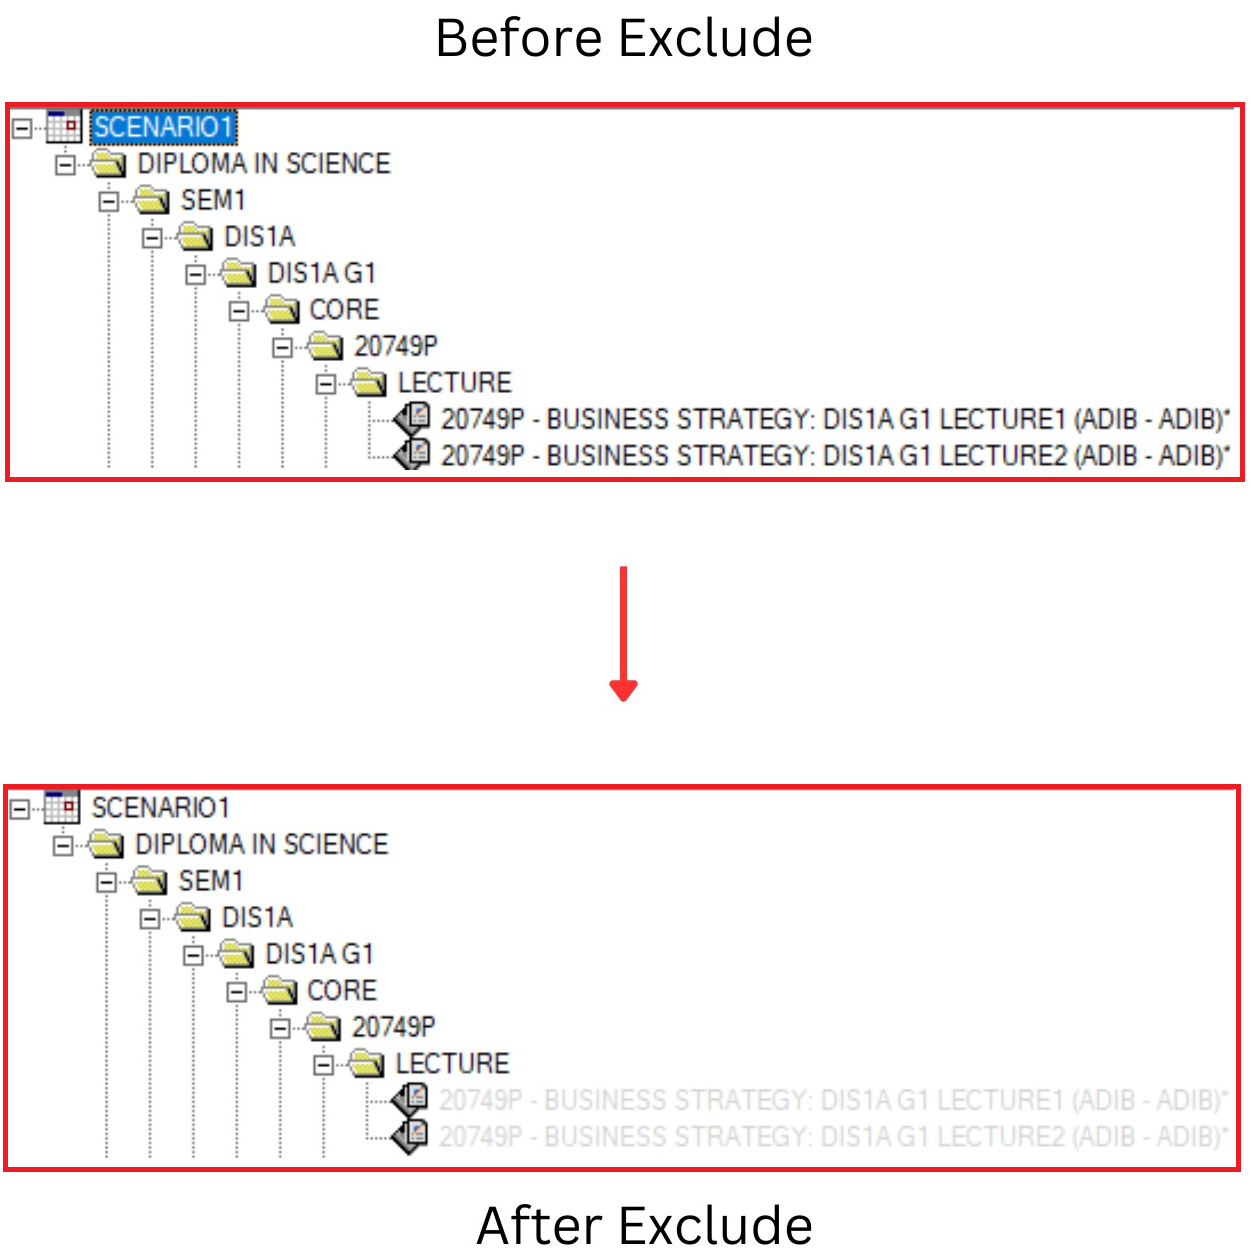
Diagram 1.2.2 : Before and After Exclude Looks at Tree Structure
By default, all the sections is Included
and can be seen Black Colour or at the
Course Status stated “Not Assigned”.
This is how it will looks like at Course status before and after exclude all sections.
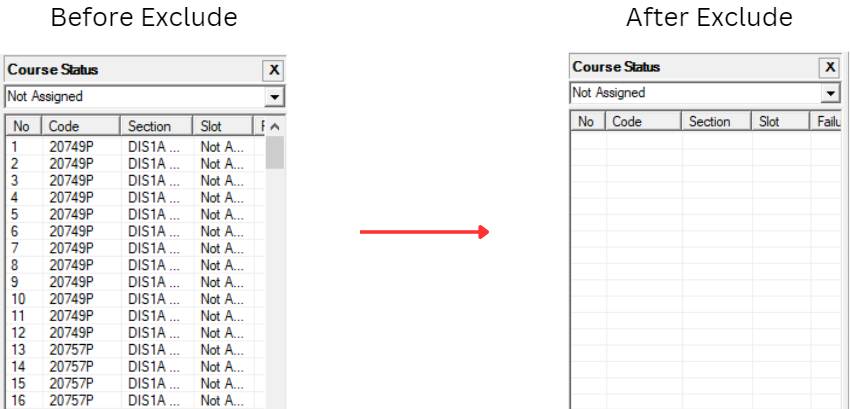
Diagram 1.2.3 : Before and After Exclude Looks at "Not Assigned" Status
User can also double check at Course
Status that no Section is being Excluded
by changing the Status ”Not Assigned” to
“ Excluded Sections”.
If there is no Section at the “Excluded
Section” Status, it means that all Sections
have been Included.
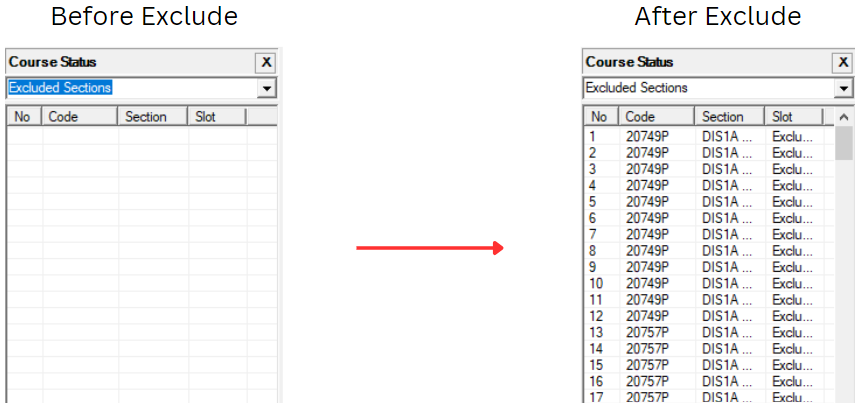
Diagram 1.2.3: Before and After Exclude Looks at "Exclude Section" Status
1.2. Include the Section
User can also use the Include Section function to do Prioritized
Generate Process. Choose either to Include Sections
from Tree Structure OR Course list OR Batch Grouping OR Lecturer List
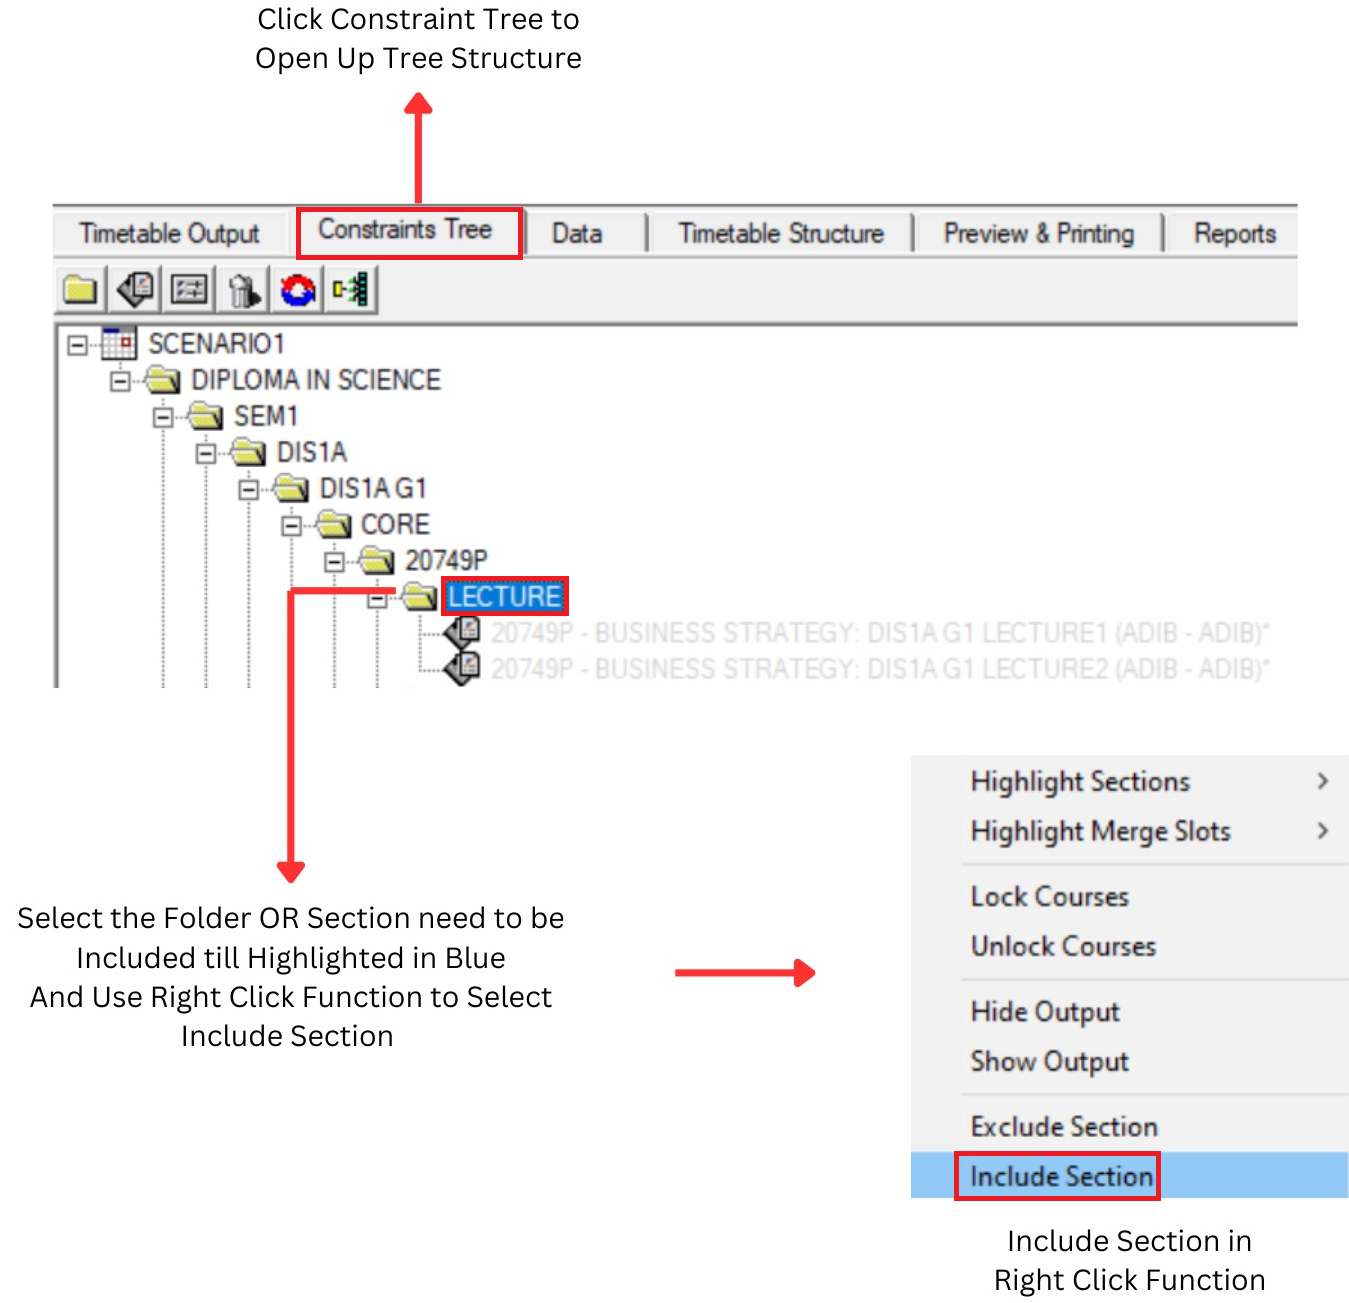
Diagram 1.3.1 : Include Section at Tree Structure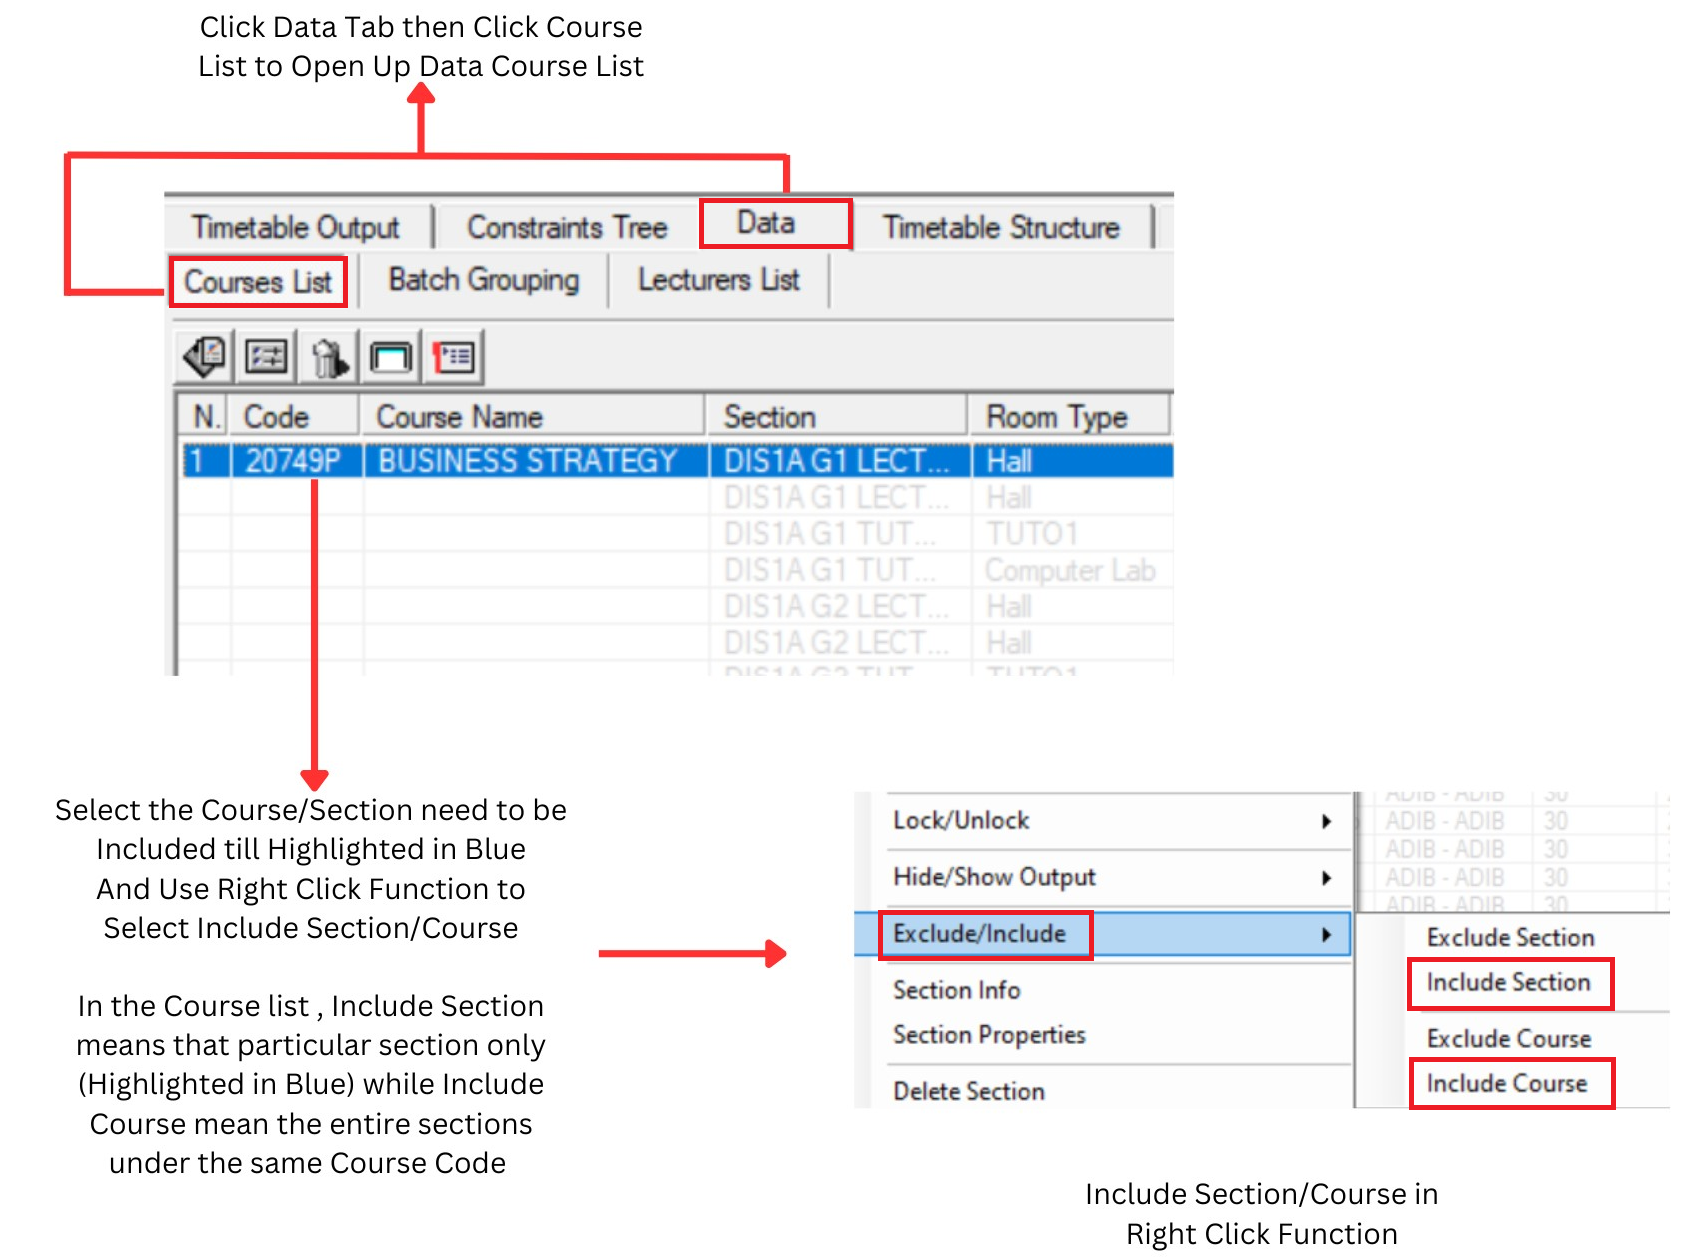
Diagram 1.3.2 : Include Section at Course List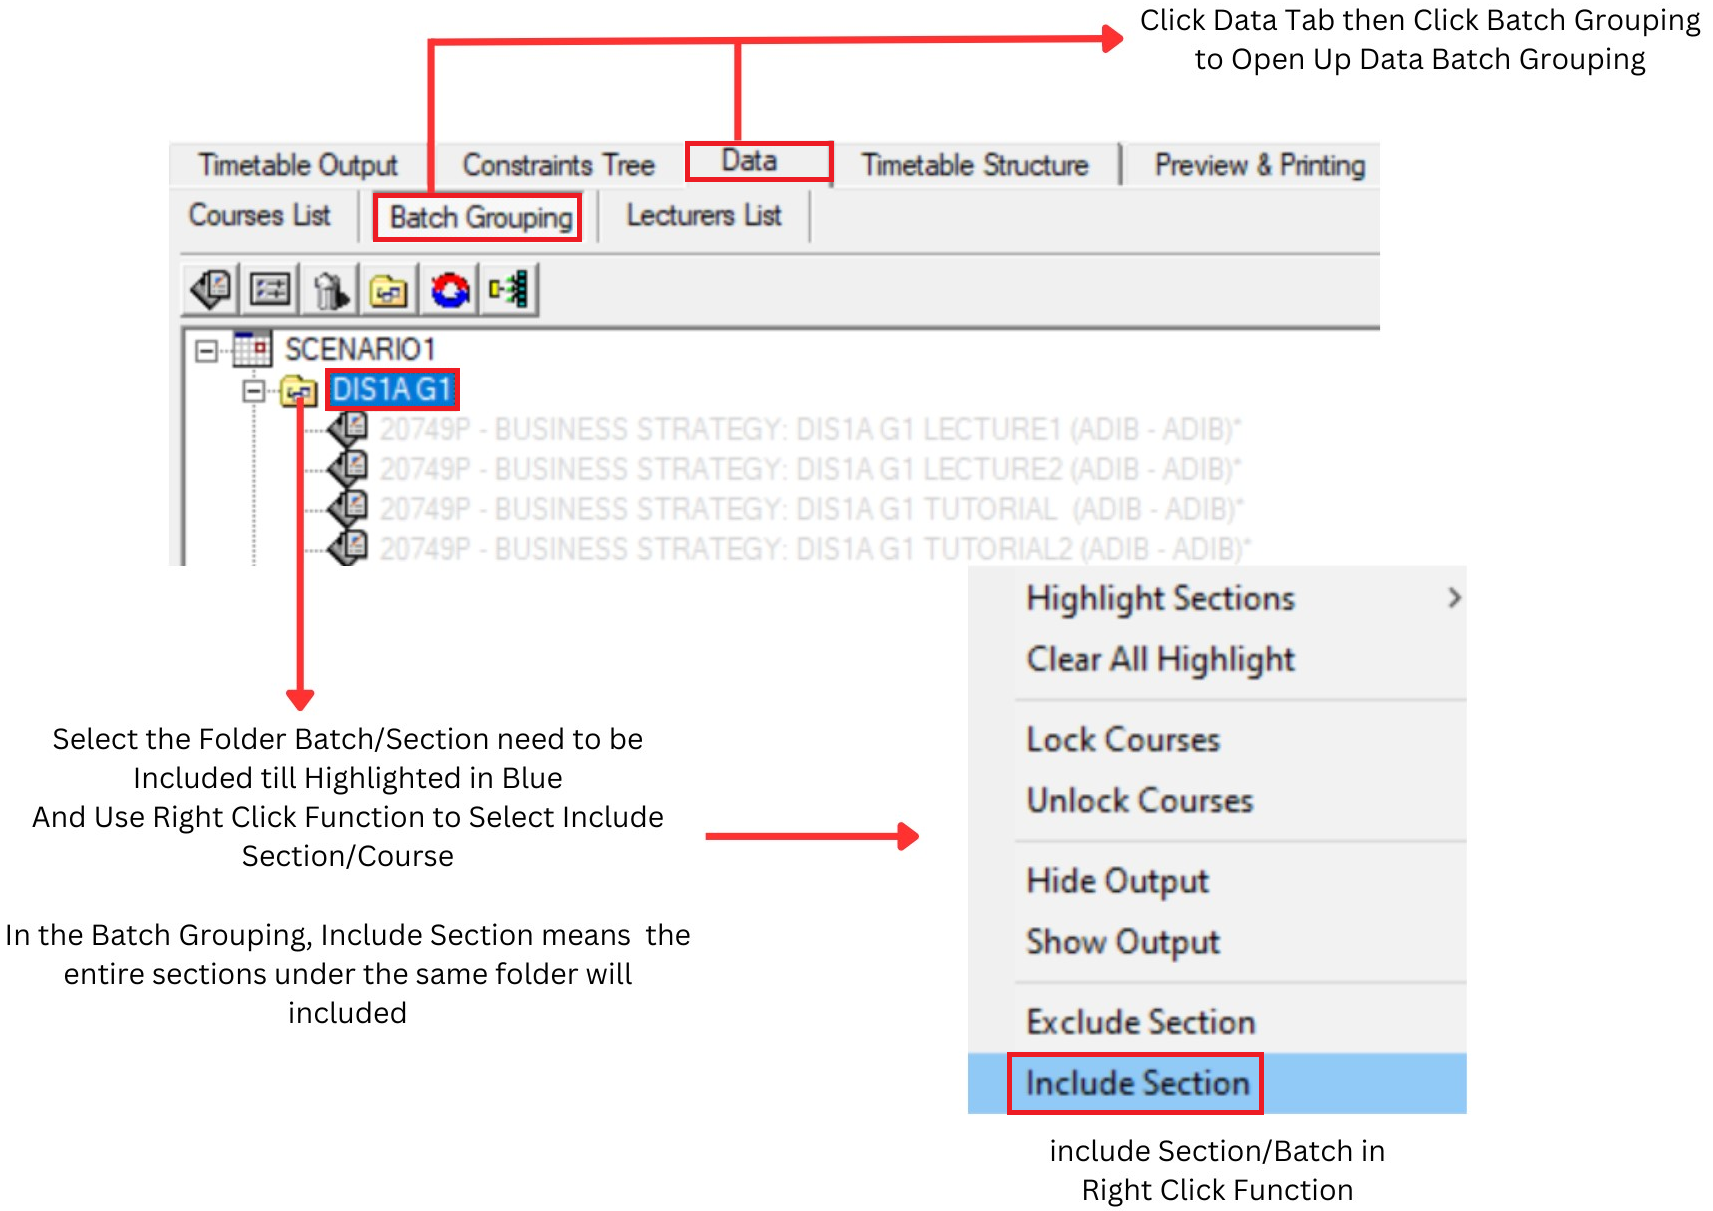
Diagram 1.3.3 : Include Section at Batch Grouping
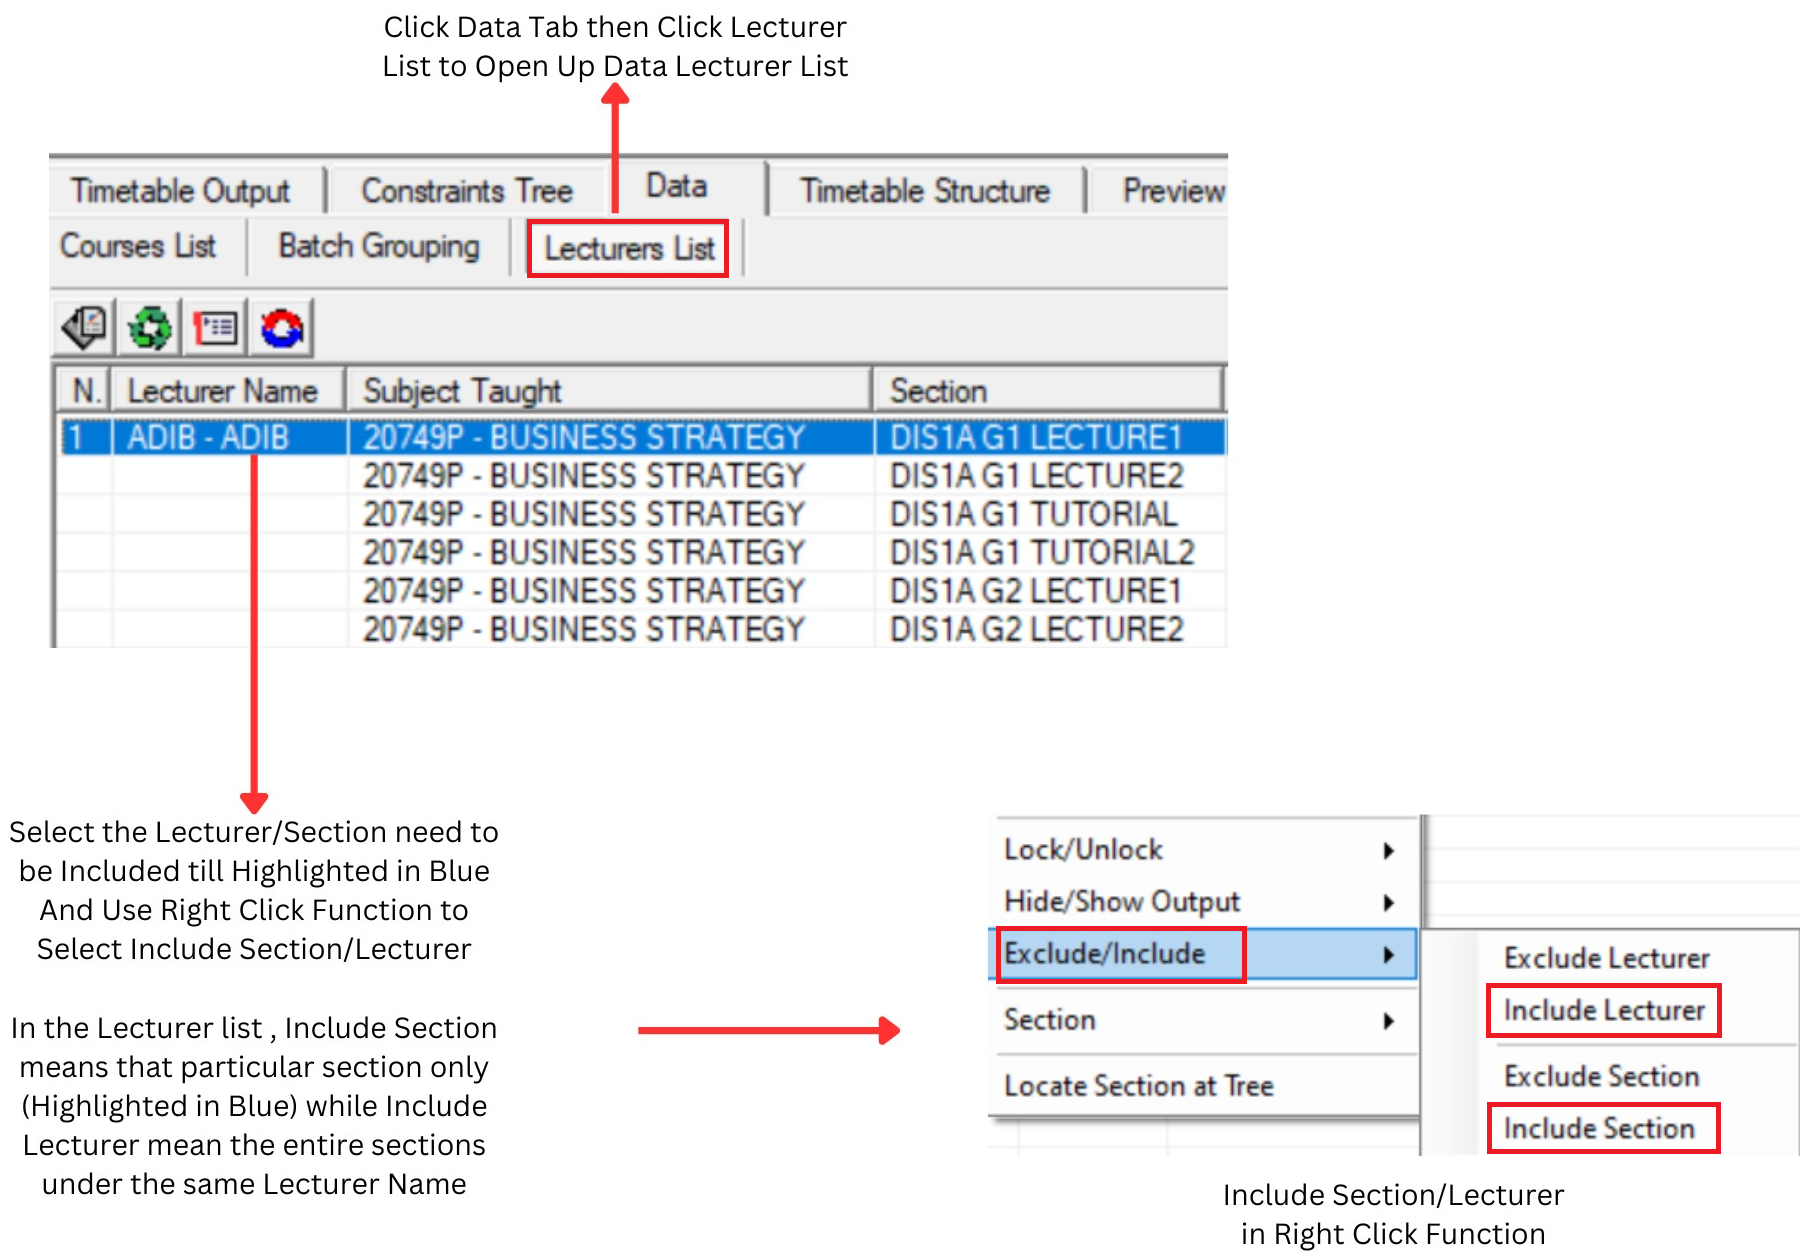
Diagram 1.3.4 : Include Section at Lecturer List1.3. Exclude Slot at Timetable Output
Before Generate, user can also determine
which slot in the timetable to be excluded
temporarily. Exclude Slots are slots that you do not want the Included Sections to be slotted in (Example: user will like to fill up all
the slots on Monday to Thursday first
while excluding all the Friday slots.
Friday slots will only be open when all
the slots from Monday to Thursday have
been filled up).. Excluded slots will be highlighted in Black colour. You can exclude just ONE SLOT (EXCLUDE IN THE SLOT), Room, Day and Time.
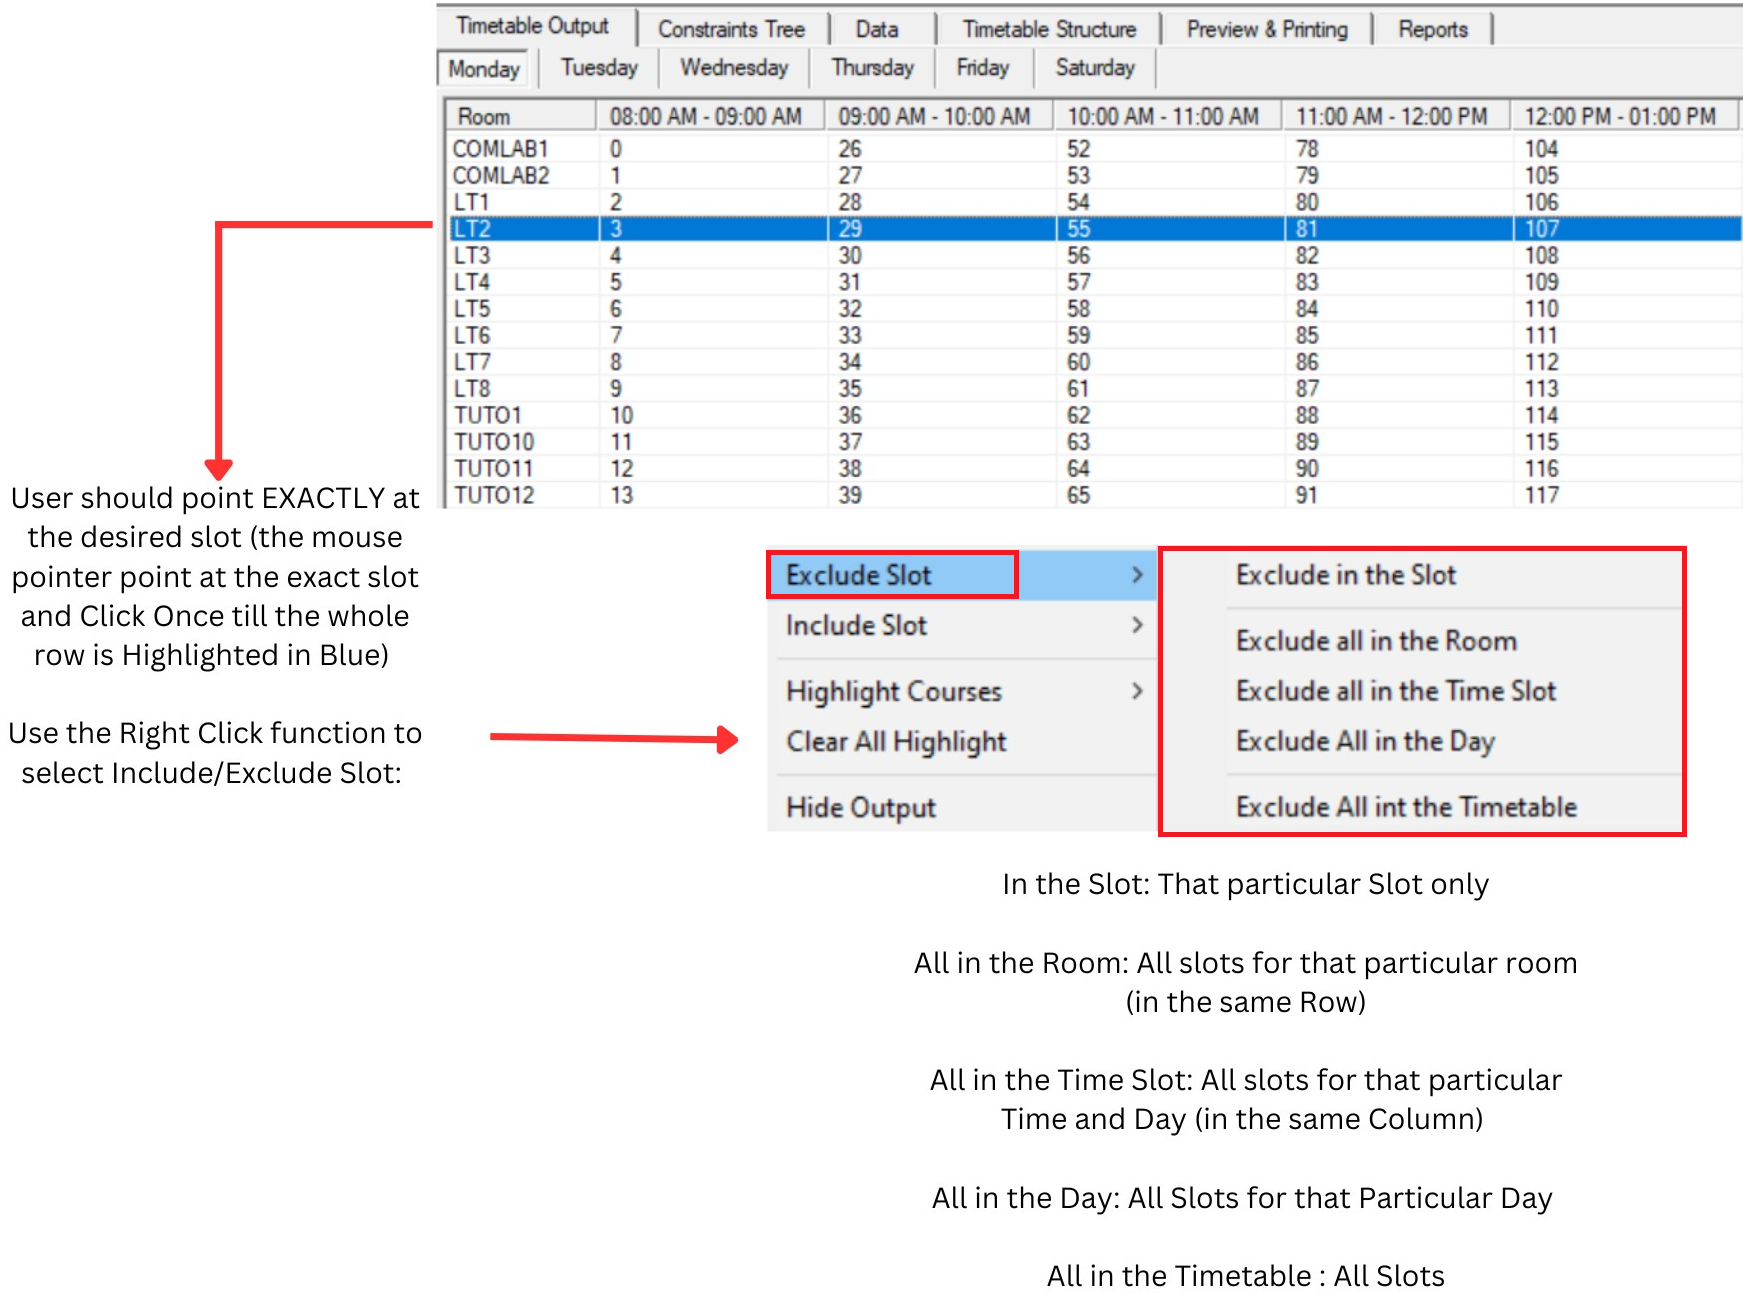
Diagram 1.4.1 : Exclude Slot at Timetable Output
2. Auto Generate
Once all constraints have been set and Double Checking has been completed, you can use the Auto Generate function to Auto Assign the Included Sections (shown at "Not Assigned" at Course Status).
There 2 ways to Generate Timetable :
1. Click on General Timetable Icon![]()

Diagram 2.1: Location of Generate Time table Icon
2.Click the Timetable at menu bar then Click Generate Timetable
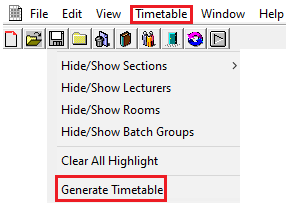
Diagram 2.2: Location of Generate Timetable in the file drop down menu

Generate Schedule Window will appear afterwards.
Diagram 2.3: Generate Schedule Window
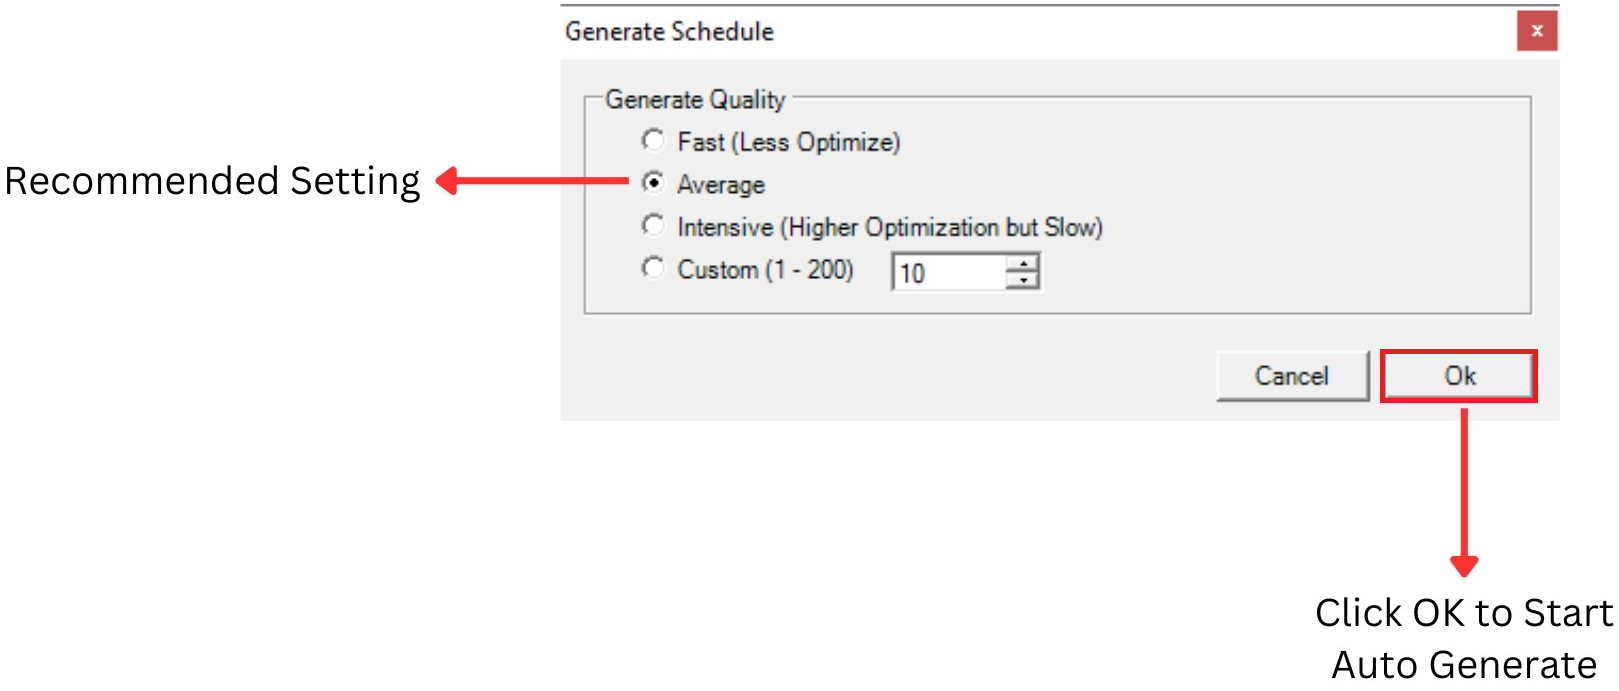
User can determine the quality of the Generate Process by setting at the Generate Schedule
Recommended Setting is at the Average
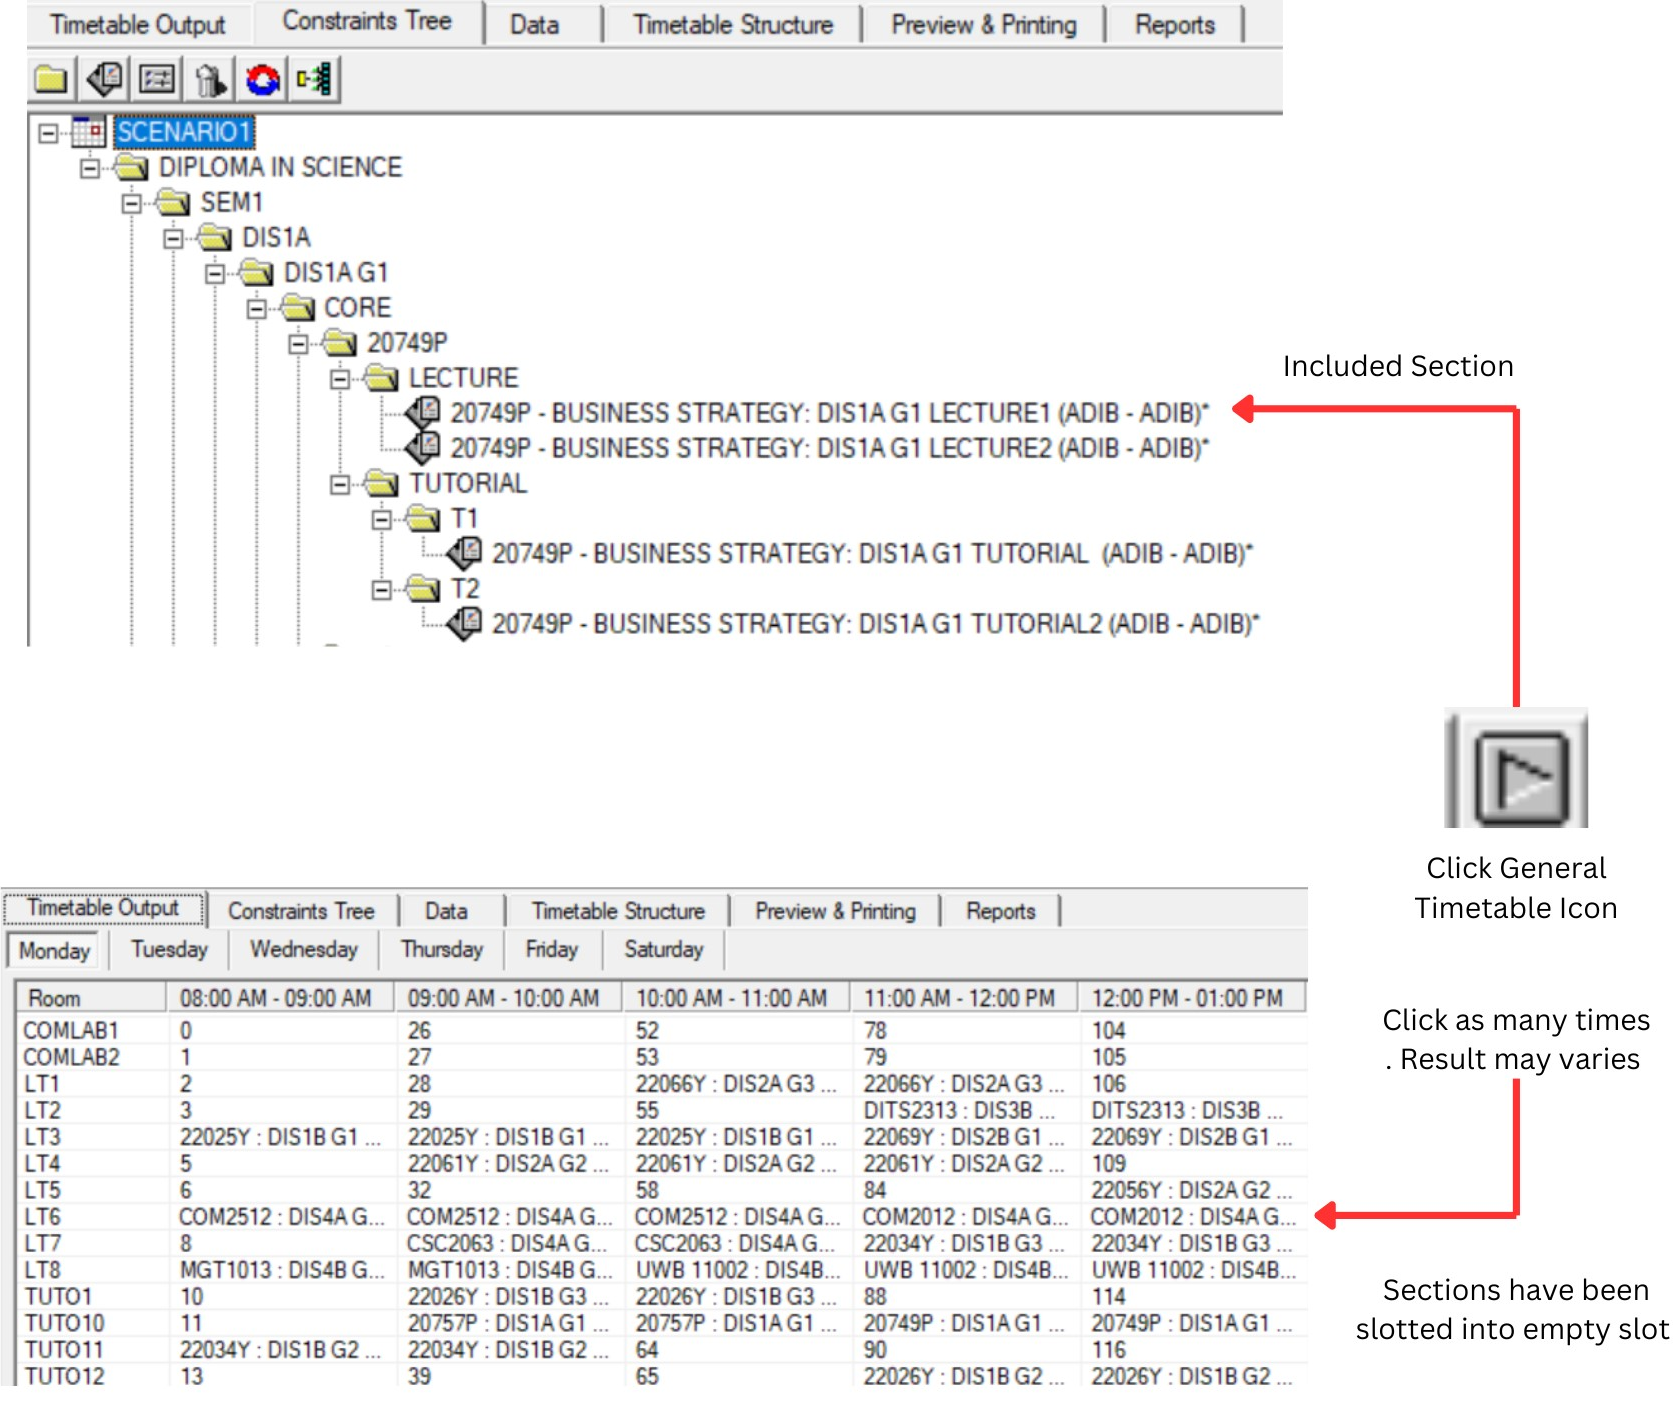
Diagram 2.4: Generate Process
3. Manual Allocation
Apart from Auto-Generate, user can manually add the section to the desired slot. Manual slot in can be done in Timetable Output. User will use this process for few reasons:
- Specific Time, Day and Room is known
- Alternative Method without using Specific Time Slot and Specific Room at the Constraint Box
- Specified request for sections and lecturer
- Total Control by the User
User can slot section/s manually into the Timetable Output by choosing the slot (Day, Time and Room) and then right click to Add Course.
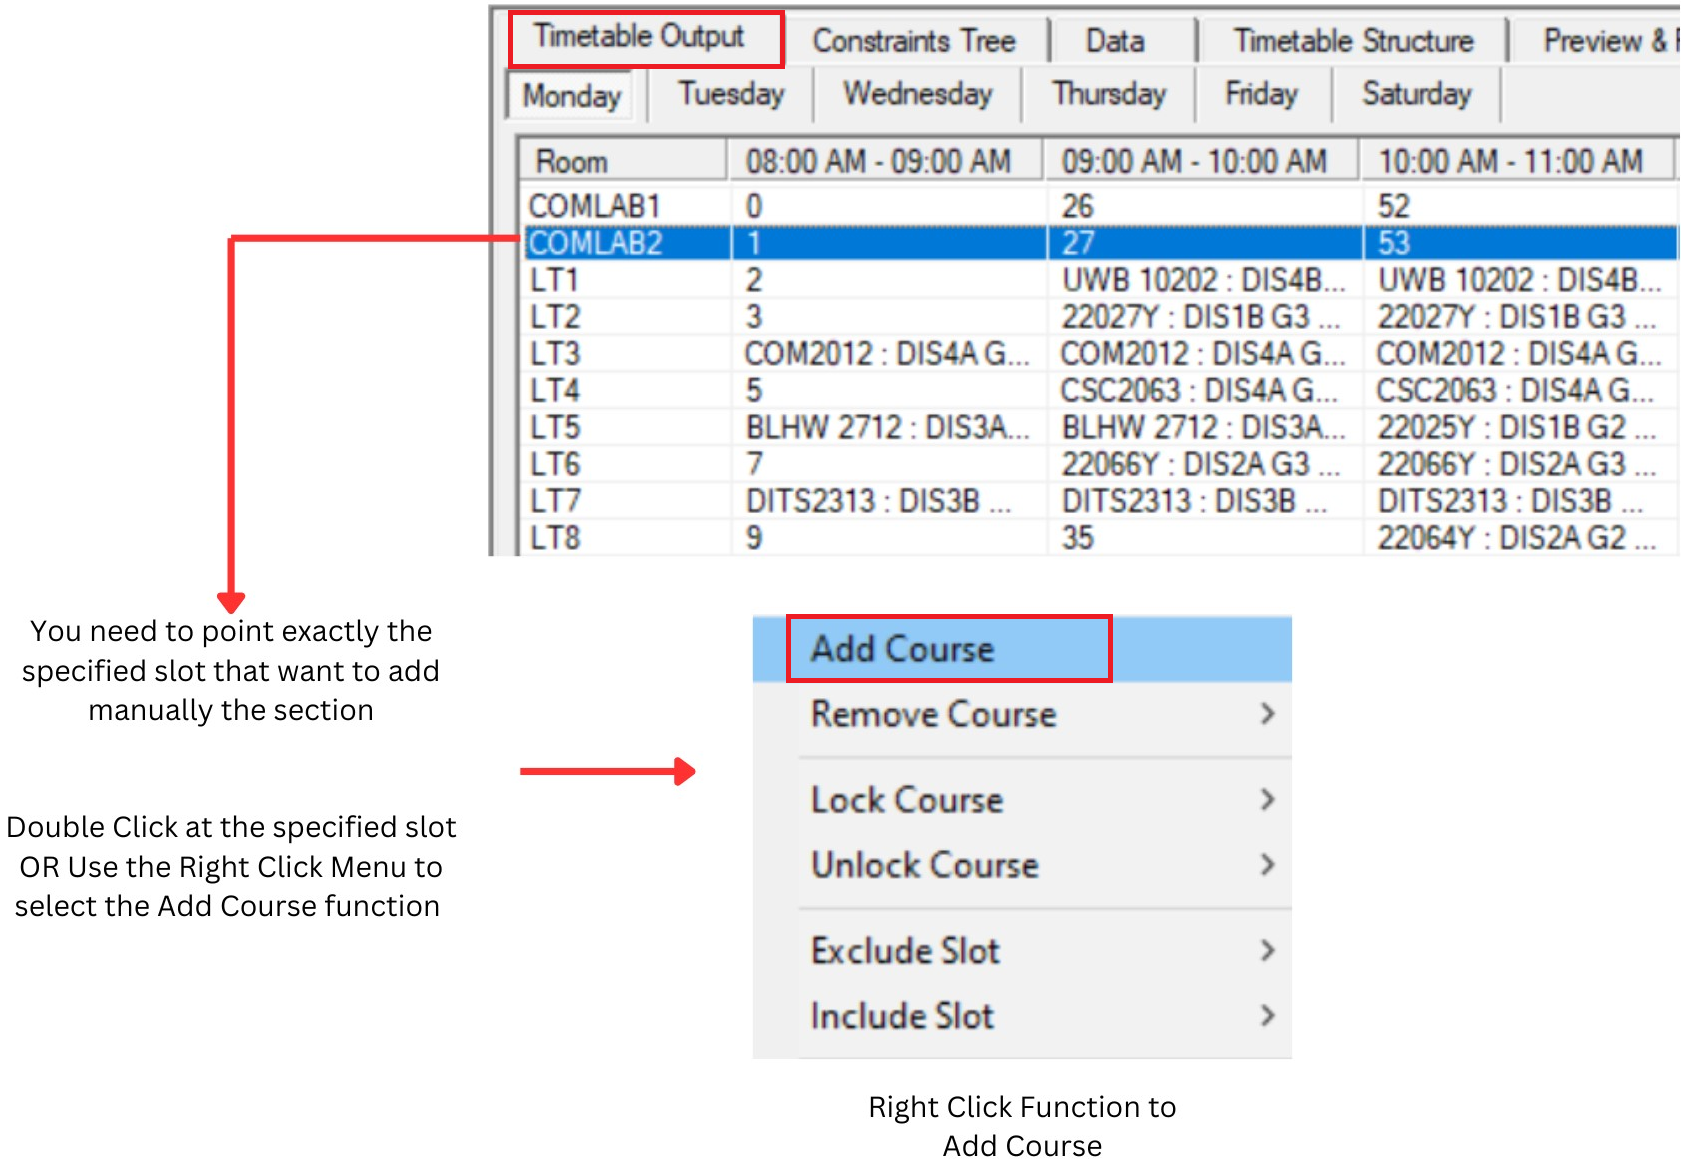
Diagram 3.1 : Add Course Manually
Add course to Slot window will appear
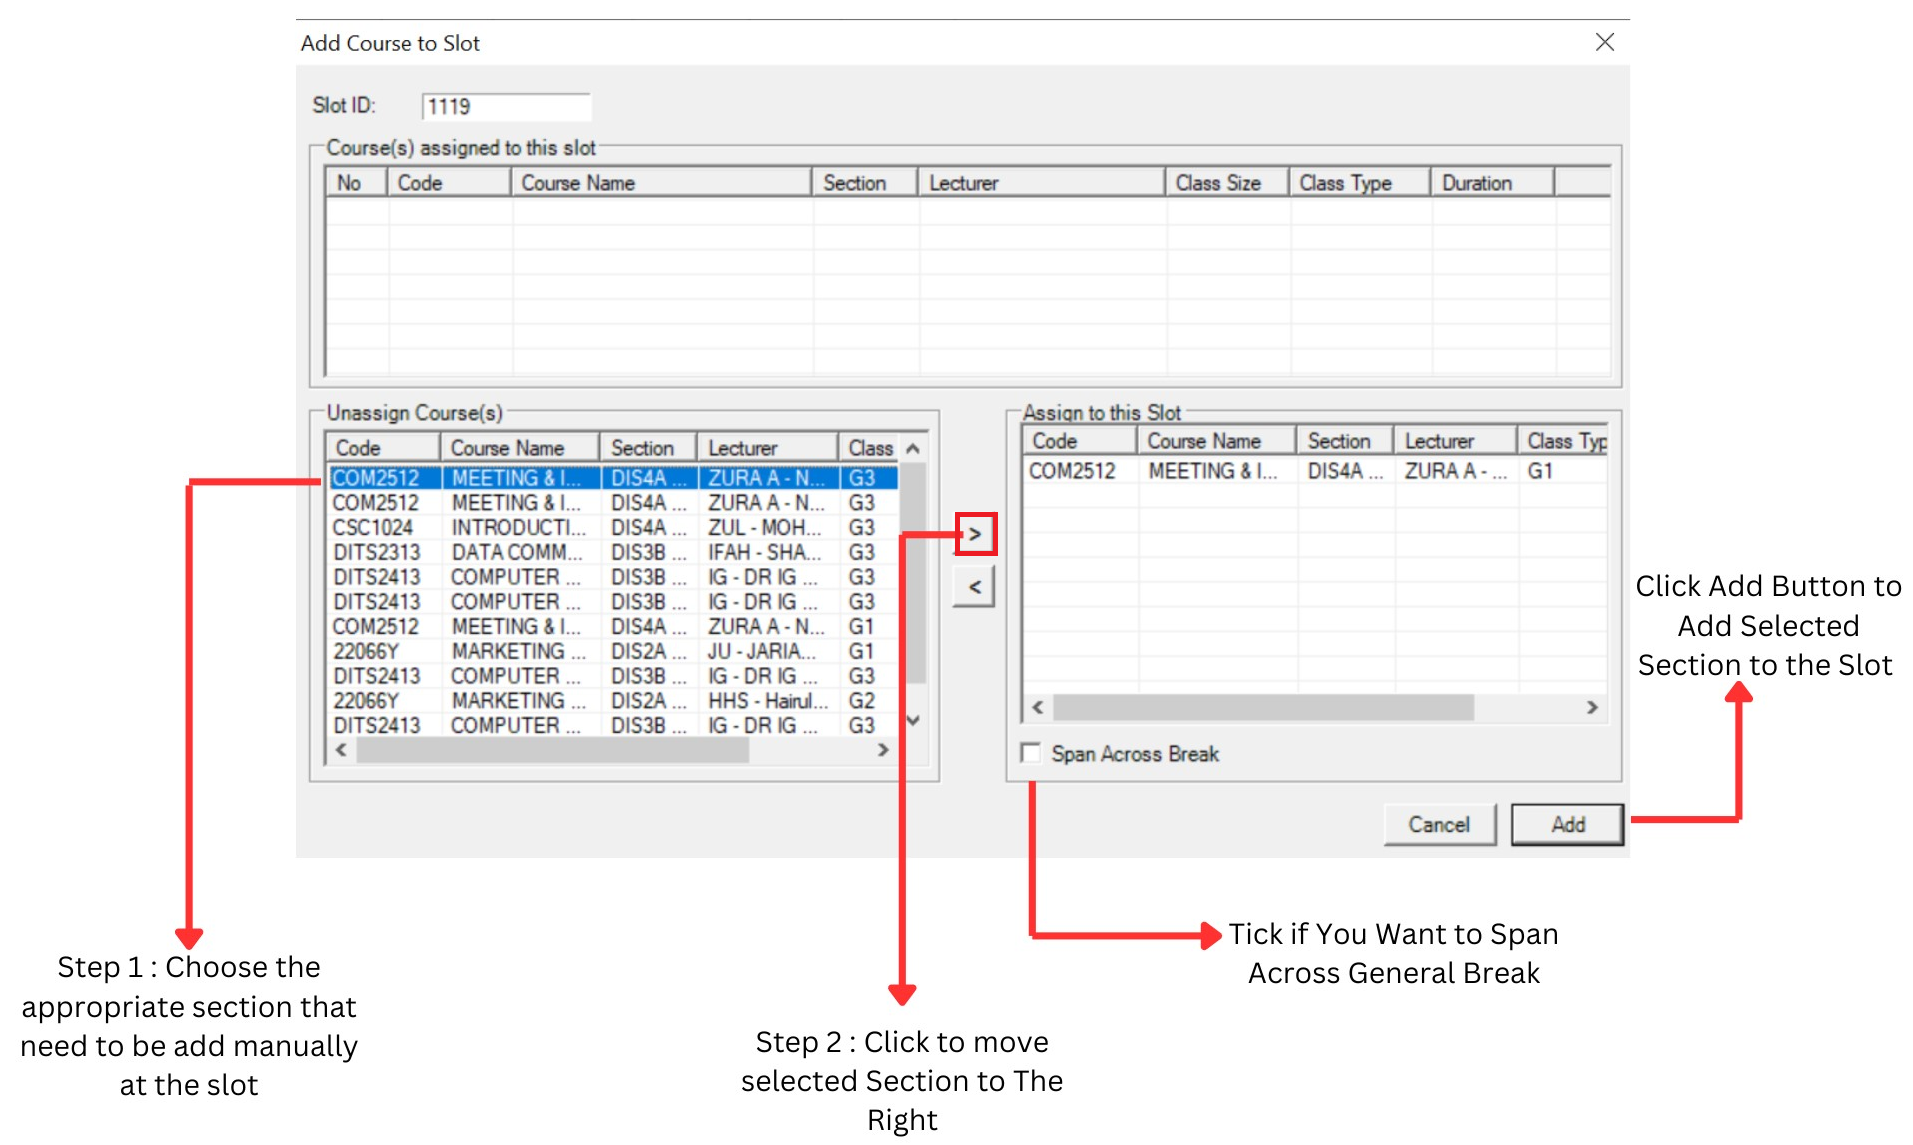
Diagram 3.2 : Step to Add Course Manually
Reminders
There are 4 main Reminders in Manual Allocation Process ;
1. Lecturer Conflict
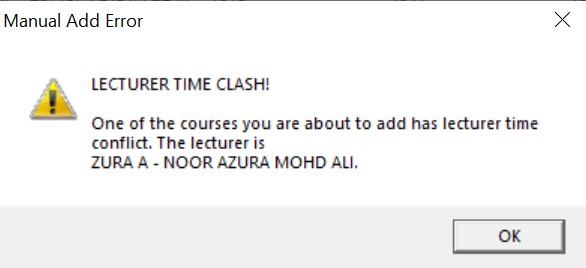
Diagram 3.3 : Lecturer Conflict
2. Same Course Group (Same Batch of Student)
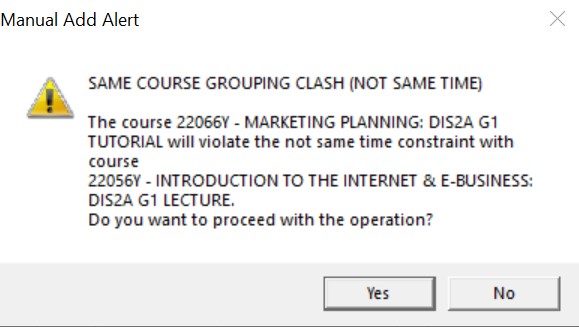
Diagram 3.4 : Same Course Grouping Clash
3. Span Across the Break Violation
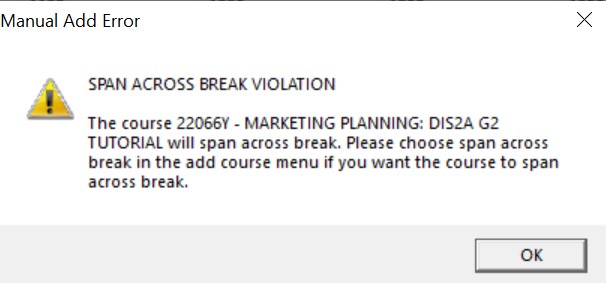
Diagram 3.5 : Span Across Break Violation
4. Auto-Lock Reminder
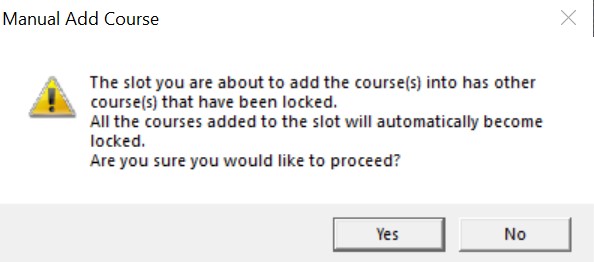
Diagram 3.6 : Auto Lock Reminder