Stage 8: Auto Generate & Manual Allocation
| Site: | Timetable Plus |
| Course: | Timetable Plus Class Infinity |
| Book: | Stage 8: Auto Generate & Manual Allocation |
| Printed by: | Guest user |
| Date: | Sunday, 31 May 2026, 5:43 AM |
1. Before Auto Generate
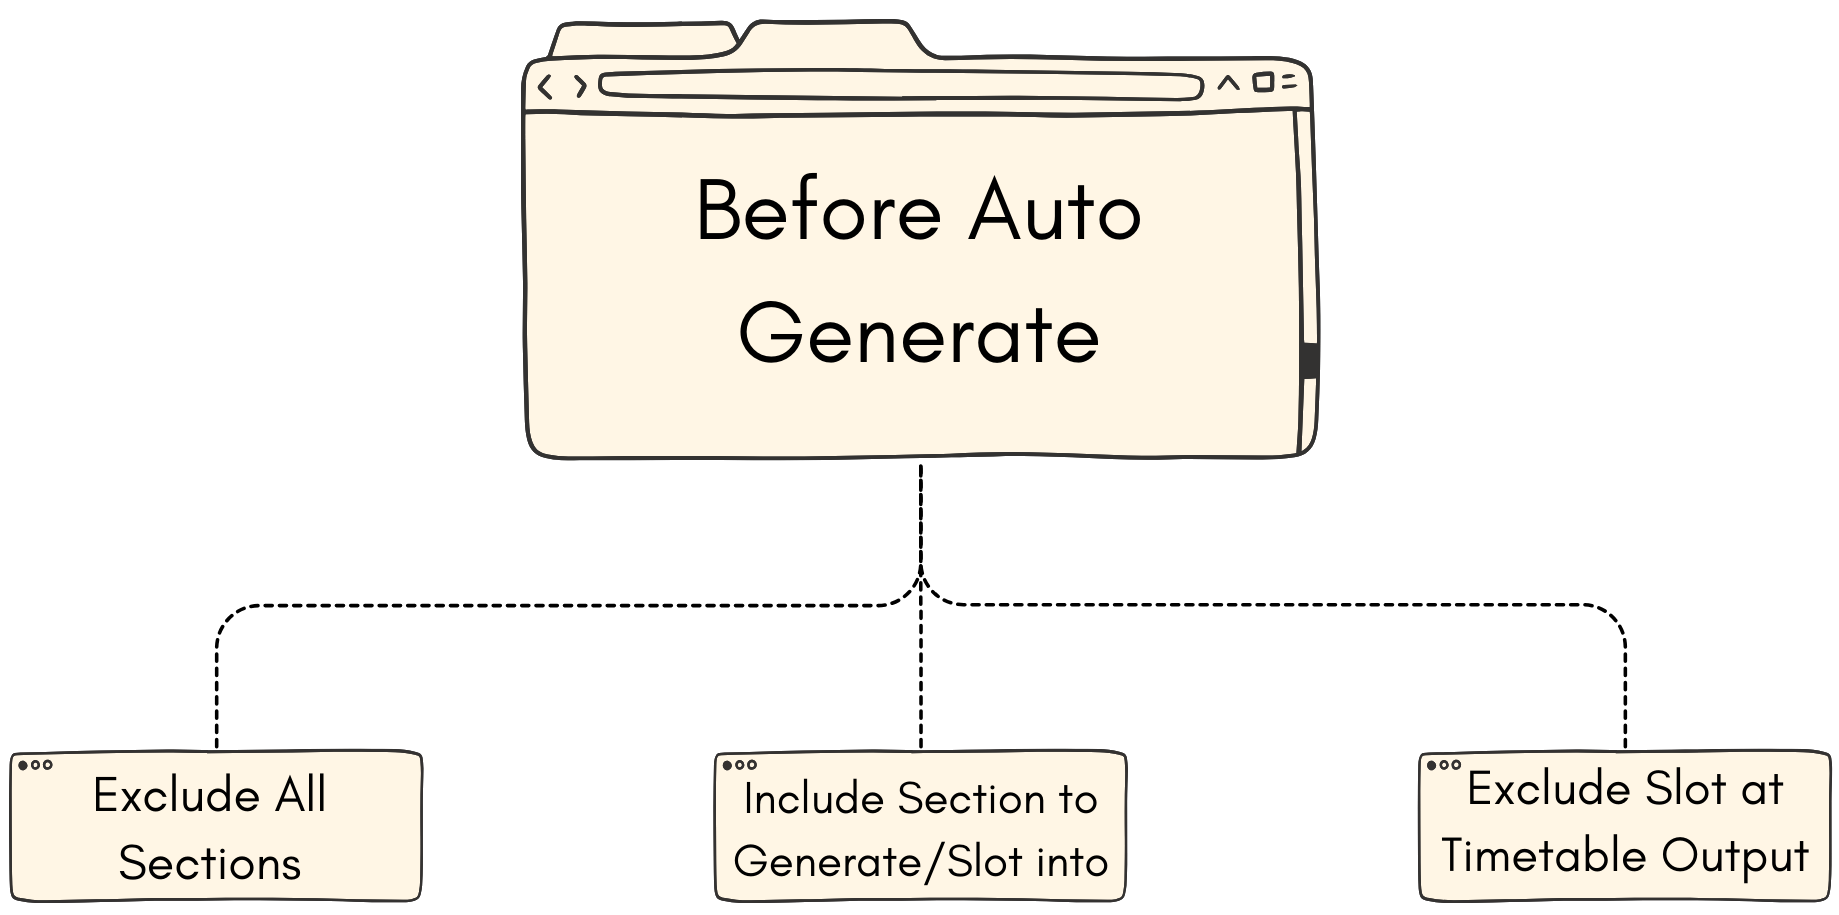
Before using the Auto Generate function, it is important for user to CHECK the following:
- Generate Constraint at Group folder (at Tree).
- Constraint Options.
- Exclude Sections that Do Not want to be Generated. Include Sections that want to be Generated first. This is for those who practice Priority Generate/Slot in.
- Double Check Section Status.
- Exclude Slots at Timetable Output.
1.1. Exclude All Section
Exclude All Sections. The easiest way is to go to Timetable Menu and choose Include/Exclude Sections and then Exclude All Section.
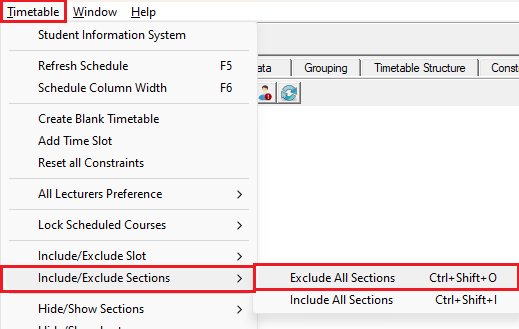
Diagram 1.1.1 Exclude All Sections
This is how it will looks like at tree before and after exclude all sections.
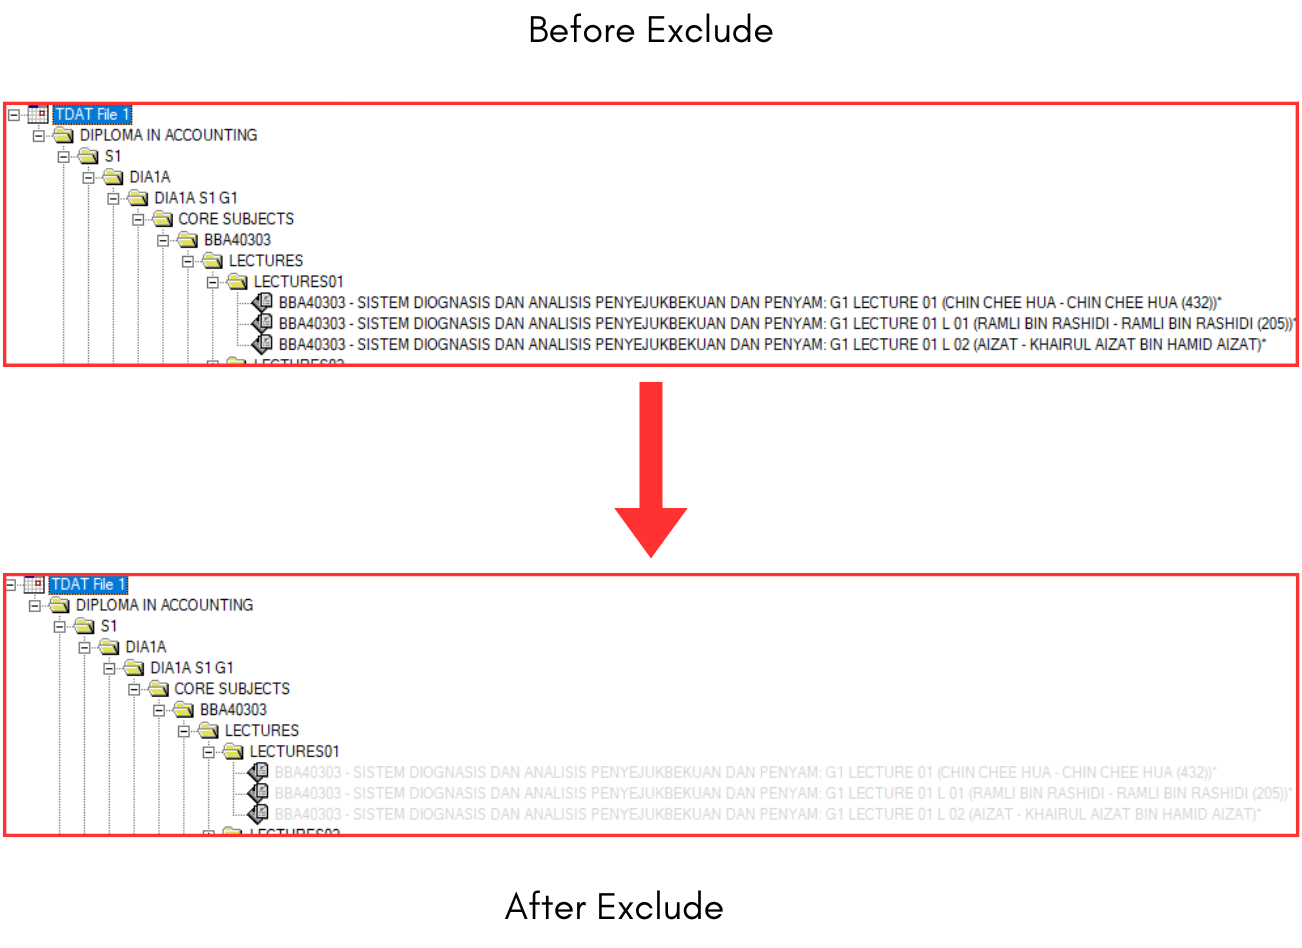
Diagram 1.1.2 Before and After Exclude Looks at Tree Structure
This is how it will looks like at section status summary before and after exclude all sections.
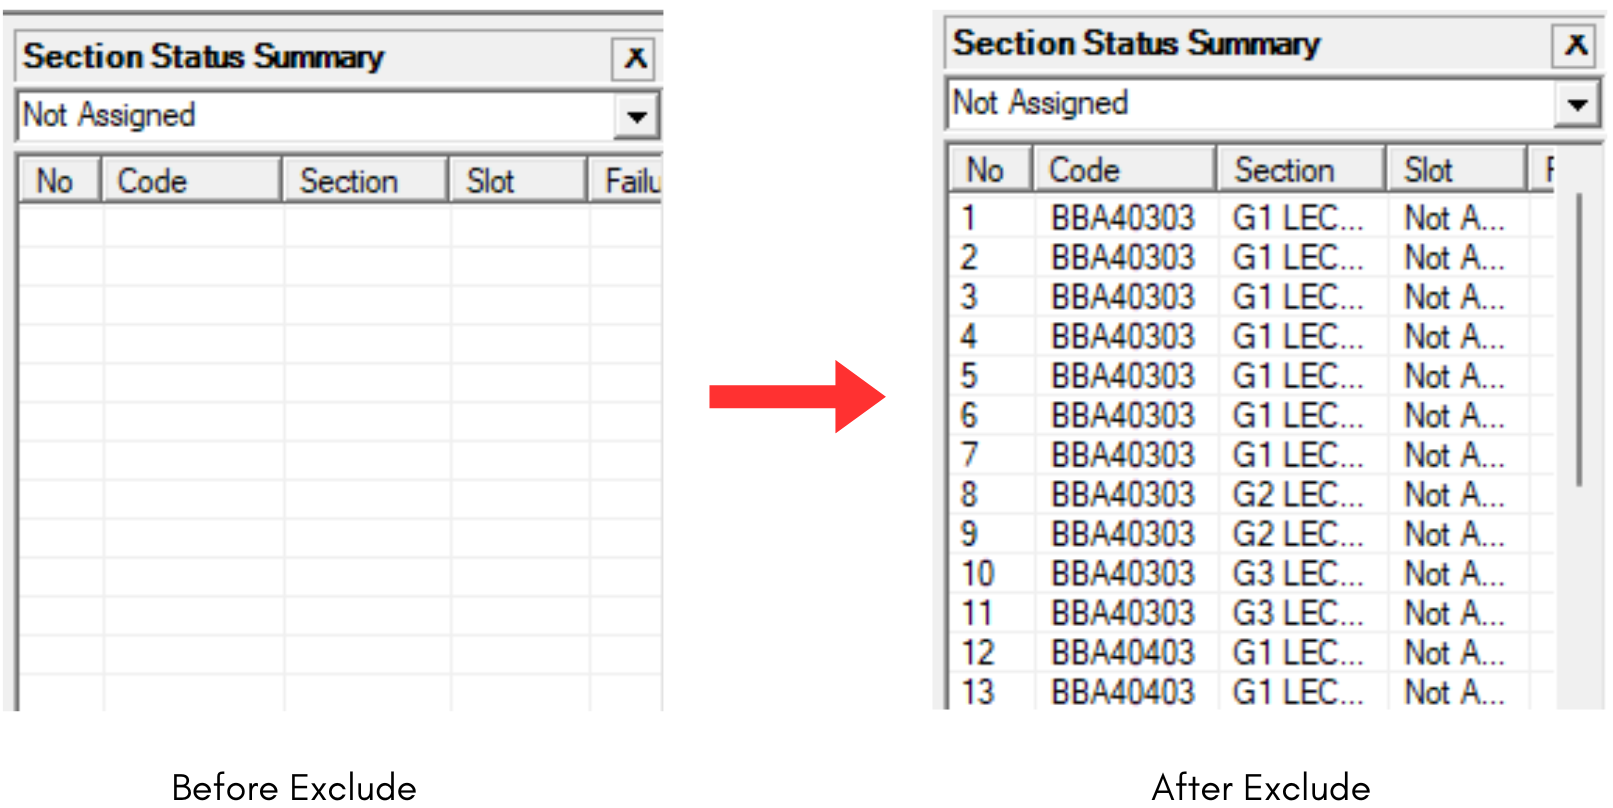
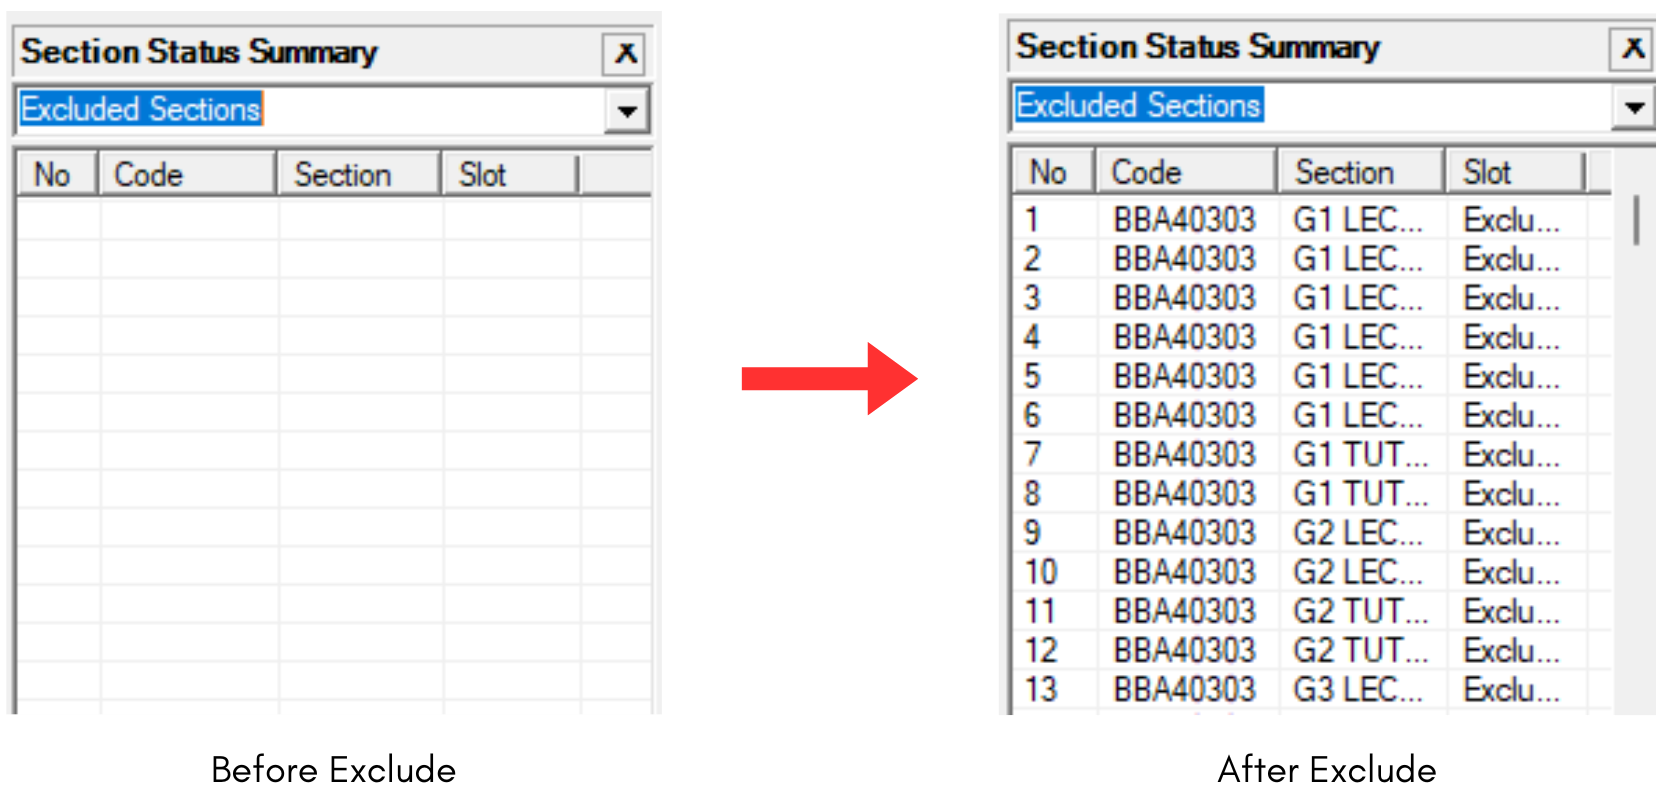
Diagram 1.1.3 Before and After Exclude Looks at Section Status Summary
1.2. Include sections to Generate/Slot into
Include only those Sections that want to be prioritize to be slotted into the Timetable Output. You can Include Sections by Right Click via Tree, Course List, Lecturer List, Batch Group/List and Merge Group/List. Another way of Include Section function is at Custom Section Action under Timetable Menu.
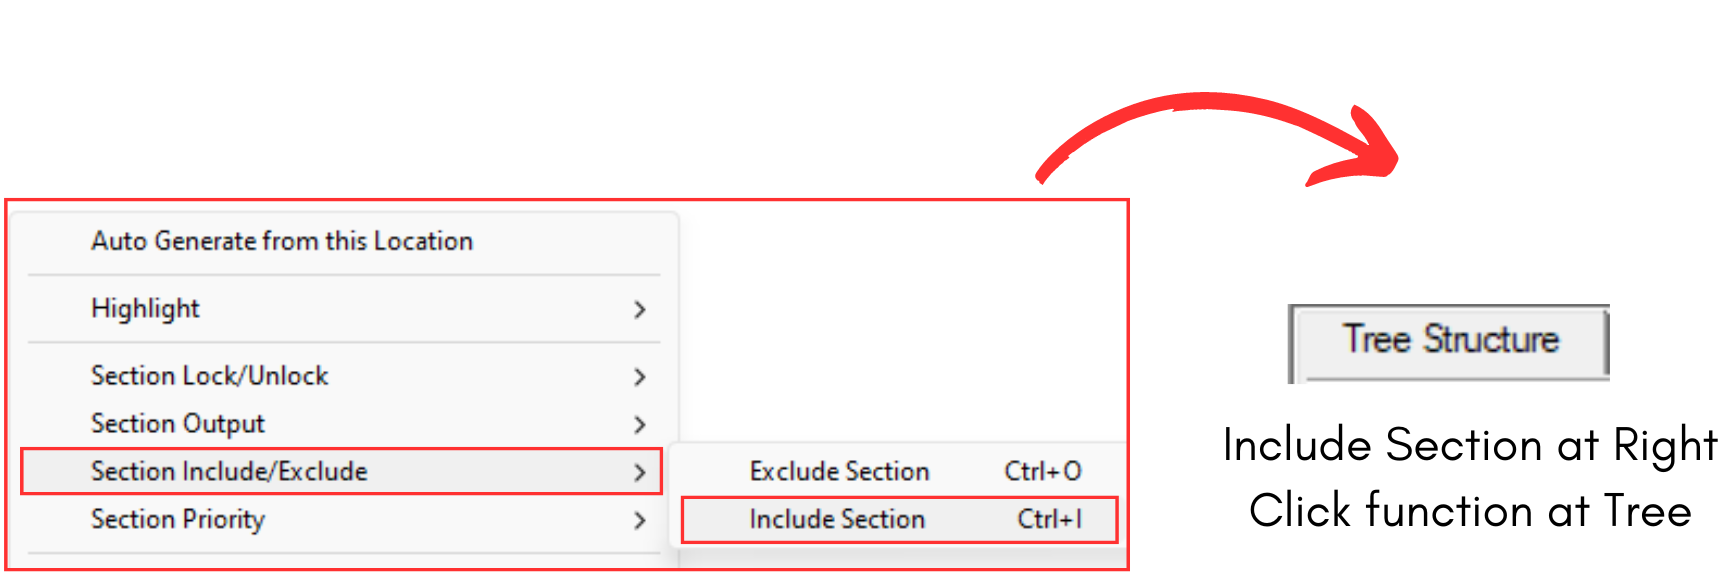
Diagram 1.2.1 Include Funtion at Tree Structure
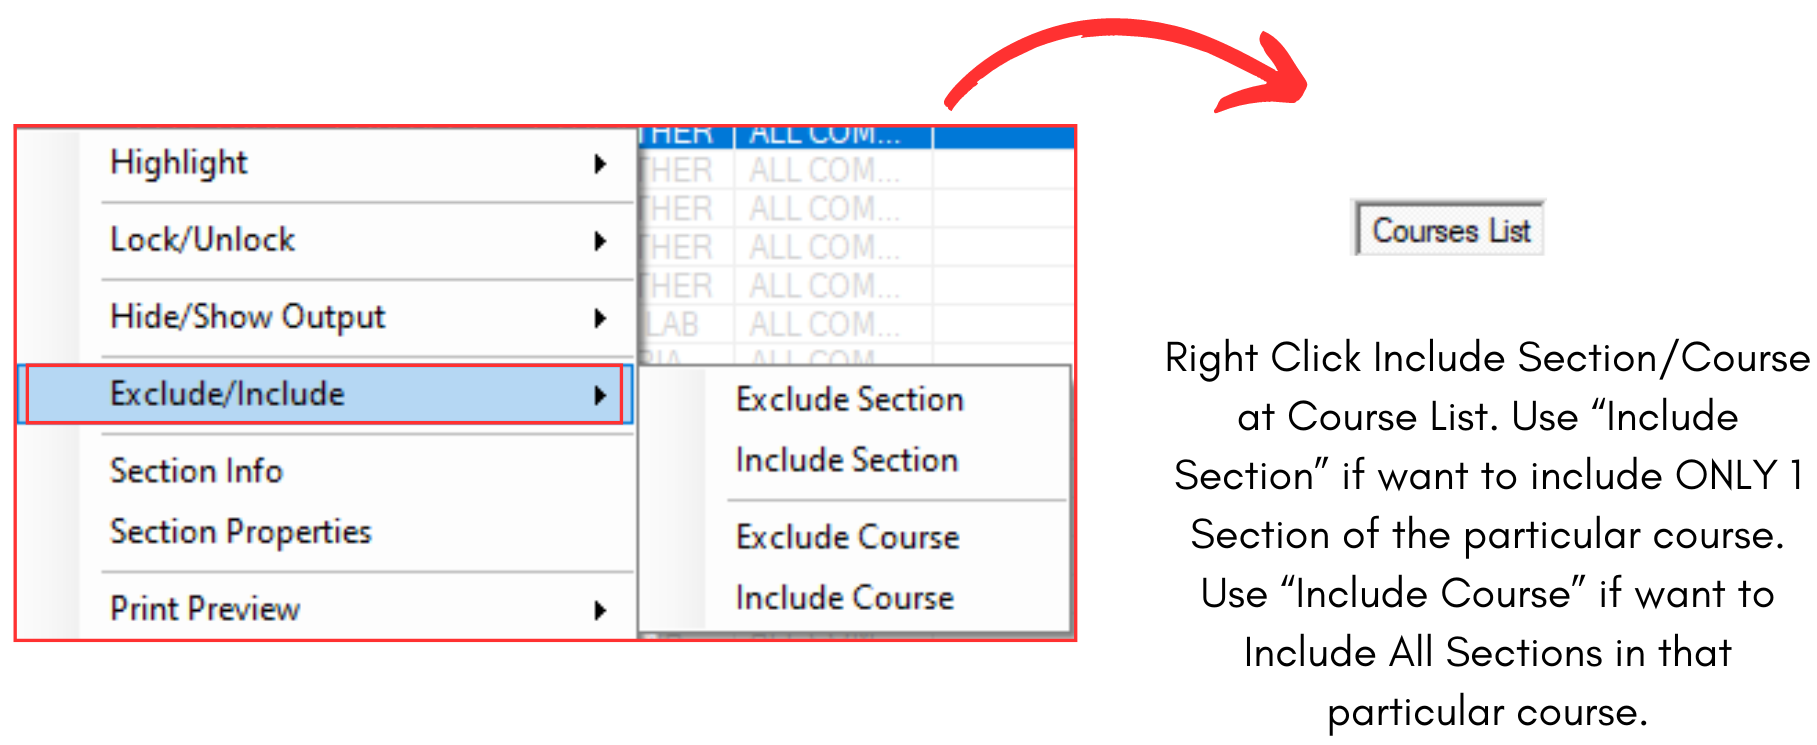
Diagram 1.2.2 Include Funtion at Course List
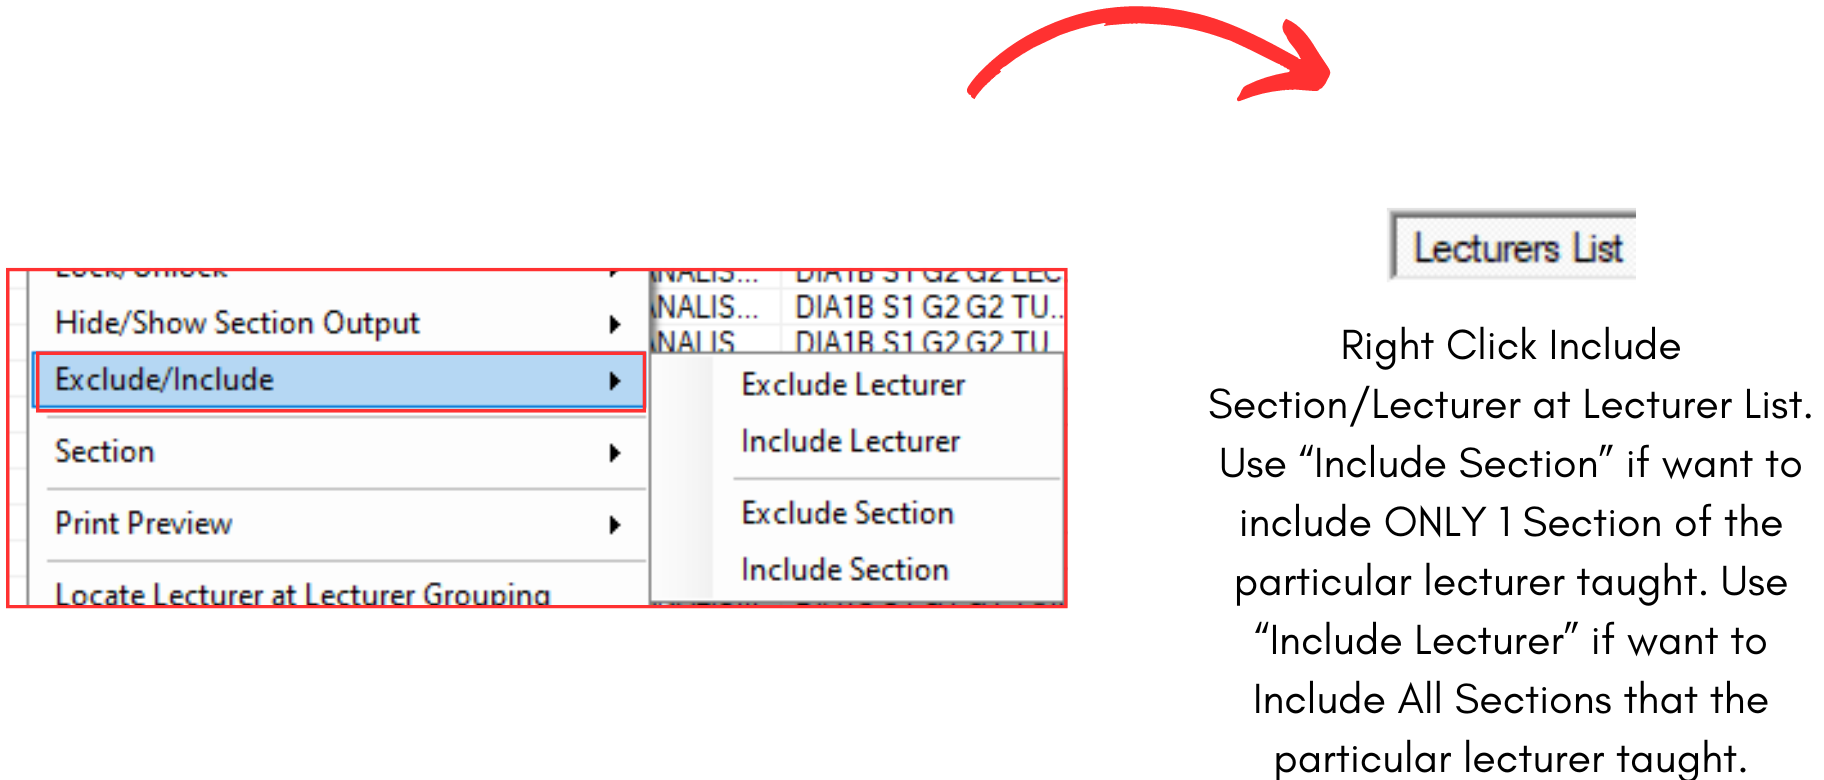
Diagram 1.2.3 Include Function at Lecturer List
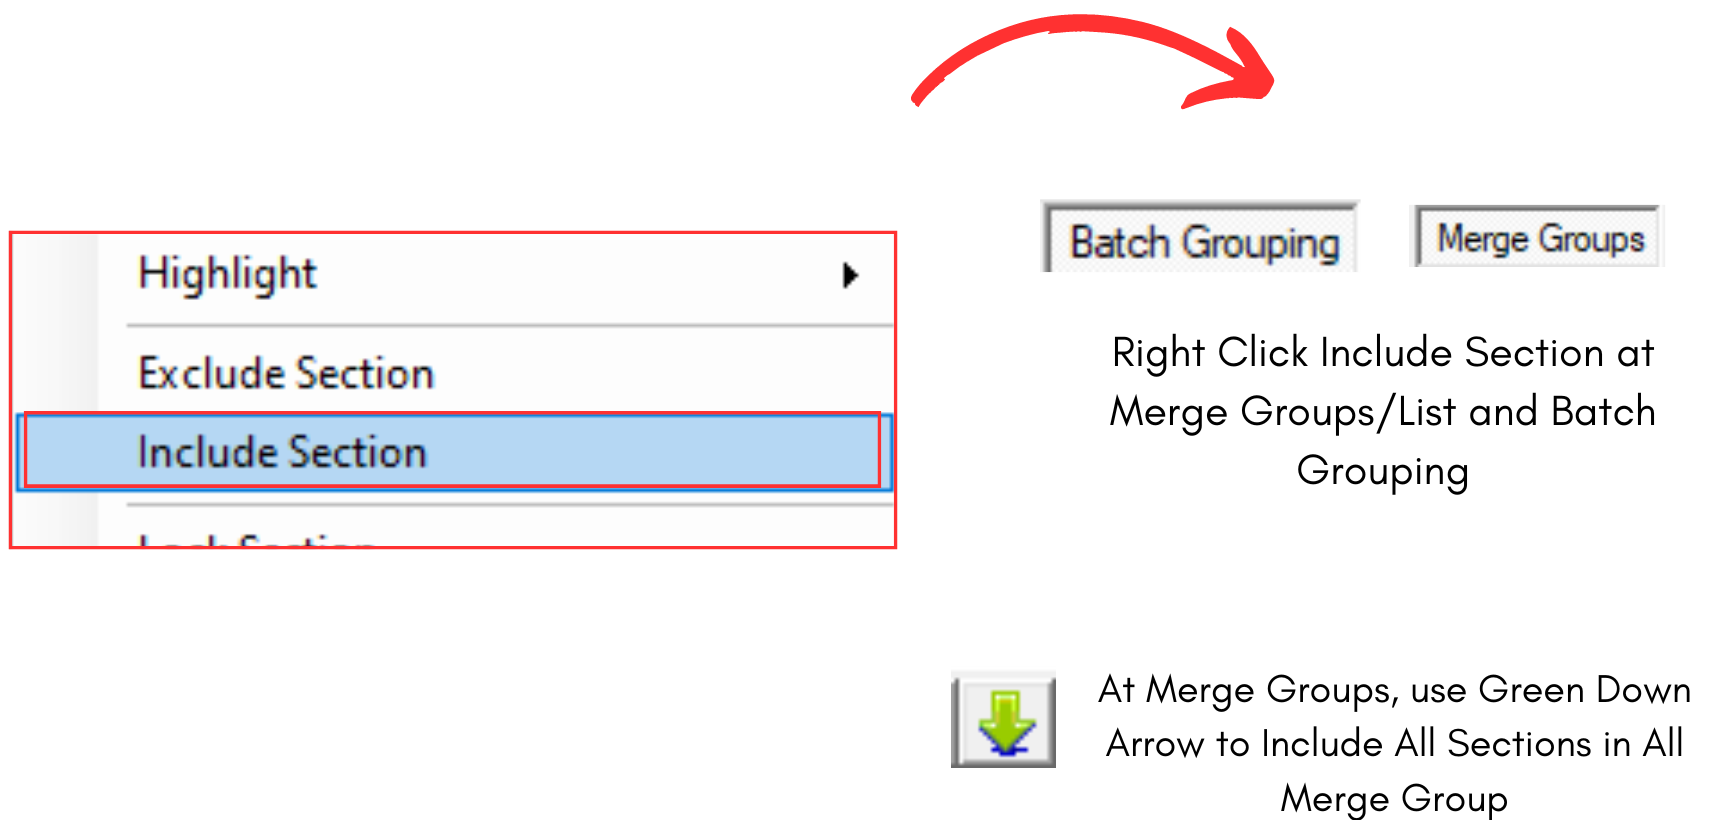
Diagram 1.2.4 Include Function at Merge Group and Batch Grouping
You can Include Sections based on the criteria example Include Sections that are 4 hours in duration OR Include Section with Class Type: LAB. Therefore, user can use Custom Section Actions under the Timetable Menu.
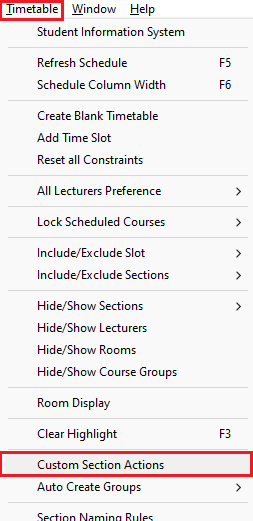
Diagram 1.2.5 Location of the Custom Section Actions
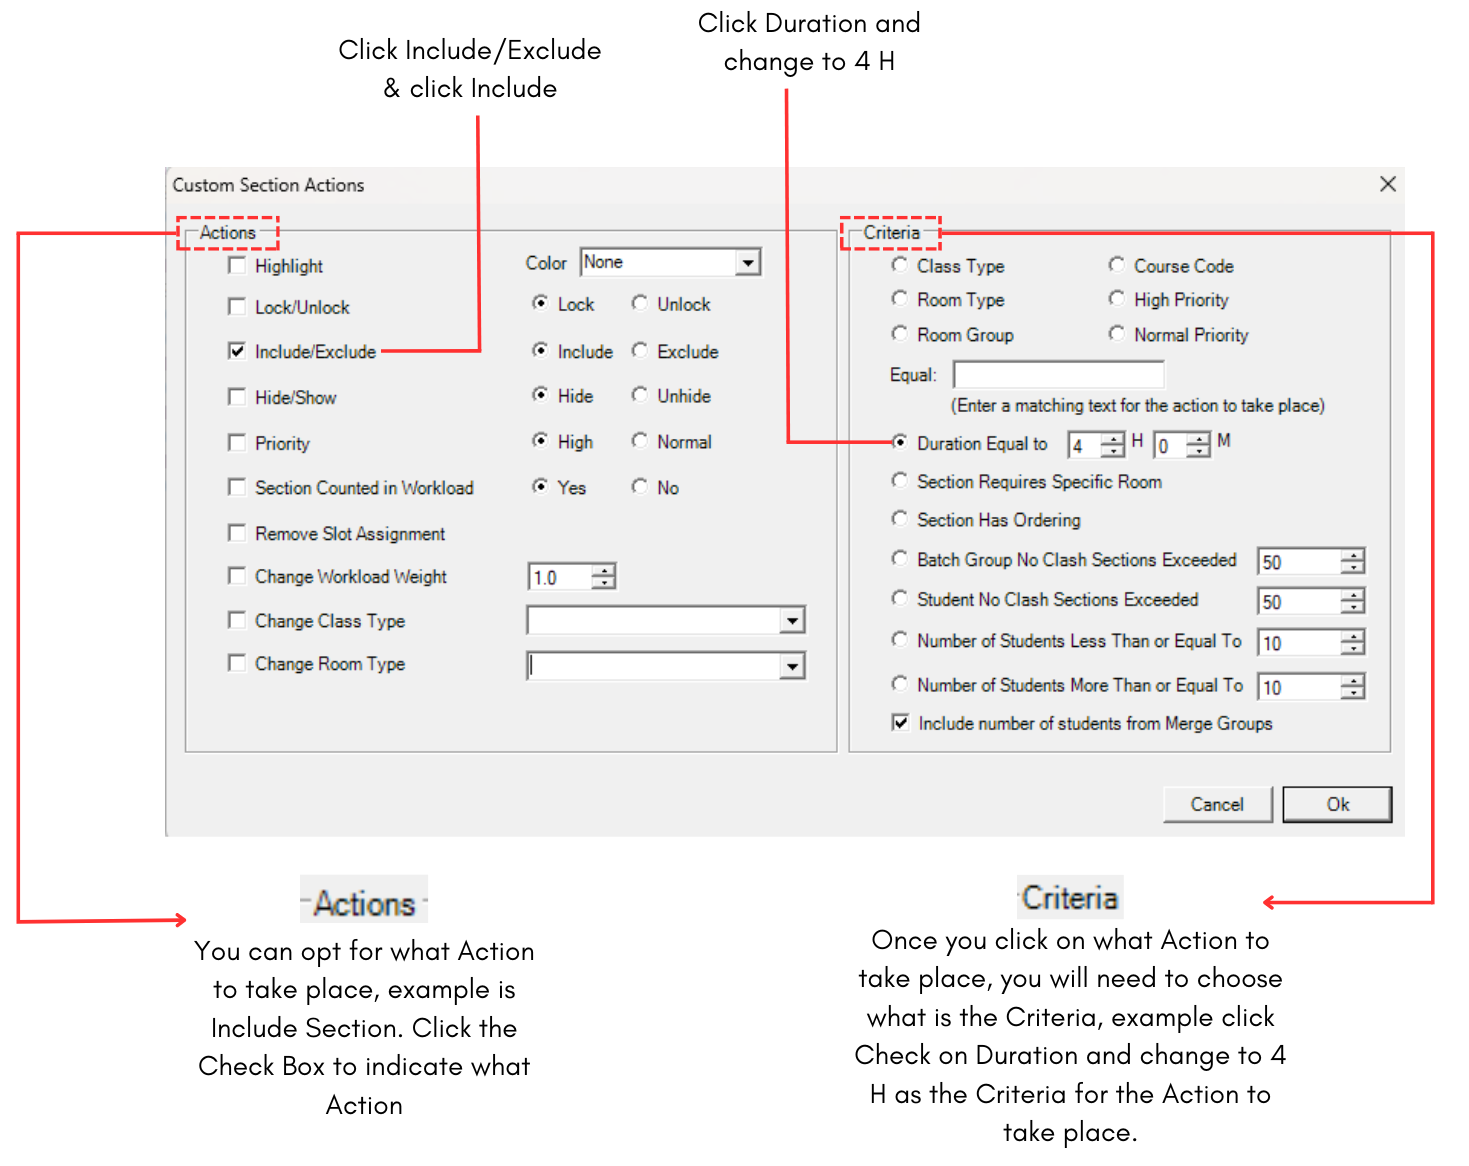
Diagram 1.2.6 Custom Section Actions Window
Note that Actions and Criteria can ONLY TAKE PLACE ONE AT A TIME. Meaning to Include Sections that are 4 Hours and 5 Hours, you need to perform the Criteria for 4 Hours first and Click OK. After the Action has been completed, then you can change to 5 Hours and click OK again.
Double Check Section Status
Before Auto Generate or Manual Allocation, you are advised to check the Section Status to see the status of Locked, Unlocked, Exclude, Include Sections. Important is to confirm if the Unlocked Sections need to Locked and vice versa before Auto Generate process.
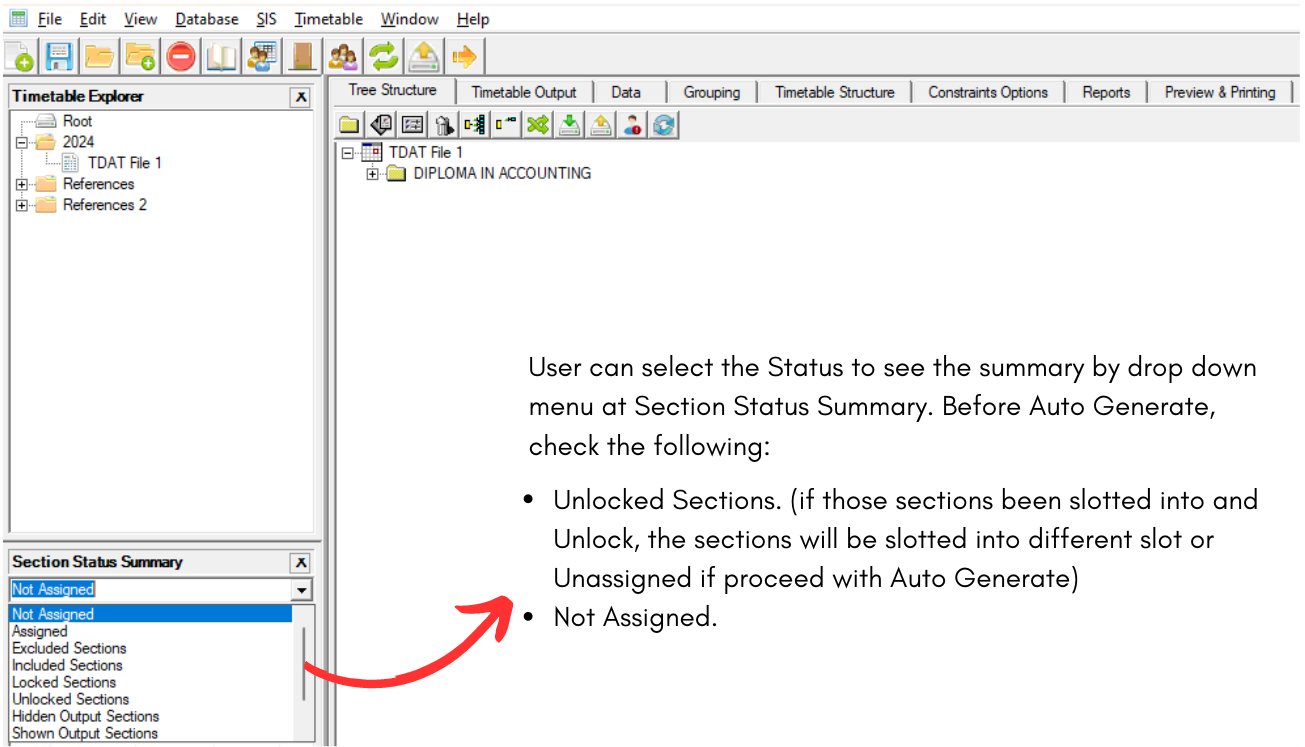
Diagram 1.2.7 Double Check Section Status
1.3. Exclude Slots at Timetable Output.
You can use the Exclude Slot function to exclude slots at Timetable Output. Exclude Slots are slots that you do not want the Included Sections to be slotted in. Excluded slots will be highlighted in Black colour.
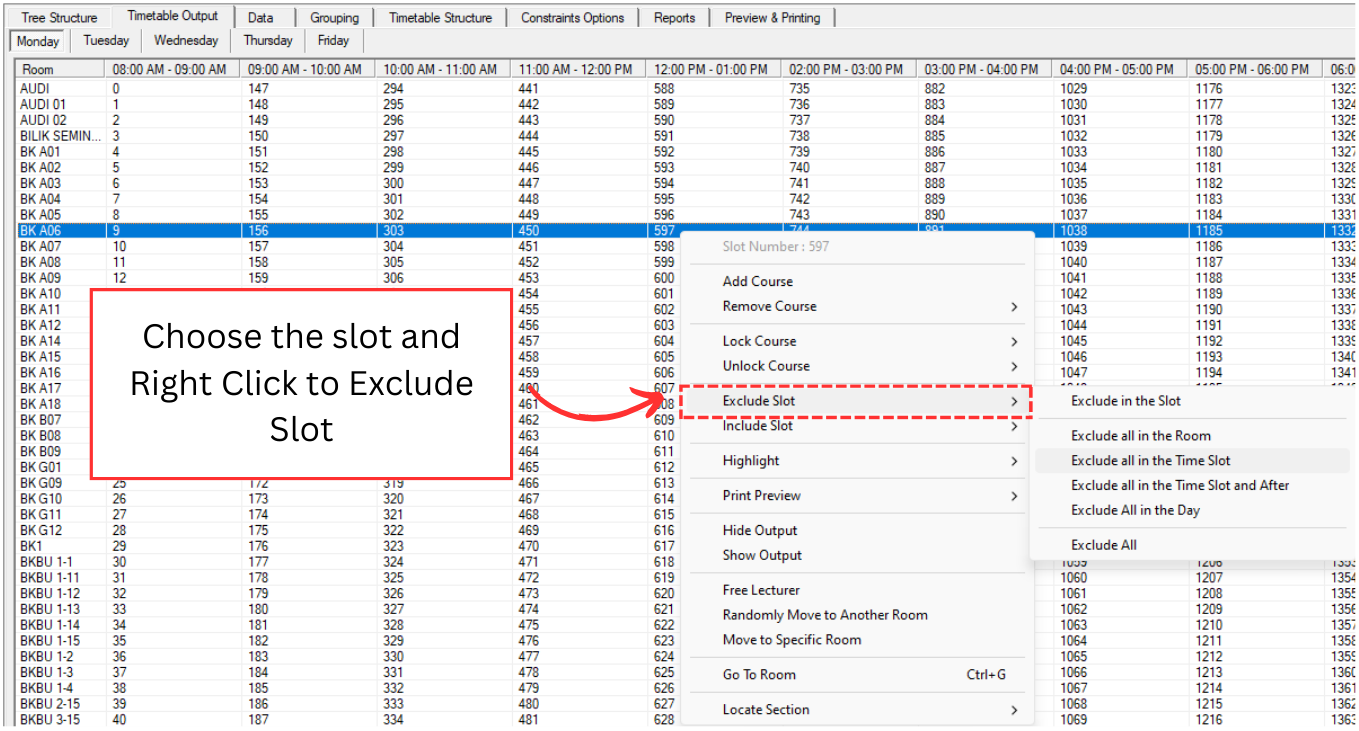
Diagram 1.3.1 Exclude slots at Timetable Output
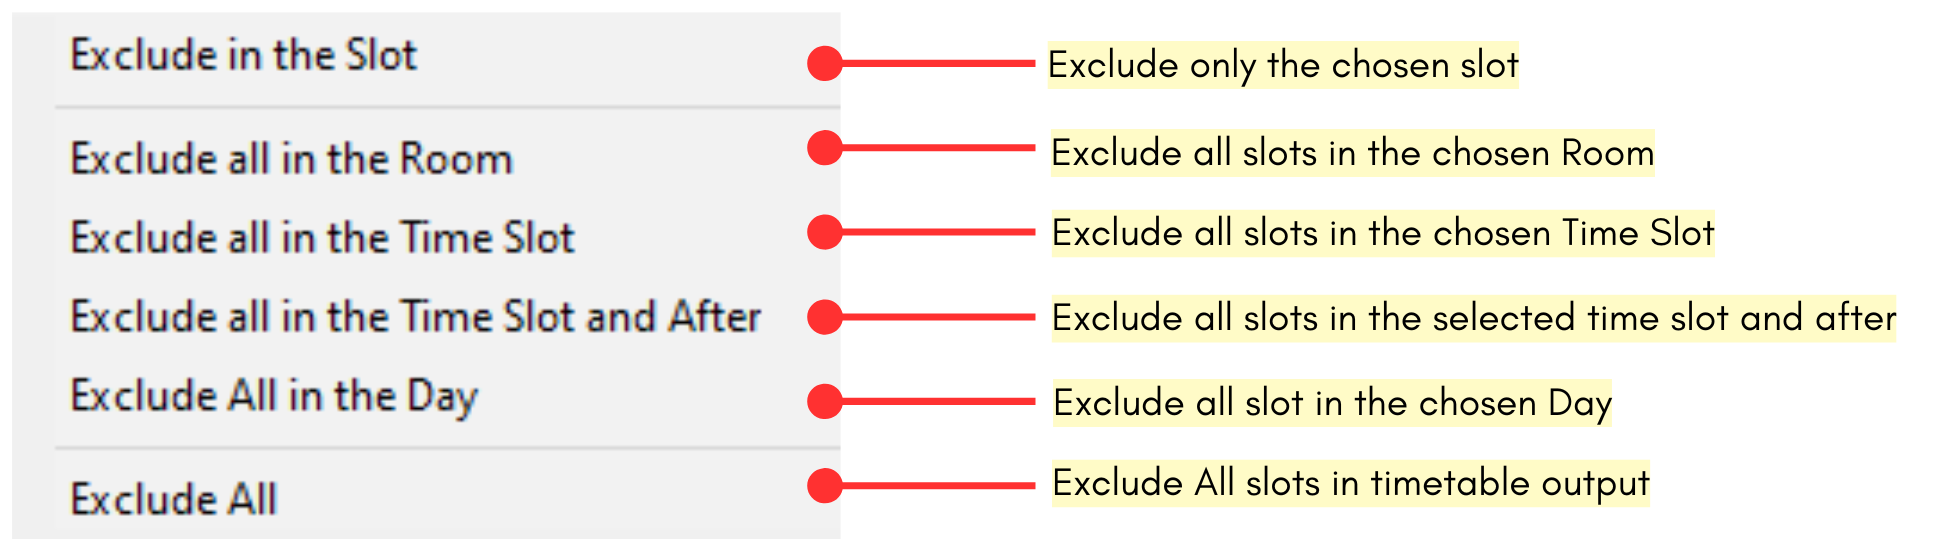
Diagram 1.3.2 Exclude slots at Timetable Output Explanation
Below is how it will looks like when you exclude the timetable output.

Diagram 1.3.3 Excluded slots at Timetable Output
2. Auto Generated
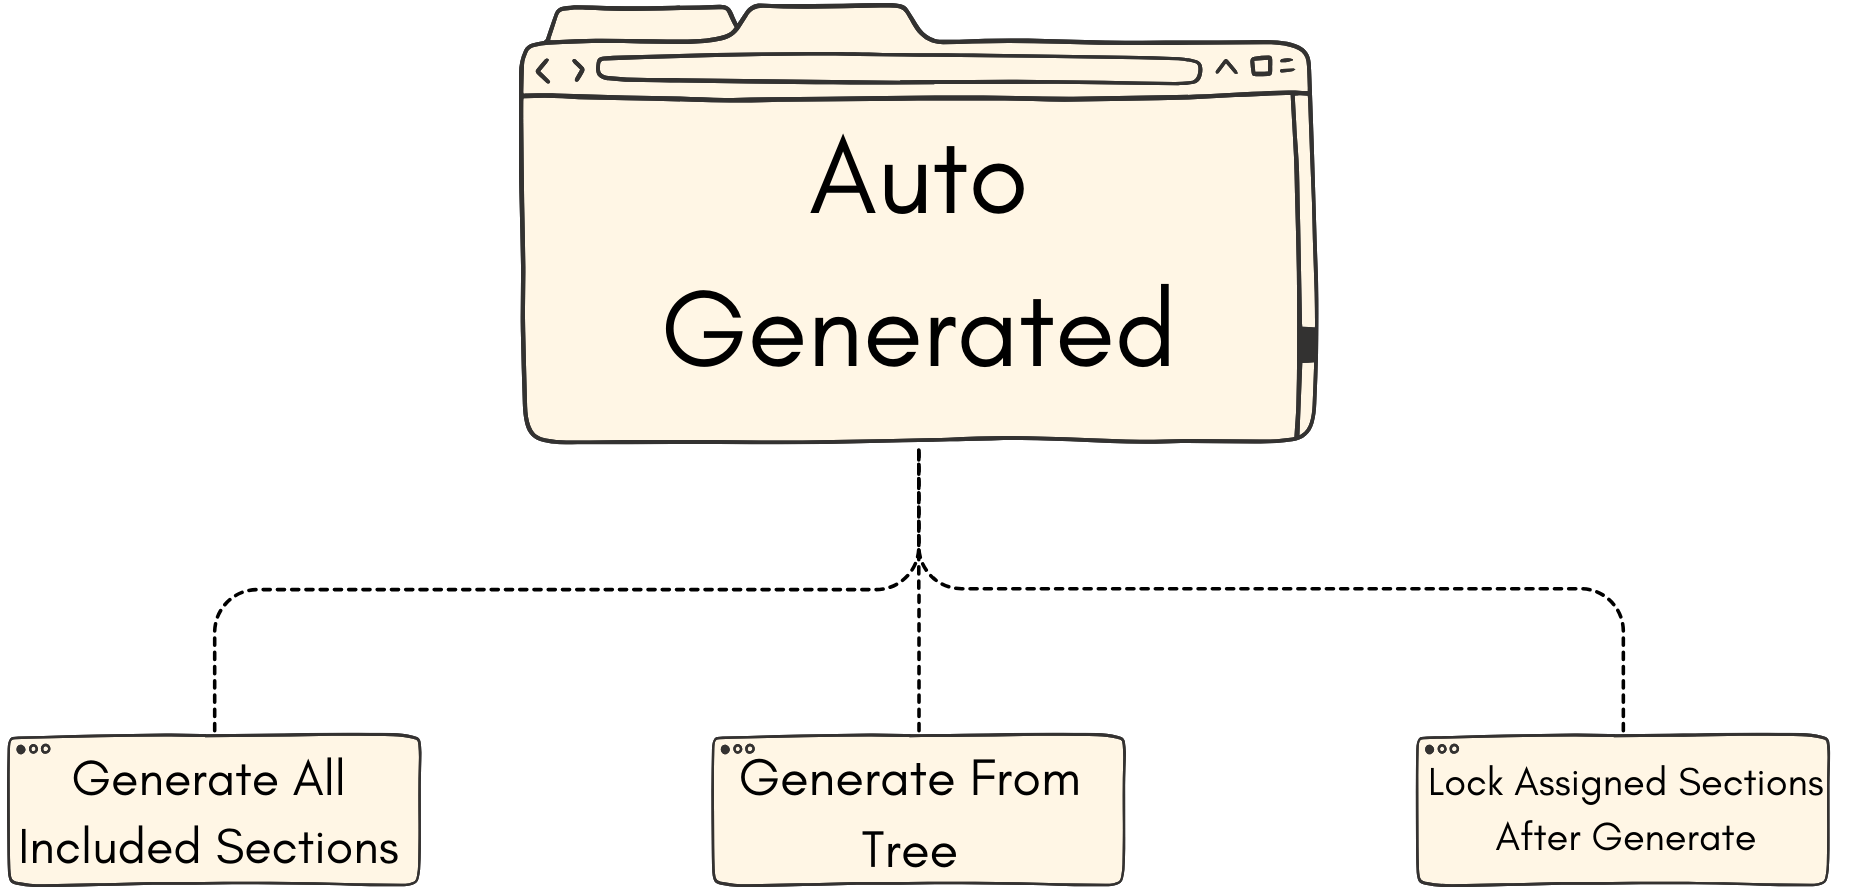
Here we will learn on how to Generate the Timetable Output.
2.1. Generate All Included Sections
Once all constraints have been set and Double Checking has been completed, you can use the Auto Generate function to Auto Assign the Included Sections (shown at Not Assigned at Section Status Summary).
Below is the timetable before we do the Auto Generate.
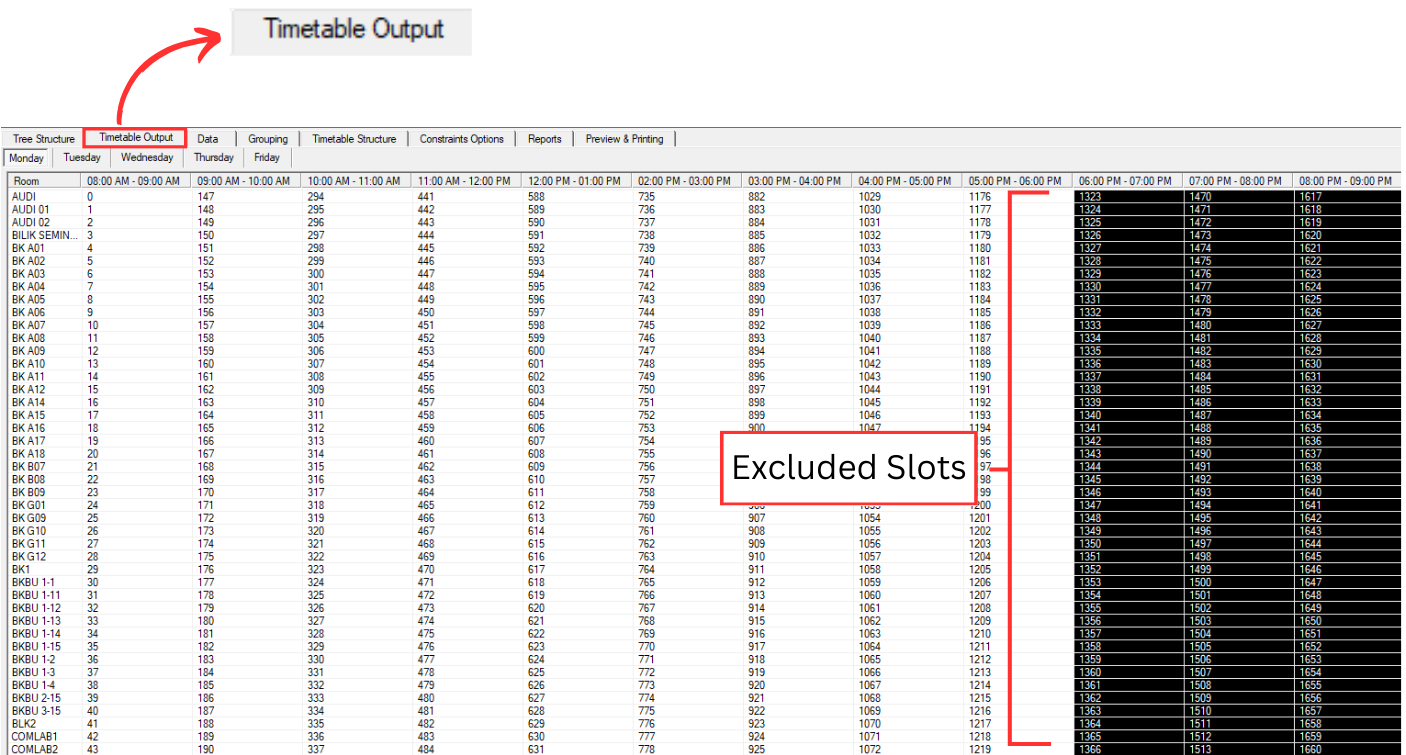
Diagram 2.2.1 Timetable Output before Auto Generate
Click the Auto Generate.
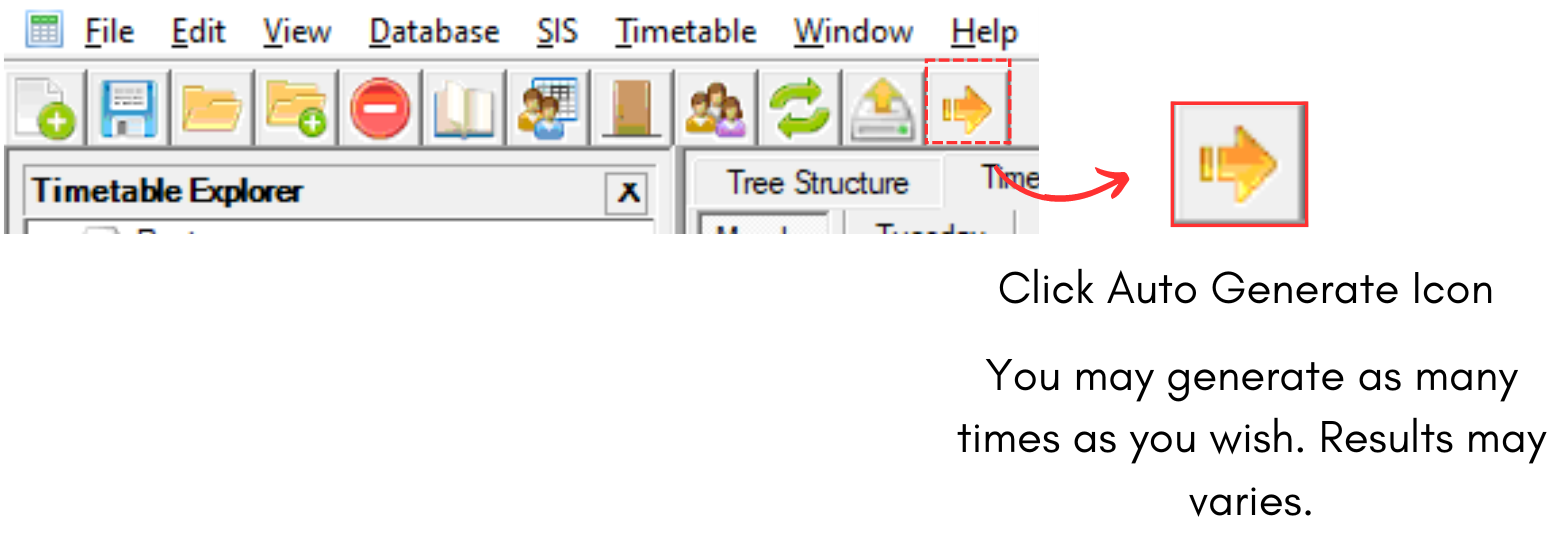
Diagram 2.2.2 Auto Generate Icon
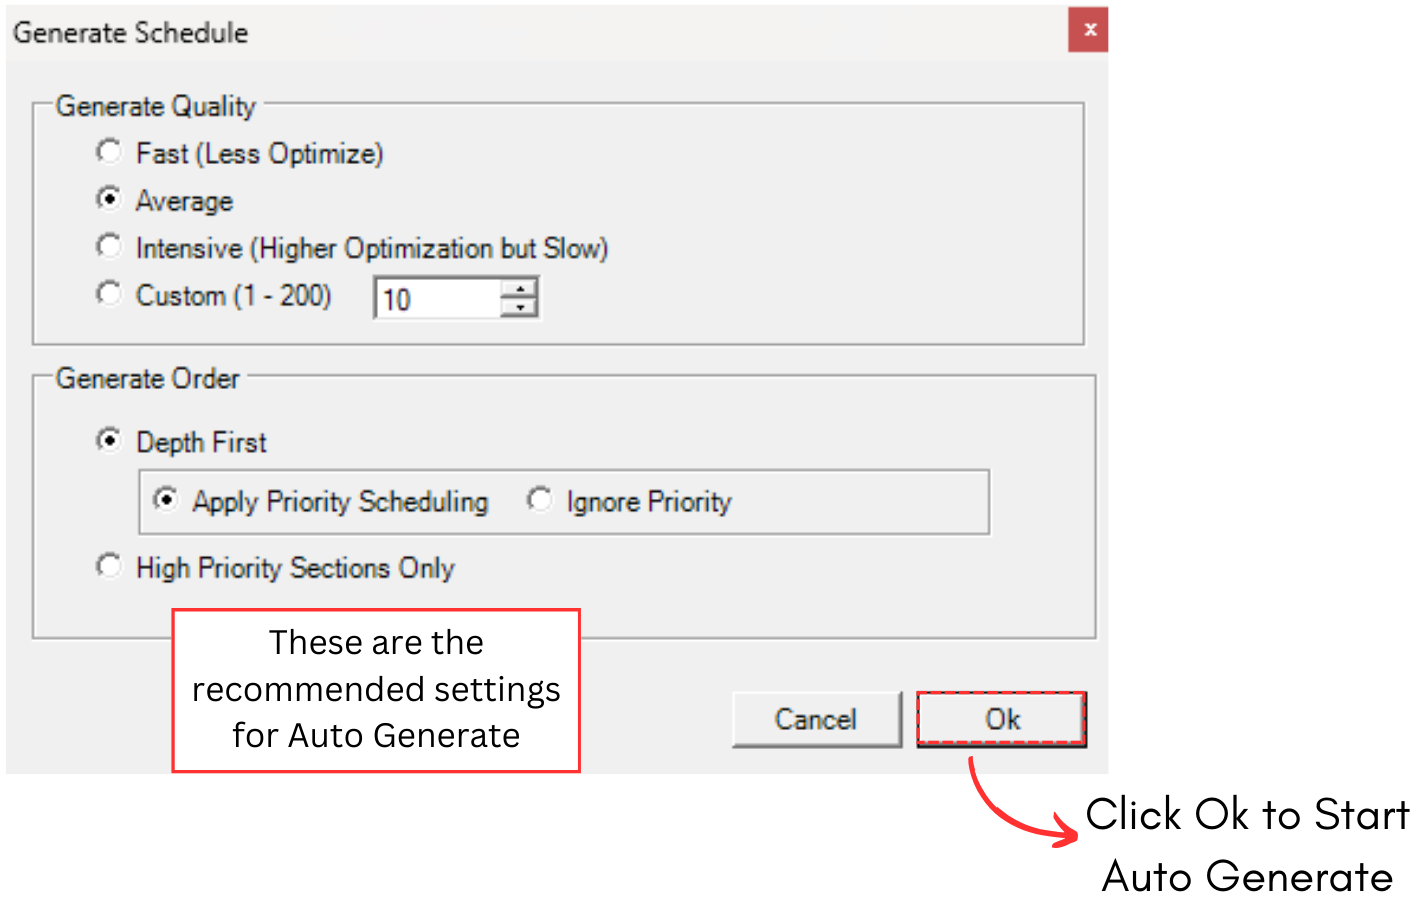
Diagram 2.2.3 Generate Schedule Window
Below is the result after auto generated the timetable output.
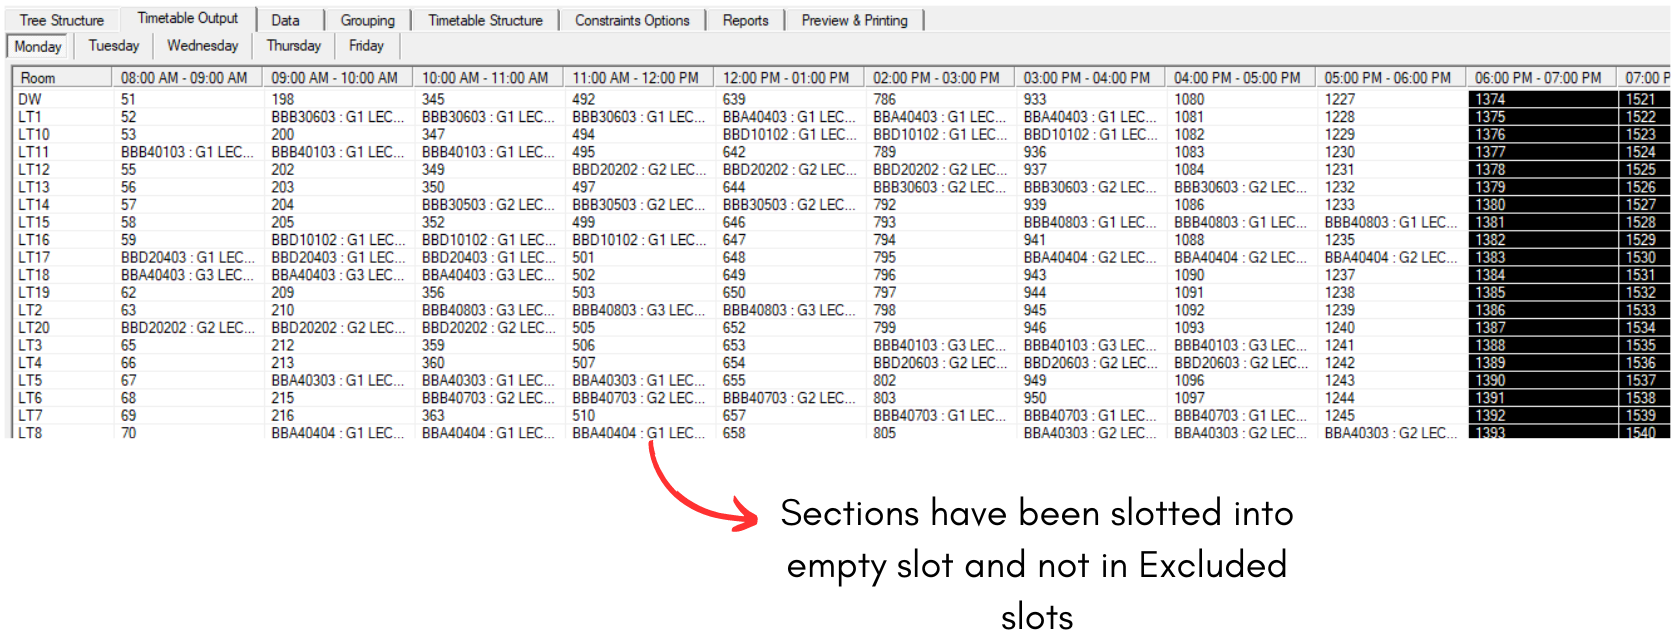
Diagram 2.2.4 Generated Timetable Output
2.2. Generate From Tree
You can also do the auto generate from the Tree Stucture.
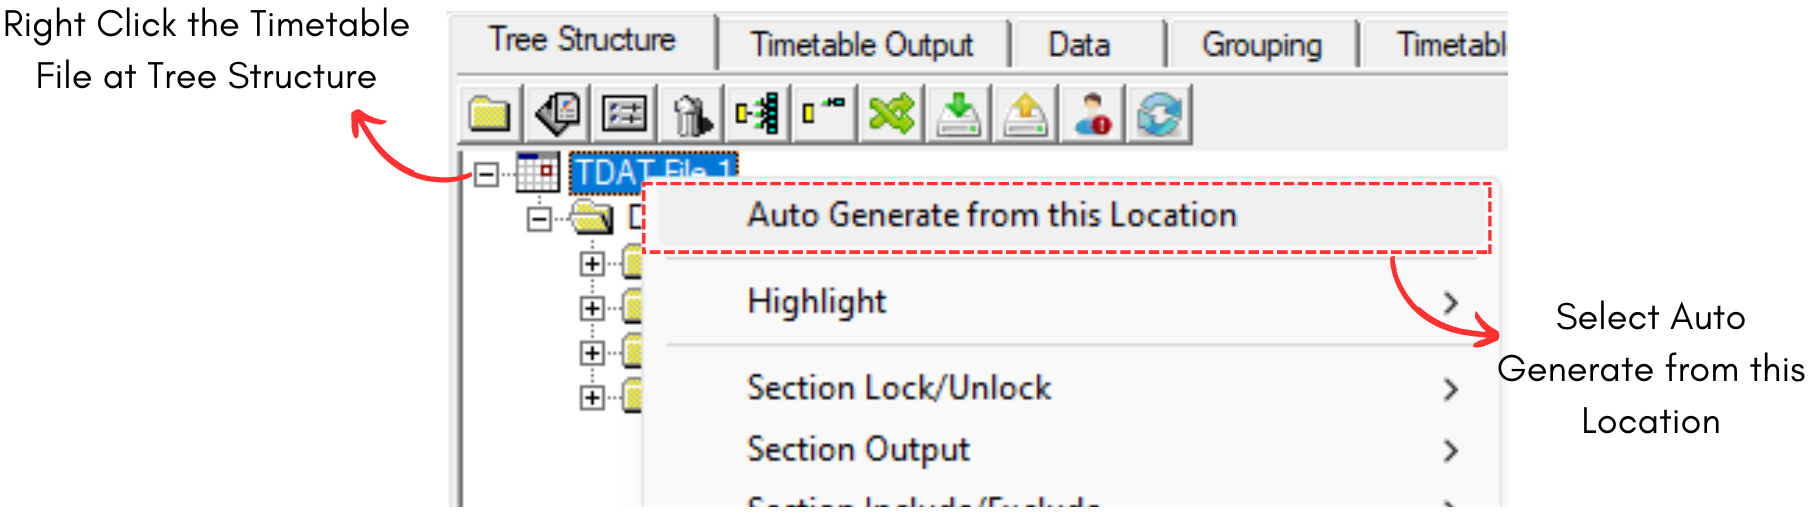
Diagram 2.2.1 Auto Generate from Tree Structure
You have the option to GENERATE ALL by using right click function on the top timetable file OR you can GENERATE ONLY THE DESIRED FOLDER OR SECTION under it.
Generate Schedule Window will appear afterwards.
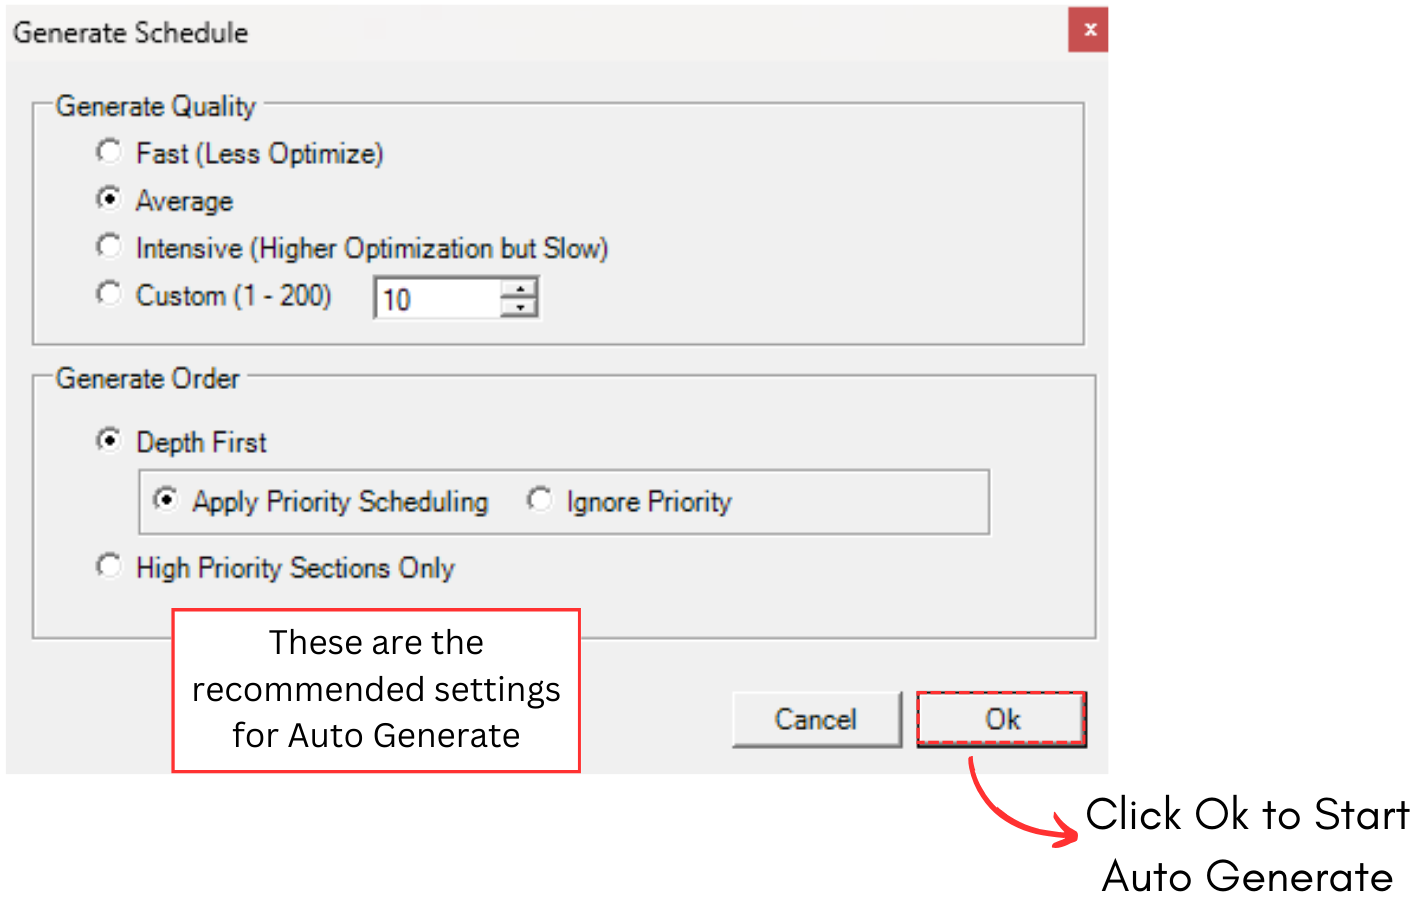
Diagram 2.2.2 Generate Schedule Window
Below is the result after auto generated the timetable output.
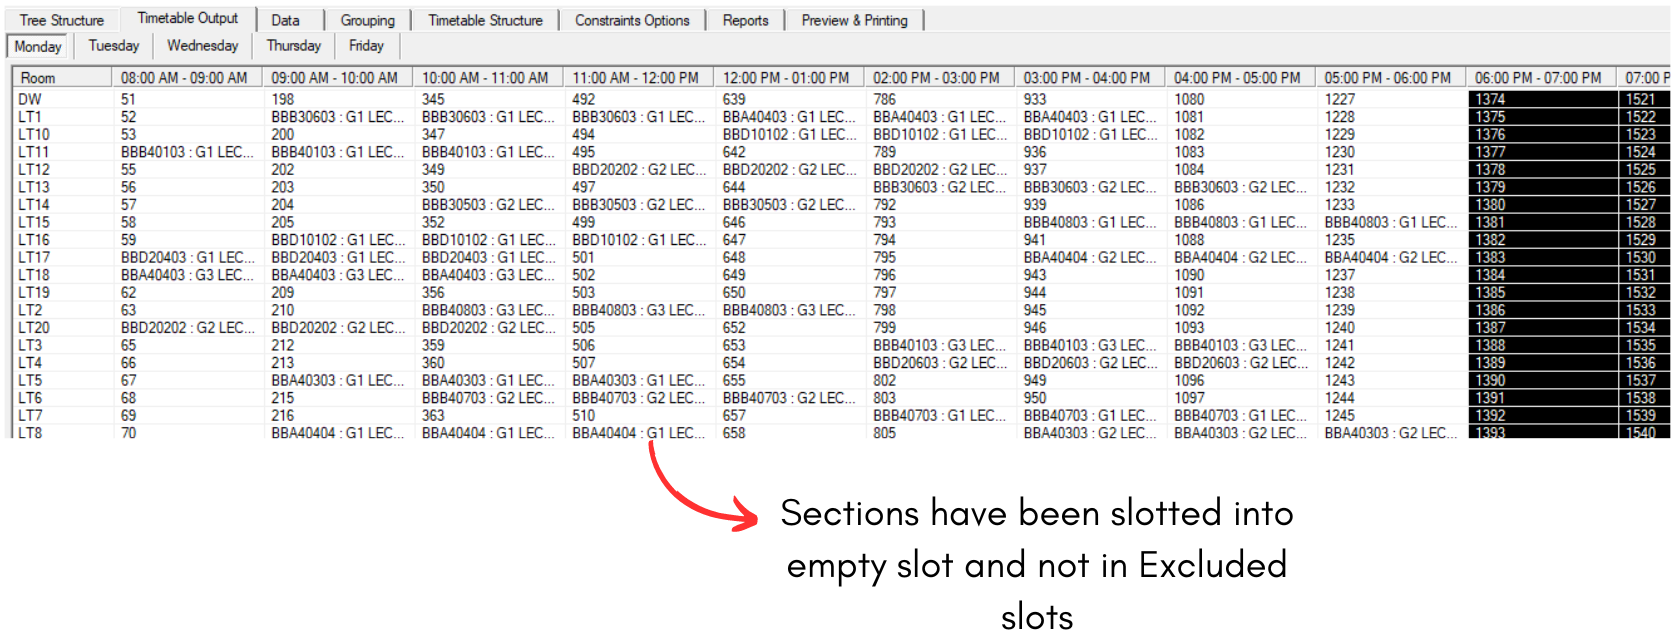
Diagram 2.2.3 Generated Timetable Output
2.3. Lock Assigned Sections After Generate
Once you have generated the timetable, it is important to lock assigned sections before you generate all or generate more included part to make sure the sections that has been assigned will not be generated again into another slot.
There are 3 simple steps to lock the assigned sections after generate.
STEPS 1: Right Click anywhere in the Timetable Output.
STEPS 2: Choose Lock Course and you may select to which slot to lock.
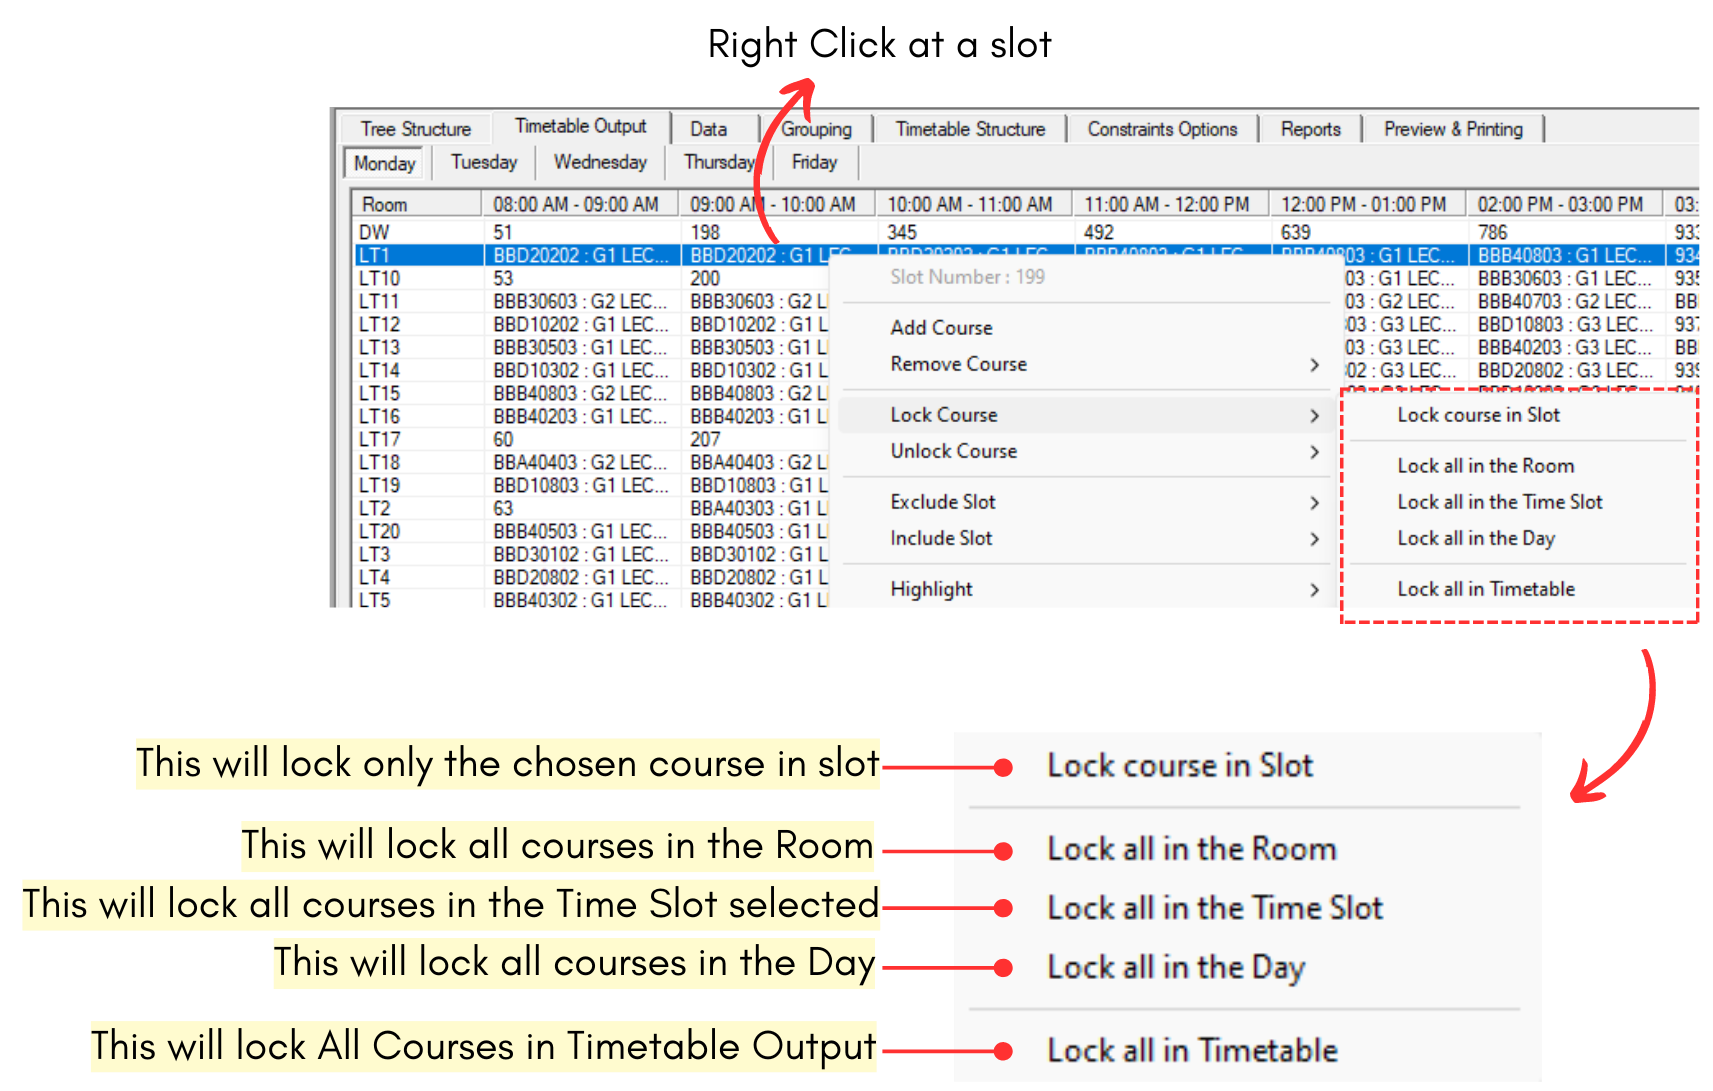
Diagram 2.3.1 Lock Section/Course in Timetable Output
STEPS 3: To Lock All, Click on Lock All in Timetable.
Now, locked sections in slot will be shown in grey and when you generate other sections, locked section wouldn't be generated again and will stay at the same slot.
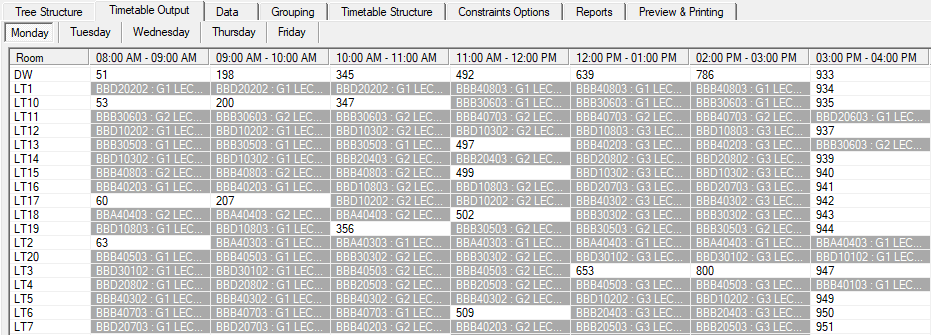
Diagram 2.3.2 Grey Colour Lock Section/Course in Timetable Output
You may repeat the step Include Section to Generate/Slot into to choose the next desired sections to generate first.
Or to Generate All, you go to Timetable and choose Include All Sections under Include/Exclude Sections.
3. Manual Allocation
User can slot section/s manually into the Timetable Output by choosing the slot (Day, Time and Room) and then right click to Add Course.
Manual slot in can be done in Timetable Output. 
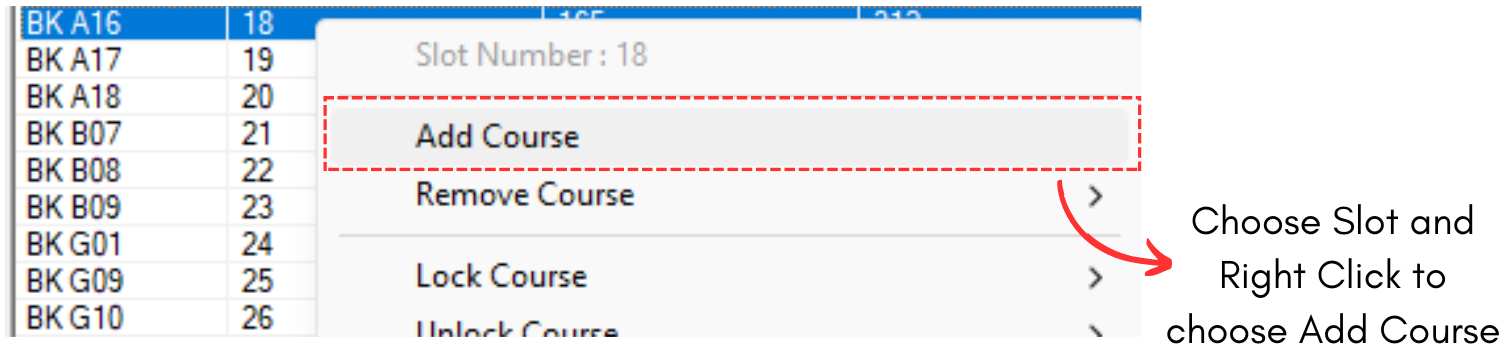
Diagram 3.1 Add Course on Right Click Function
Add course to Slot window will appear.
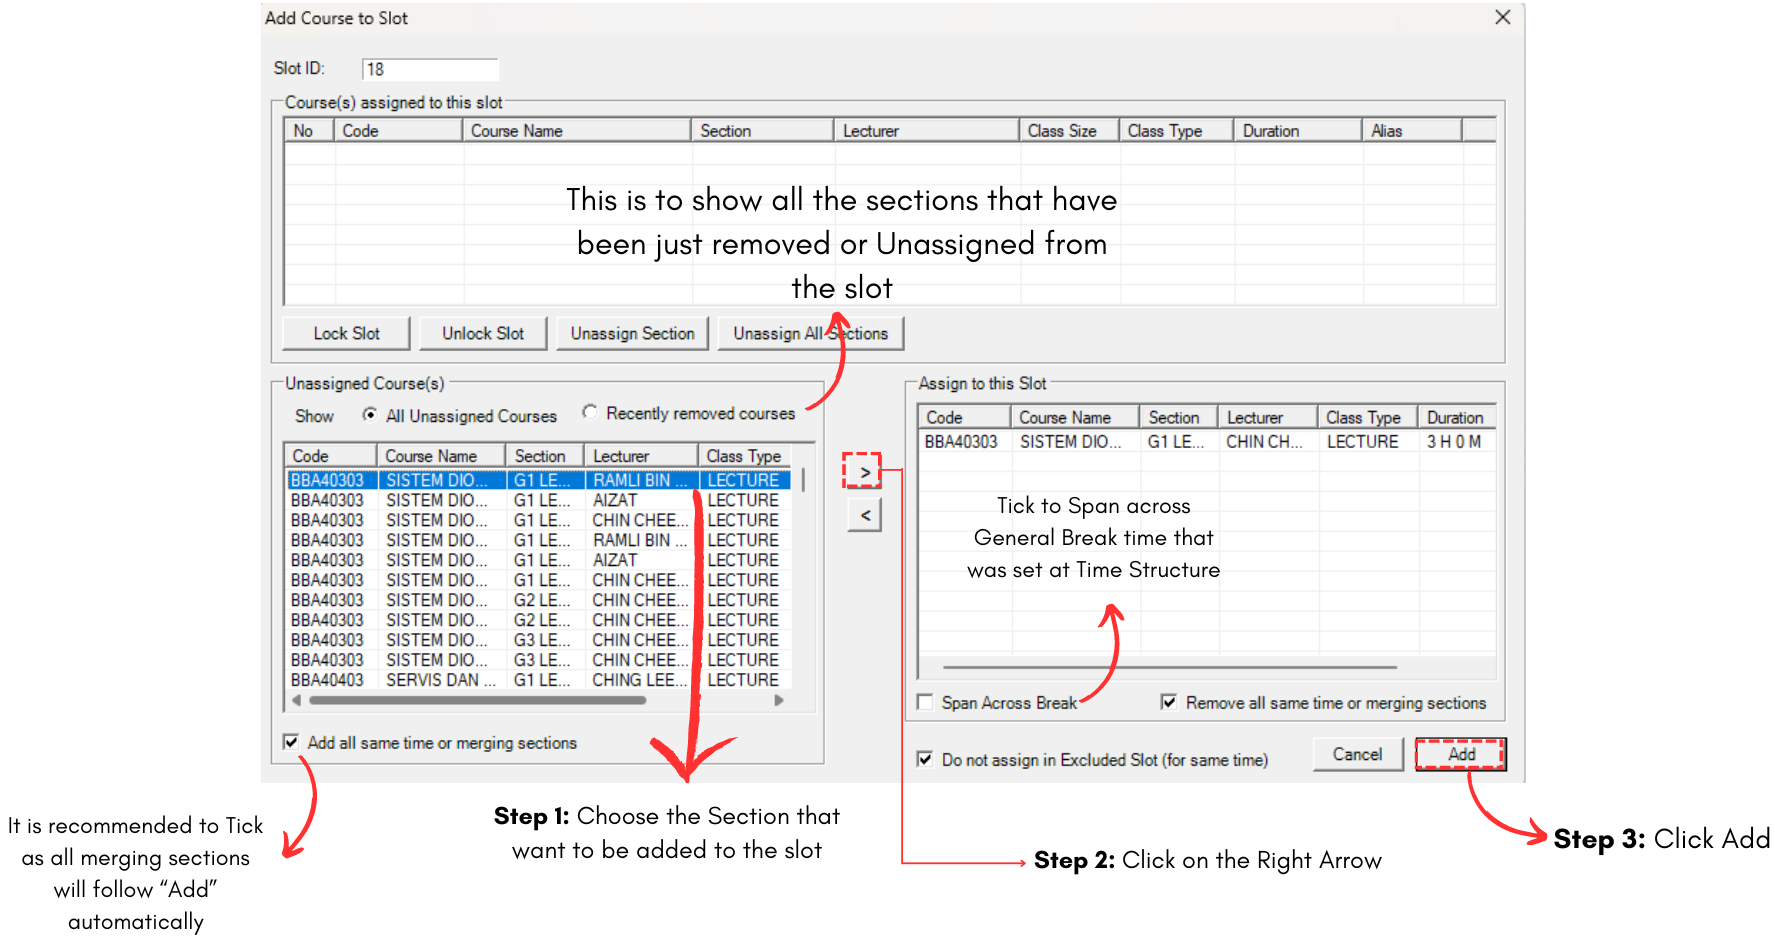
Diagram 3.2 How to Add Course in Add Course to Slot Window
Note that you can Assign, Unassign, Lock and Unlock section/s in the slot from this window.
Manual Slot in Alert
There are few alerts that can help you during Manual Slot in.
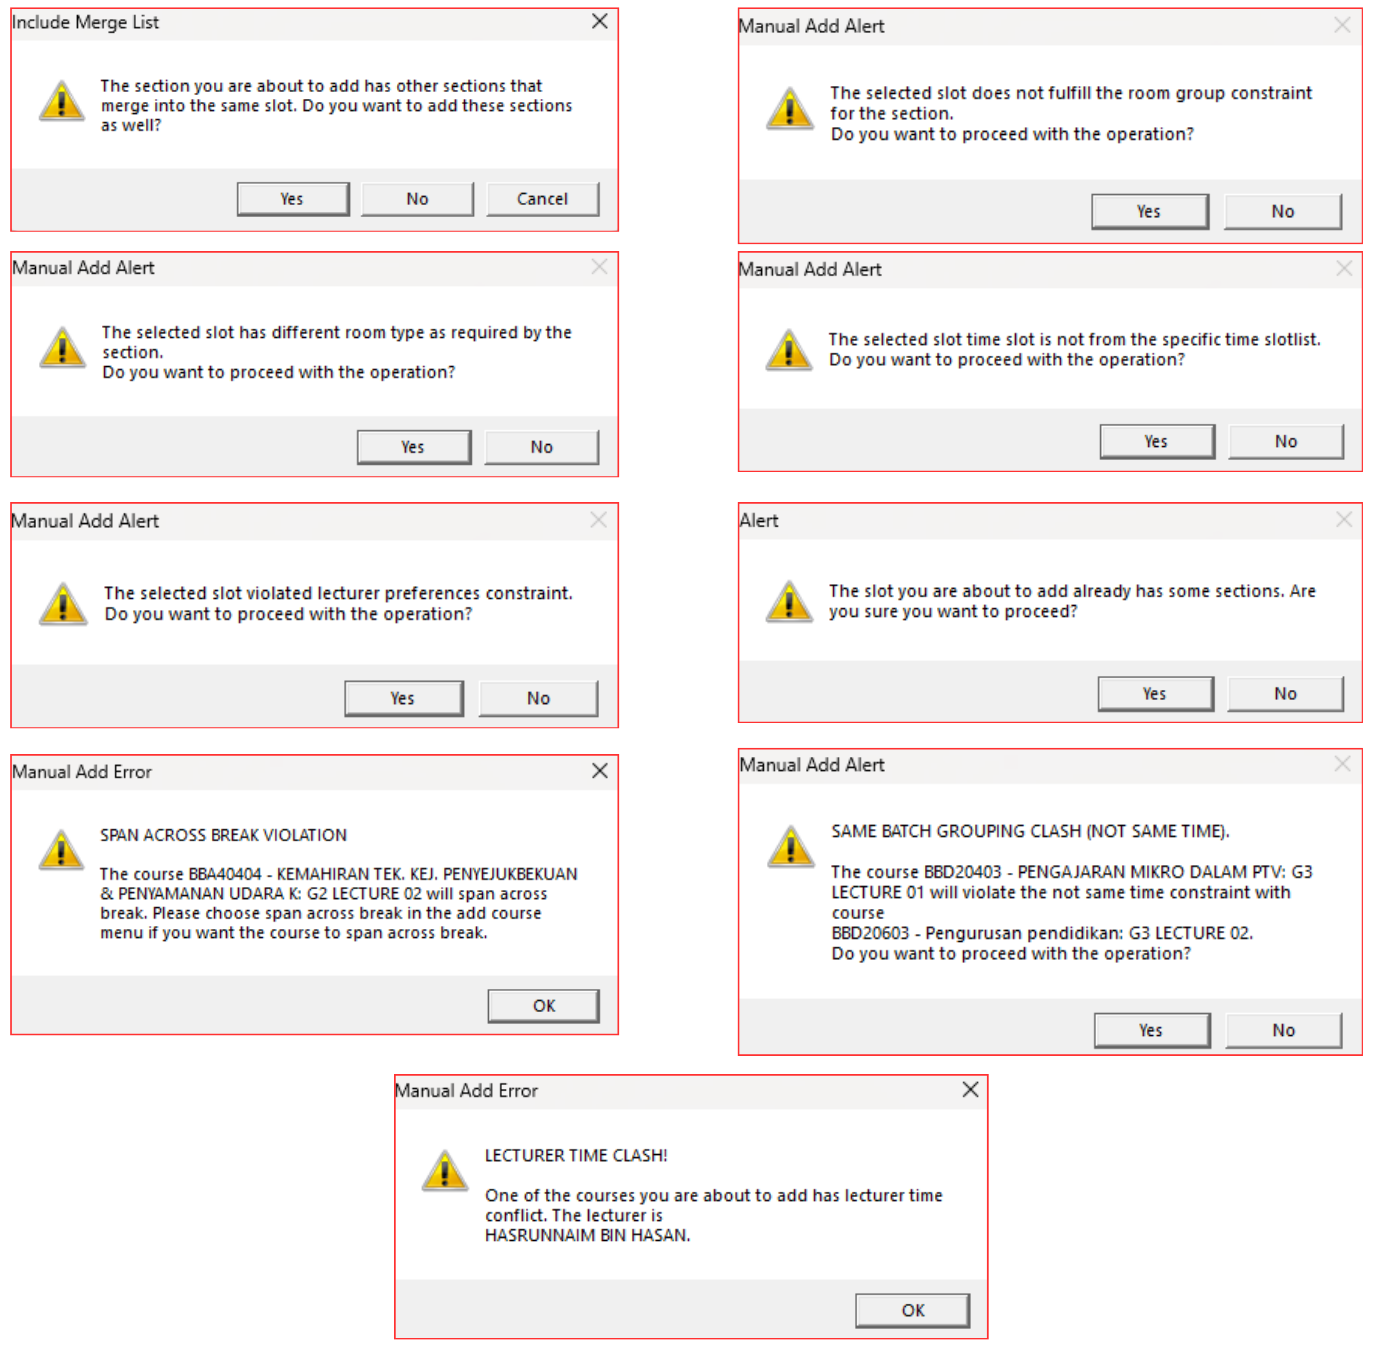
Diagram 3.3 Manual Slot in Alerts
If you choose Yes when Manual Slot In Alert Popup, you will be able to assign section into the desired slot. However, it will be shown as Constraint Violation at Report - Constraint Violation.