Stage 1: Database
| Site: | Timetable Plus |
| Course: | Timetable Plus Spring |
| Book: | Stage 1: Database |
| Printed by: | Guest user |
| Date: | Sunday, 3 May 2026, 5:27 AM |
1. Course Management
Course Management is important part of creating database. In Course Management, there are few things that you can do which is How to Create A New Course, How to Edit Course, How to Delete Folder or Course, How to Import and Export Course List.There are 2 options to open up course management window :
Option 1. Click the Course Management Icon

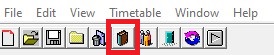
Diagram 1.1: Location of icon to open Course Management Window
Option 2. Click the
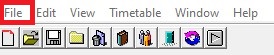
Diagram 1.2: Location of Courses in the file drop down menu to open Course Management Window
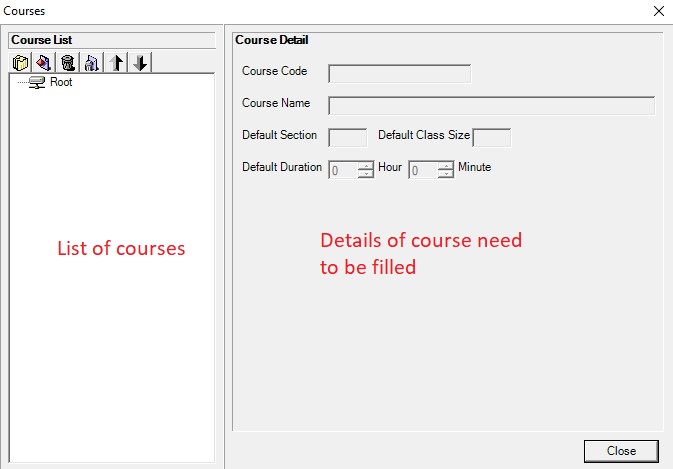
Diagram 1.3: Course Management windowA new window will pop up, showing the course management tab.
Inside Course Management tab, you will be able to see icons on the left side.
![]()
| Click this icon to create new folder | |
| Click this icon to create new room. | |
 | Click this icon to delete the lecturer or folder that you don't want. |
 | Click this icon to delete all the lecturers and folder. |
 | Click this icon to export the lecturer database from software to your file. |
 | Click this icon for import the lecturer database from your file to software. |
1.1. How to Create A New Course
There are 2 simple Steps to Create New Course in Course Management :
Step 1: Click create new course icon  to add new course
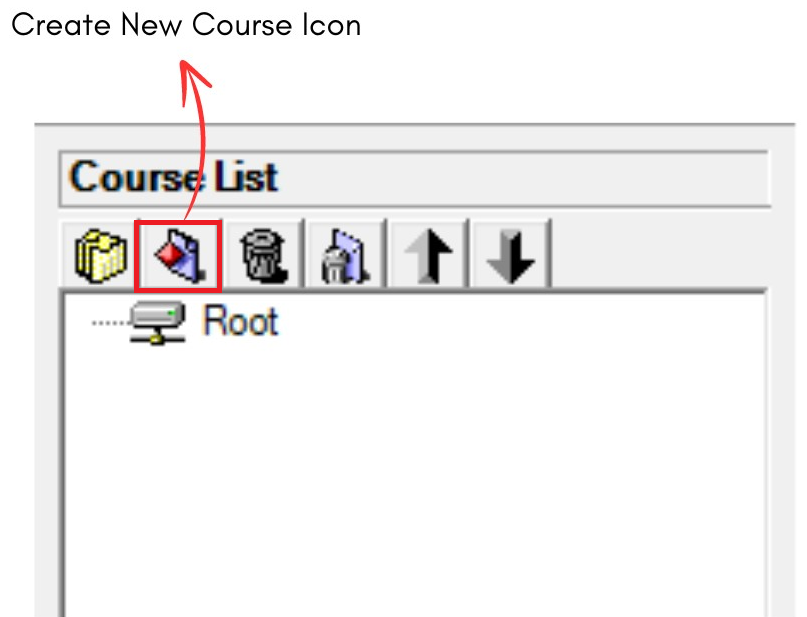
Diagram 1.1.1: Course Management Icons
Step 2 : Fill in the course detail with information you have
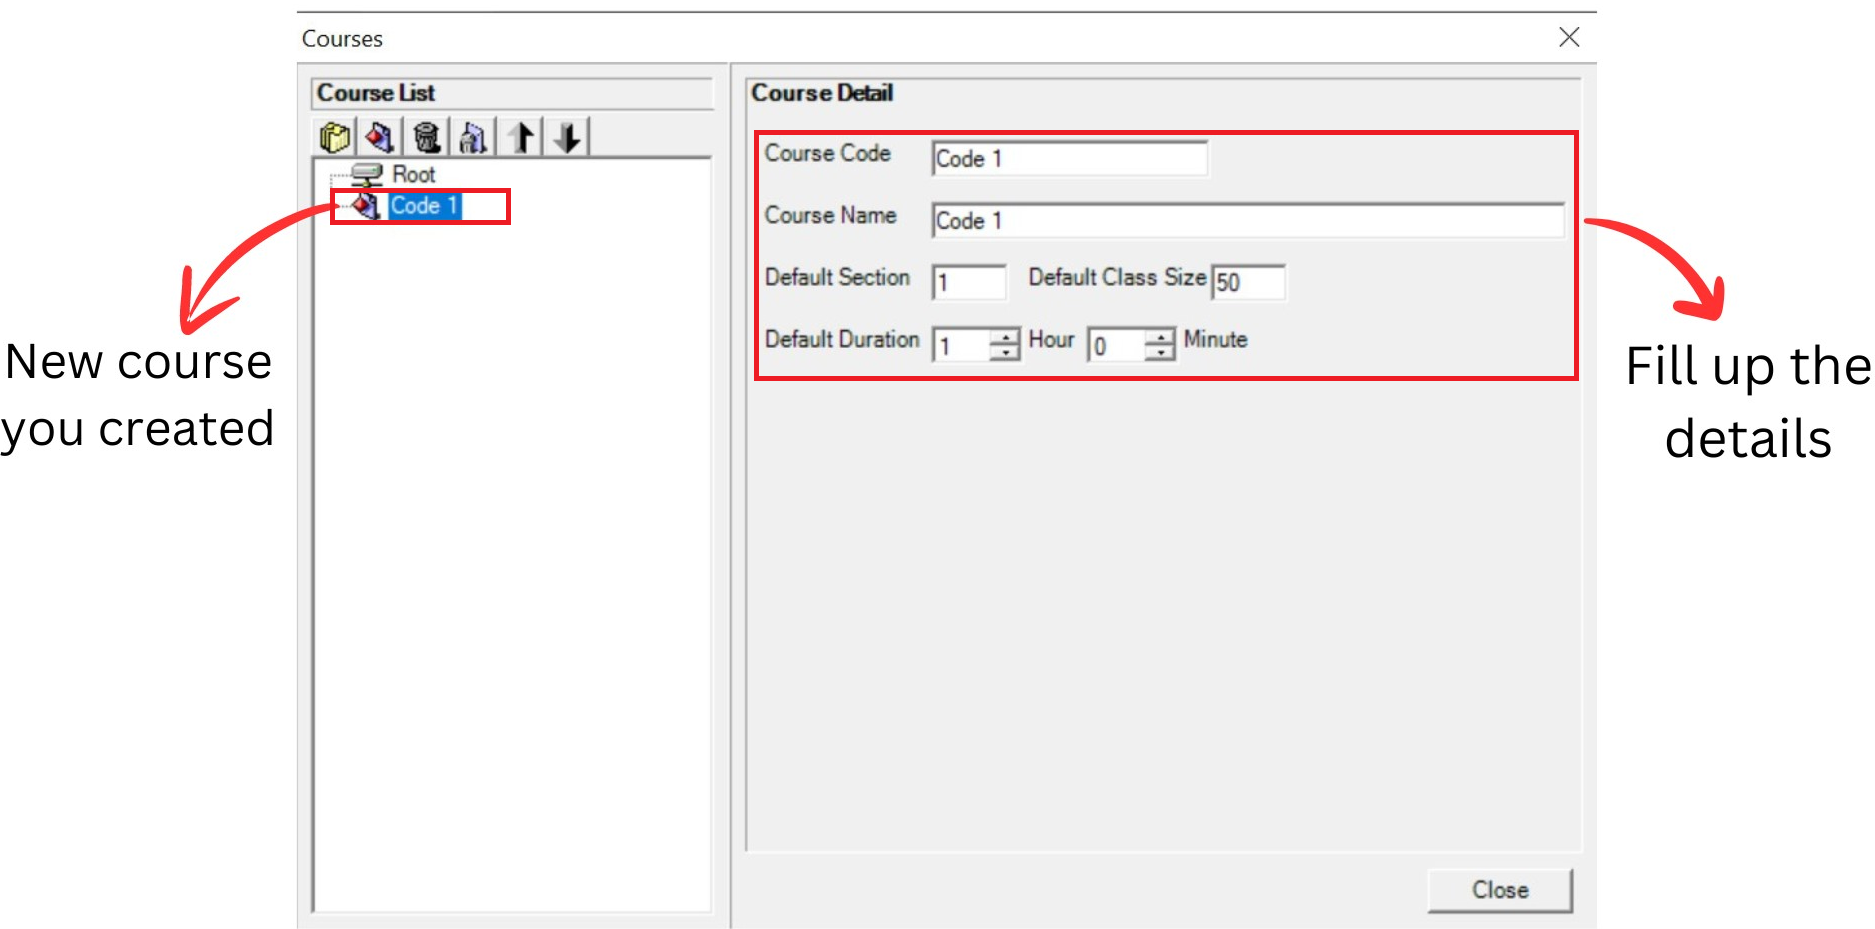
Diagram 1.1.2: Default details of a new course
Refer to the table below as example.
Course Code | Short name of the course. NOTED: Course code cannot be duplicated |
Course Name | Long name of the course |
Default Section | Default section is 1. User can make changes in data entry. |
Default Class Size | Default class capacity is 20 User can make changes in data entry |
Default Duration | Default duration is 1 hour. User can make changes in data entry |
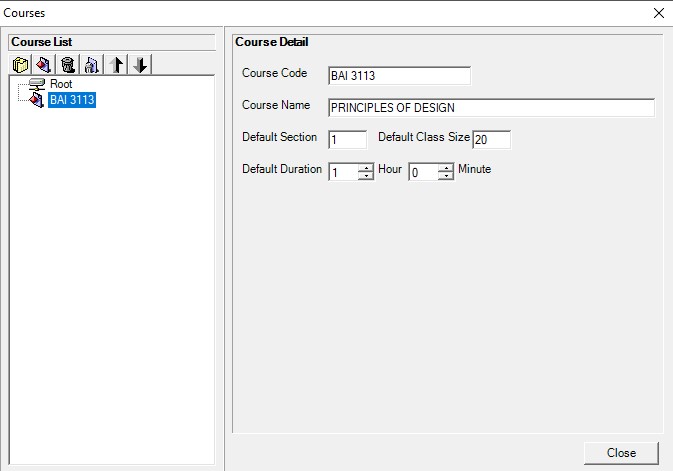
Diagram 1.1.3: Filled course detailsImportant Note:
1. New course you created will automatically appear at the bottom list of courses.
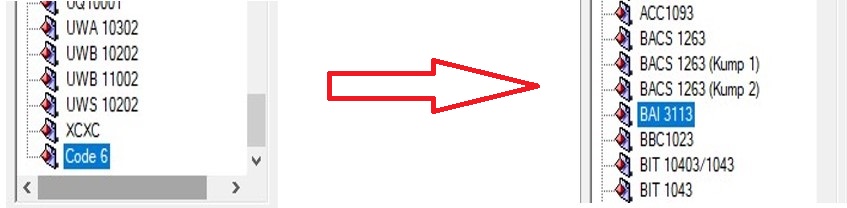
Diagram 1.1.4: Location new course you created before and after fill up the details
Option 1: Organize your courses into respective folder (Non-compulsory)
There are 3 steps to Create New Folder in Course Management
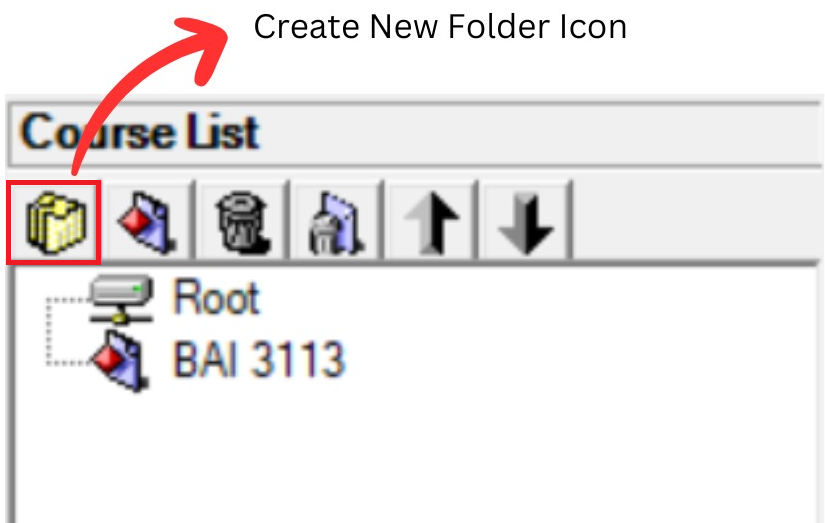
Diagram 1.1.5: Location of Create New Folder Icon
Step 1: Click Create New Folder icon  to organize your courses into respective folder.
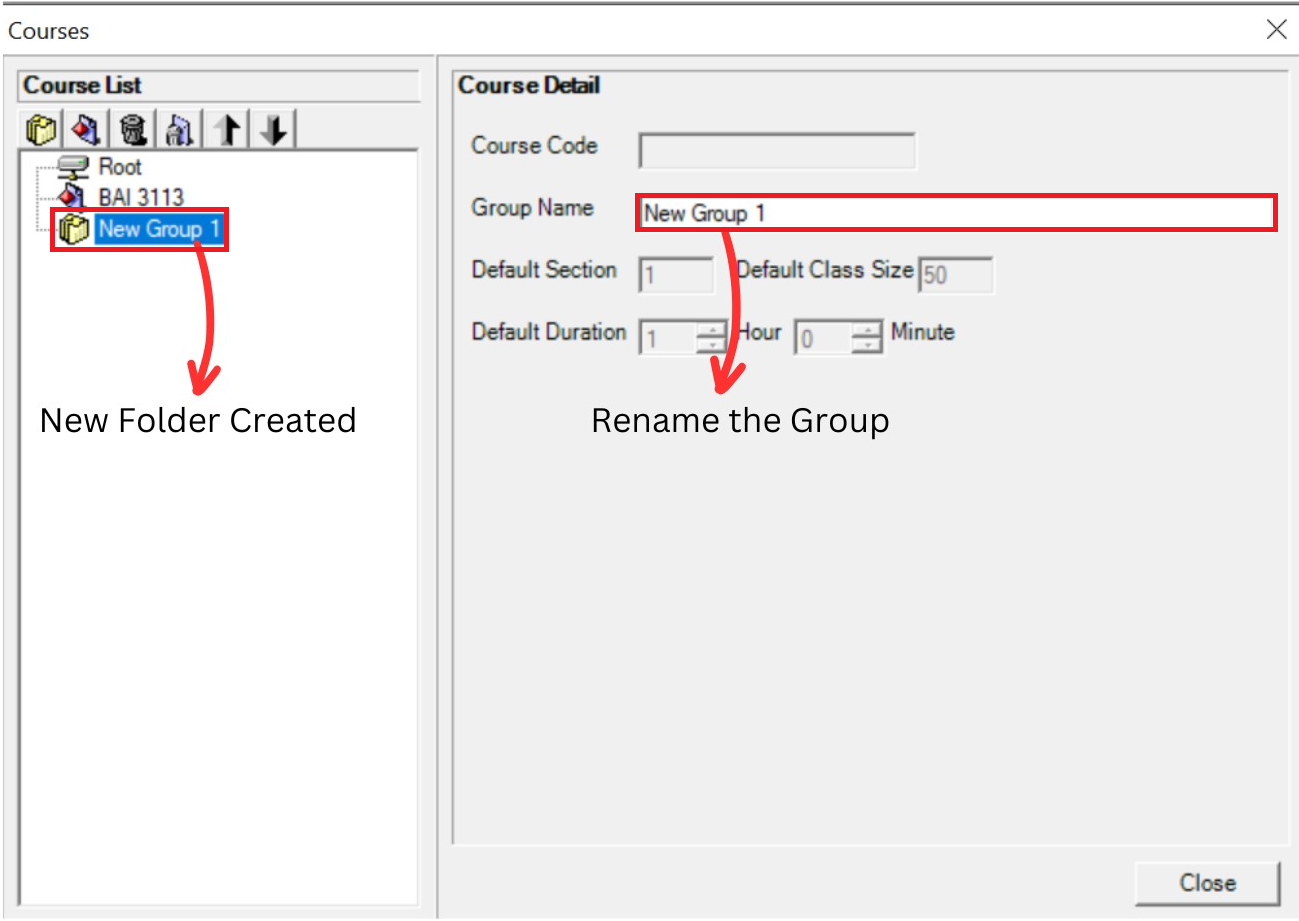
Diagram 1.1.6: Course folder details
Step 2: Rename the group.
(User can change the name by department of course. Example: DEPARTMENT OF ACCOUNTING)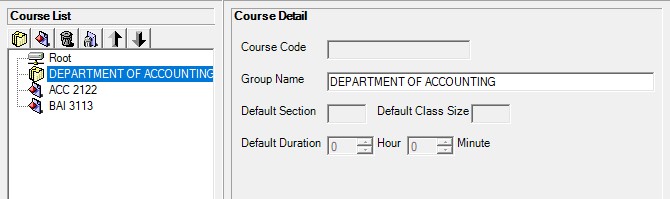
Diagram 1.1.7: Folder Renamed
Step 3: Drag the selected course to the folder and drop
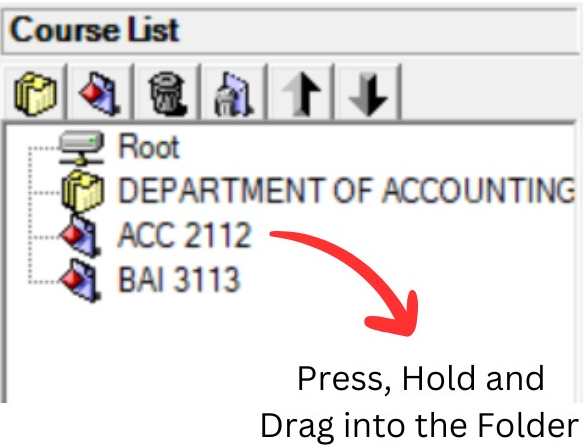
Diagram 1.1.8: Select a course to drag into the folder
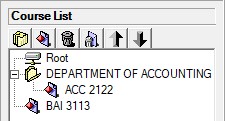
Diagram 1.1.9: Course under a folder
NOTED: New courses, new folders can be found at the bottom of the Course List. Once, Course Management has been closed, the new folder will follow the alphabetical order of the Course List once Course Management is reopened.
1.2. How To Delete a Folder Or Course
Keep your Course List tidy by deleting course or folder you no longer need.
There are 2 simple steps to Delete Course/Folder Only or Delete All:
Delete Course/Folder Only 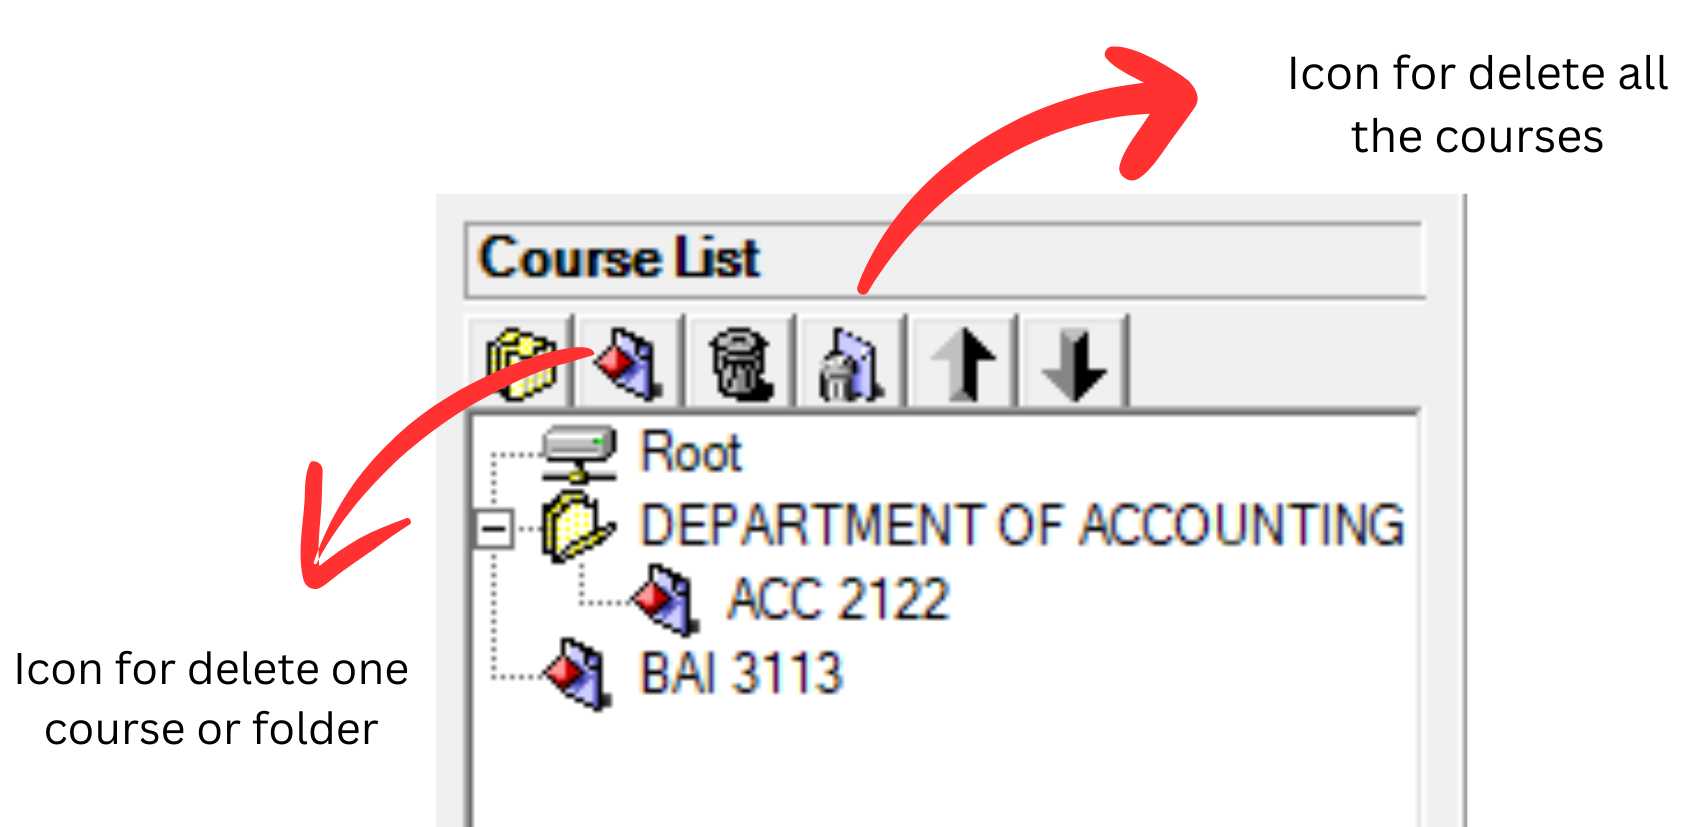
Diagram 1.2.1: Delete course and delete all the courses icon
Step 1: Select the course or folder and Click Delete Course Or Folder Icon 
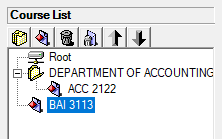
Diagram 1.2.2: Selected course to delete
Step 2: Confirmation window will pop-up and click Yes to Delete.
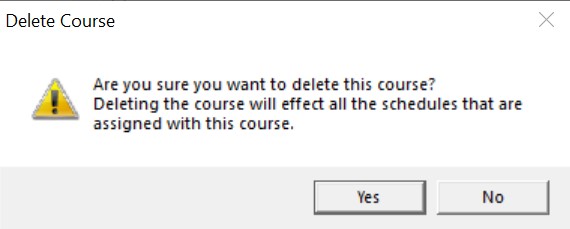
Diagram 1.2.3: Confirmation window to delete course
Delete All
Step 1: To delete all, click the delete all icon 
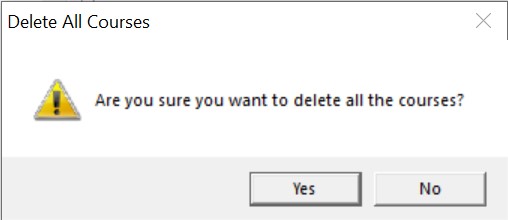
Diagram 1.2.4: Confirmation window to delete all the courses
Step 2: Confirmation window will pop-up and click Yes to Delete.
1.3. How To Export Course Database
User can export the course database to users device or transfer to other website.
There are 4 Steps to Export Course Database:

Diagram 1.3.1: Location of Export Icon
Step 1: Click the Export Icon  to export Course list
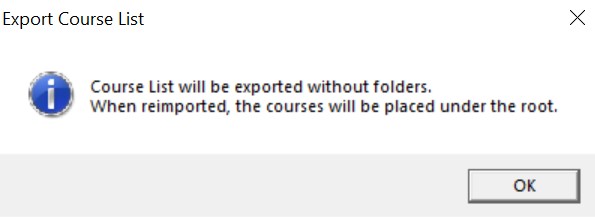
Diagram 1.3.2: Confirmation window to Export Course List
Step 2: Click OK to export room list to your computer. It will be exported without folders. When reimported, the courses will be placed under the root.

Diagram 1.3.3: Save Course list pop-up window
Step 3: Select the desired location to save the folder. For example, in backup file
Step 4: Click save and exporting the database is complete and user may change the file name.
Example :Course list
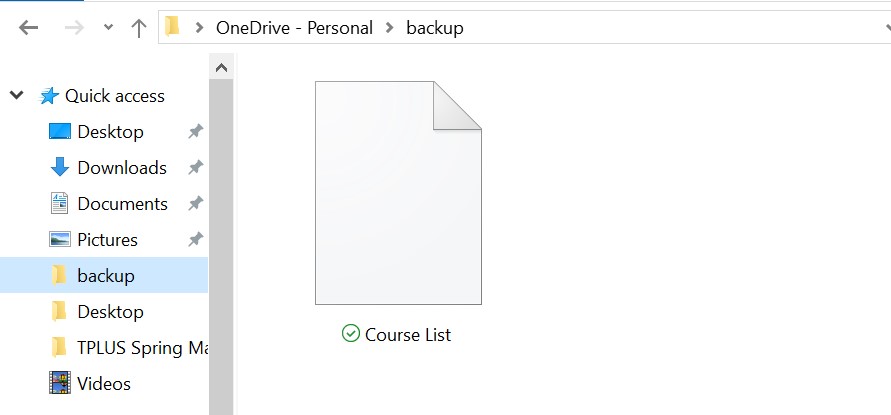
Diagram 1.3.4: Location of the saved files
Once user saved user may locate the saved files in the location that user choose. For example, in backup file
1.4. How To Import Course Database
Users can import the course database that users have to Timetable Plus Spring.( NOTED: The file that user want to import MUST in csv file )
There are 3 simple Steps to Import Course Database:
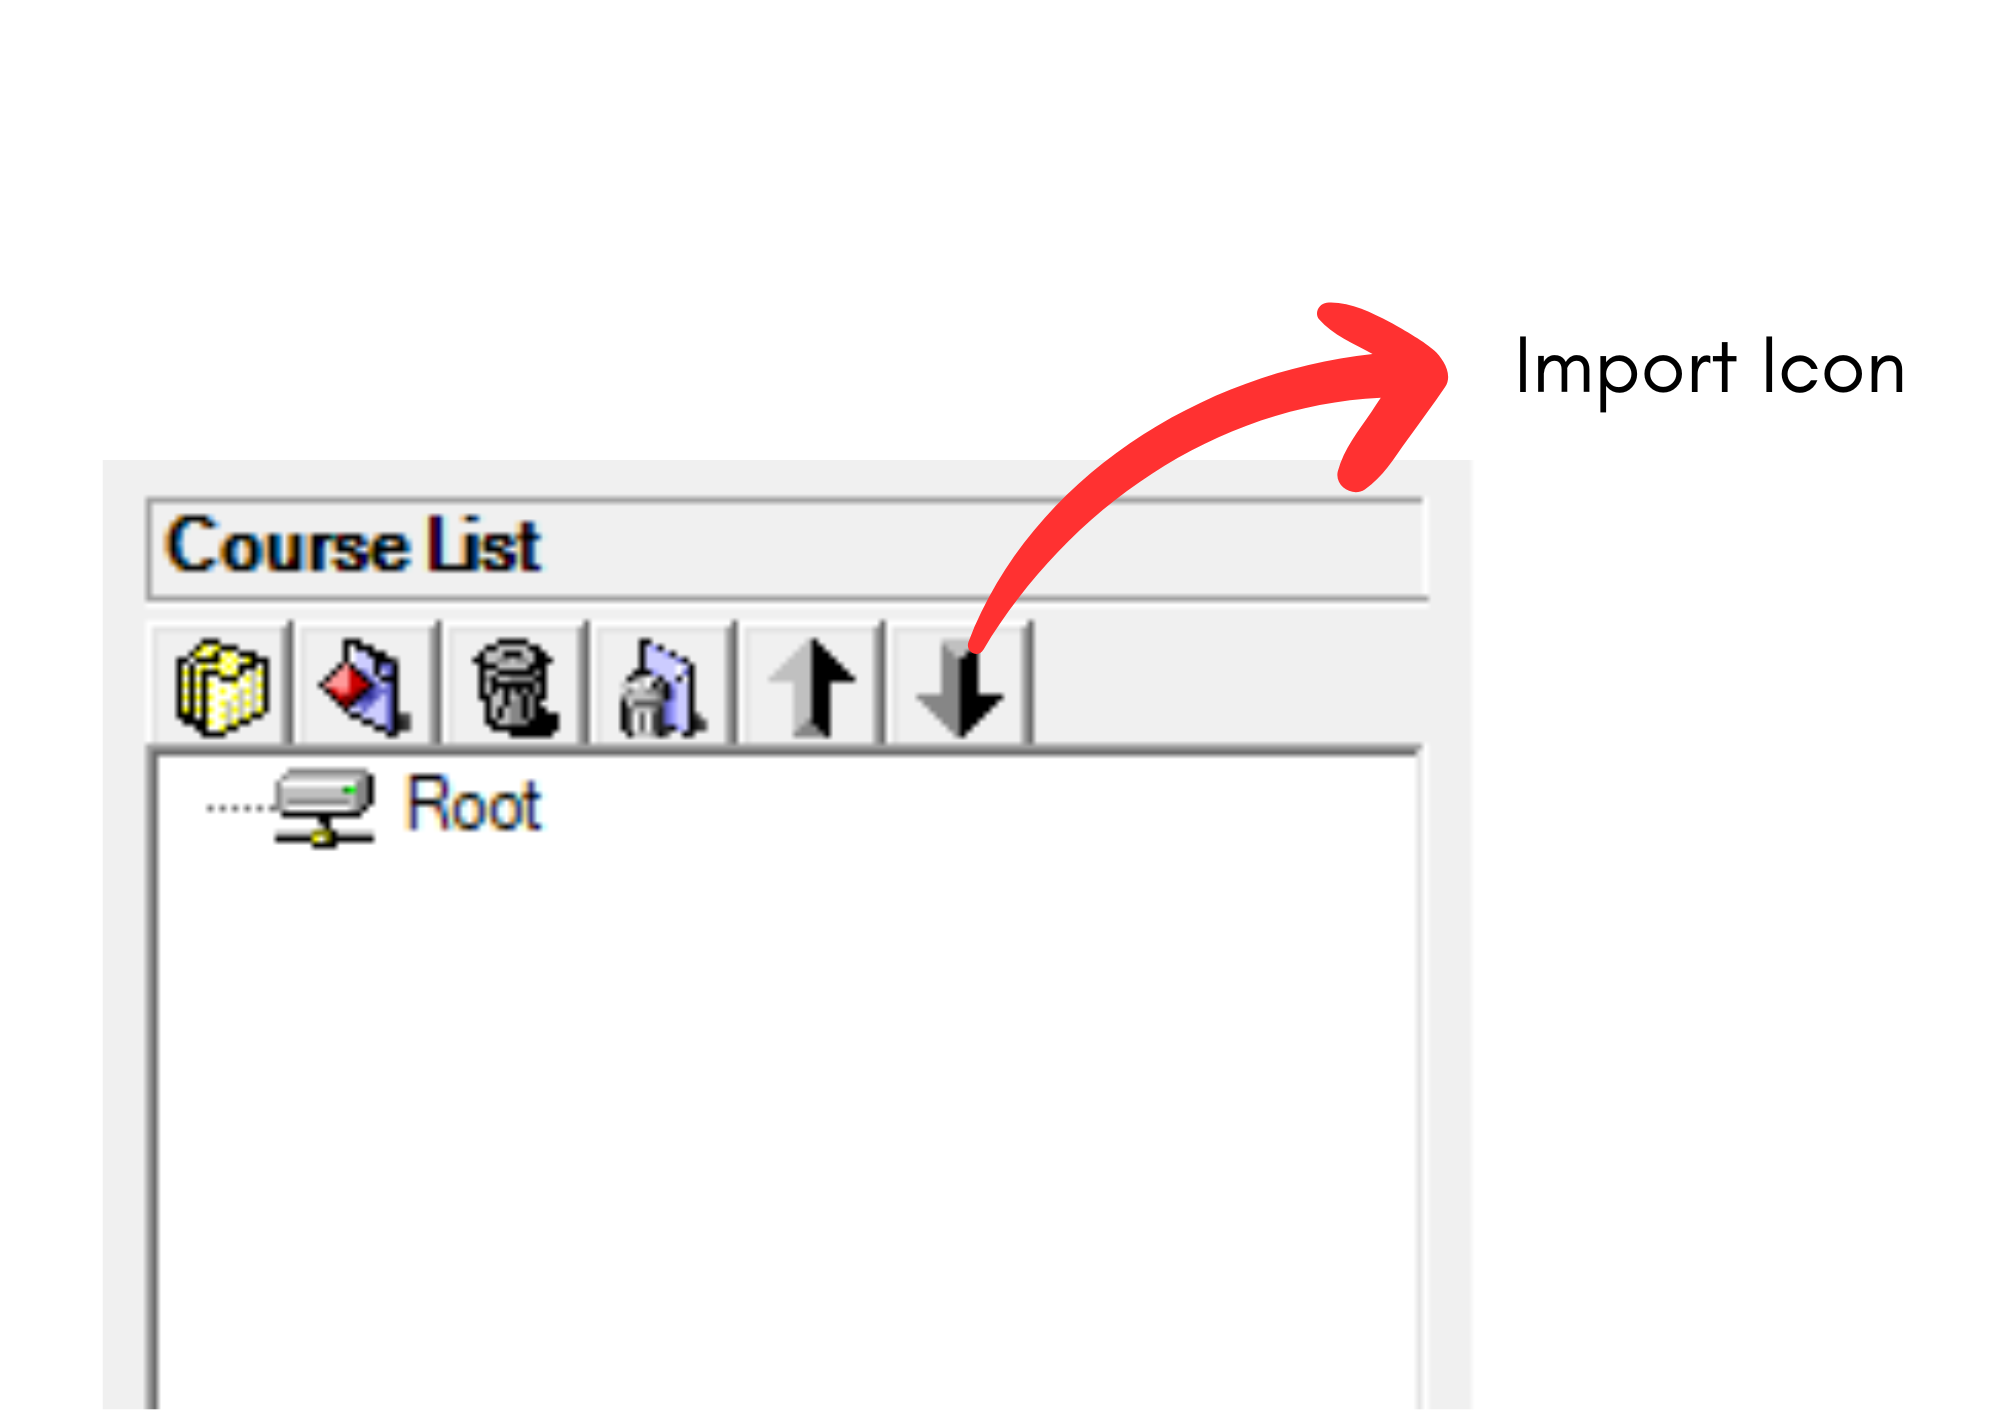
Diagram 1.4.1: Location of import iconStep 1: Click the import icon  to import course database
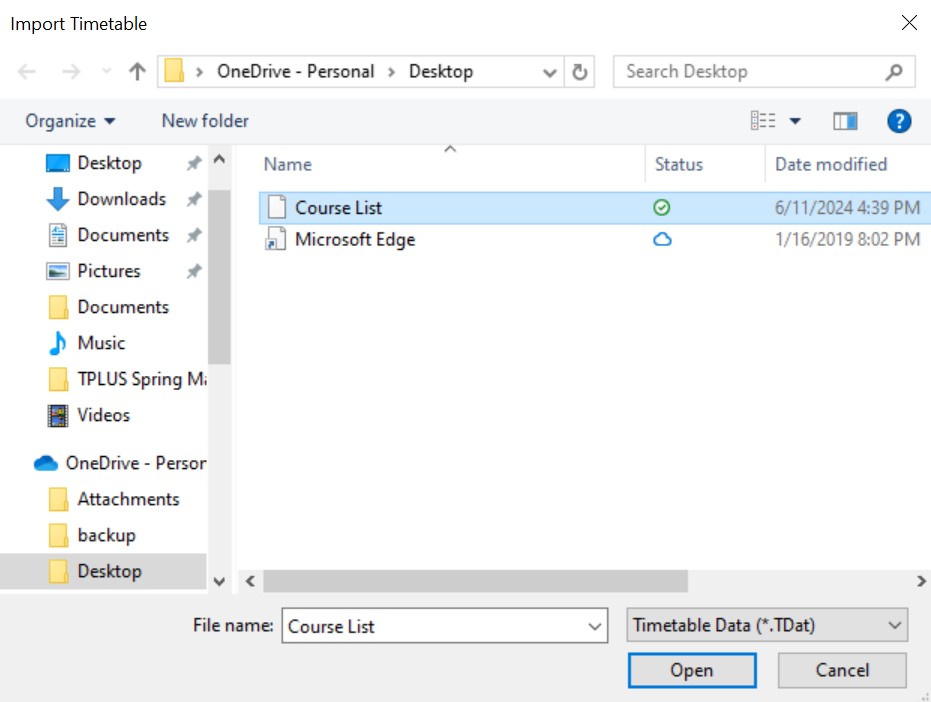
Diagram 1.4.2: Open Course Database file
Step 2: Select the file that user want to import and click open or double click the file

Diagram 1.4.3: Importing course list completed
Step 3: Click Close, and the course list is automatically save in course management.
2. Lecturers Management
Lecturers Management is important part of creating database. In Lecturers Management, there are few things that you can do which is How to Create A New Lecturer, How to Delete Folder or Lecturer, How to Import and Export Lecturer List.
There are 2 options to Open Up Lecturer Management window :
Option 1. Click the Lecturer Management Icon 

Diagram 2.1: Location icon Lecturer Management
Option 2. Click the ![]() at menu bar and then click
at menu bar and then click ![]()
![]()

Diagram 2.2: Location of Lecturers in the file drop down menu
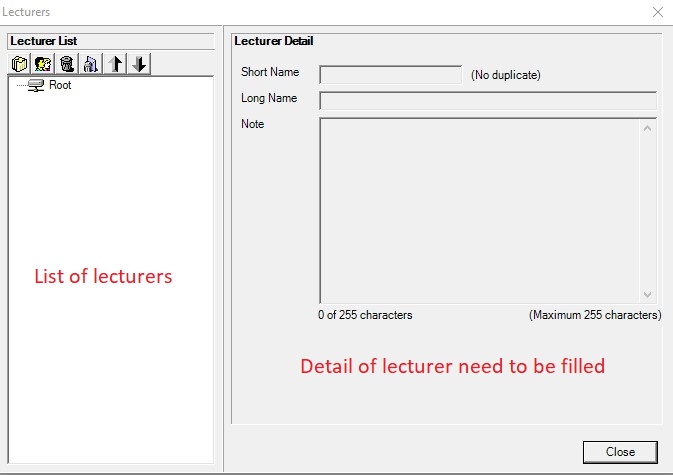
Diagram 2.3: Lecturer Management Window
A new window will pop up, showing the lecture management tab.
![]()
| | Click this icon to create new folder |
| Click this icon to create new room. | |
 | Click this icon to delete the lecturer or folder that you don't want. |
 | Click this icon to delete all the lecturers and folder. |
 | Click this icon to export the lecturer database from software to your file. |
 | Click this icon for import the lecturer database from your file to software. |
2.1. How To Create A New Lecturer
There are 2 simple Steps to Create New Lecturer in Lecturer Management :
Step 1: Click create new lecturer icon  to add new lecturer
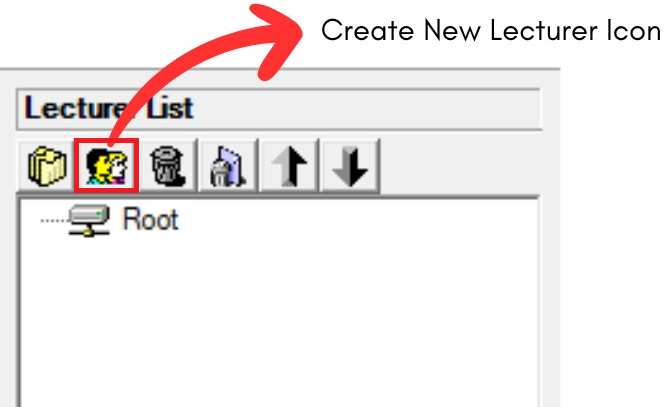
Diagram 2.1.1: Create new folder and new lecturer icon
Step 2: Fill in the course detail with the information you have
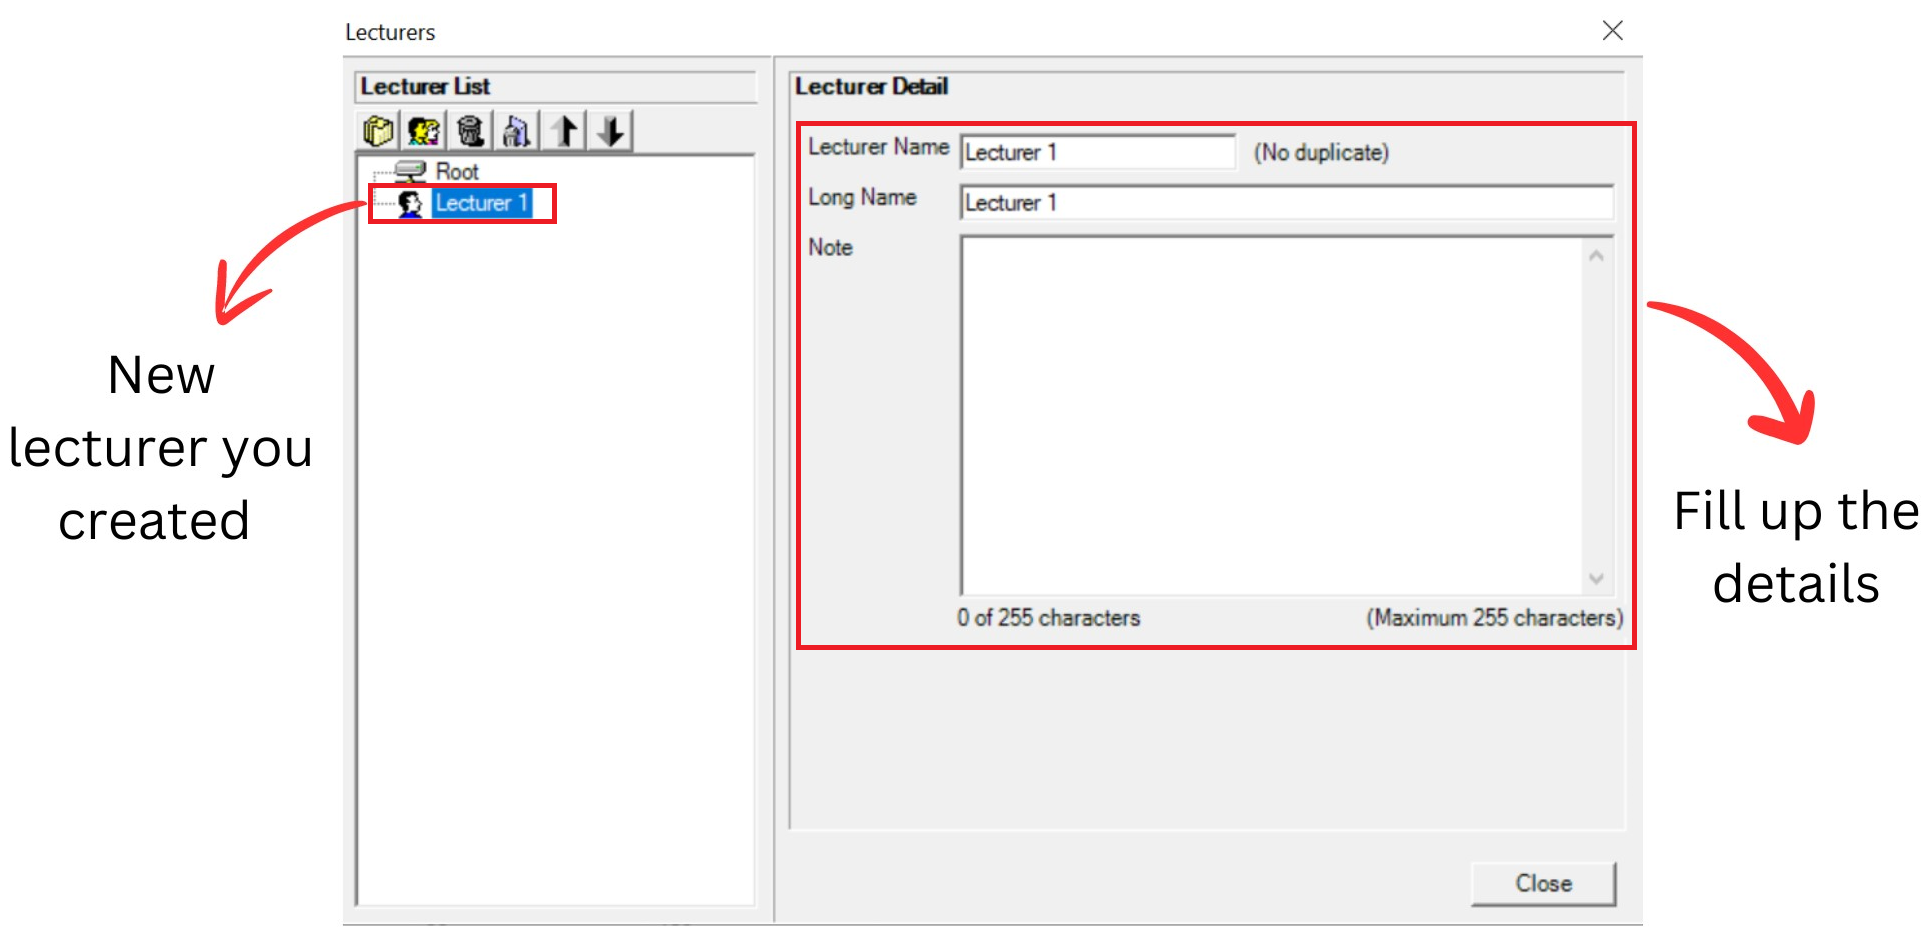
Diagram 2.1.2: Default details of a new lecturer Refer to the table below as example.
Short Name | Short name of the lecturer. Short name cannot be duplicated |
Long Name | Long name of the Lecturer |
Note | Optional to put the note or preference of lecturer Example: In charge of swimming club |
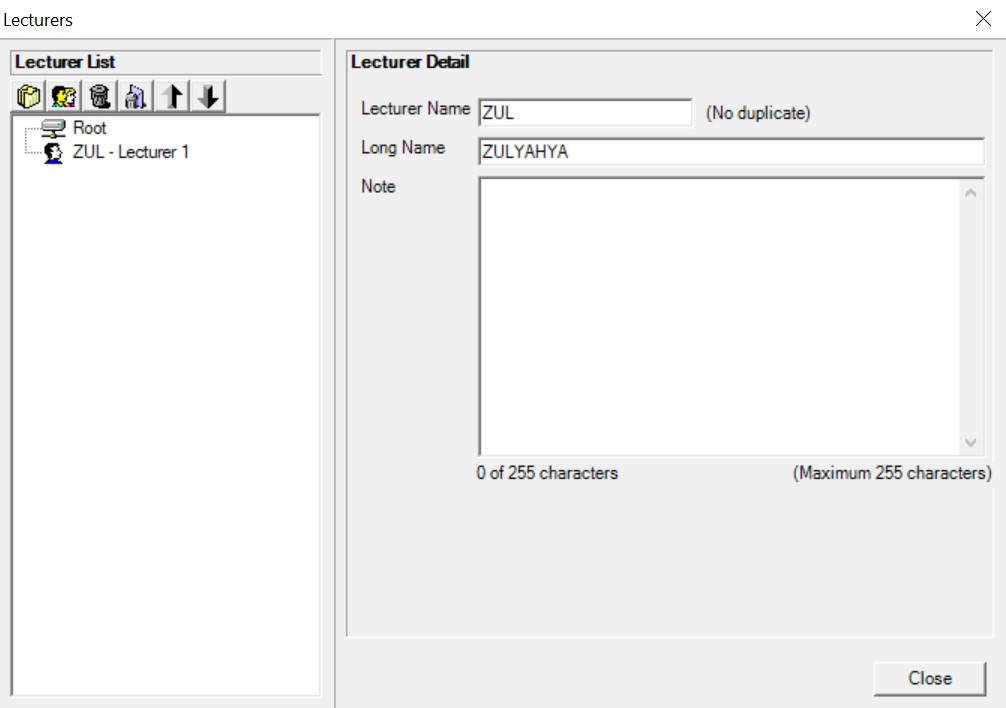
Diagram 2.1.3: Filled lecturer detailsImportant note:
New lecturer you created will automatically appear at the bottom list of courses. Fill up the lecturer detail and you close the lecturer management window and reopening it, the course will be found in the list of lecturers according to alphabetical order.
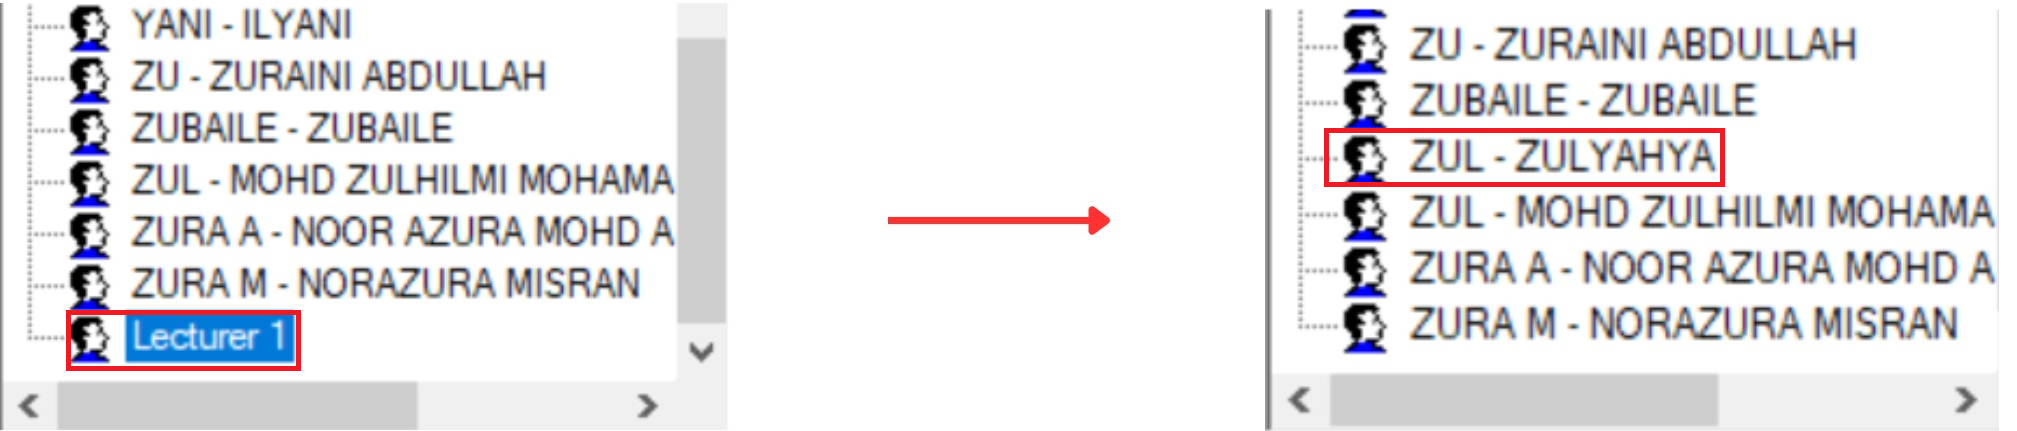
Diagram 2.1.4: Location new lecturer you created before and after fill up the detailsOption 1: Organize your lecturers into respective folder (Non-compulsory)
There are 3 steps to Create New Folder in Lecturer Management
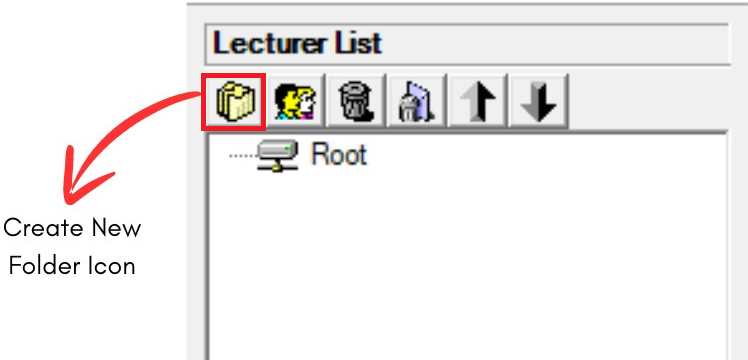
Diagram 2.1.5: Location of Create New Folder IconStep 1: Click Create New Folder icon  to organize your lecturers into respective folder
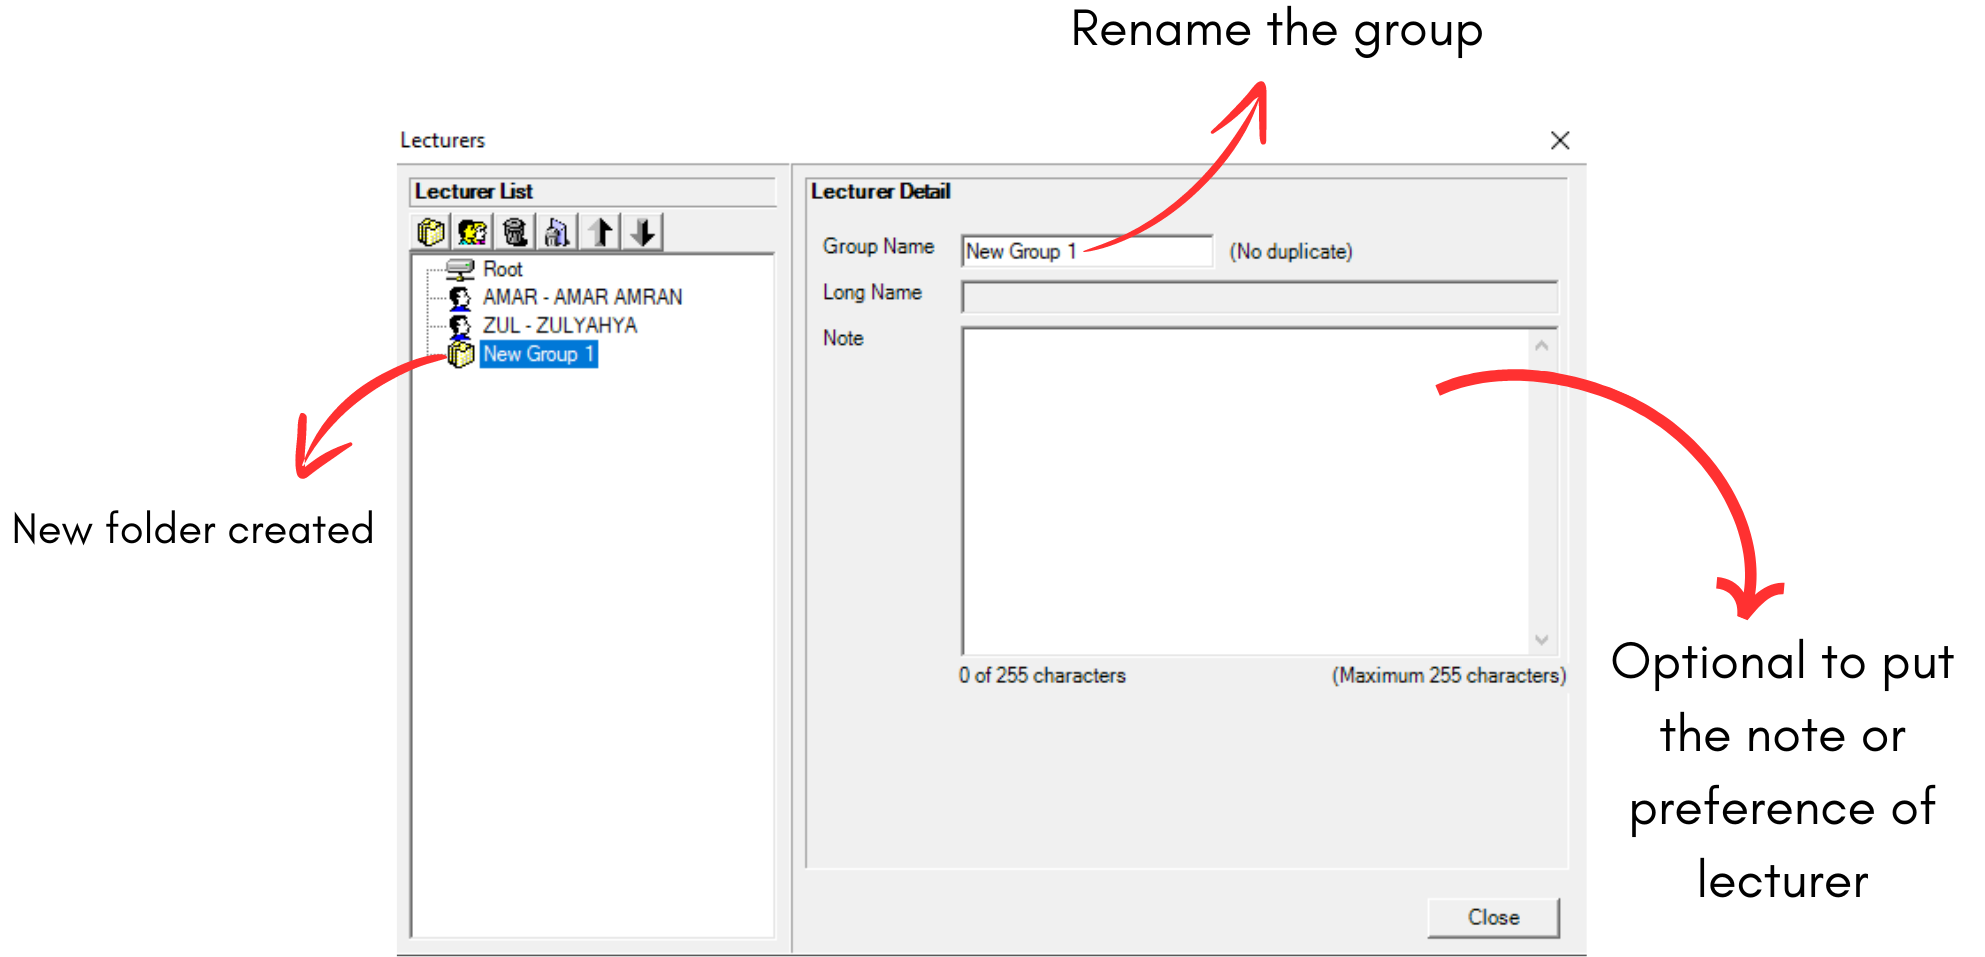
Diagram 2.1.6: Lecturer's folder details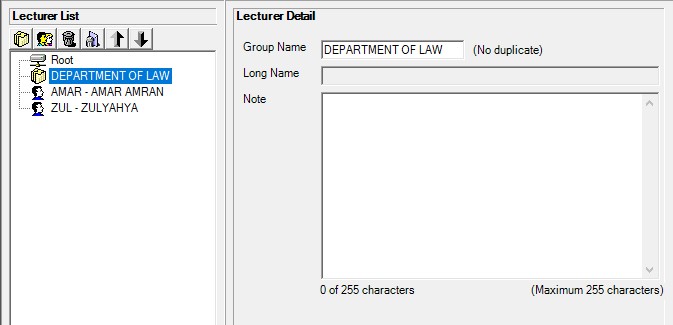
Diagram 2.1.7: Filled lecturer's folder detailStep 2: Rename the group.
(User can change the name by department of course. Example: DEPARTMENT OF LAW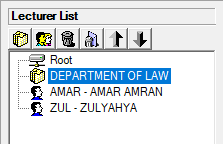
Diagram 2.1.8: Renamed lecturer's folderStep 3: Drag the selected lecturer to the folder and drop
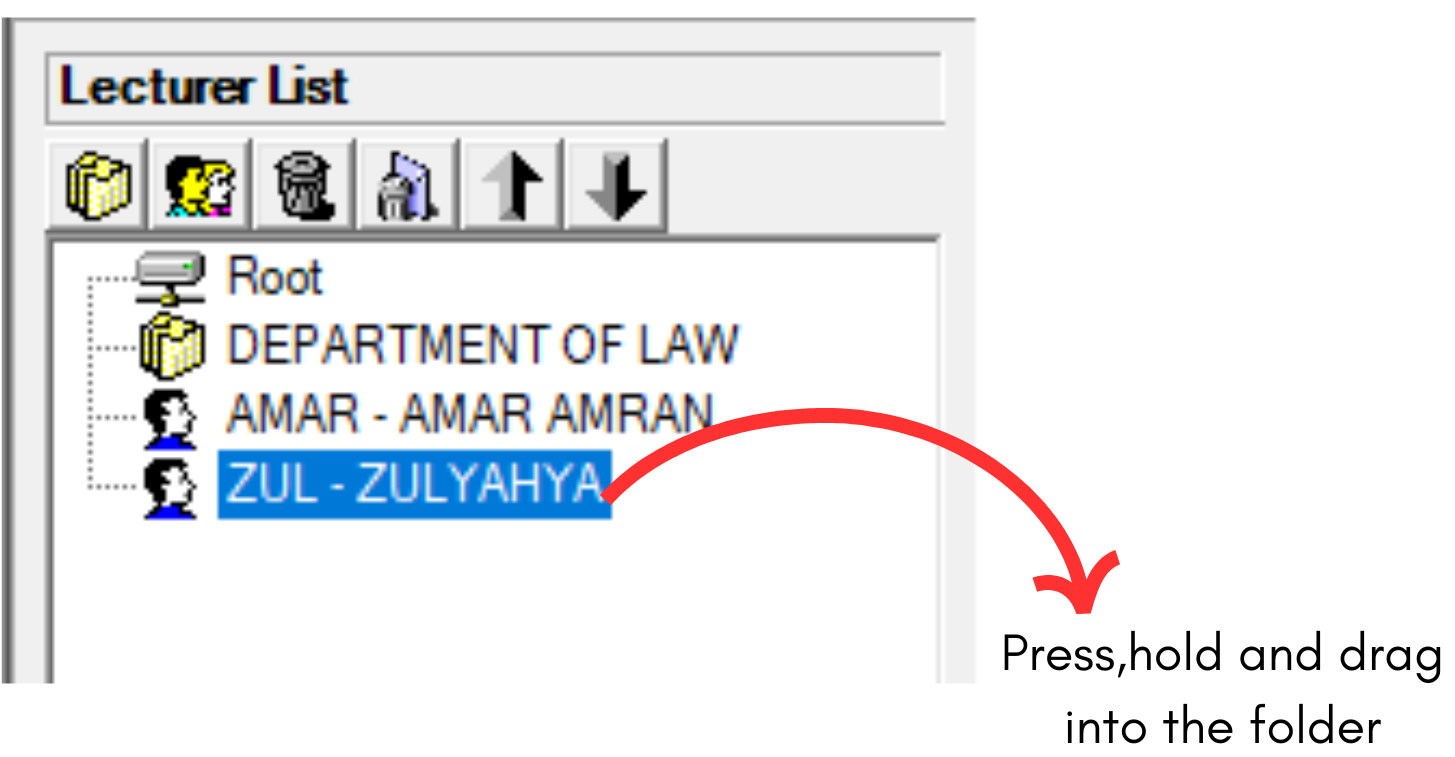
Diagram 2.1.9: Select a course to drag into the folder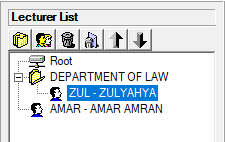
Diagram 2.1.10: Lecturer under a folderNOTED: New lecturers, new folders can be found at the bottom of the Lecturer List. Once, Lecturer Management has been closed, the new folder will follow the alphabetical order of the Lecturer List once Lecturer Management is reopened.
2.2. How To Delete A Folder Or Lecturer
Keep your Lecturer List tidy by deleting Lecturer or folder you no longer need.
There are 2 simple steps to Delete Lecturer/Folder Only or Delete All:
Delete Lecturer/Folder Only
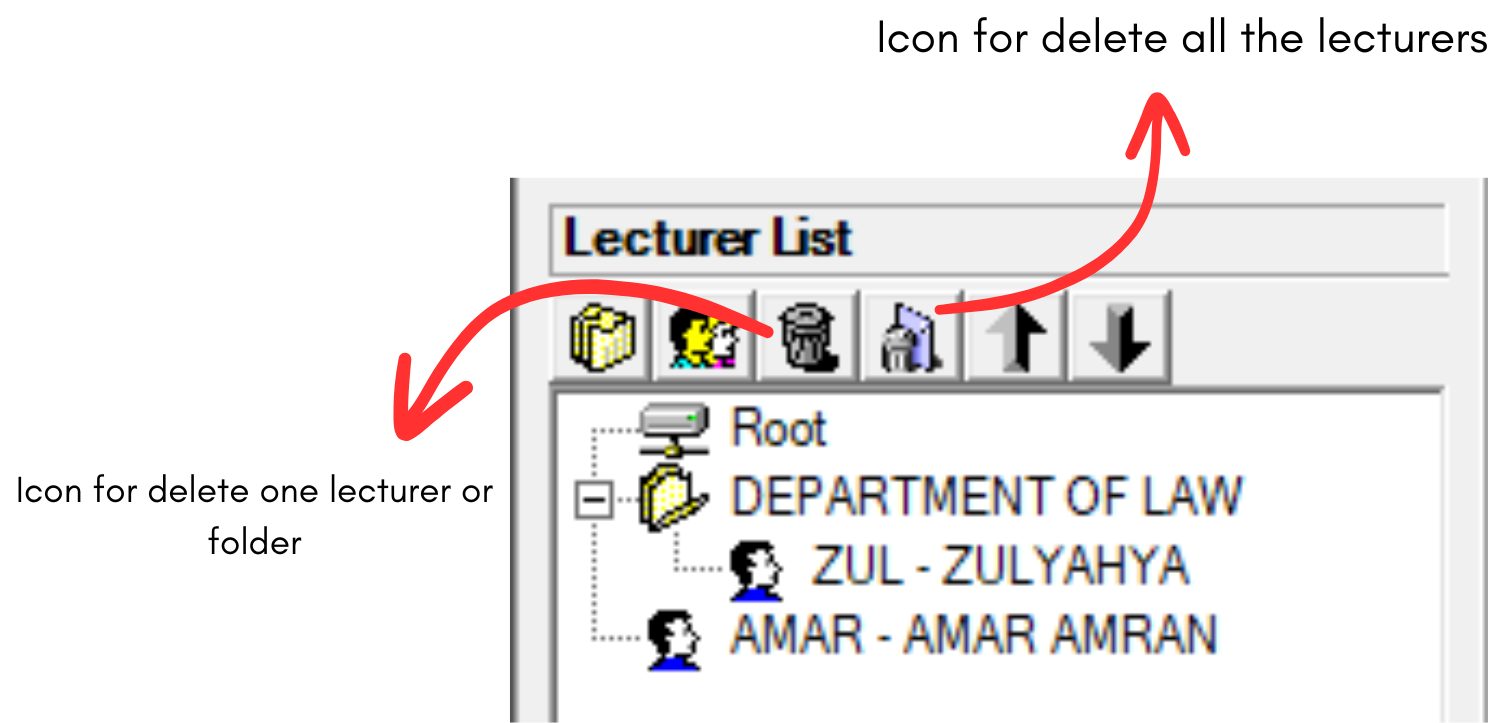
Diagram 2.2.1: Delete lecture and delete all the lecturers icon
Step 1: Select the Lecturer or folder and Click Delete Lecturer Or Folder Icon 
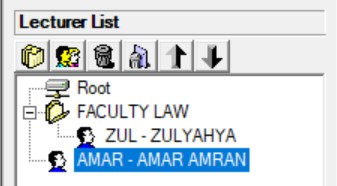
Diagram 2.2.2: Selected lecturer to delete
Step 2: Confirmation window will pop-up and click Yes to Delete
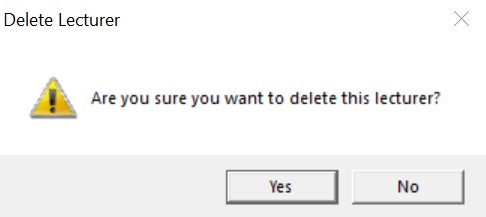
Diagram 2.2.3: Confirmation window to delete lecturerDelete All
Step 1: To delete all, click the delete all icon 
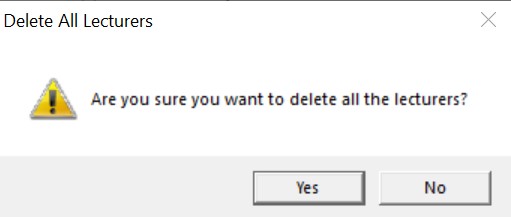
Diagram 2.2.4: Confirmation window to delete all the lecturersStep 2: Confirmation window will pop-up and click Yes to Delete.
2.3. How To Export Lecturer Database
User can export the Lecturer database to users device or transfer to other website
There are 4 simple steps to Export Lecturer Database:
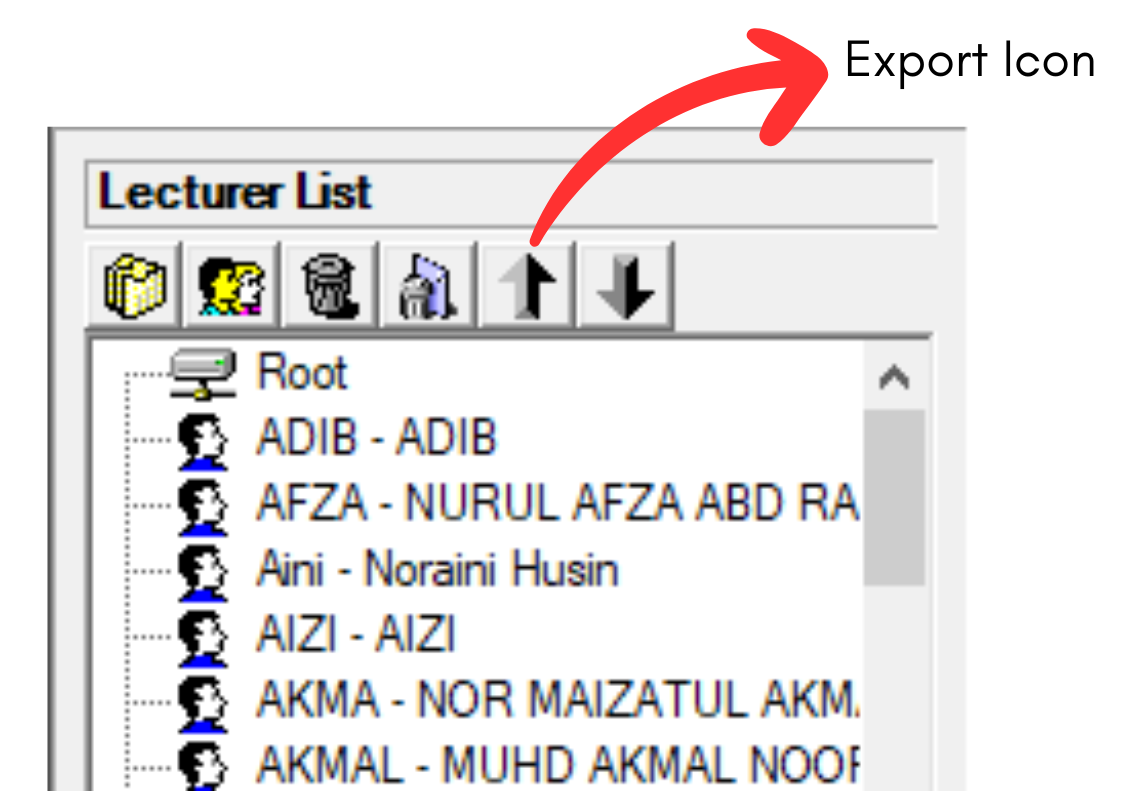
Diagram 2.3.1: Location of Export Icon
Step 1: Click the Export Icon  to export Lecturer list
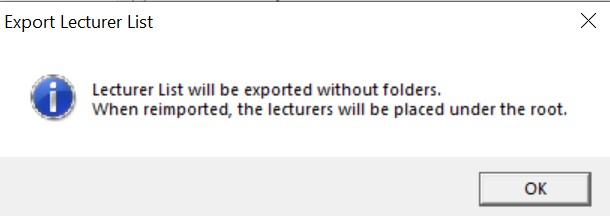
Diagram 2.3.2: Confirmation window to Export Lecturer ListStep 2: Click OK to export Lecturer list to your computer. It will be exported without folders. When reimported, the lecturers will be placed under the root.
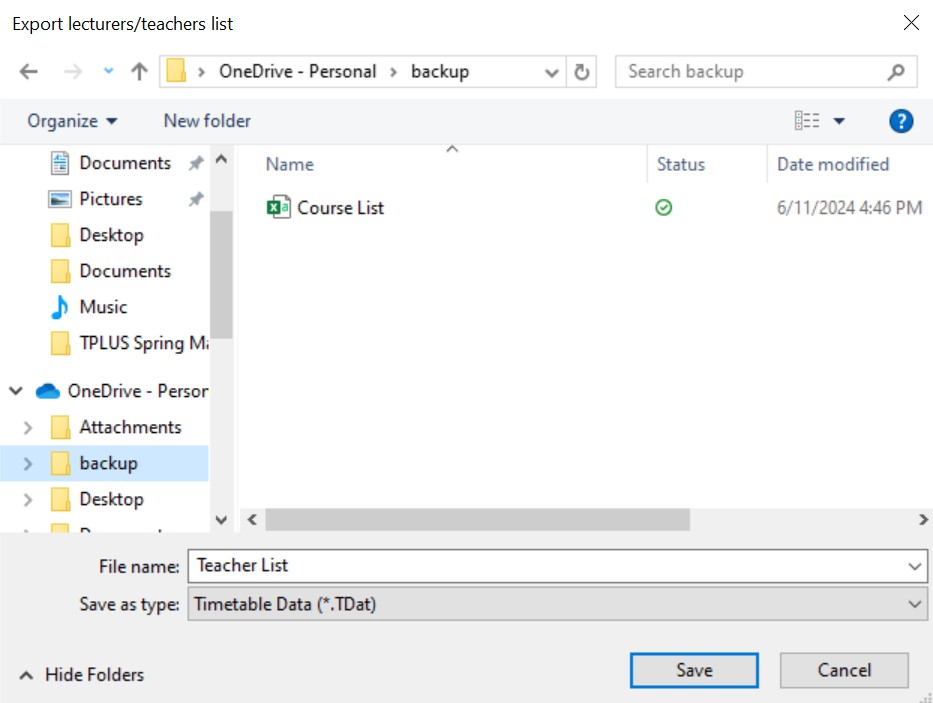
Diagram 2.3.3: Save Lecturer list pop-up windowStep 3: Select the desired location to save the folder. For example, in backup file
Step 4: Click save and exporting the database is complete and user may change the file name.
Example :Teacher list
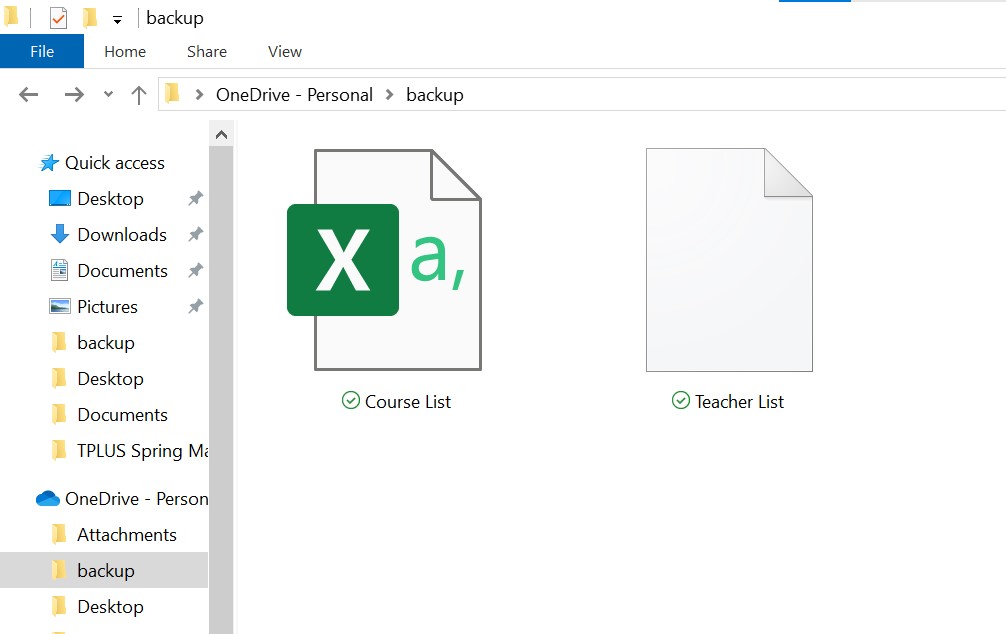
Diagram 2.3.4: Location of the saved filesOnce user saved user may locate the saved files in the location that user choose. For example, in backup file.
2.4. Importing Lecturer Database
Users can import the lecturer database that users have to Timetable Plus Spring.( NOTED: The file that user want to import MUST in csv file )
There are 3 Steps to Import Lecturer Database:
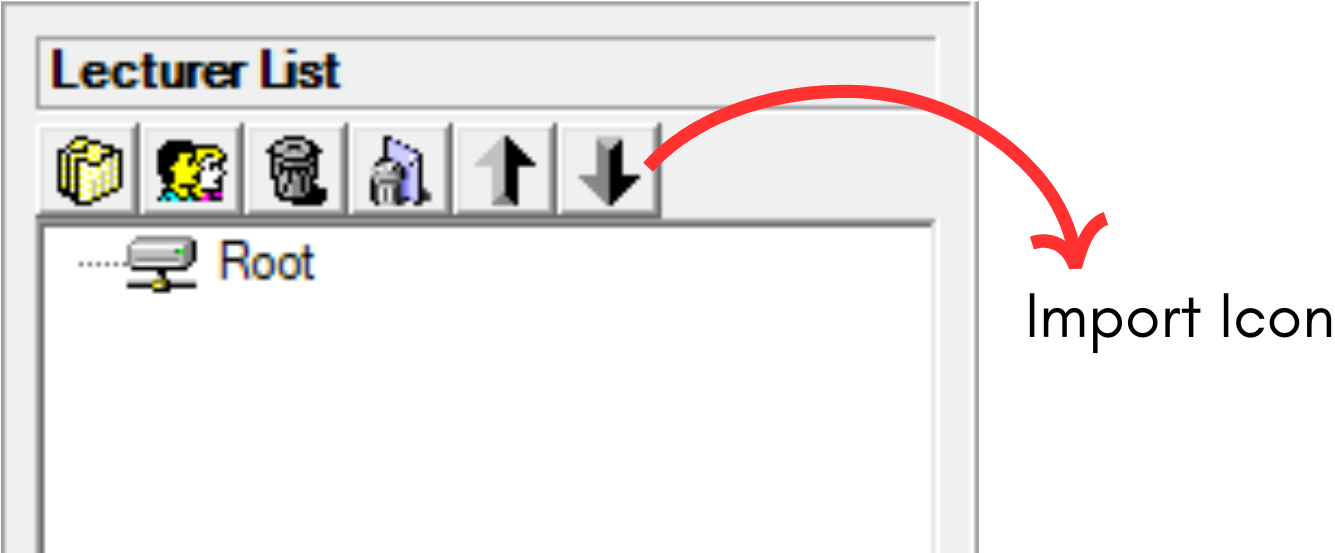
Diagram 2.5.1 Location import Icon in Lecturer ManagementStep 1: Click the import icon  to import course database
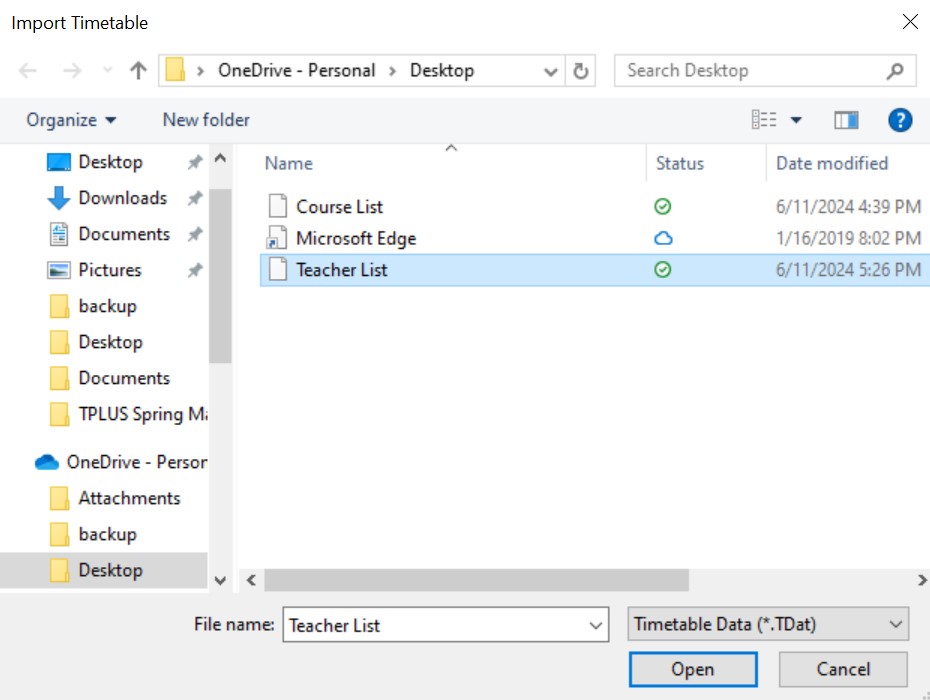
Diagram 2.5.2: Open Lecturer Database file
Step 2: Select the file that user want to import and click open or double click the file

Diagram 2.5.3: Importing Lecturer list completedStep 3: Click Close, and the course list is automatically save in lecturer management
3. Room Management
Room management is important part of creating database. In Room Management, there are few things that you can do which is How to Create A New Room, How to Delete A Folder or Room, How to Import and Export Room List.
There are 2 options to open up Room management window :
Option 1: Click the Room Management icon 

Diagram 3.1: Location icon Room Management
Option 2. Click the ![]() at menu bar and then click
at menu bar and then click ![]()

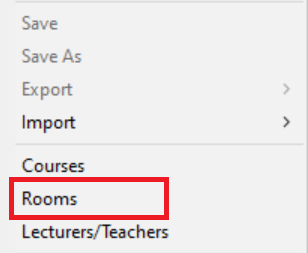
Diagram 3..2: Location of Rooms in the file drop down menu
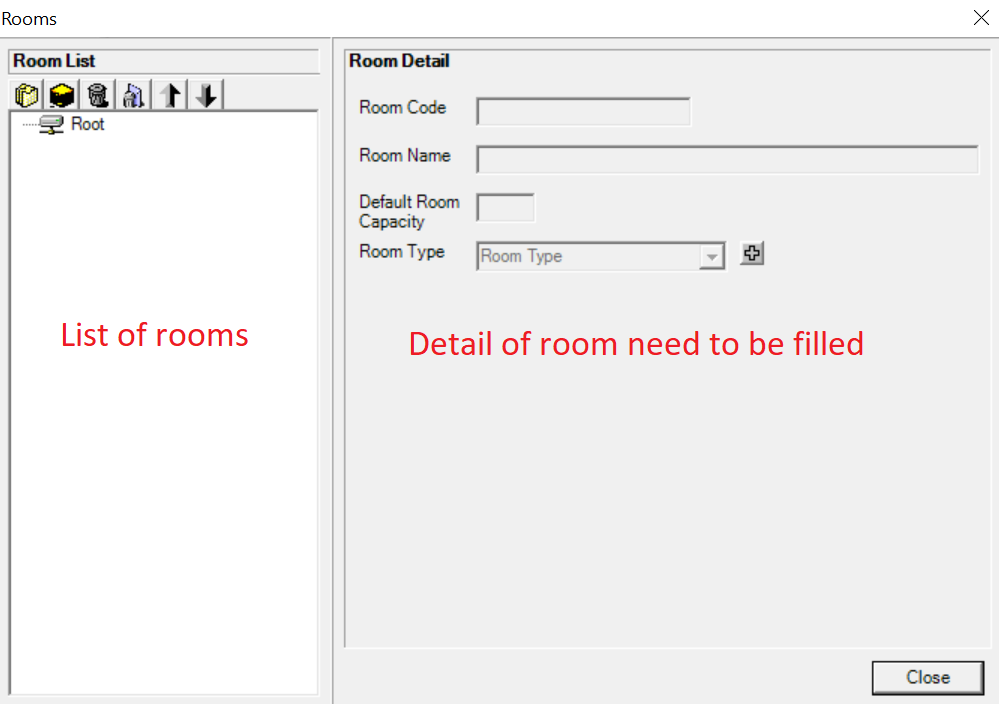
Diagram 3.3: Room Management Window
A new window will pop up, showing the Room management tab.
The icon will be on the top left side of room management tab.
![]()
| | Click this icon to create new folder |
| Click this icon to create new room. | |
 | Click this icon to delete the lecturer or folder that you don't want. |
 | Click this icon to delete all the lecturers and folder. |
 | Click this icon to export the lecturer database from software to your file. |
 | Click this icon for import the lecturer database from your file to software. |
3.1. How To Create A New Room
There are 2 simple Steps to Create New Room in Room Management :
Step 1: Click create new room icon  to add new room
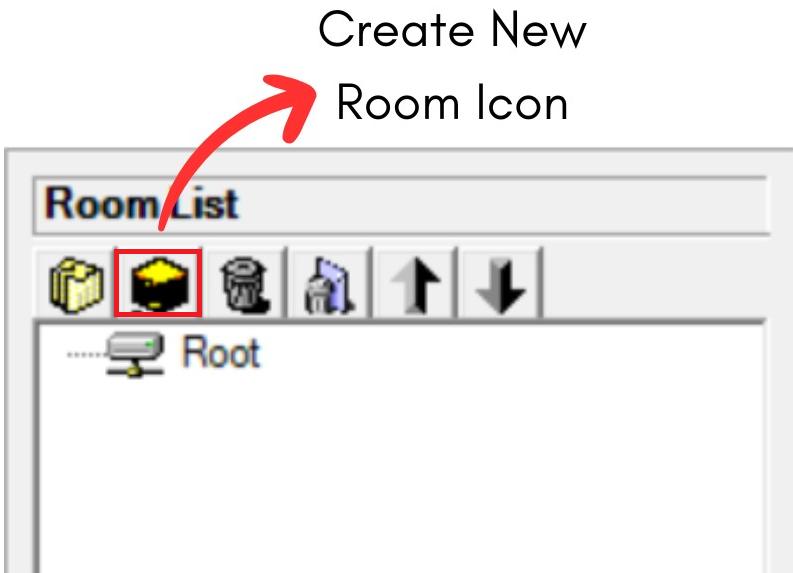
Diagram 3.1.1: Create new folder and new room icon
Step 2: Fill in the room detail with the information you have
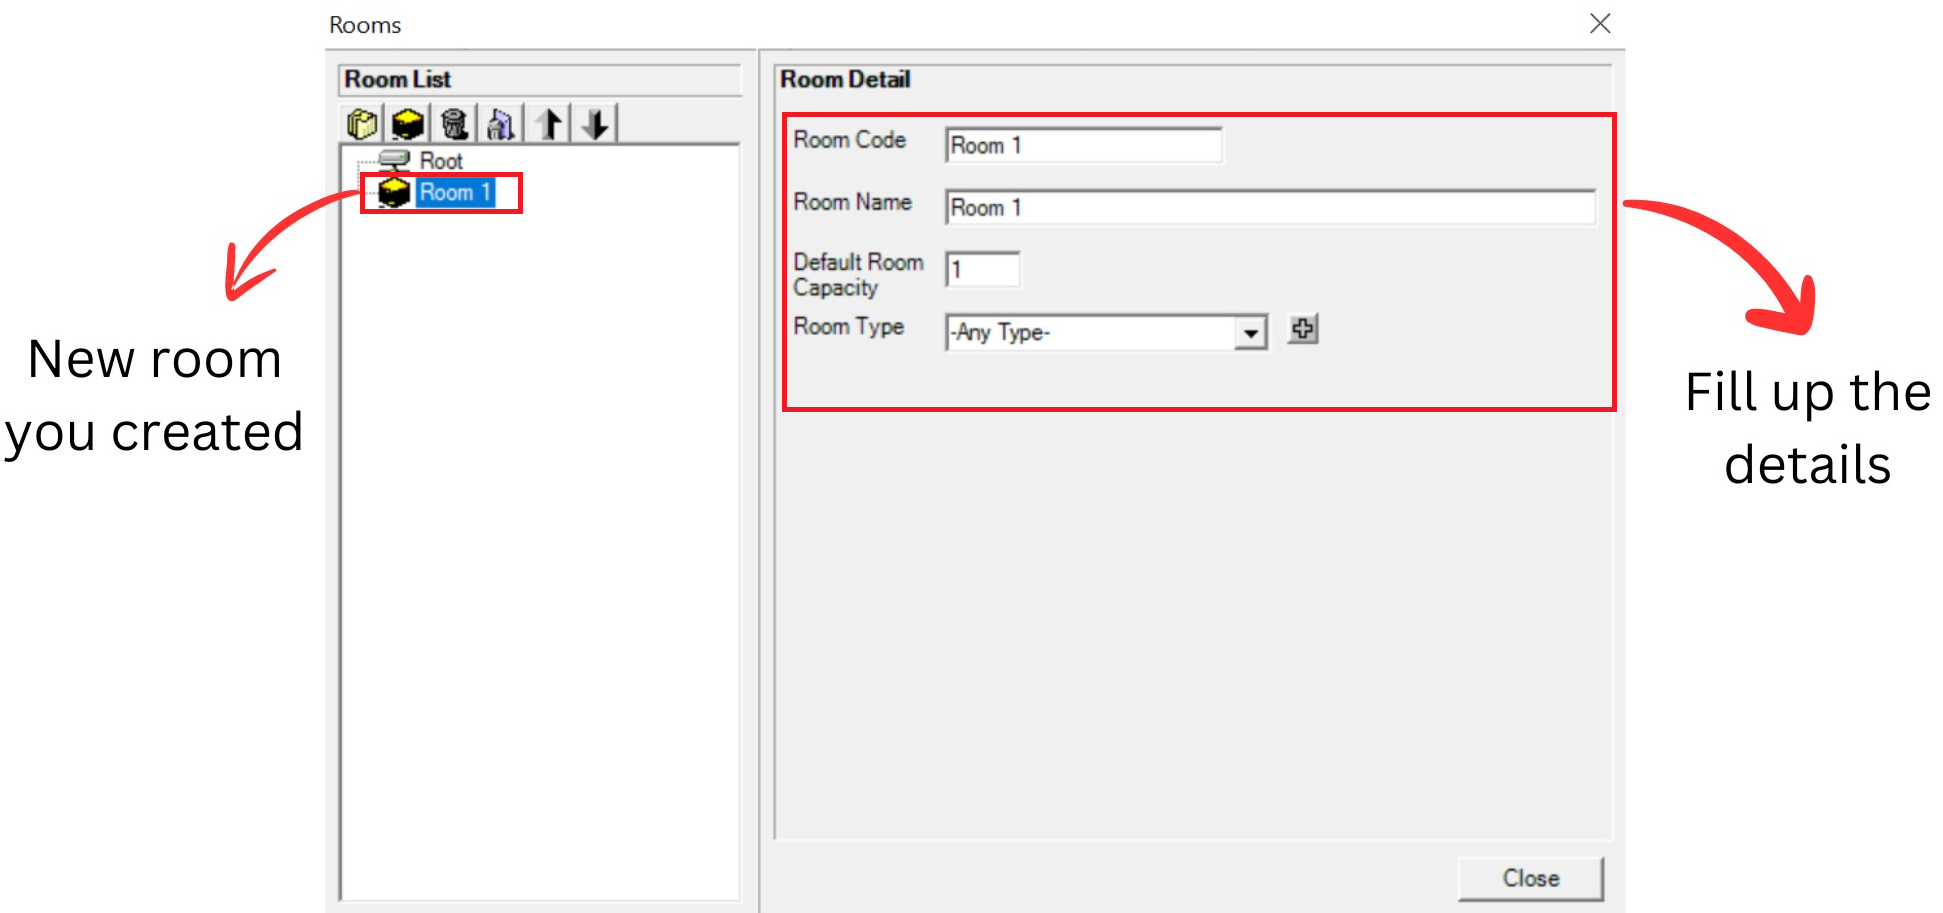
Diagram 3.2.2: Default details of a new room
Refer to the table below as example.
Room Code | Short name of the room. Room code cannot be duplicated and compulsory. |
Room Name | Long name of the room. It is compulsory. |
Default Room Capacity | Default room capacity is 20 User can make changes in data entry |
Room Type | Type of room Example: BK |
Below is the example how it look after filling the detail.
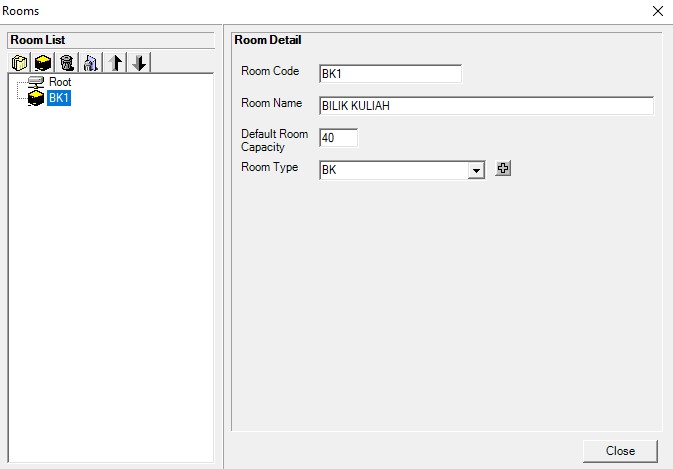
Diagram 3.2.3: Filled room details
Important note:
1. New room you created will automatically appear at the bottom list of rooms. Fill up the room detail and you close the room management window and reopening it, the room will be found in the list of rooms according to alphabetical order.

Diagram 3.2.4: Location new course you created before and after fill up the detailsOption 1: Organize your rooms into respective folder (Non-compulsory)
There are 3 steps to Create New Folder in Course Management
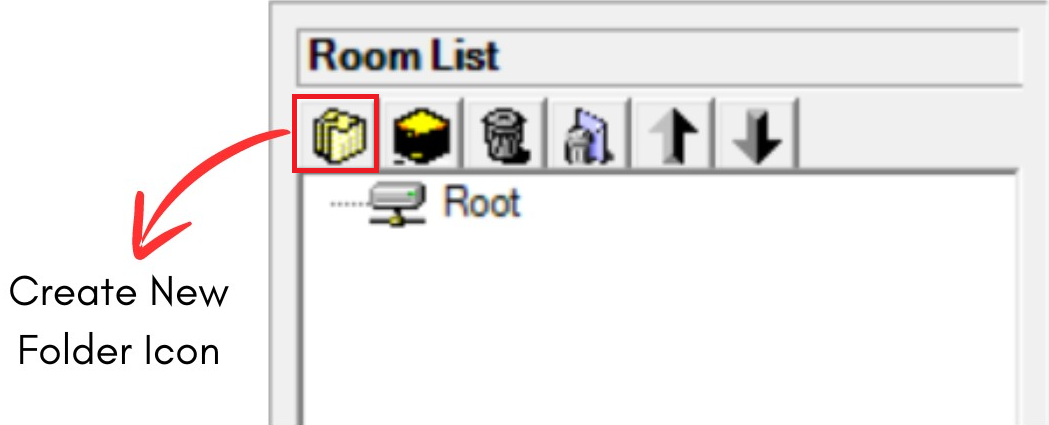
Diagram 3.2.5: Location of Create New Folder Icon
Step 1: Click Create New Folder icon  to organize your rooms into respective folder
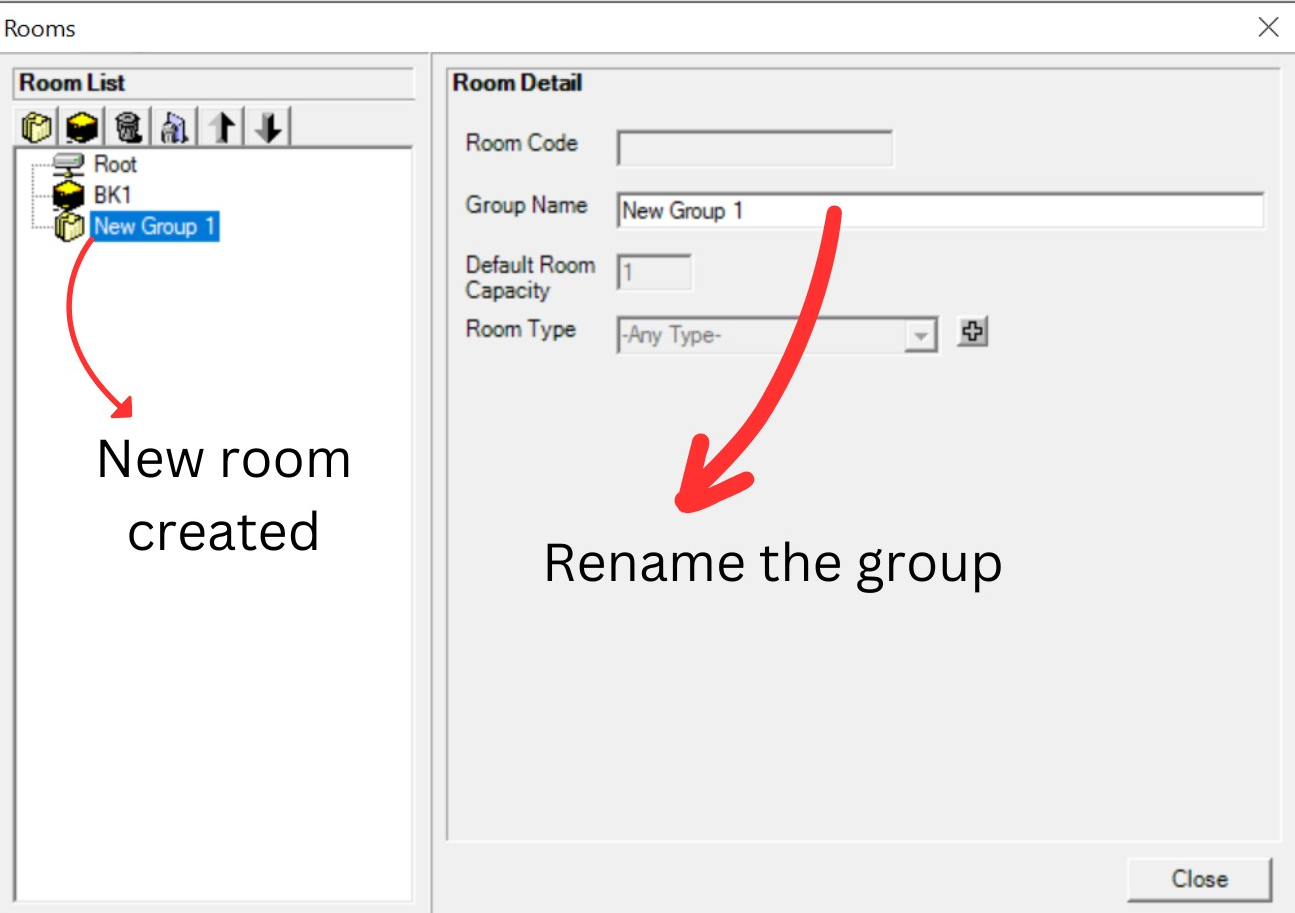
Diagram 3.2.6: Room's folder details
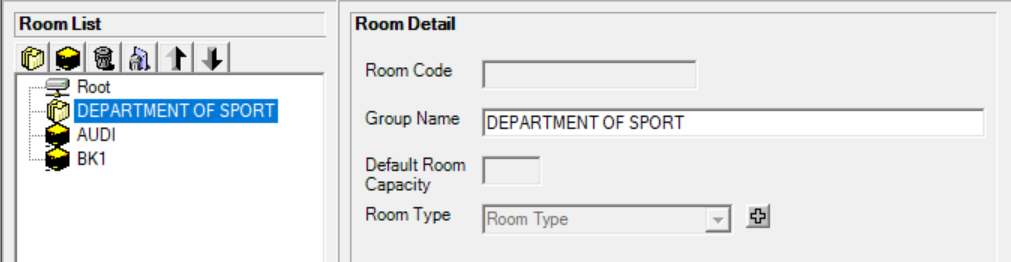
Diagram 3.2.7: Filled lecturer's folder detail
Step 2: Rename the group.
(User can change the name by department of course. Example: DEPARTMENT OF SPORT
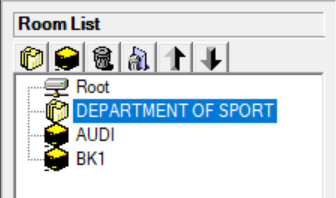
Diagram 3.2.8: Renamed room's folder
Step 3: Drag the selected room to the folder and drop

Diagram 3.2.9: Select a course to drag into the folder
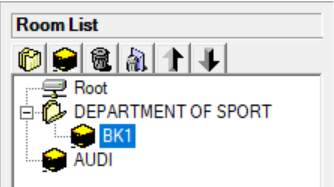
Diagram 3.2.10: Room under a folderNOTED: New rooms, new folders can be found at the bottom of the Room List. Once, Room Management has been closed, the new folder will follow the alphabetical order of the Room list once Room Management is reopened
3.2. How To Delete A Folder Or Room
Keep your Room List tidy by deleting Room or folder you no longer need.
There are 2 simple steps to Delete Room/Folder Only or Delete All:
Delete Room/Folder Only
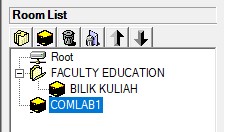
Diagram 3.2.1: Selected room to delete
Step 1: Select the course or folder and Click Delete Room Or Folder Icon 
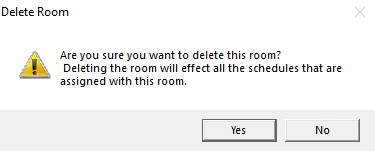
Diagram 3.2.2: Confirmation window to delete roomStep 2: Confirmation window will pop-up and click Yes to Delete
Delete All
Step 1: To delete all, click the delete all icon
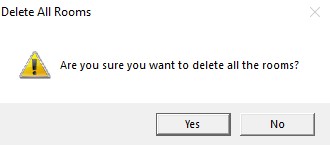
Diagram 3.2.3: Confirmation window to delete all the roomsStep 2: Confirmation window will pop-up and click Yes to Delete.
3.3. How To Export Room Database
User can export the room database to users device or transfer to other website
There are 4 Steps to Export Room Database:
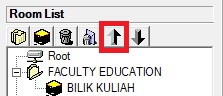
Diagram 3.3.1: Location of Export Icon
Step 1: Click the Export Icon to export Room list
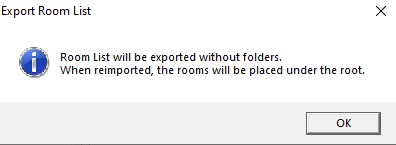
Diagram 3.3.2: Confirmation window to Export Room ListStep 2: Click OK to export Room List to your computer. It will be exported without folders. When reimported, the rooms will be placed under the root.
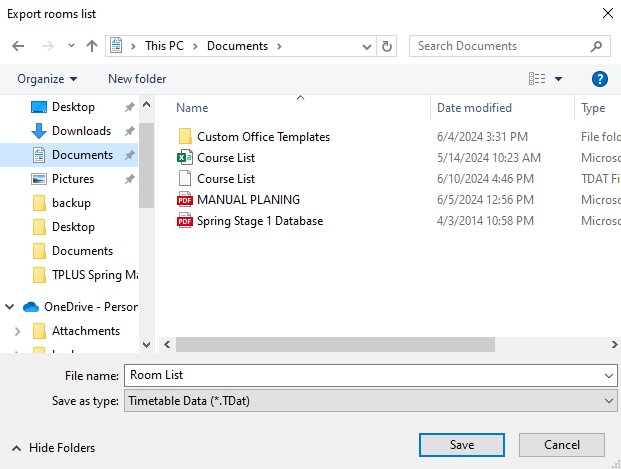
Diagram 3.3.3: Save Room list pop-up windowStep 3: Select the desired location to save the folder. For example, in Documents
Step 4: Click save and exporting the database is complete and user may change the file name.
Example :Room list
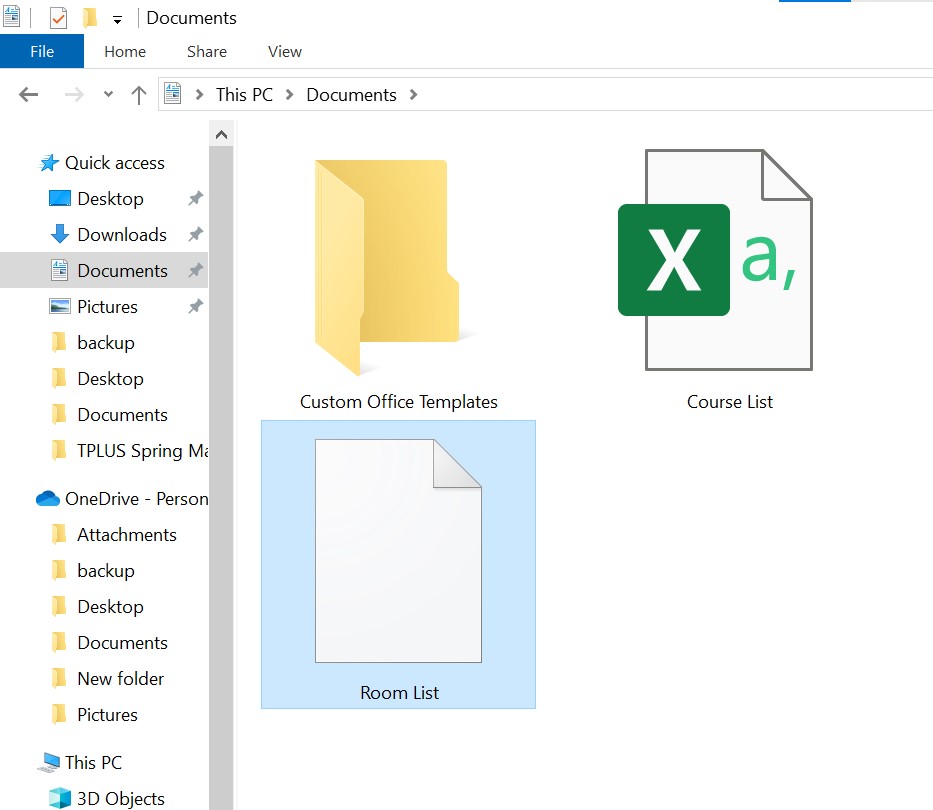
Diagram 3.3.4: Location of the saved files Once user saved user may locate the saved files in the location that user choose. For example, in documents.
3.4. How To Import Room Database
Users can import the room database that users have to Timetable Plus Spring.
( NOTED: The file that user want to import MUST in csv file )
There are 3 simple Steps to Import Course Database:
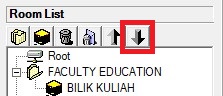
Diagram 3.4.1: Location import Icon in Room ManagementStep 1: Click the import icon to import room database
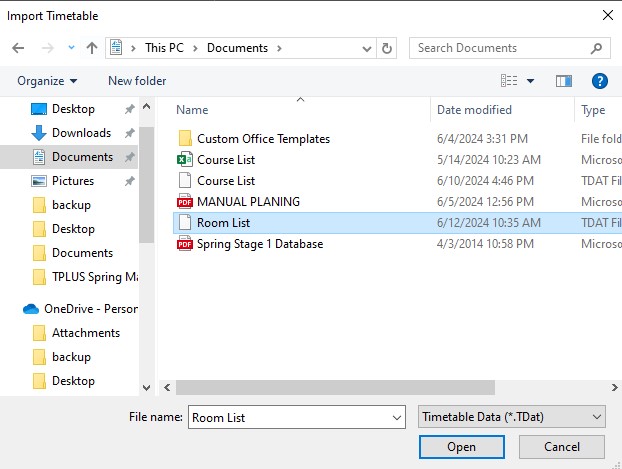 Diagram 3.4.2: Open Room Database file
Step 2: Select the file that user want to import and click open or double click the file
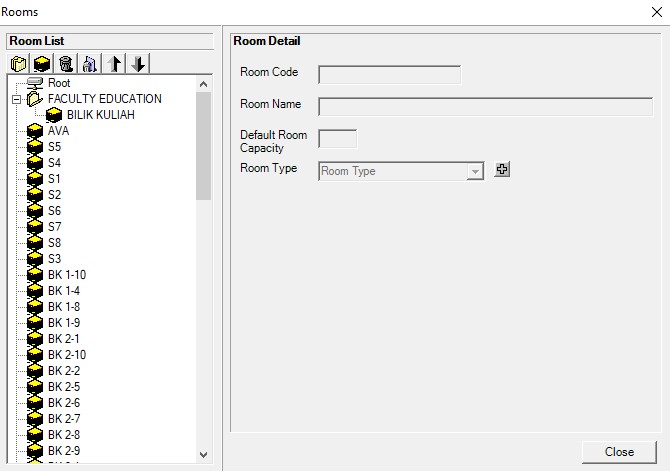 Diagram 3.4.3: Importing Room list completed