Stage 2: Timetable Structure
| Site: | Timetable Plus |
| Course: | Timetable Plus Class Infinity |
| Book: | Stage 2: Timetable Structure |
| Printed by: | Guest user |
| Date: | Sunday, 31 May 2026, 6:52 AM |
1. Setting up Timetable Structure
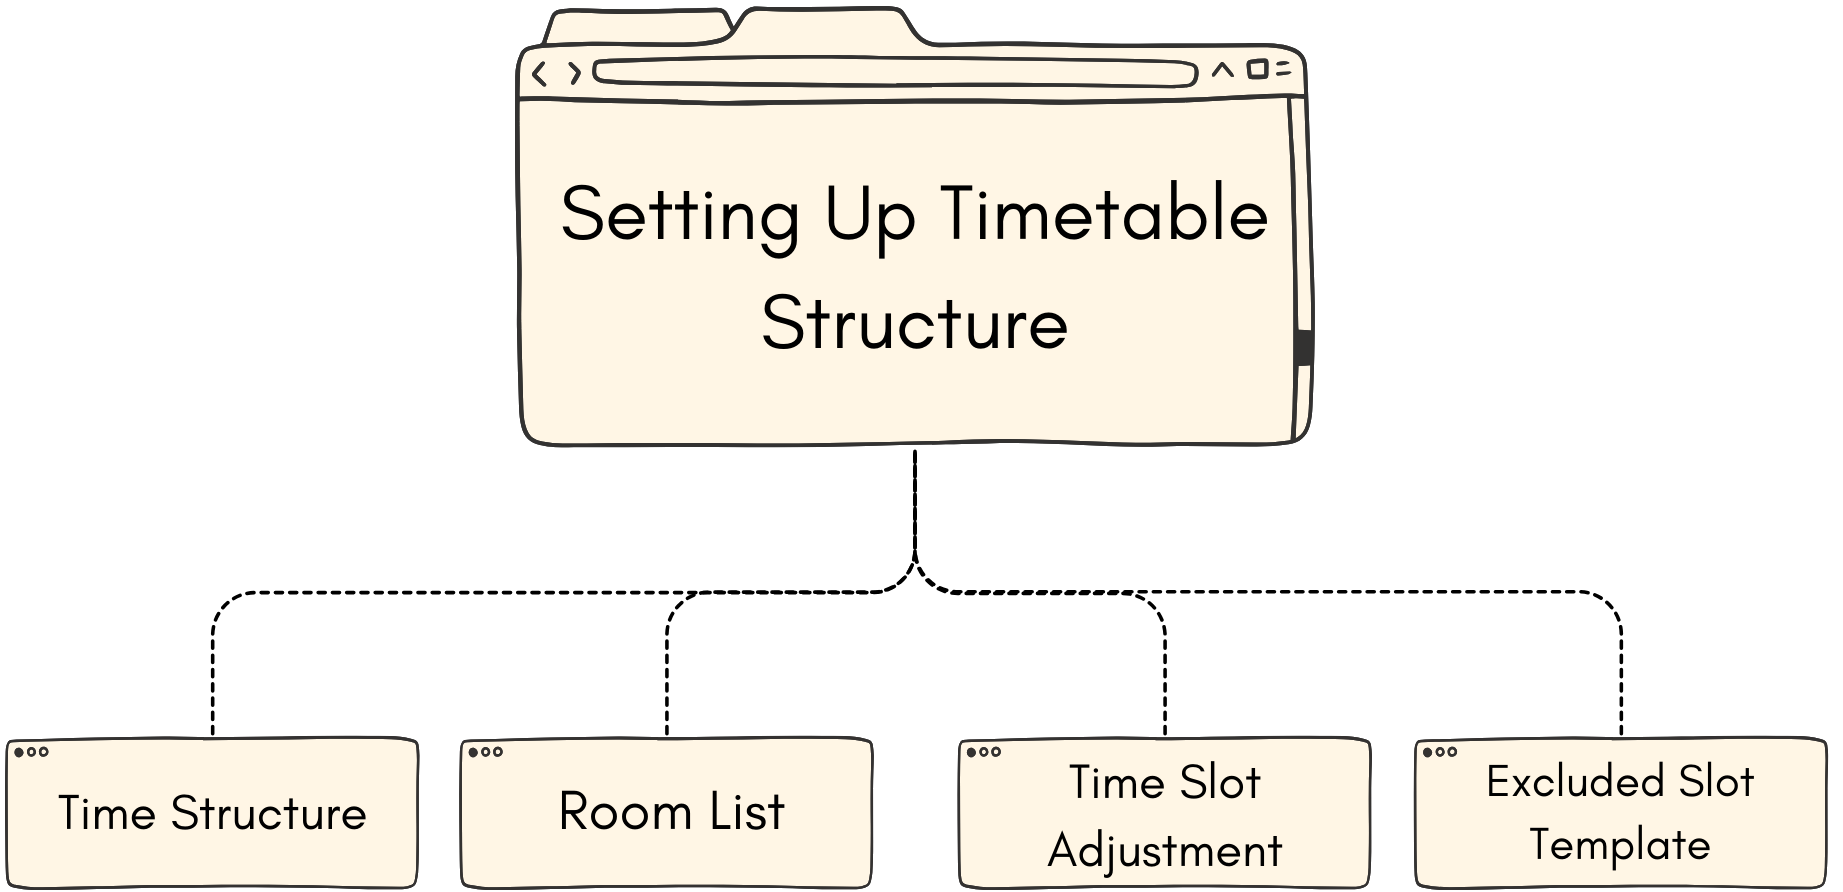
What is Timetable Structure?
Timetable structure is the framework or layout of the timetabe.
Why Timetable Structure is needed?
Timetable Structure is needed to ensure that when inserting the sections into the timetable and generating the sections into slots, everything works smoothly.
1.1. Time Structure

Diagram 1.1.1 Location of the Time Structure
To setting up the Time Structure, there are 3 simple steps.
STEPS 1: Go to Timetable Structure and select Time Structure.
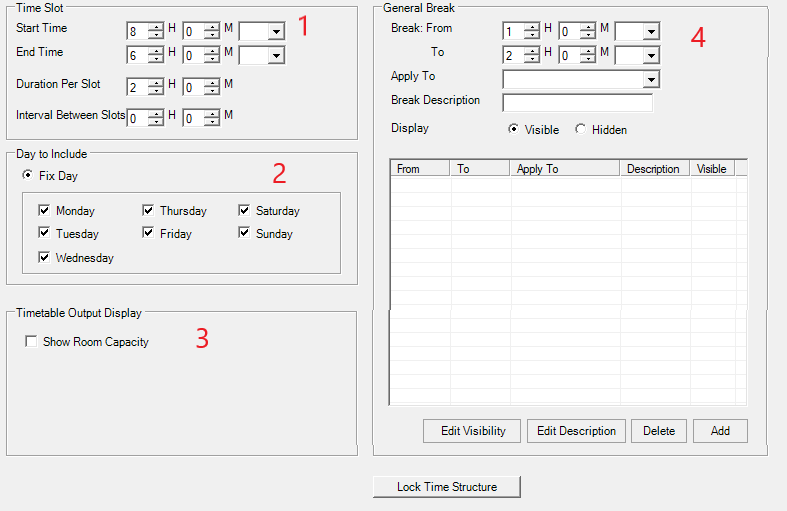
Diagram 1.1.2 Time Structure Window
STEPS 2: Fill in all the sections. Sections has been divided into below.
1. Time Slot
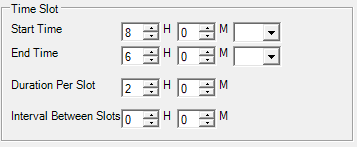
Diagram 1.1.3 Time Slot Section
For better understanding, refer to the table below.
|
Start Time |
time of the ending time of the day in the schedule.
|
|
End Time |
time of the ending time of the day in the schedule. |
|
Duration Per Slot |
time taken for each slots or subjects in the timetable. |
|
Interval Between Slot |
the space between the previous slot and the next slot. |
Table 1.1.1 Time Slot Explaination
2. Day to Include
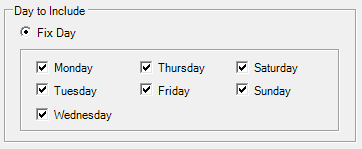
Diagram 1.1.4 Day to Include Section
Day to Include is the day that you want to include in your timetable output. Tick the box of the preferred day to include. Tick Fix Day if you want the day to always be fixed for the whole timetable output.
3. Timetable Output Display
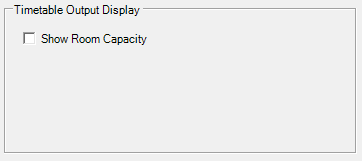
Diagram 1.1.5 Timetable Output Display Section
If you want to Show Room Capacity to be added into the output, tick Show Room Capacity and apply changes.
4. General Break
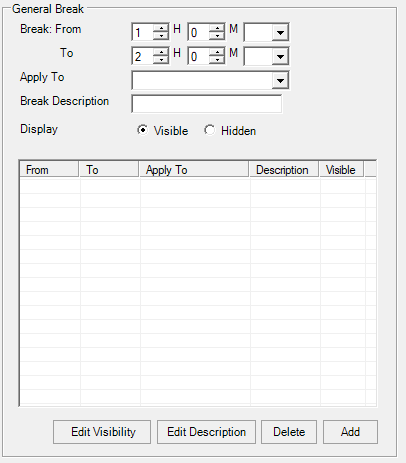
Diagram 1.1.6 General Break Section
General Break is where you will need to add break for the whole week so that the there will be slots for it. You may choose the break time to be apply into All Day or any of your preferred day. Below is the example of added break time.
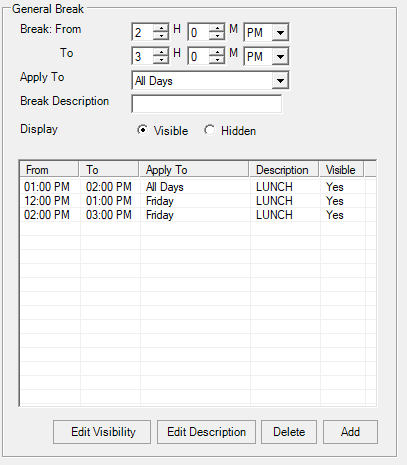
Diagram 1.1.7 Example Added General Break Section
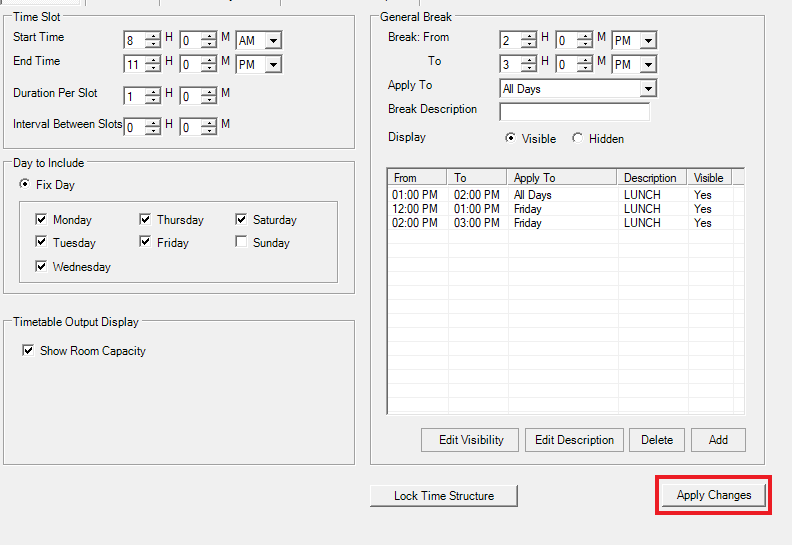
Diagram 1.1.8 Apply Changes in the Timetable Structure
For the Lock Time Structure, you may click the button if you want the time structure to be locked and cannot be changed.
1.2. Room List

Diagram 1.2.1 Location of the Room List
To go to the Room List, you may click the Room List section next to the Time Structure.
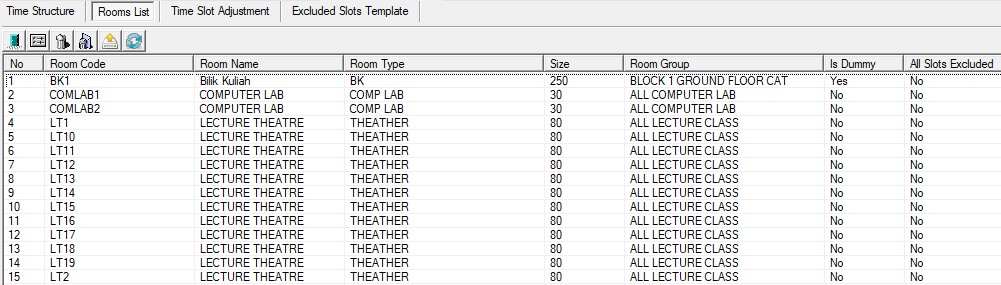
Diagram 1.2.2 Room List
There are few icons that need to be studied before adding the room into Room List.
 |
Click this icon to add new room. |
 |
Click this icon to see room properties. |
 |
Click this icon to delete the room. |
 |
Click this icon to delete all the rooms. |
 |
Click this icon to export rooms. |
 |
Click this icon to refresh Room List. |
1. Add New Room
.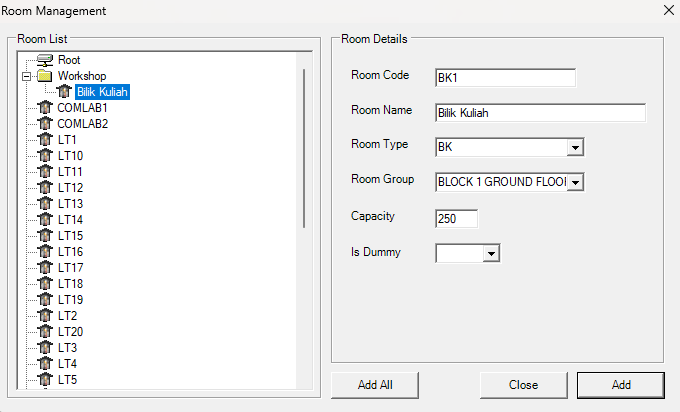
Diagram 1.2.3 Room Management Window
To add only one room, you may select the desired room and click Add.
To add all room, you may select Add All and it will automatically add all available room.
2. Room Properties

Diagram 1.2.4 Select A Room
To view the room properties, you may select a room in the list. Click on the Room Properties icon.
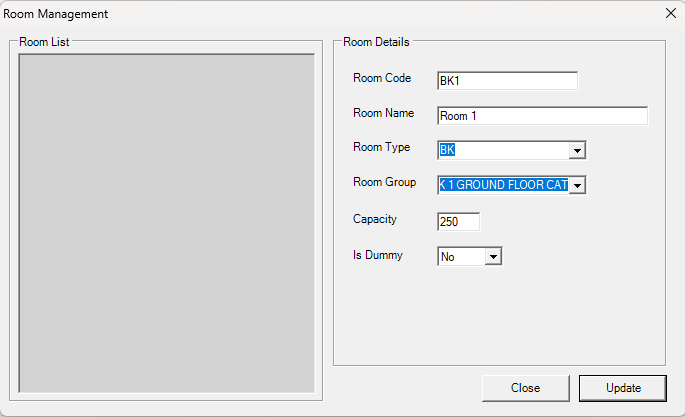
Diagram 1.2.5 Room Properties
A Room Properties window will appear and you will be able to see the room's details.
3. Delete Room
To delete room, you may select a room in the list. Click on the Delete Room icon.
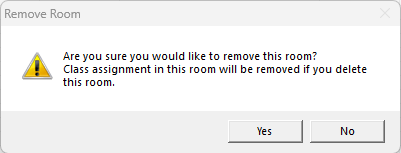
Diagram 1.2.6 Delete Room Pop-up
A delete pop-up will appear asking for confirmation on deletion.
4. Delete All Room
To delete all room, you may select a room in the list. Click on the Delete All Room icon.
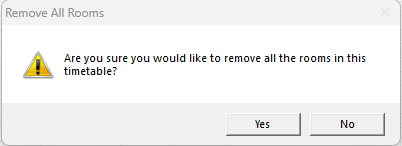
Diagram 1.2.7 Delete All Room Pop-up
A delete pop-up will appear asking for confirmation on deletion.
5. Export Room
To export room, you may click on the Export Rooms icon.
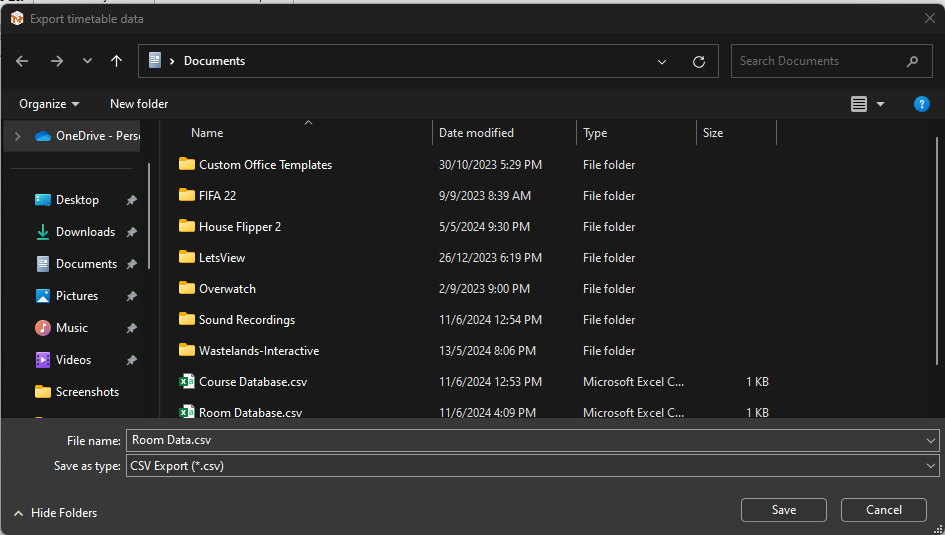
Diagram 1.2.8 Export Window Pop-Up
Select your desired place to save. And click Save button.
4. Refresh Room List
icon. 1.3. Time Slot Adjustment

Diagram 1.3.1 Location of the Time Slot Adjustment
To go to the Time Slot Adjustment, you may click the Time Slot Adjustment section next to the Room List.
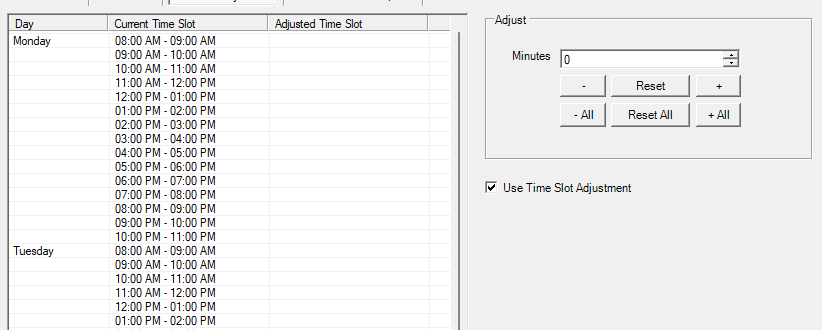
Diagram 1.3.2 Time Slot Adjustment
Step by Step on how to input Time Slot Adjustment:
Step 1: Click on the particular slot (e.g Monday 08.00 AM- 0900 AM)
Step 2: Go to Adjust column and input the X Minutes to adjust (e.g 30 Minutes)
Step 3: Click either  or
or 
(If press then the adjusted time is 0830 -0930)
Step 4: Check the box Use Time Slot Adjustment if all Batch of Students and Lecturers are going to use this time slot adjustment.
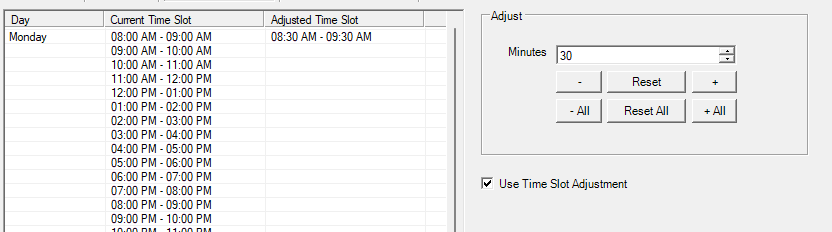
Diagram 1.3.3 Time Slot Adjusted On Monday
Above is the example after the time slot has been adjusted on Monday.
1.4. Excluded Slot Template

Diagram 1.4.1 Location of the Excluded Slots Template
To go to the Excluded Slots Template, you may click the Excluded Slots Template section next to the Time Slot Adjustment.
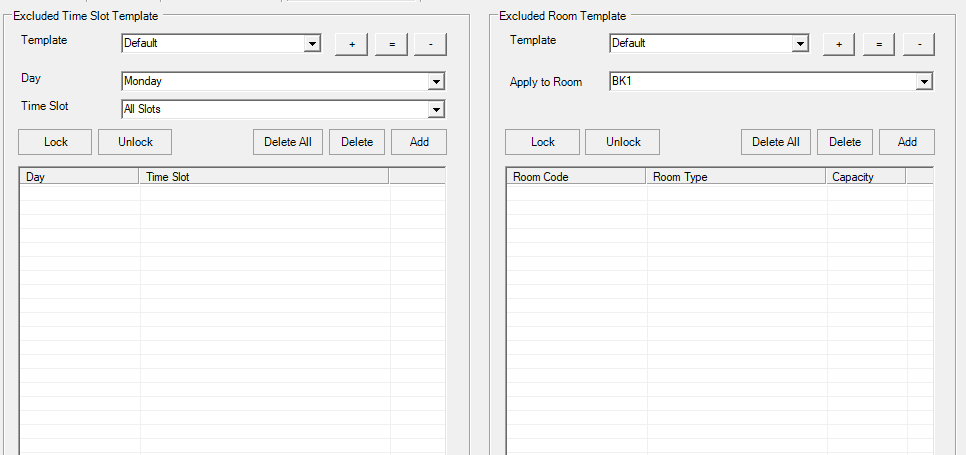
Diagram 1.4.2 Excluded Slots Template
In Excluded Slots Template, there are two things you can exclude which is Time Slots and Room.
This function is not often used as it is recommended that Exclude Slot function is executed at Exclude Slot from Timetable Output instead.
2. Timetable Output
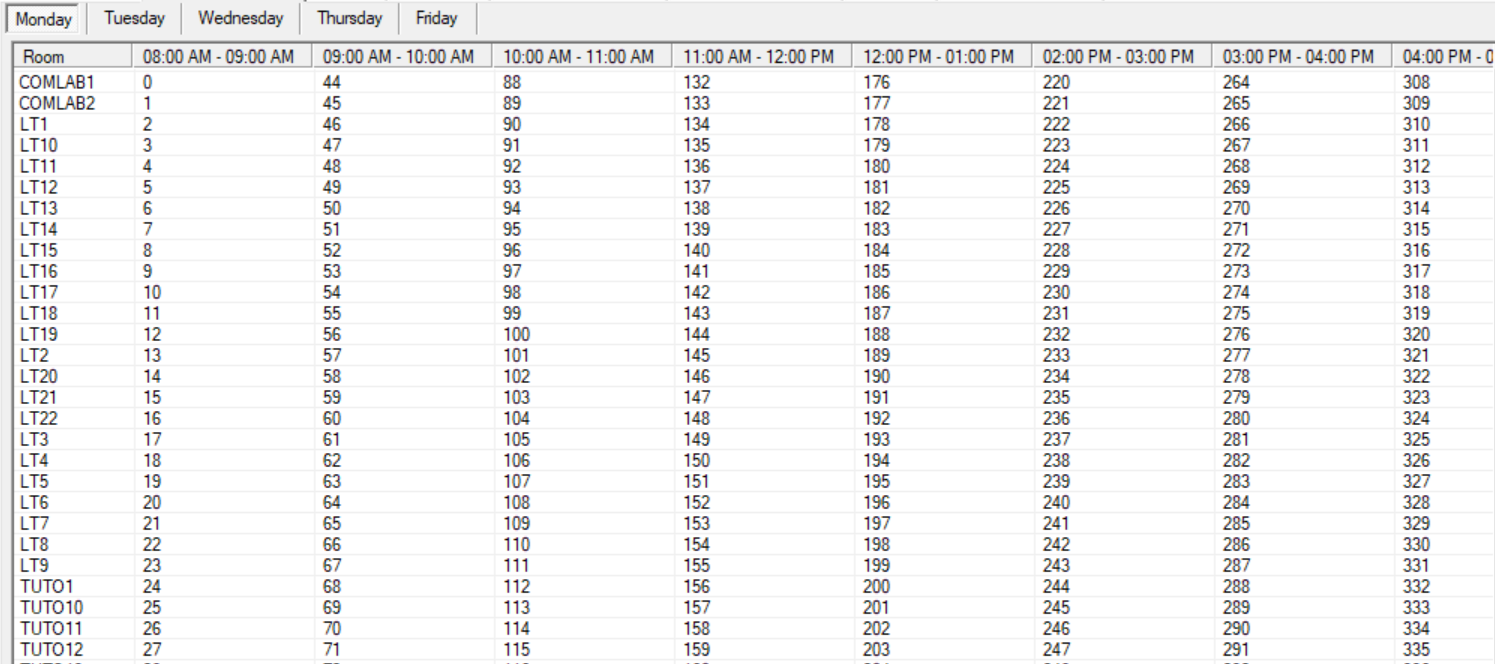
Diagram 2.1 Result of Timetable Output Structure
This is how the timetable output will looks like after you are done structuring the timtetable. Below is the explanation of the Timetable Output.
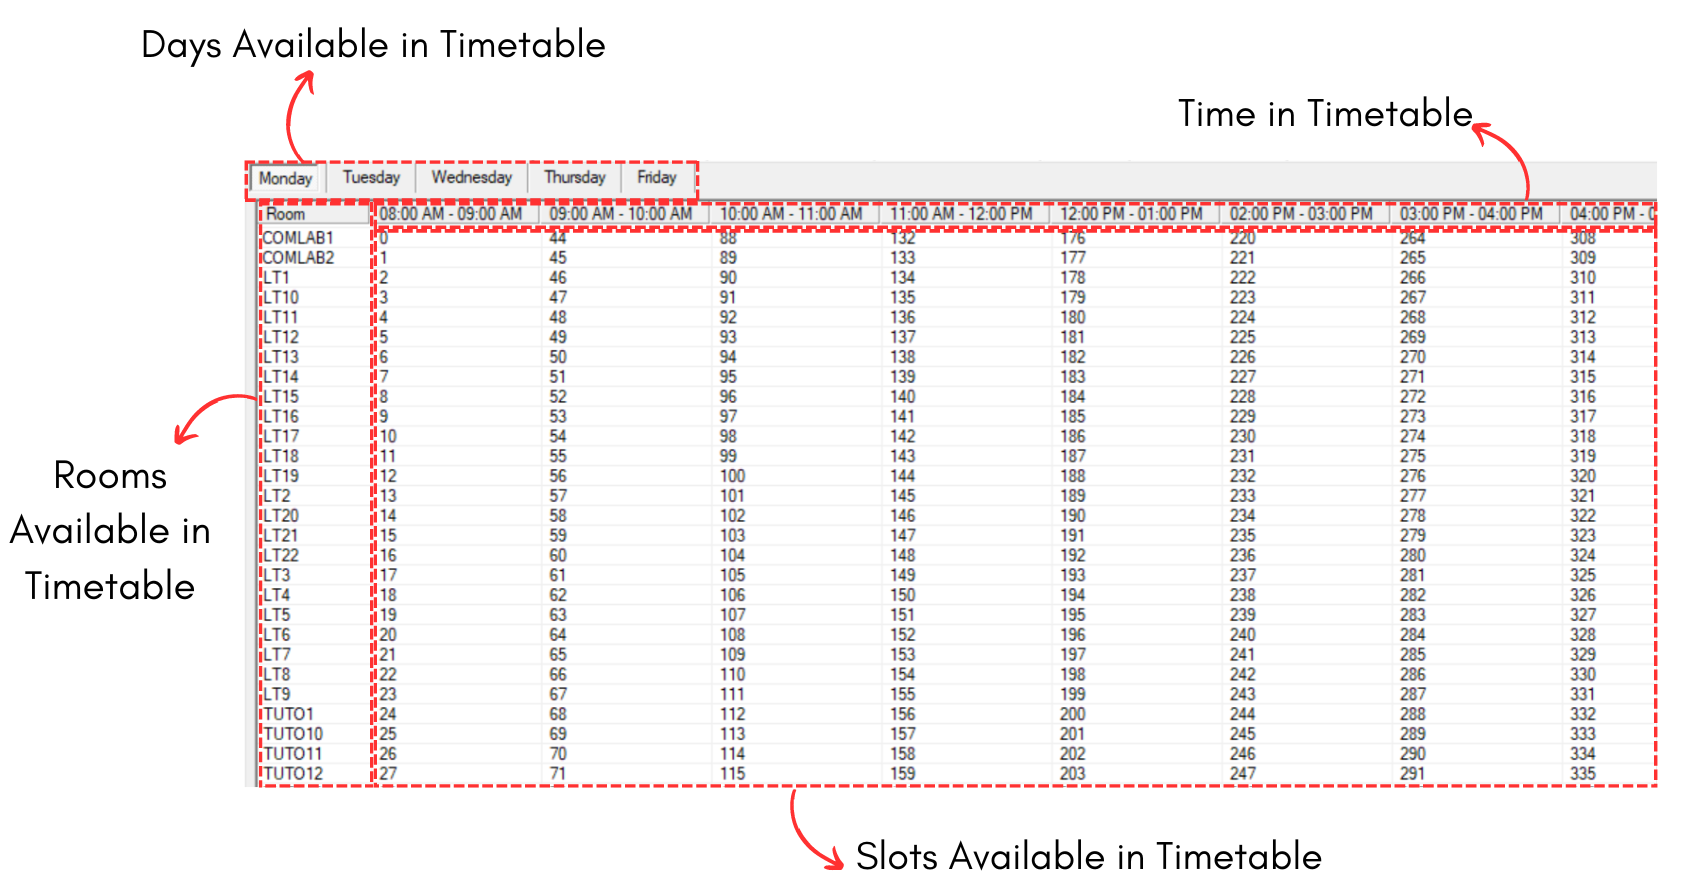
Diagram 2.2 Timetable Output Explanation