Self Services
| Site: | Timetable Plus |
| Course: | Timetable Plus Campus (Ver 1) |
| Book: | Self Services |
| Printed by: | Guest user |
| Date: | Friday, 1 May 2026, 2:55 PM |
1. Self Services
Introduction to Self Services
The Self Services section in Timetable Plus Campus allows administrators to manage their personal account settings, view timetables, update profiles, and modify preferences. This section is accessible from the main dashboard after logging in.
Step-by-Step Guide for Self Services
1. Accessing Self Services
- Log in to Timetable Plus Campus using your admin credentials.
- After logging in, you will be directed to the Dashboard and locate the Self Services card on the dashboard.
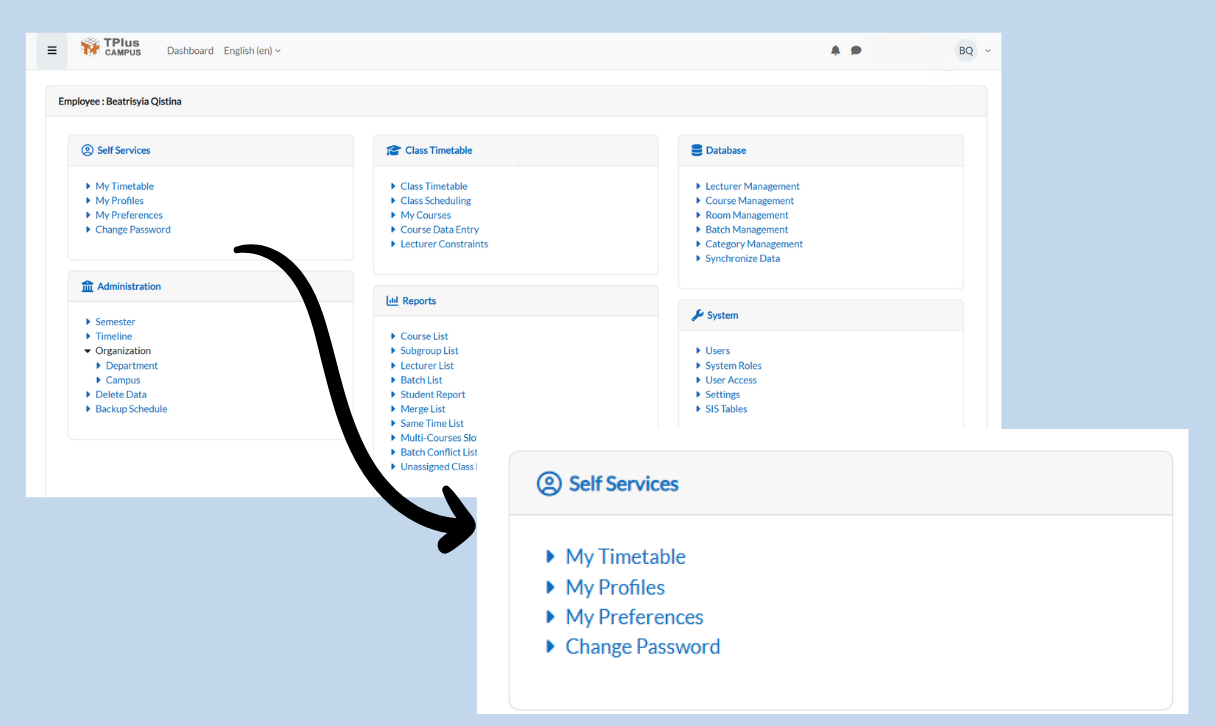
2. My Timetable
- Purpose: View your personal timetable.
Steps:
- Under Self Services, click My Timetable.
- The system will display your assigned timetable based on your role.
- Click the dropdown button to adjust the view by semester.
3. My Profiles
Purpose: Update your personal details, username, and profile picture.
Step-by-Step Guide
A. Accessing My Profiles
- From the Dashboard, go to Self Services > My Profiles.
- The User Profiles page displays your current information:
- Name
- National ID
- ID Type
B. Updating Basic Profile Information
- Click Action and click Update Profiles to update the current profile information.
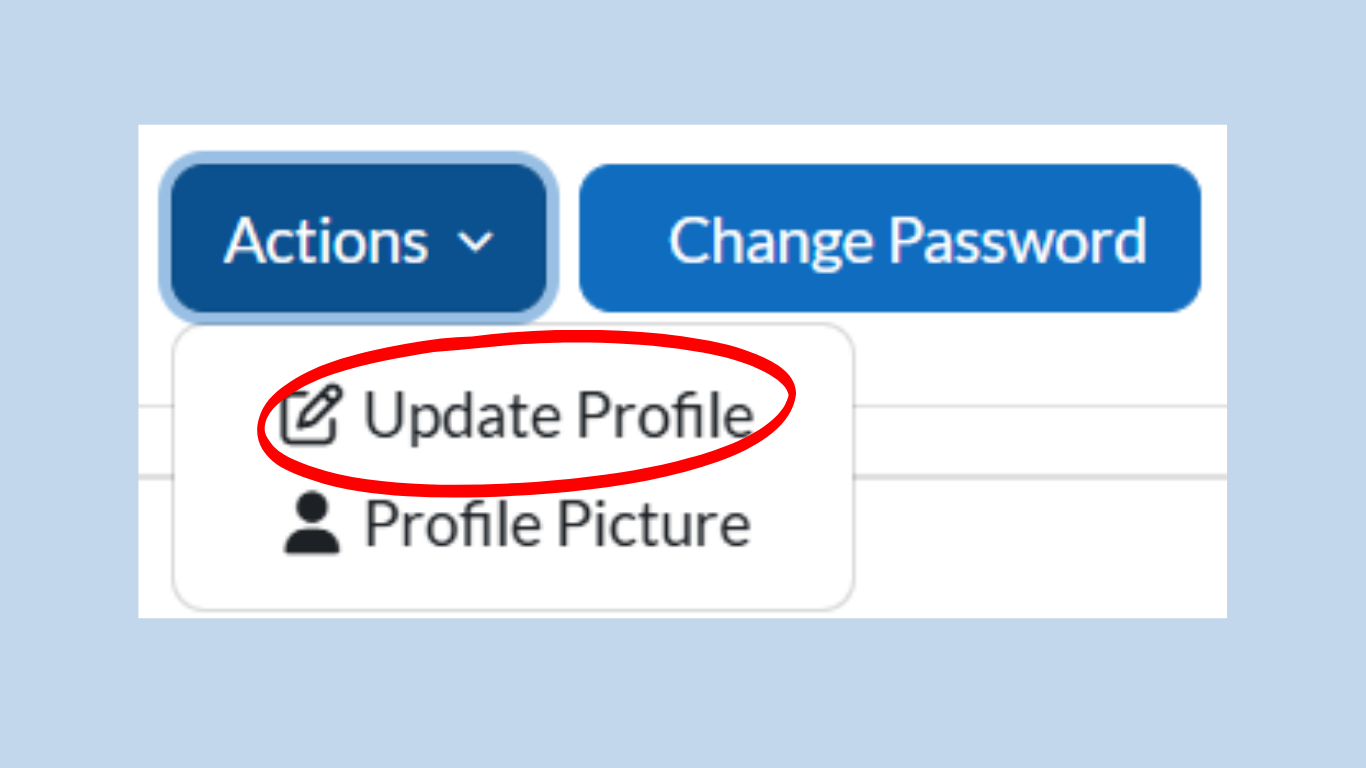
- The Update Profiles form will appear with fields:
- Username (read-only)
- First Name
- Family Name
- National ID
- ID Type (select from options)
- Gender (select from options)
- Make changes as needed.
- Click Save Changes to confirm or Cancel to discard.
Note: Username and email require technical support assistance.
C. Uploading a Profile Picture
- On the User Profiles page, click Profile Pictures.
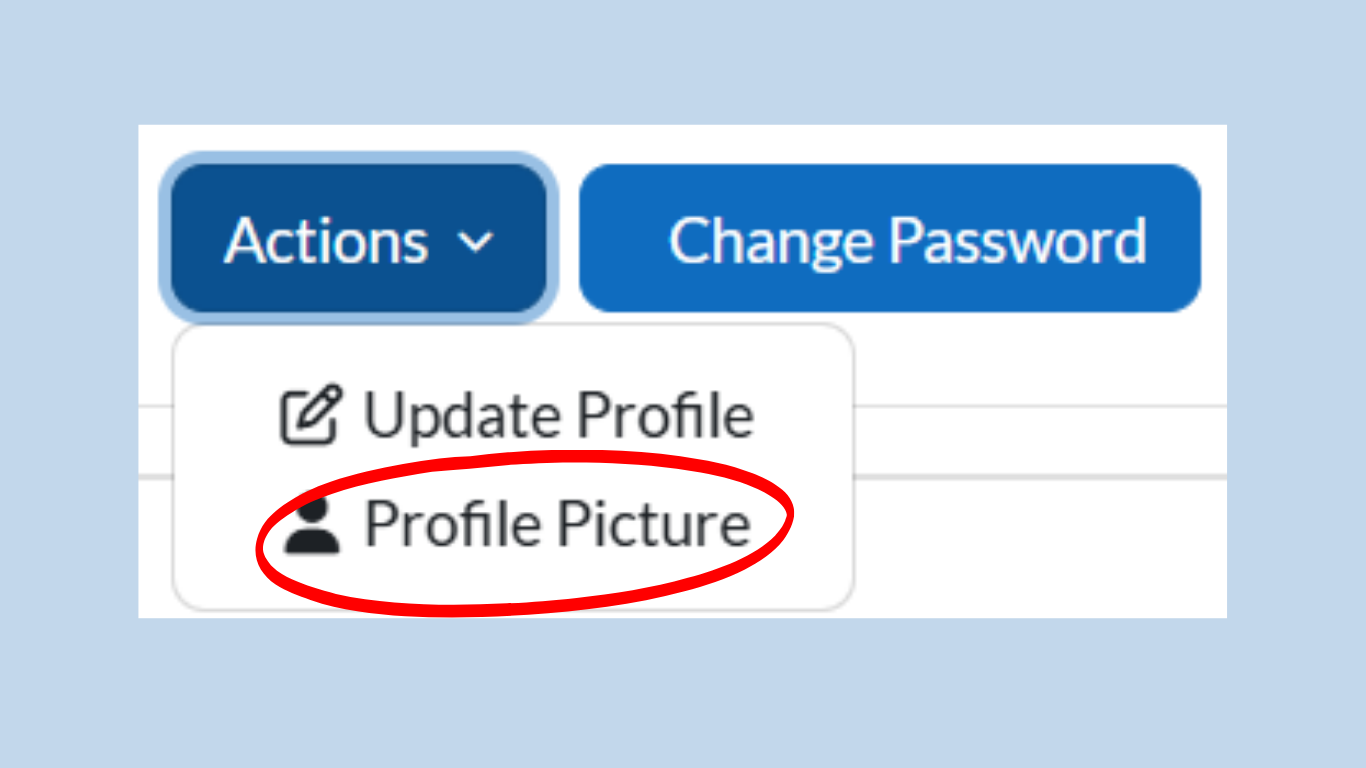
- Choose a File or drag/drop an image (max 5 MB):
- Accepted formats: .jpg, .png.
- File must be named as [username].extension
- Click Upload user pictures to confirm.
- To remove the picture: Check Delete Picture and save.
4. My Preferences
- Purpose: Customize system settings like language and display preferences.
Steps:
- Under Self Services, click My Preferences.
- The User Preferences page will display options:
- Active Semester: Select your working semester.
- Records Per Page: Set the number of entries displayed.
- Default Language: Choose your preferred language.
- Adjust the settings as needed.
- Click Save to apply changes.
5. Change Password
Purpose: Update your account password to ensure security.
Step-by-Step Guide
A. Accessing Change Password
- From the Dashboard, go to Self Services > Change Password.
- The Change Password page will display your username and password requirements.
B. Entering Password Details
- Current Password:
- Enter your existing password.
- New Password:
- Minimum 8 characters
- At least 1 digit
- At least 1 lowercase letter
- At least 1 special character
- Create a new password that meets the following criteria:
- New Password (Again):
- Re-enter the new password to confirm.
C. Saving Changes
- Click Save Changes to update your password.
- If successful, a confirmation message will appear.
- If you wish to cancel, click Cancel to return without changes.
Note:
- If you forget your password, contact technical support for assistance.
- Avoid using easily guessable passwords.