System
2. SYSTEM ROLES
2. Managing System Roles
Purpose:
The System Roles Management page allows you to assign and manage different roles for users within the system. Each role determine which features and operations a user can access. By assigning the correct roles, you ensure that users have appropriate access based on their responsibilities.
2.1 Navigation to the System Roles Page:
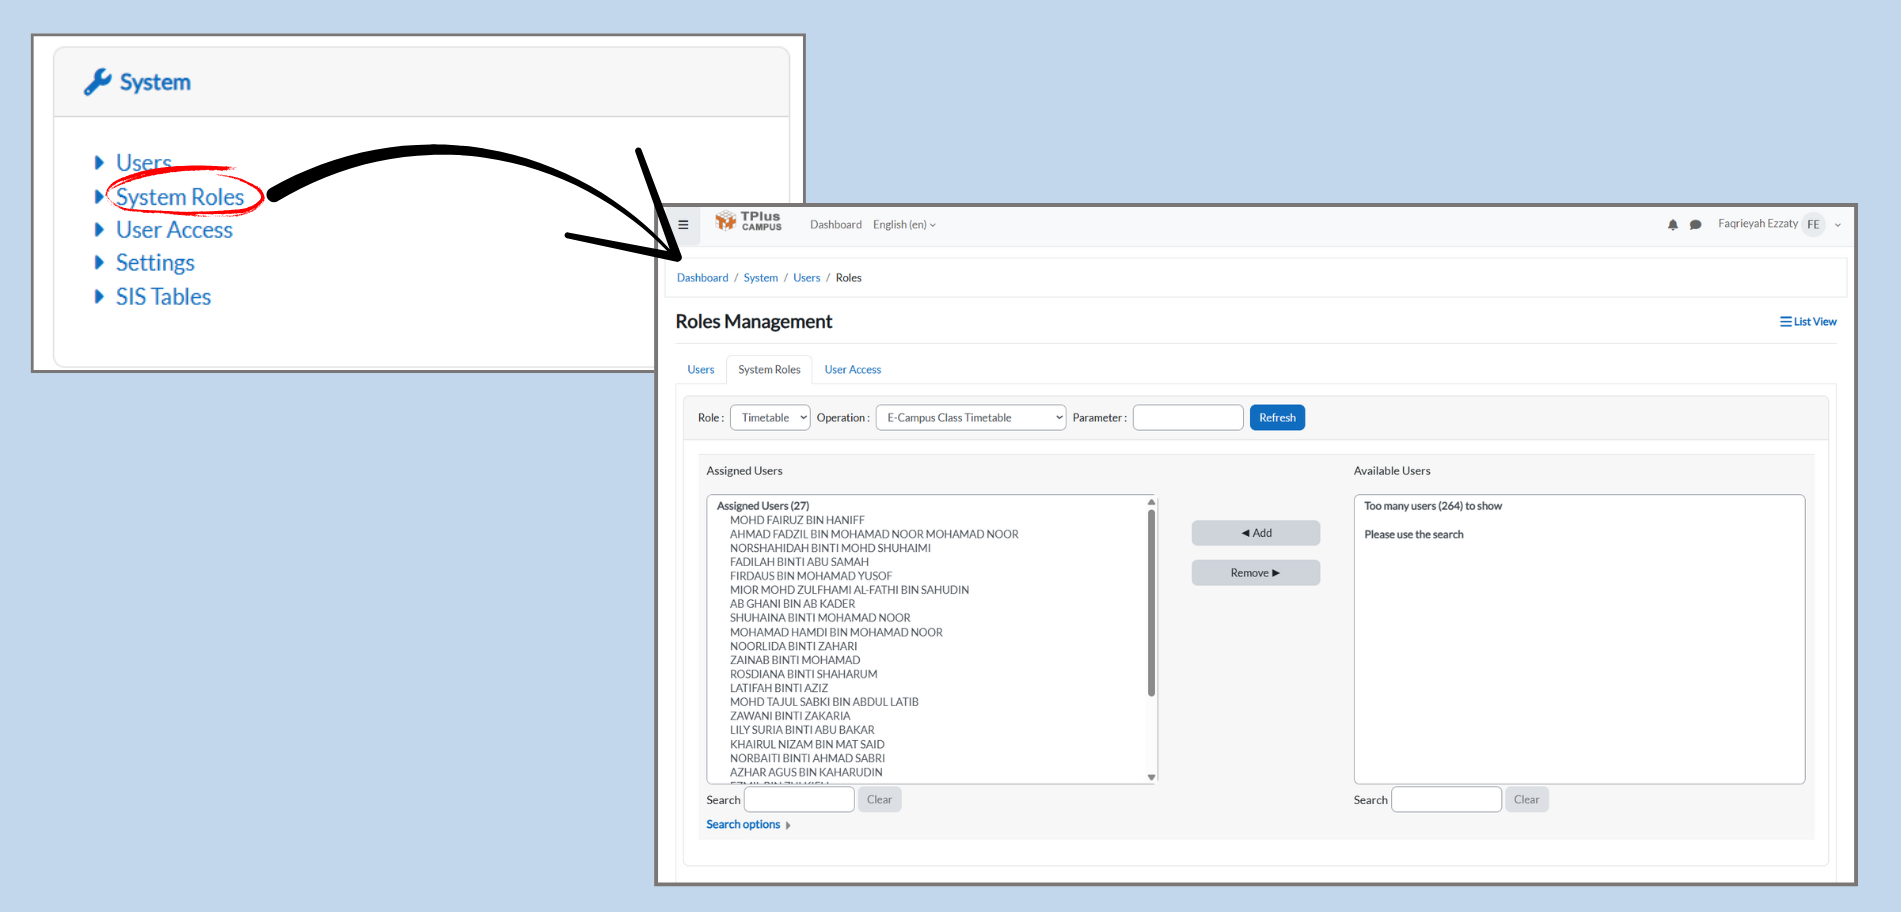
Part 1: Accessing the System Roles Section
-
Navigate to System Roles
-
From the dashboard, click on the System menu.
-
Under System, click System Roles to open the page where you can manage roles and user assignments.
-
2.2 Selecting the Role and Operation
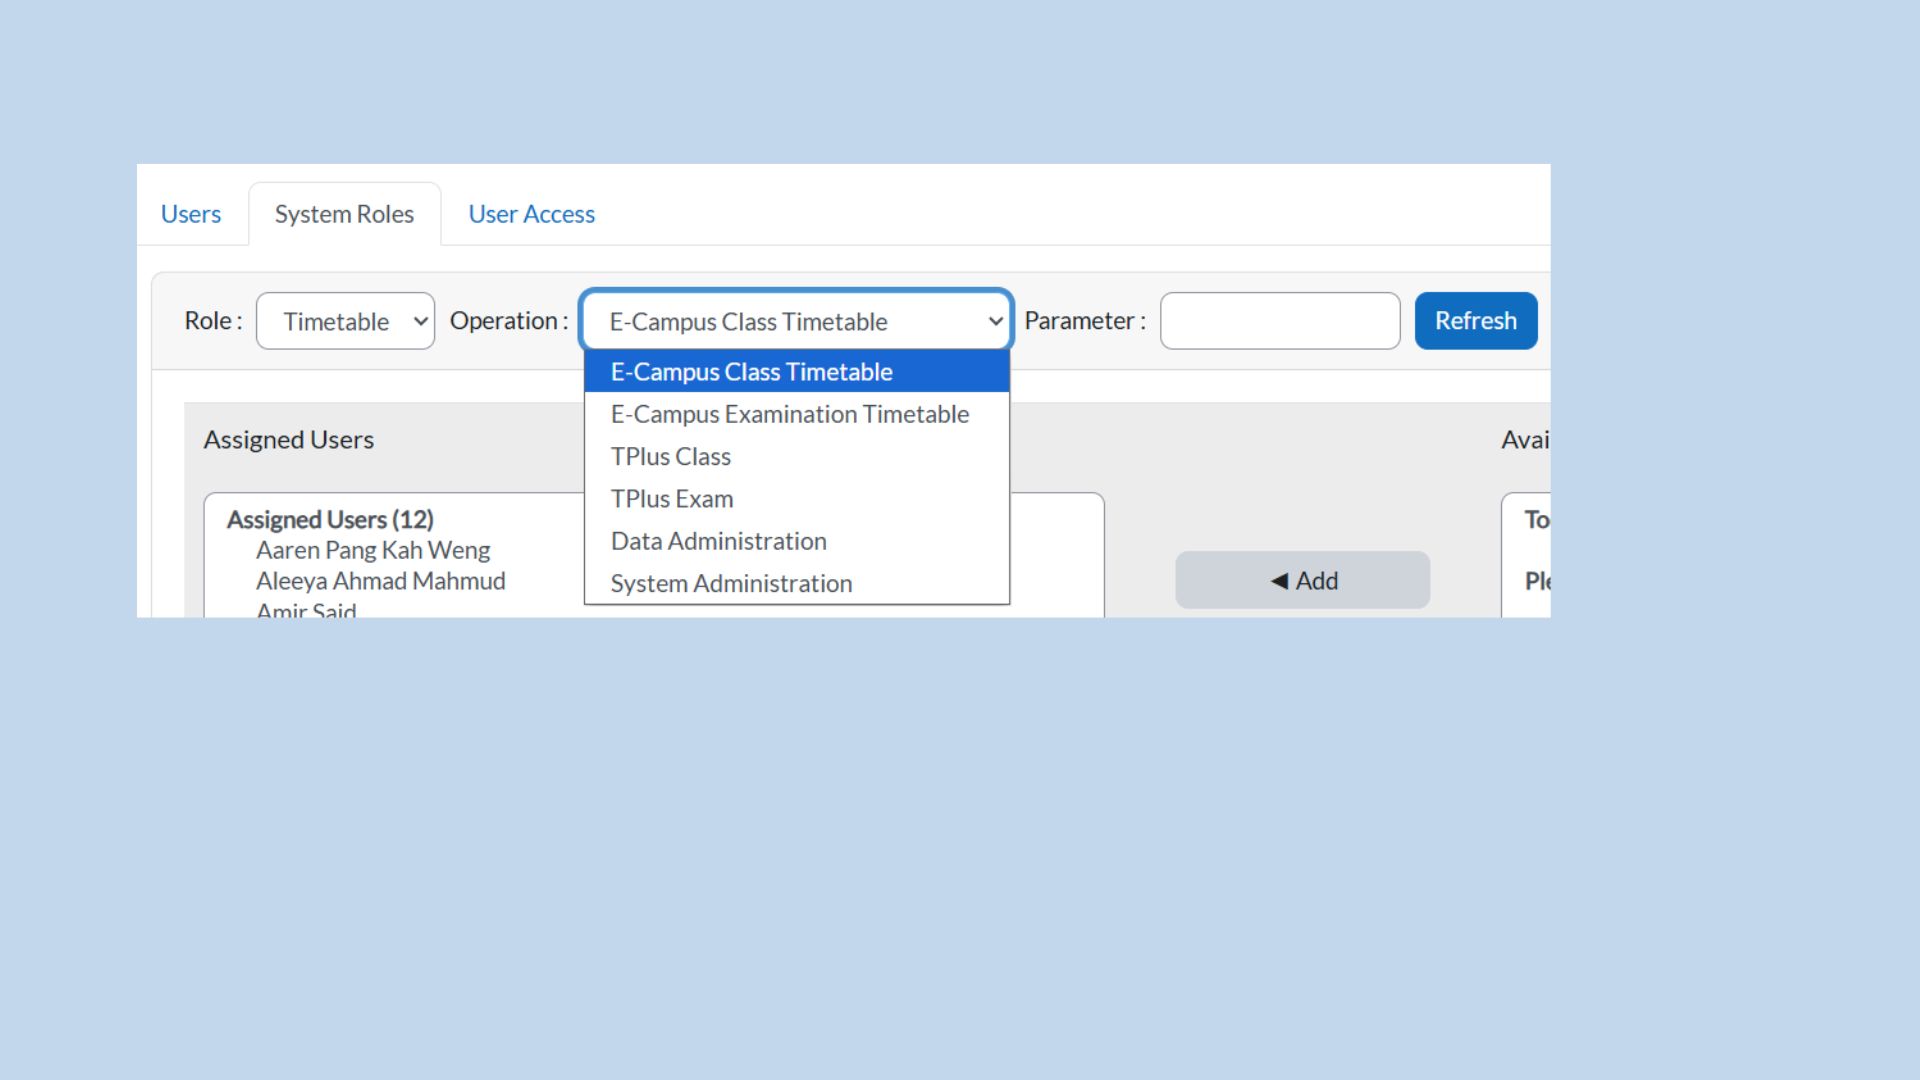
Part 2: Selecting a Role and Operation
-
Select Operation:
-
In the Operation dropdown, choose the operation associated with the selected role, such as:
-
E-Campus Class Timetable
-
E-Campus Examination Timetable
-
-
2.3 Managing Assigned Users
Part 3: Search and Manage Users
Step 1: Search for Users
-
Search Bar:
-
In both the Assigned Users and Available Users sections, there is a Search bar.
-
Admin Action: Before adding or removing users, you must search for the user’s name in the Search bar.
-
Why this is important:
-
If no search is performed, the Available Users list will be empty and show no names.
-
After typing the user’s name, it will appear in the Available User list.
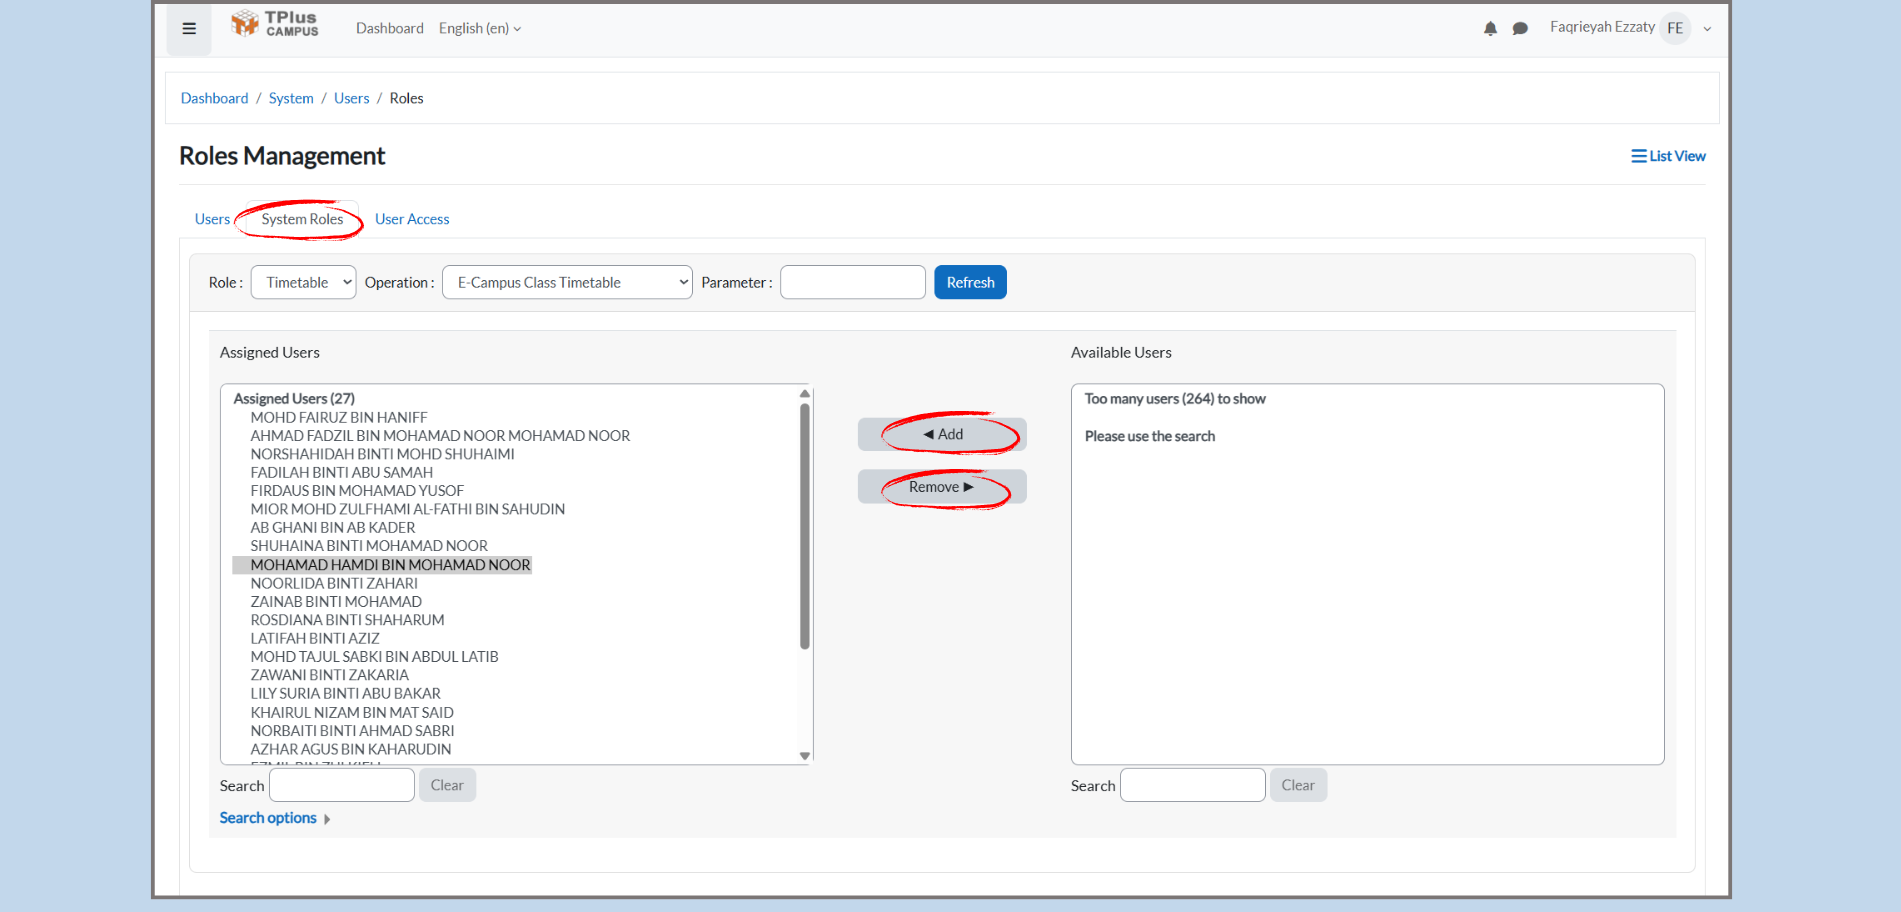
Step 2: Understanding Assigned Users (left box)
-
Assigned Users:
-
The Assigned Users section shows all the users who are already assigned to the selecter role.
-
Admin Action: If a user is in the Assigned Users list, they already have access to the role you are managing.
-
Example:
-
If you selected the Timetable role, you might see users like MOHD FAIRUZ BIN HANIF, ROSIDAH BINTI SHAHARUM, etc.
Step 3: Understanding Available Users (right box)
-
Available Users:
-
The Available Users section shows all users who have not yet been assigned to the role.
-
Admin Action: You can search for a user’s name, if they are not yet assigned to the Timetable role, their name will appear in the Available Users list.
-
2.4 Refreshing and Searching for Users
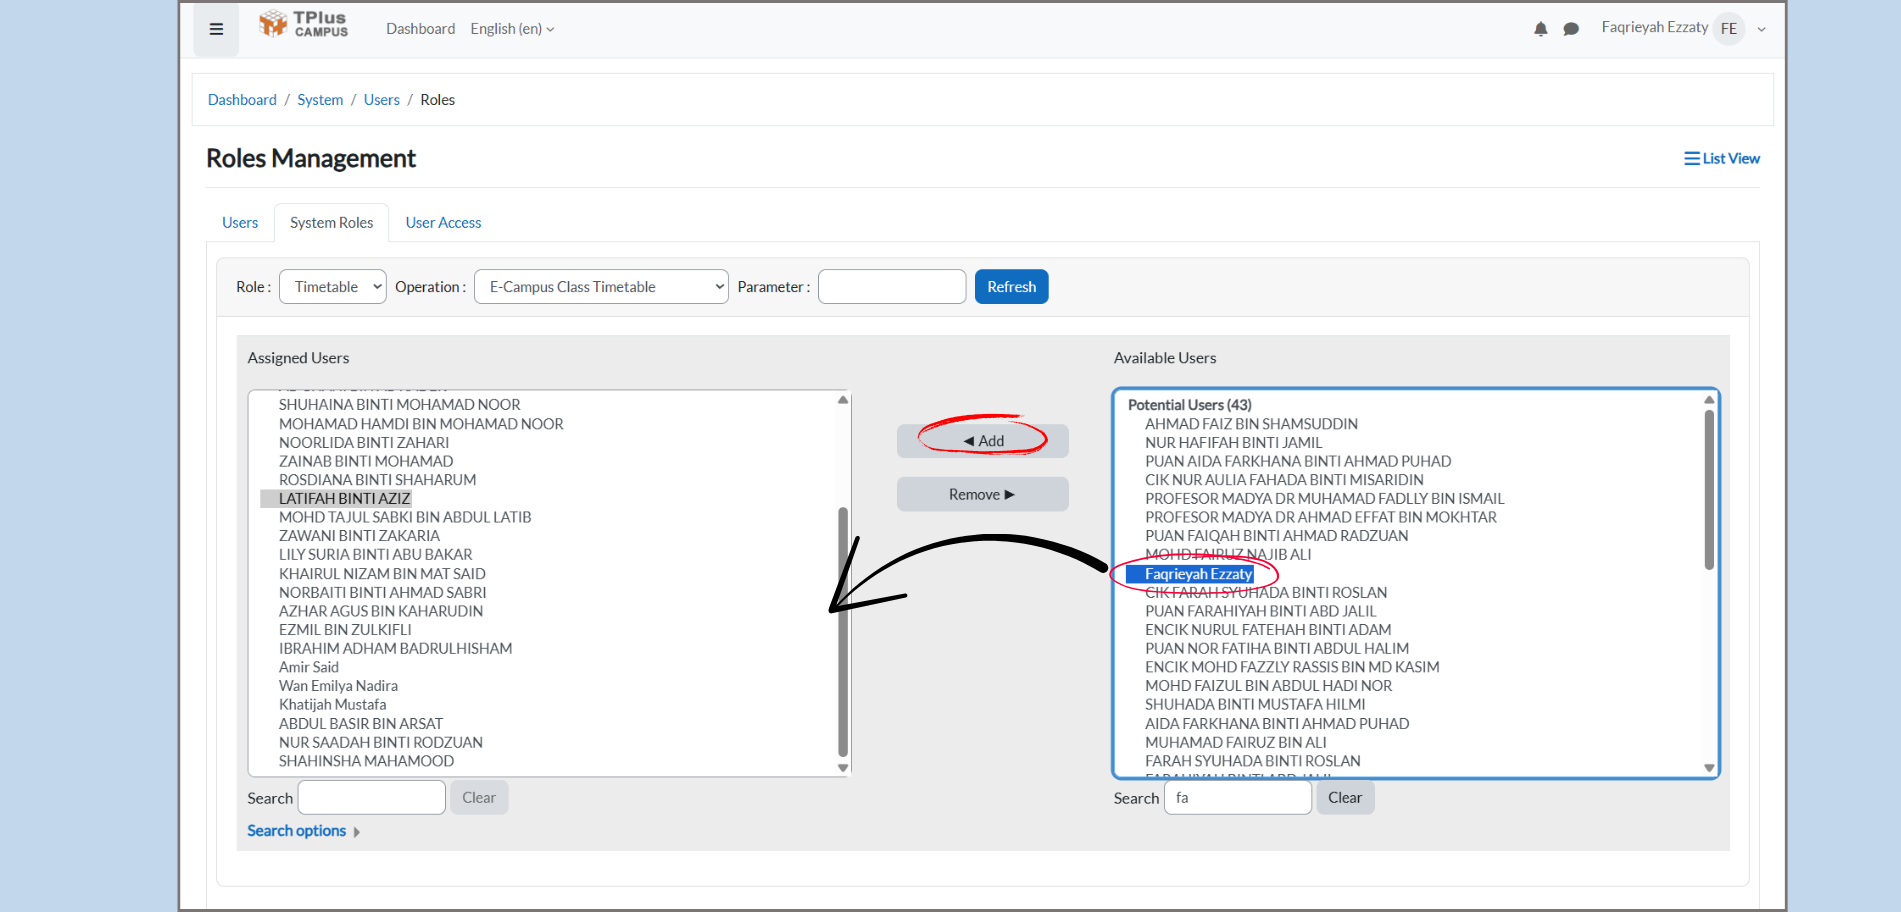
Part 4: Assigning Users to a Role
-
Assign Users:
-
First, search for the user by entering their name in the search field.
-
Once the user appears in the Available Users list, click on the user’s name to select them.
-
-
Assign the User:
-
After selecting the user, click the Add button to assign user to the selected role.
-
Important:
-
Once you click the Add button, the Assigned Users box will automatically refresh to include the newly added user. There is no need to manually click the Refresh button. The system will update the Assigned Users list automatically and place the user in the left box as soon as they are added.
Part 5: Removing Users from a Role
-
Remove Users:
-
In the Assigned Users list, if you need to remove a user, select their name.
-
Click Remove to move the user from the Assigned Users list back to the Available Users list.
-