Stage 2: Data Entry
2. Data Entry
2.1. Add Course in Data Entry
In this chapter, you will learn about:
- Add Data Entry Using Add Course Button
- Add and Duplicate Group Inside the Course
- Add and Duplicate Class Inside the Group
To do that, first you need to open the Data Entry tab.
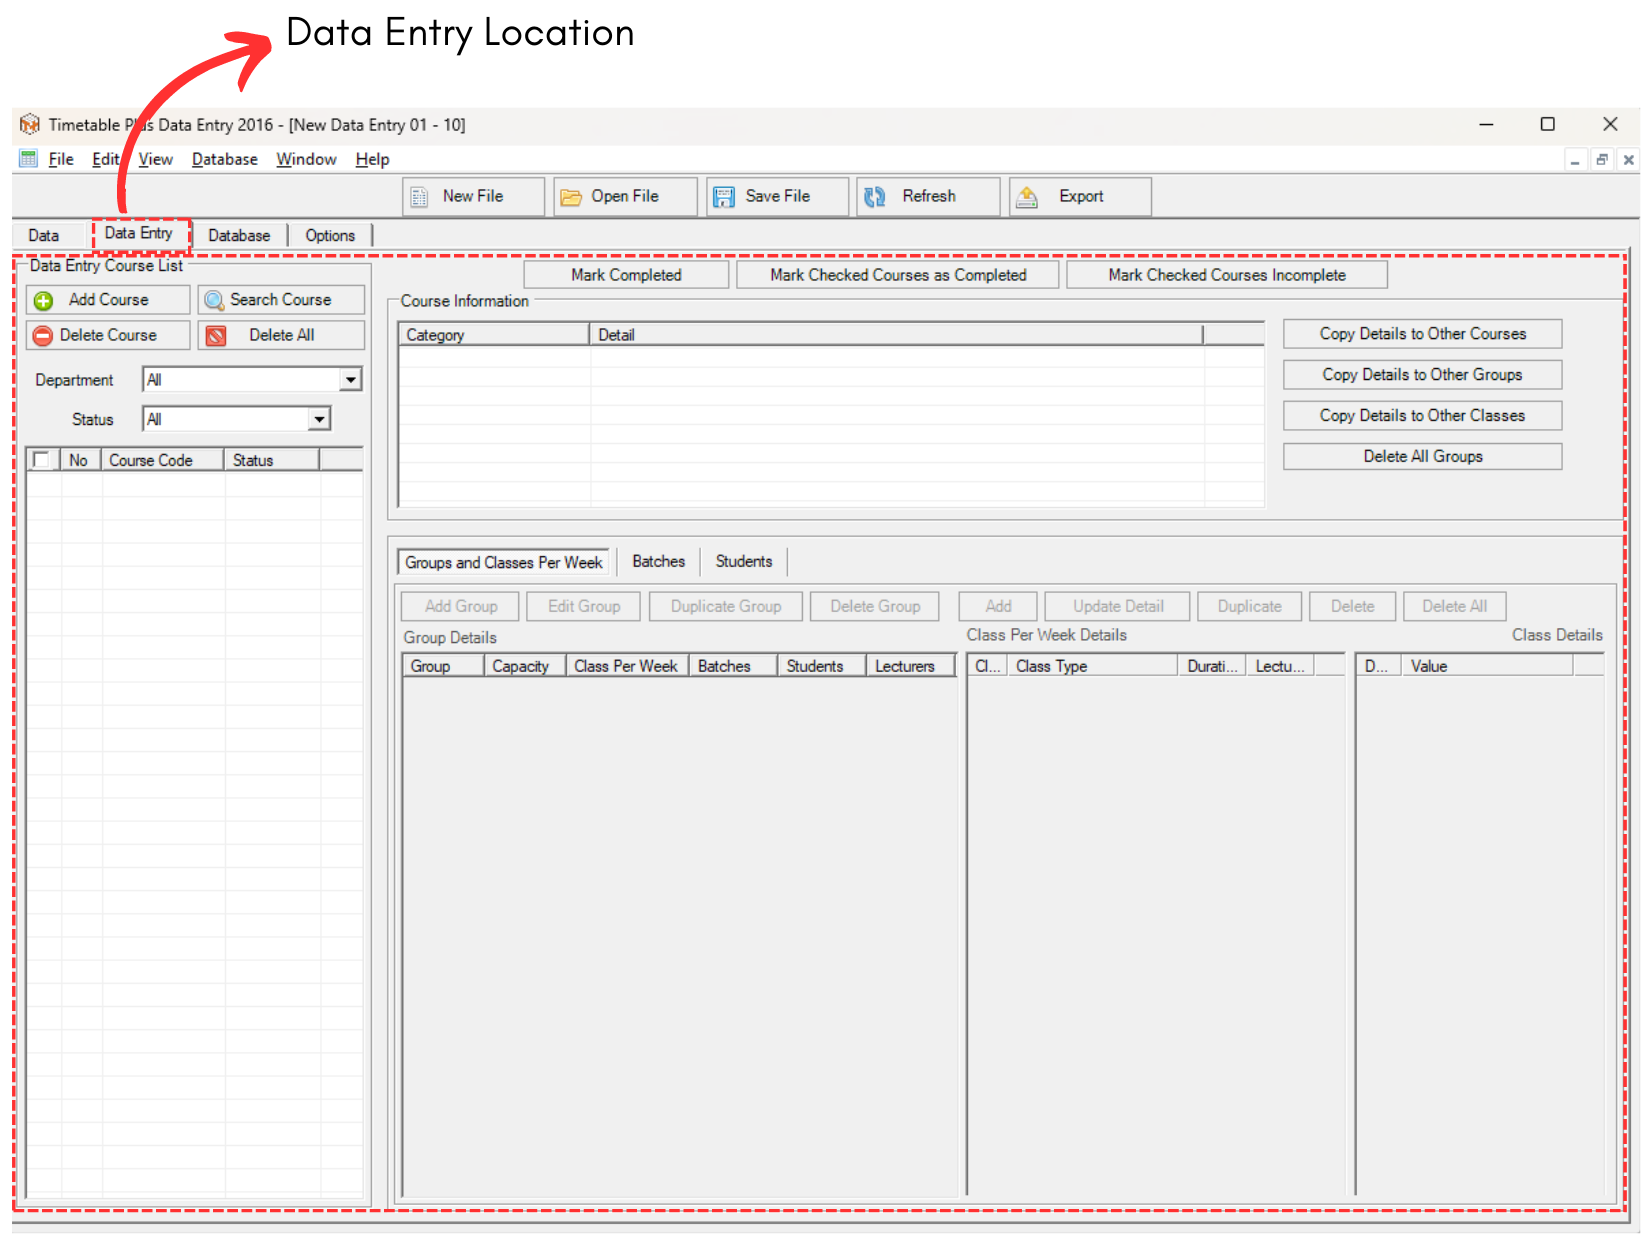
2.1.1 Data Entry Tab Location
1. Add Data Entry using Add Course Button
There are 3 simple steps in adding the data entry.
STEPS 1: Click on Add Course 
A pop up will appear.
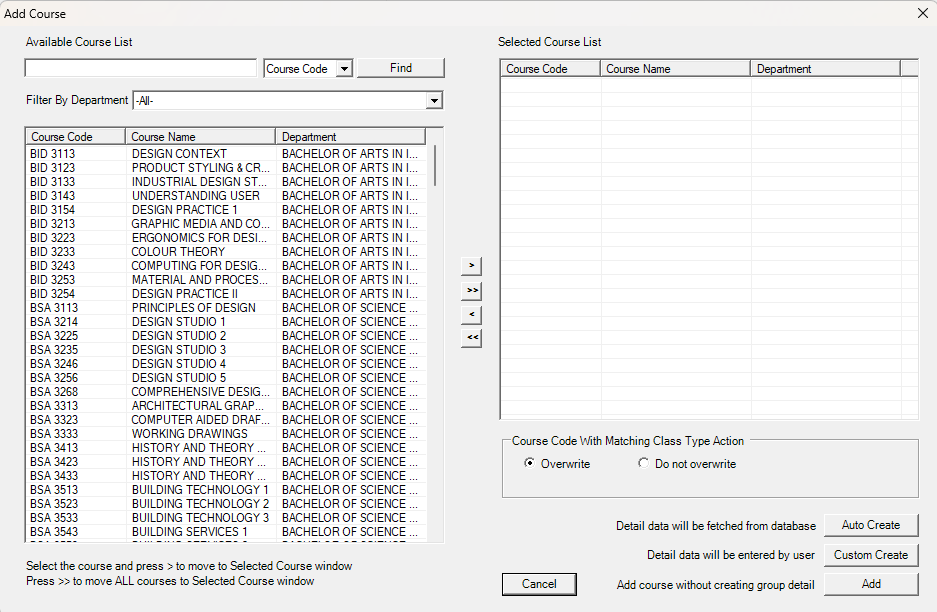
2.1.2 Add Course Popup
STEPS 2: Move the selected course to the right.
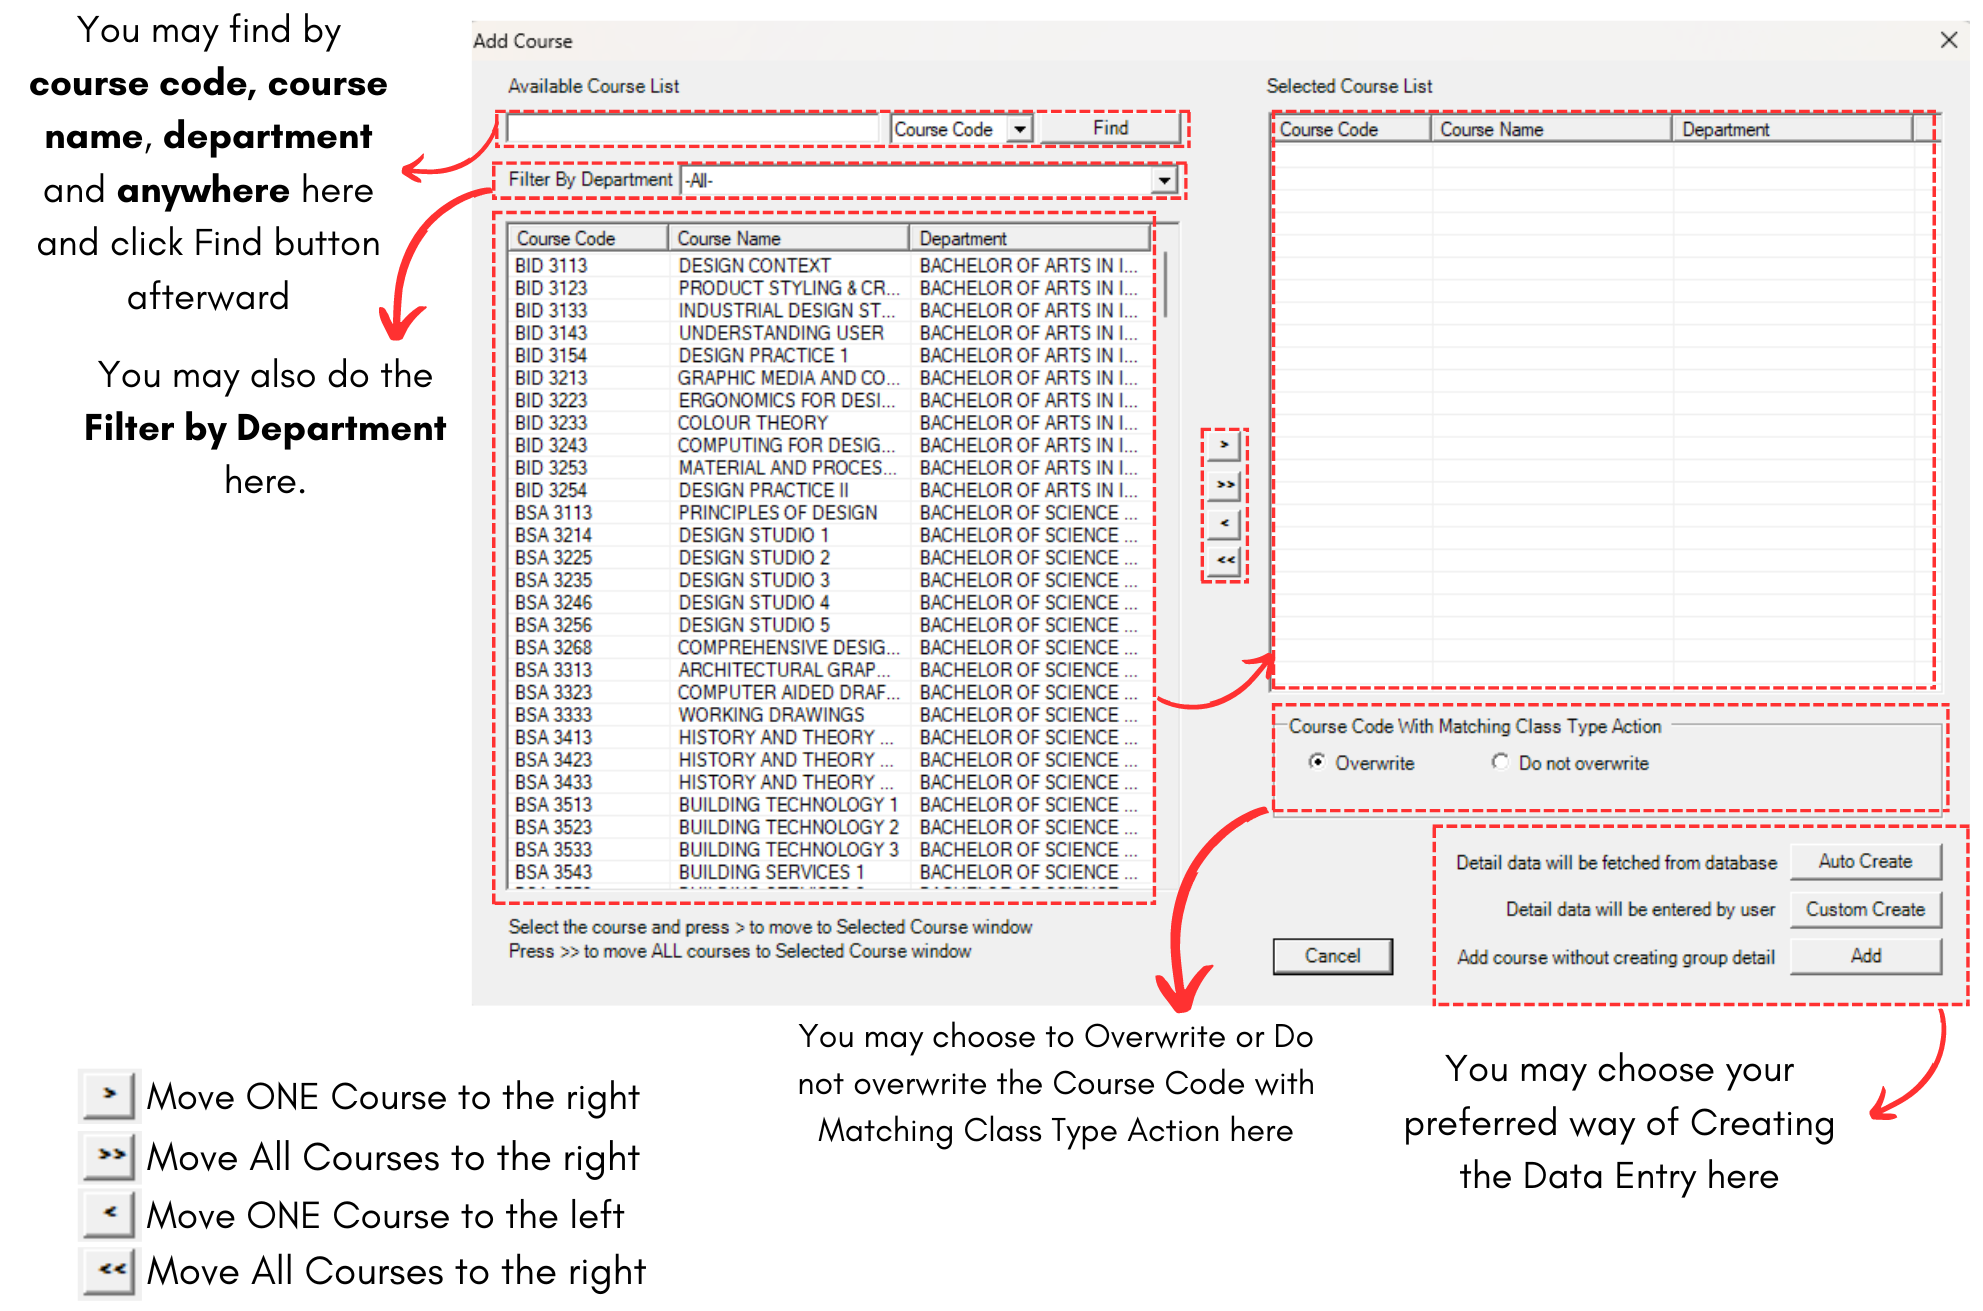
Diagram 2.1.3 Add Course Popup Explanation
For example, we choose Course Code CS221.
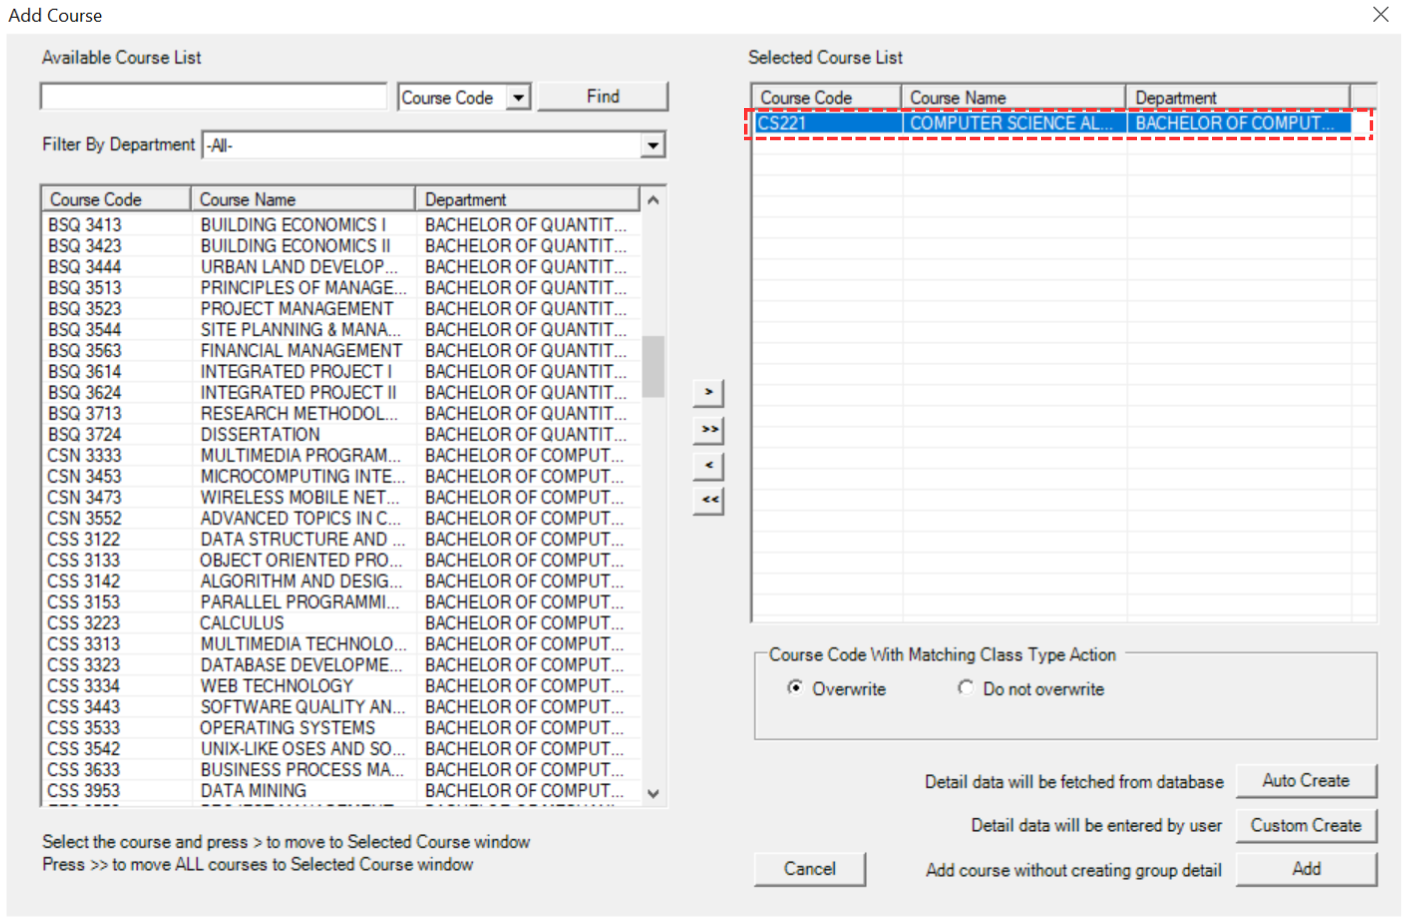
Diagram 2.1.4 Selected Course
STEPS 3: Choose to Auto Create OR Custom Create OR Add.
Refer to the explanation text on the right side of the buttons.
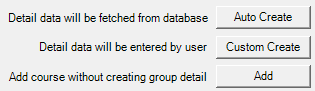
Diagram 2.1.5 Auto Create, Custom Create and Add Button
OPTION 1: If you choose Auto Create  , a popup will appear. Click Ok.
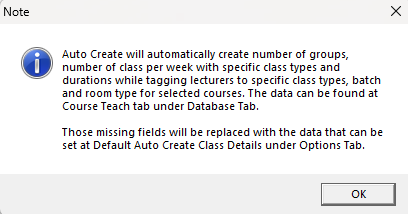
Diagram 2.1.6 Auto Create Popup
Once done, you will see the data appear in Data Entry. The data created will be based on Default Auto Create Details that you have set at Data Entry Options.
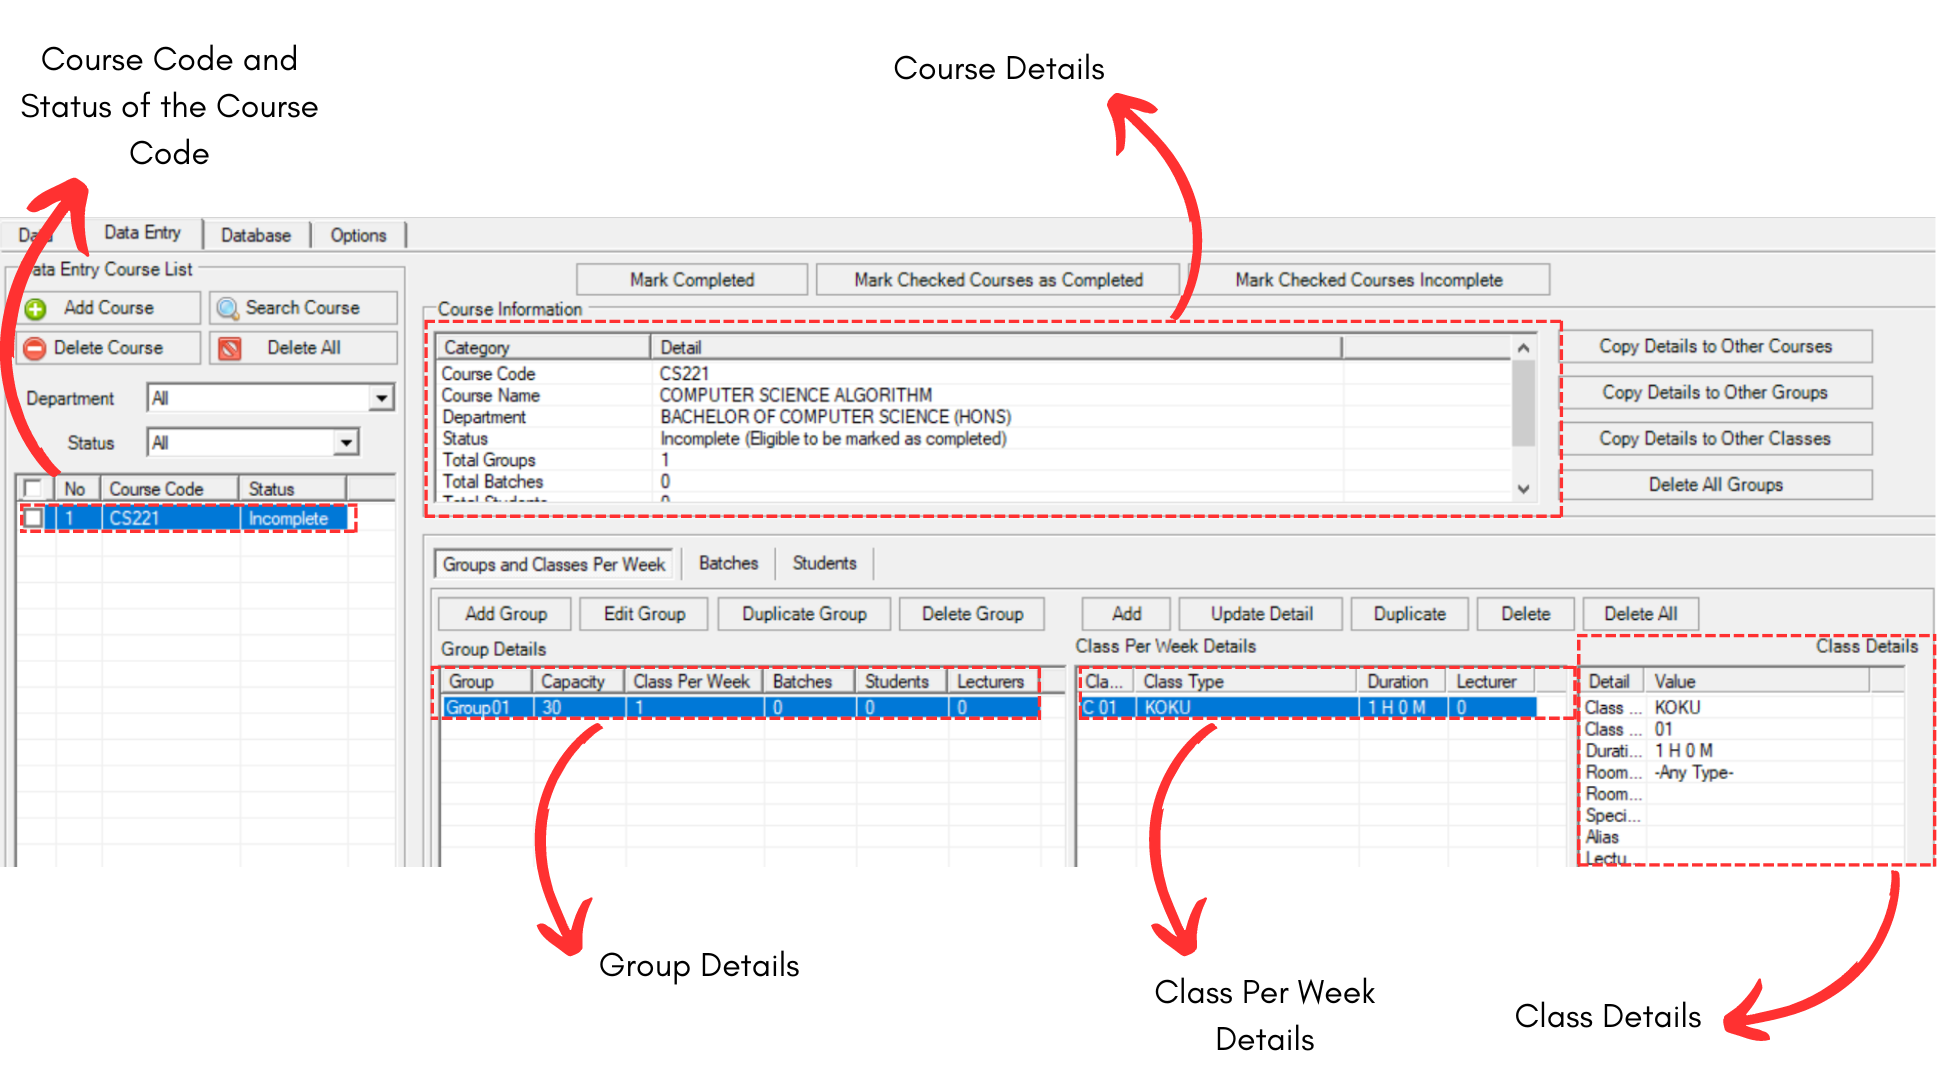
Diagram 2.1.7 Auto Create Data at Data Entry
OPTION 2: If you choose Custom Create  , a popup will appear. You may fill the fields.
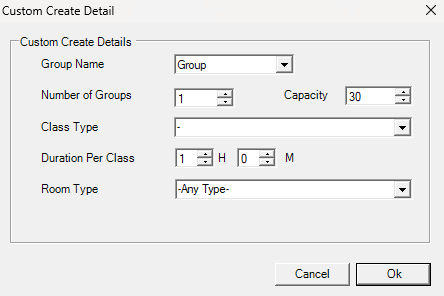
Diagram 2.1.8 Custom Create Details
To fill in the fields, refer to the table below.
|
Group Name |
Default Group Name (Can be added in Group Management).
|
|
Number of Groups |
Number of Groups that will be available for Data Entry. (Compulsory) |
|
Class Type |
Class Type for the Data Entry. (Compulsory) |
|
Capacity |
Capacity for the Class (Compulsory) |
|
Duration Per Class |
Default Time taken for the class. (Compulsory) |
|
Room Type |
Default Room Type for the Data Entry. (Compulsory) |
Table 2.1.1 Custom Create Details Explanation
Below is the example of filled fields.
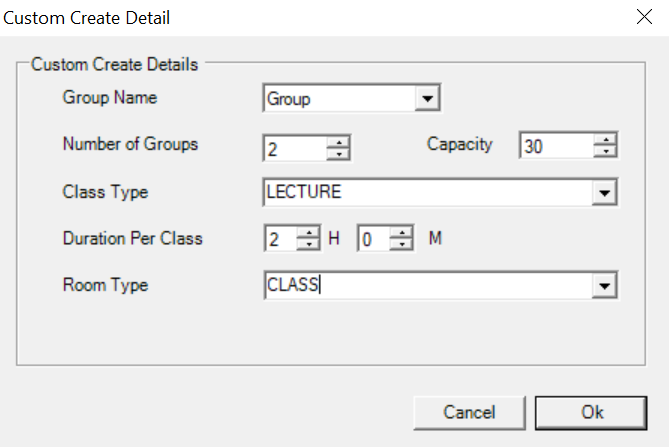
Diagram 2.1.9 Filled Custom Create Details
Click Ok once done. Once done, you will see the data in Data Entry. It will be created based on what you have chosen in Filled Custom Create Details.
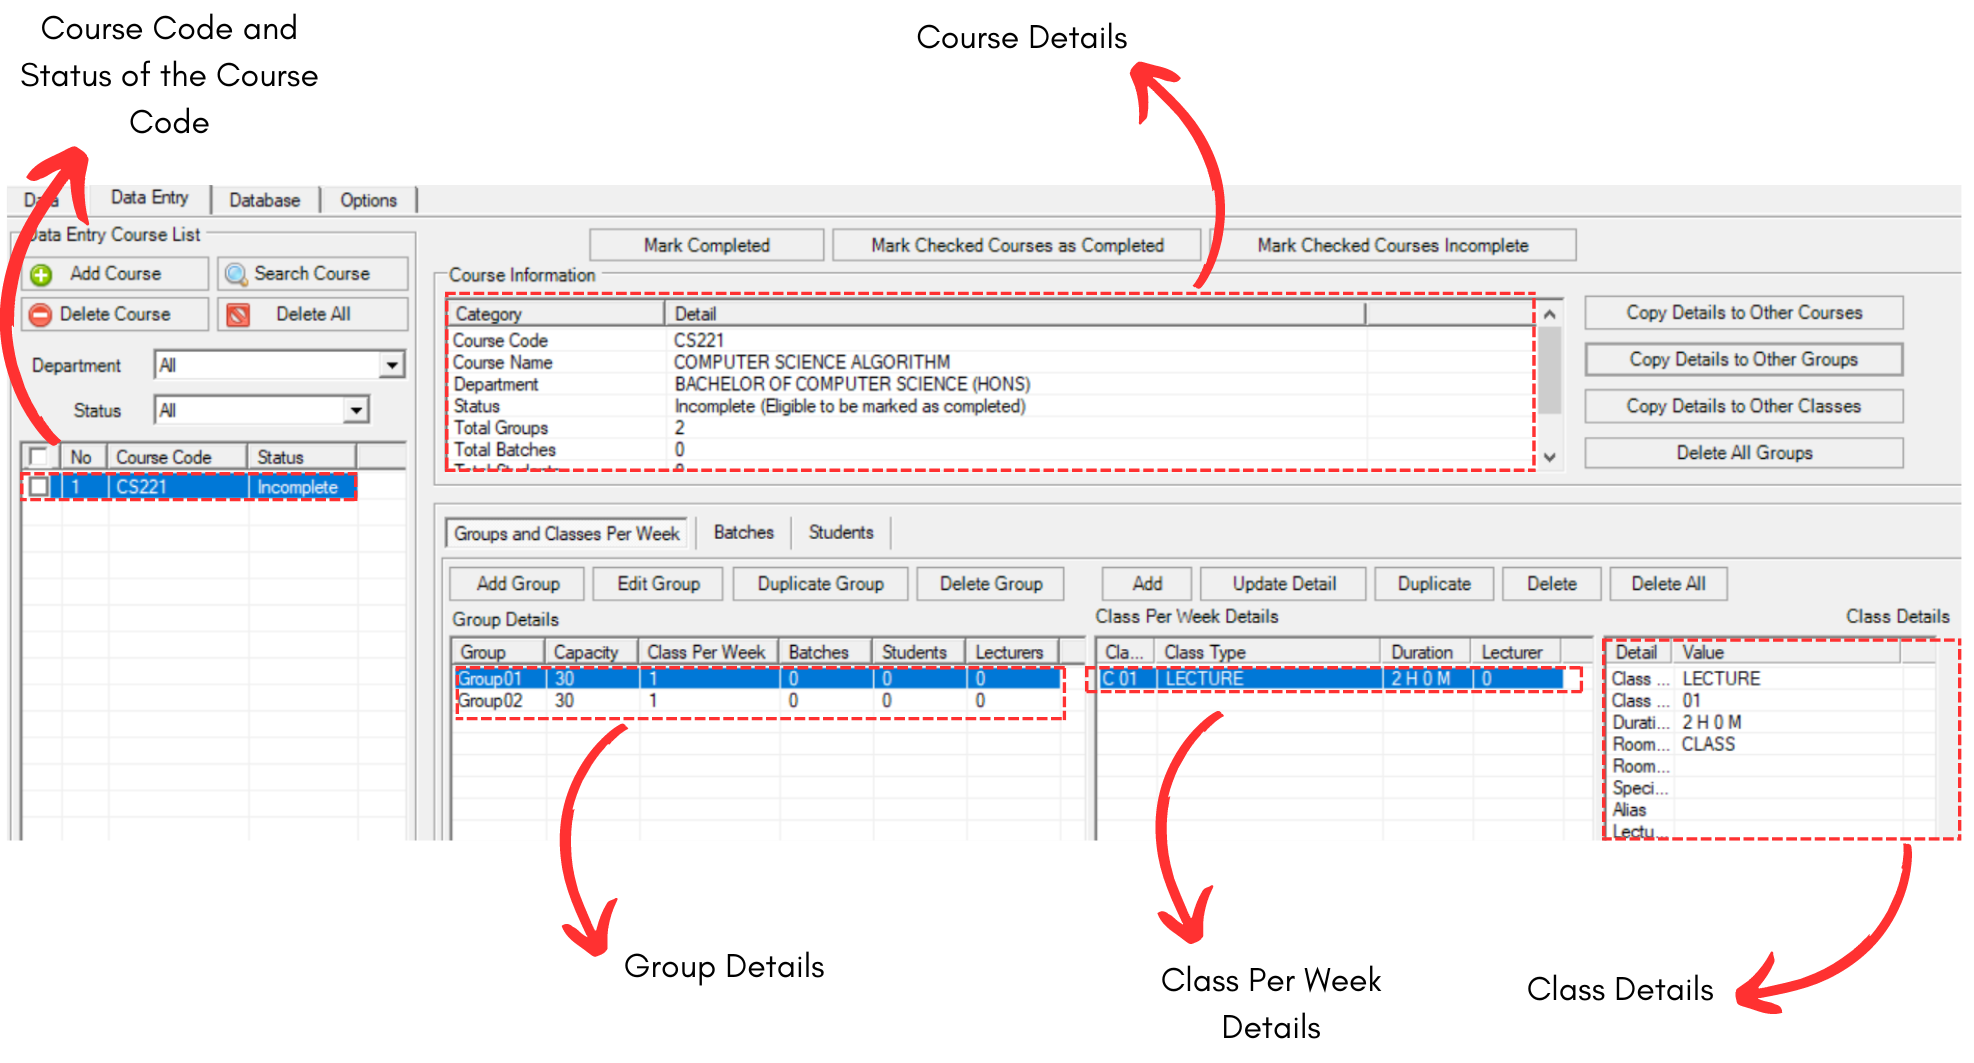
Diagram 2.1.10 Custom Create Data at Data Entry
OPTION 3: If you choose Add![]() , it will only create course on the left side and no groups details will be created.
, it will only create course on the left side and no groups details will be created.
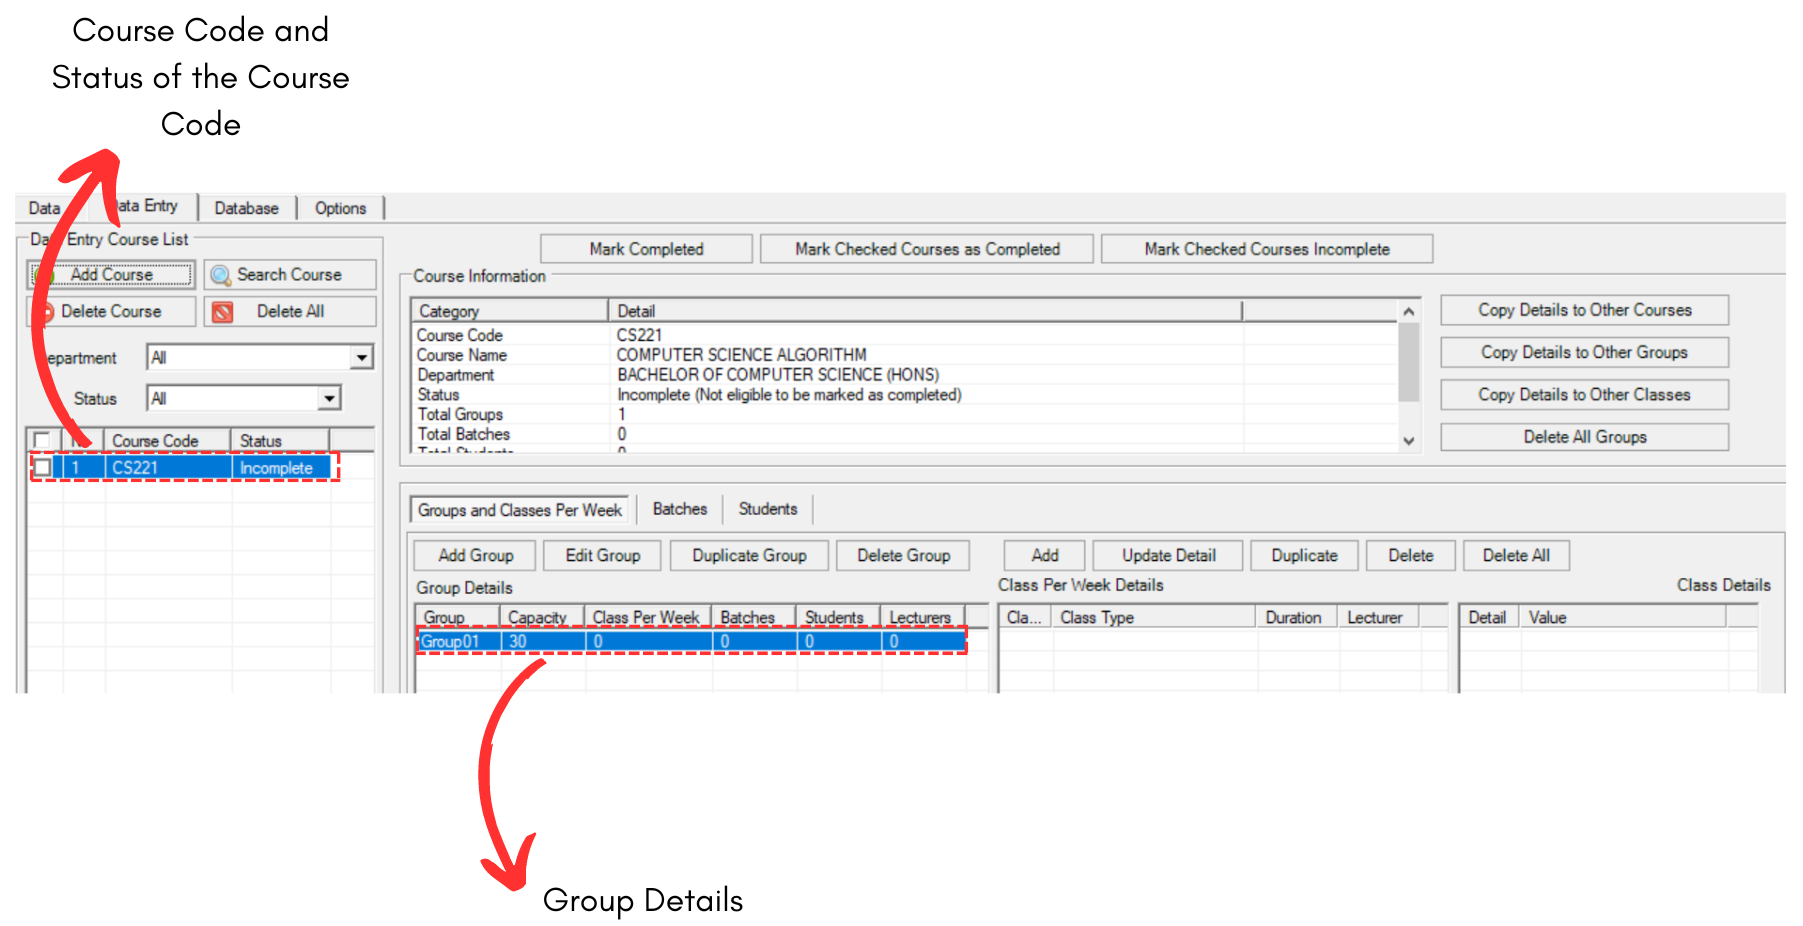
Diagram 2.1.11 Add Only Data at Data Entry
2. Add and Duplicate Group Inside the Course
You may add group in the course if you have already added course in the data Entry.
There are 3 simple steps in adding group in the course.
STEPS 1: Click on the Add Group under your chosen course. ![]()
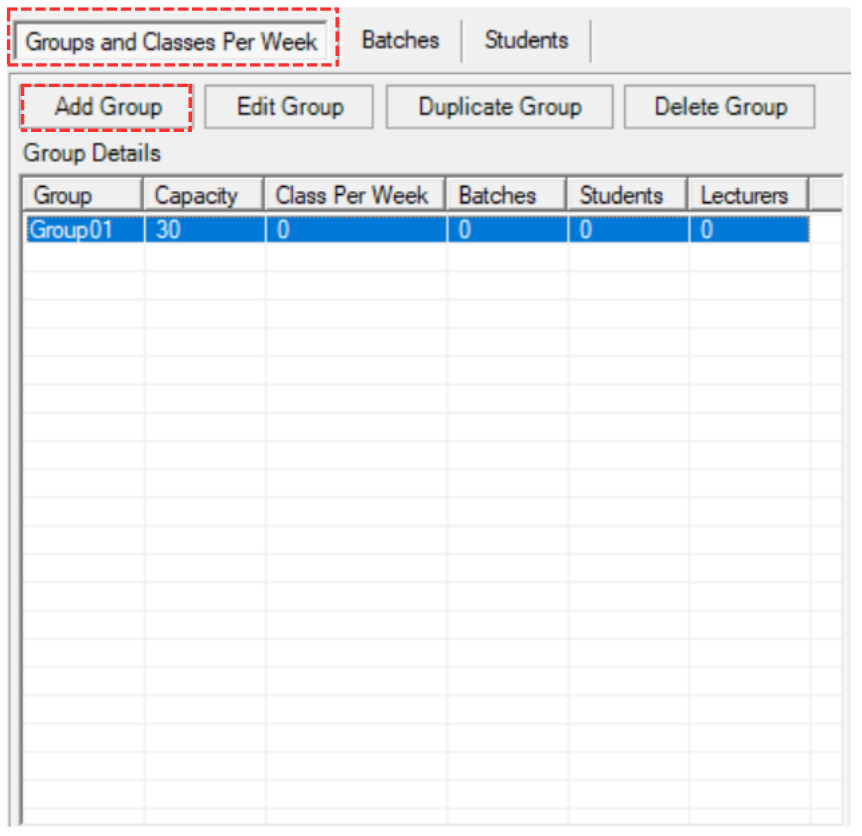
Diagram 2.1.12 Location of Add group
STEPS 2: Fill in the fields of Add Group Popup.
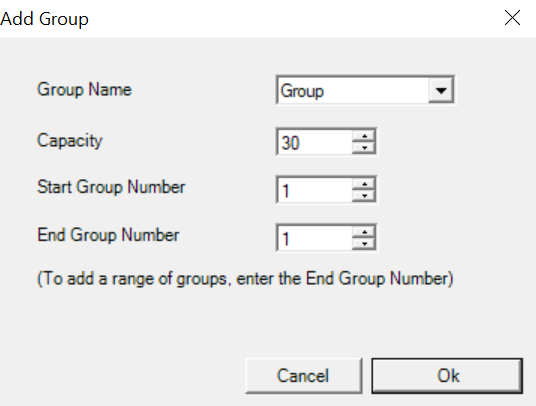
Diagram 2.1.13 Add Group Popup
To understand how to fill the field, refer to the table below.
|
Group Name |
Choose the Group Name (Can be added in Group Management).
|
|
Capacity |
Capacity of the group. |
|
Start Group Number |
The first group number. |
|
End Group Number |
The last group number (This is optional if you want to add a range of groups) |
Table 2.1.2 Add Group Explanation
For Example, we change the End Group Number as 3. This will add up to total 3 groups under the course code.

Diagram 2.1.14 Changed End Group Number
STEPS 3: Click Ok once done. You will see the group will be added under the course.
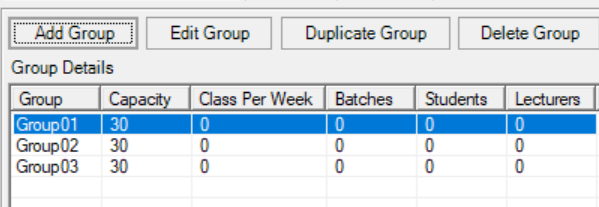
Diagram 2.1.15 Added Groups under the Course
There are 3 simple steps in duplicating the group. Refer to the picture below.
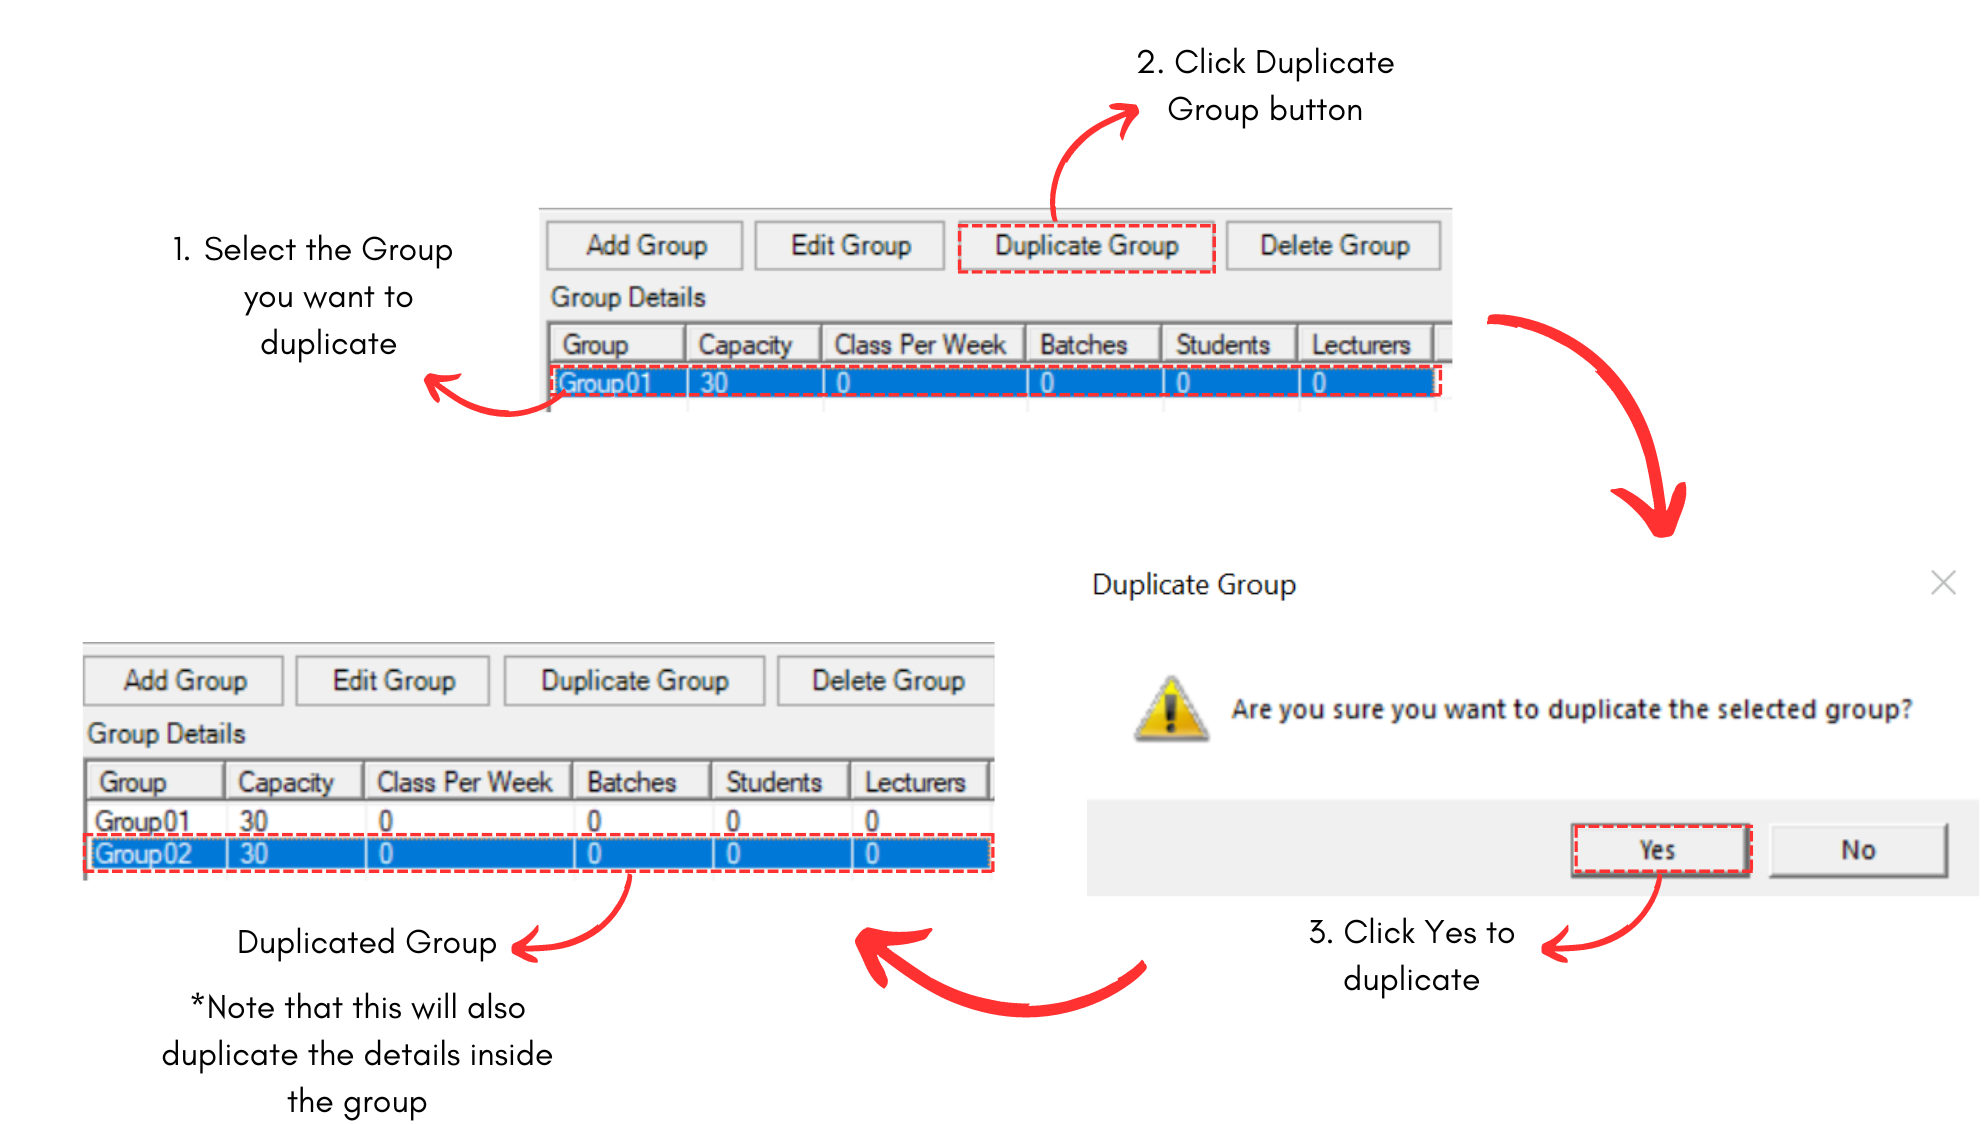
Diagram 2.1.16 Duplicated Group Under Course
3. Add and Duplicate Class Inside the Group
You may add class inside the group if you have already added groups in the course at Data Entry.
There are 3 simple steps in adding class inside the group.
STEPS 1: Click on the Add under your chosen group. ![]()
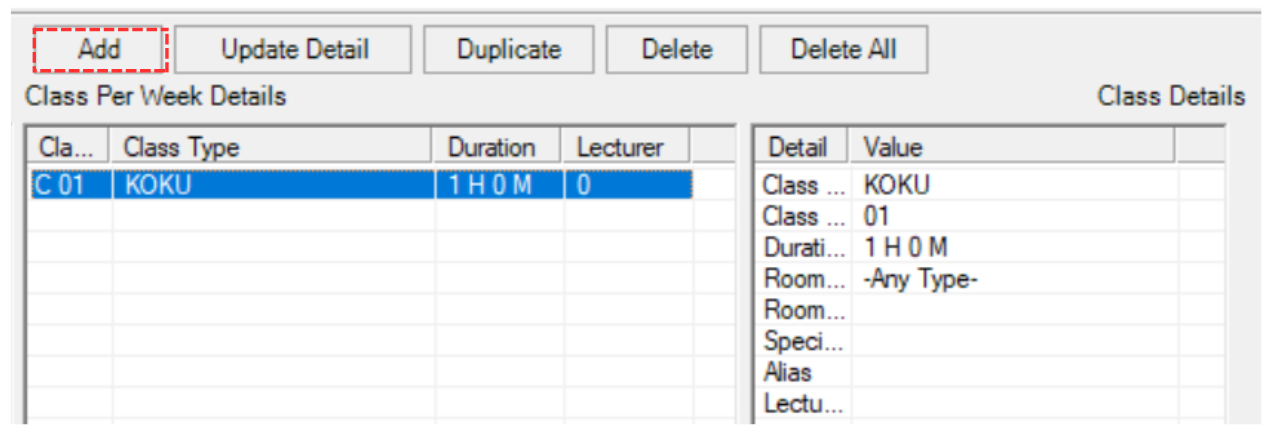
Diagram 2.1.17 Location of Add Class
STEPS 2: Fill in the fields of Add Class to Course Popup.
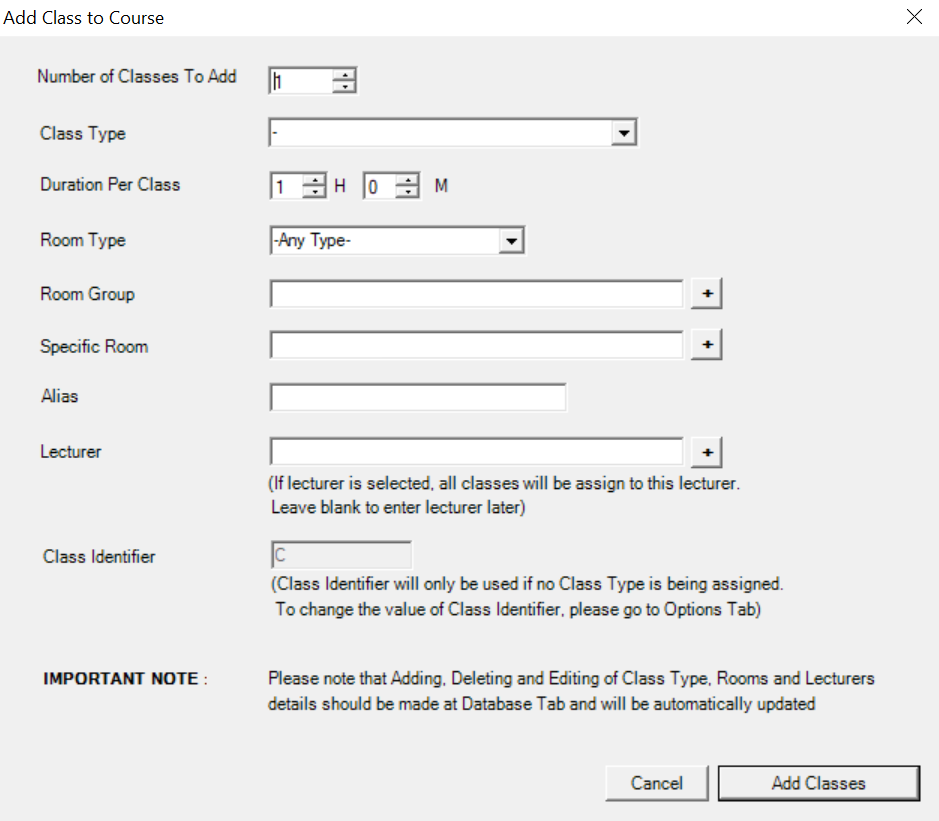
Diagram 2.1.17 Add Class to Course Popup
To understand how to fill the field, refer to the table below.
|
Number of Classes to Add |
Choose the number of classes you want to add.
|
|
Class Type |
Type of class that will be added. (compulsory) |
|
Duration Per Class |
Time taken for the class. (compulsory) |
|
Room Type |
Room Type for the class. (compulsory) |
|
Room Group |
The Group of the Room for the Class. (non-compulsory) |
|
Specific Room |
Specific Room for the Class (non-compulsory) |
|
Alias |
Alias of the Class (non-compulsory) |
|
Lecturer |
The lecturer that will teach the class (compulsory) |
Table 2.1.2 Add Class Explanation
Below is the example of fields been filled.
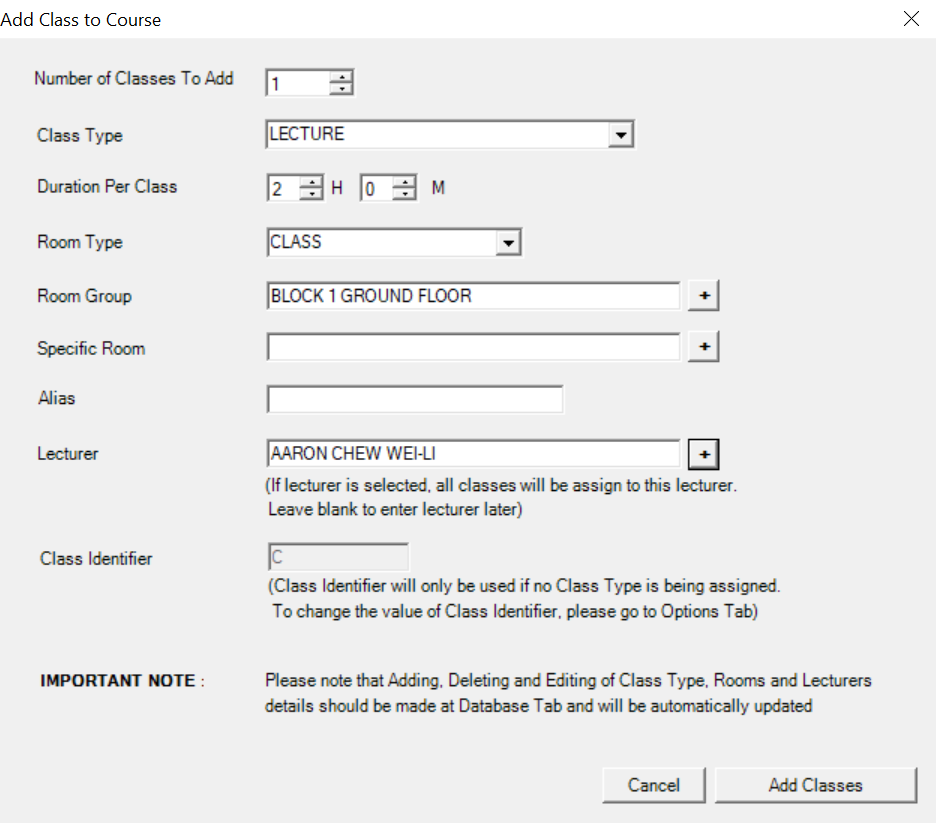
Diagram 2.1.18 Class Details Filled
STEPS 3: Click Add Classes once done. You will see the group will be added under the course.
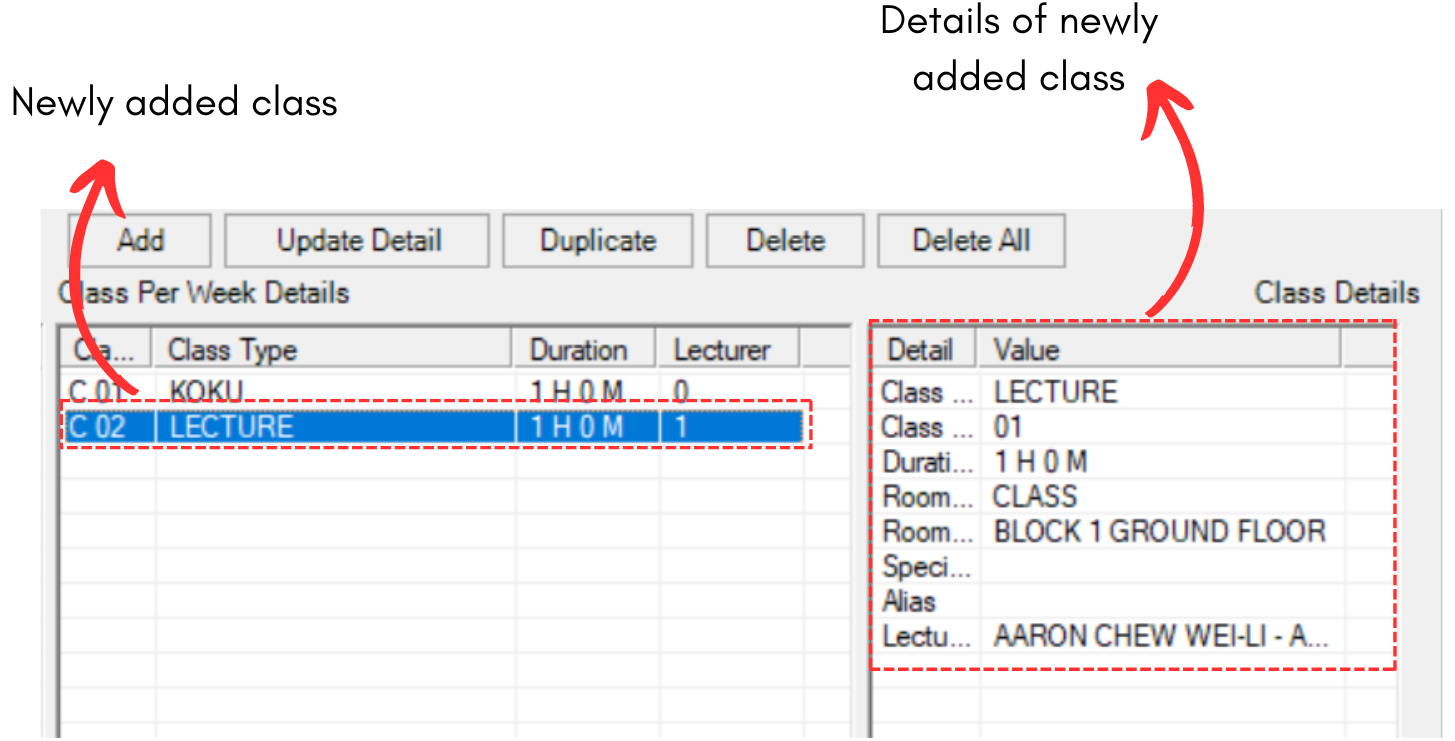
Diagram 2.2.19 Added Class under Class
There are 3 simple steps in duplicating the class. Refer to the picture below.
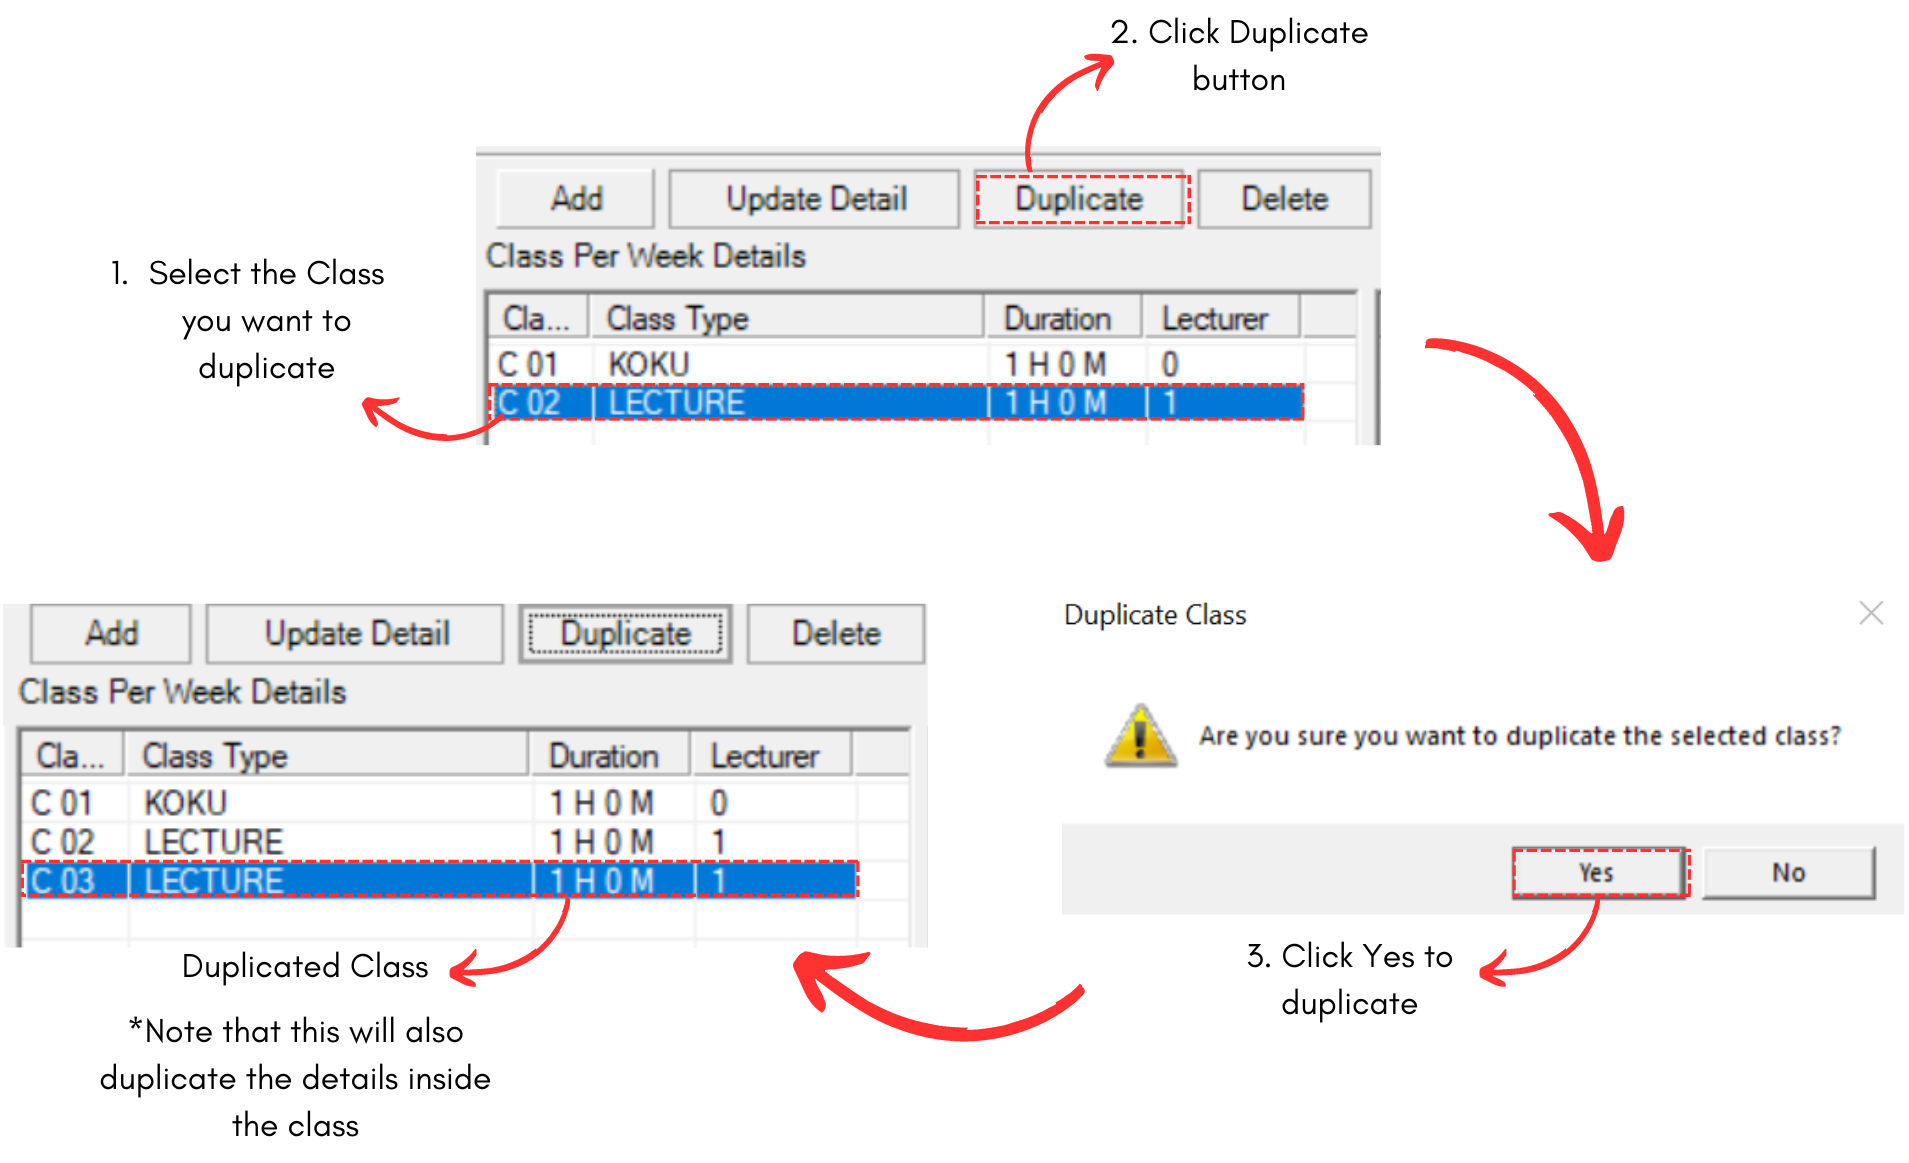
Diagram 2.1.16 Duplicated Class Under Course