Stage 3: Tree Structure and Data Entry
3. Customize Tree Structure
3.2. Batch Grouping
To open Batch Grouping, you may go to Grouping and select Batch Grouping.

Diagram 3.2.1 Location of the Batch Grouping
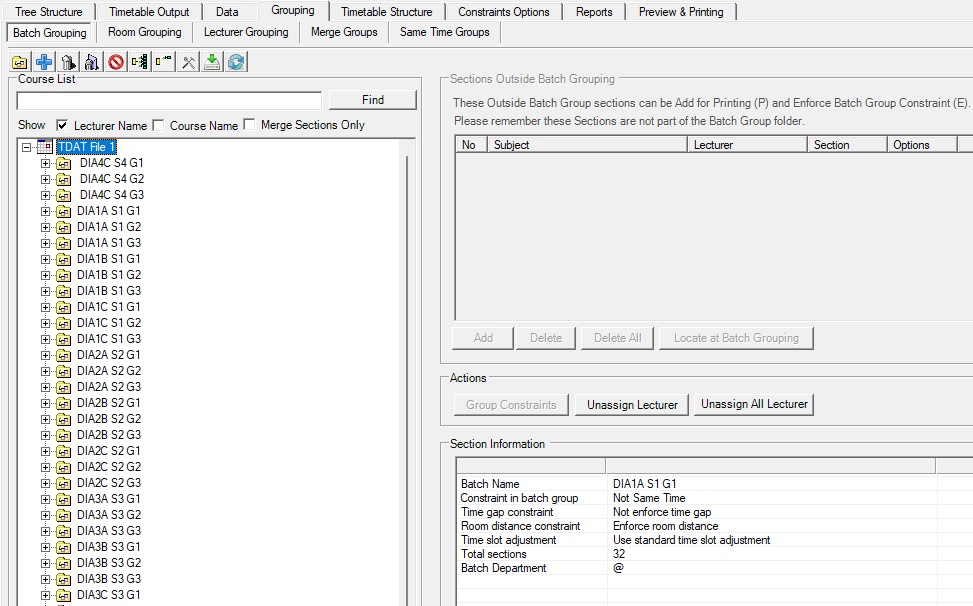
Diagram 3.2.2 Batch Grouping
There are few icons that need to be studied before adding the batch into Batch Grouping.

 | Click this icon to add new group. |
 | Click this icon to add course. |
 | Click this icon to delete the course or batch group. |
 | Click this icon to delete all the batch group. |
 | Click this icon to delete all empty batch group. |
 | Click this icon to expand group. |
 | Click this icon to collapse group. |
 | Click this icon to detect clashing at batch grouping. |
 | Click this icon to import from SIS. |
 | Click this icon to refresh the view of batch grouping. |
Add Batch Grouping
There are three ways of adding Batch Grouping.
1.To add Batch Grouping, click on the add new group icon .
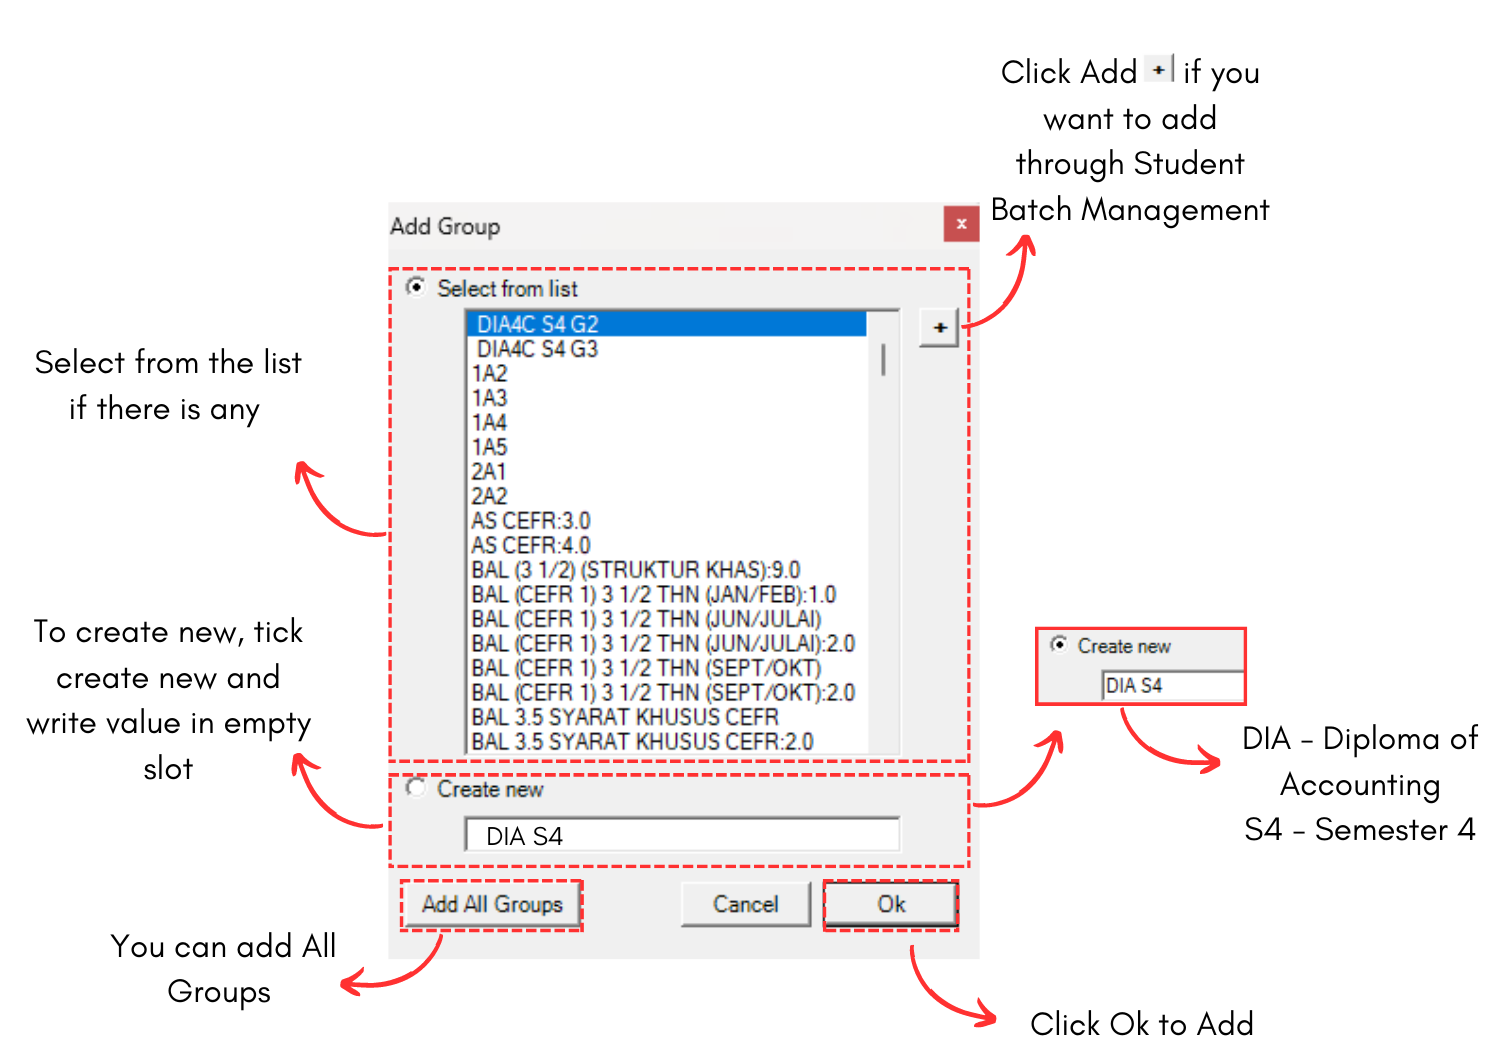
Diagram 3.2.3 Add Group Pop-up
Once added new group, select the batch group and click on Add Course icon
A window will appear, showing the courses that can be selected.
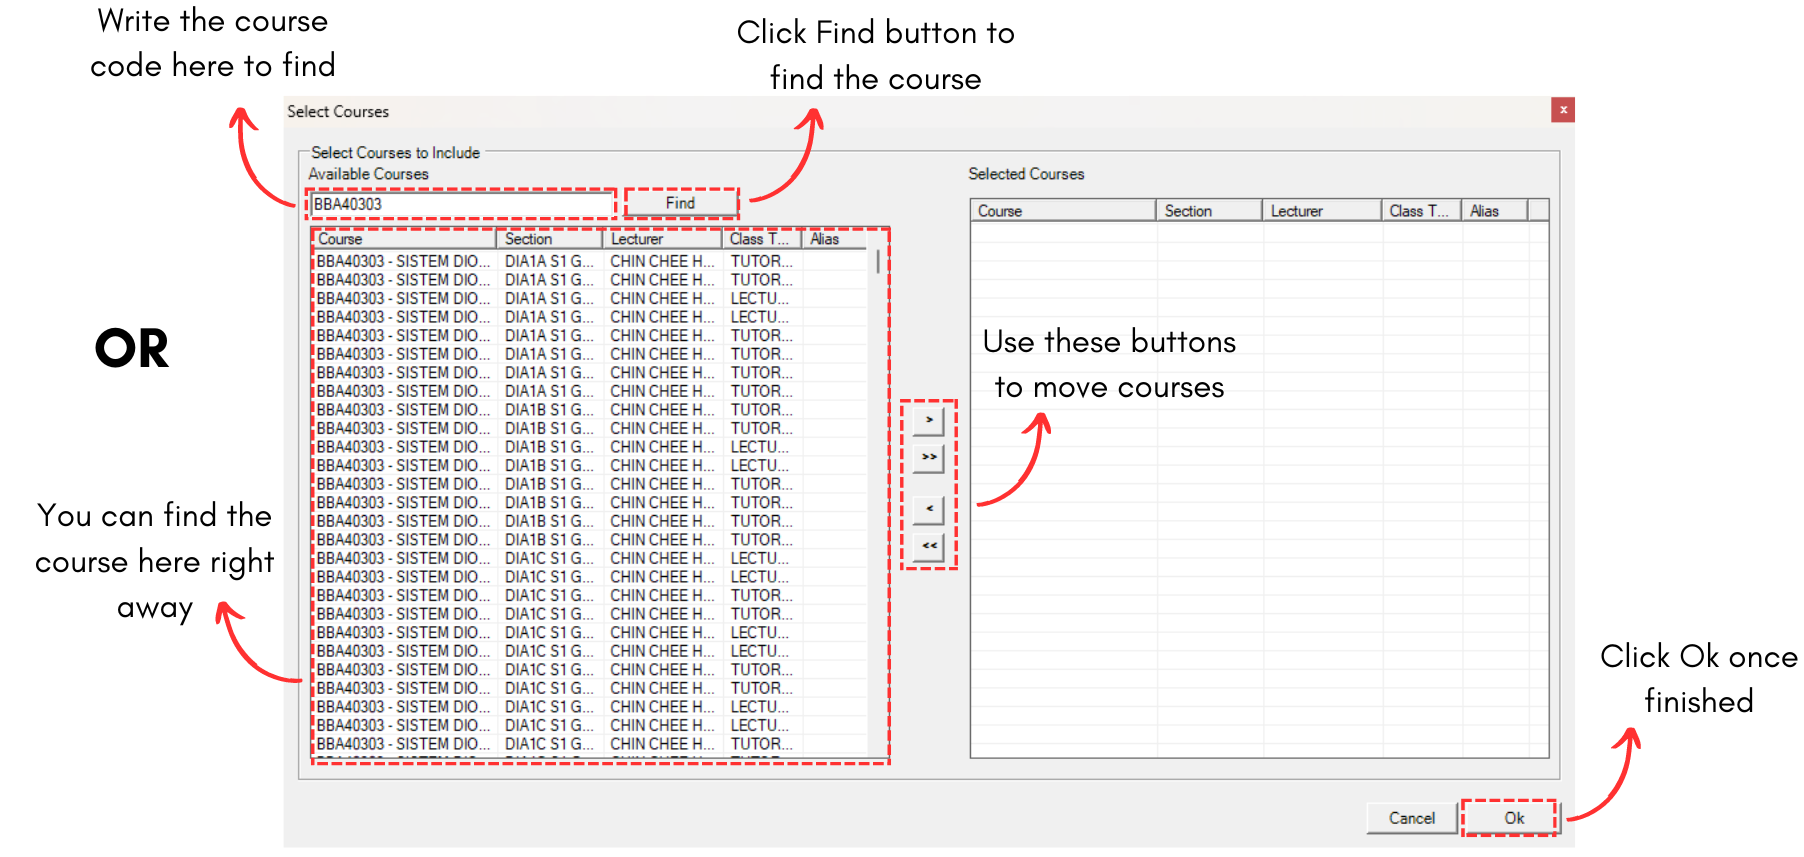
Diagram 3.2.4 Select Courses Window
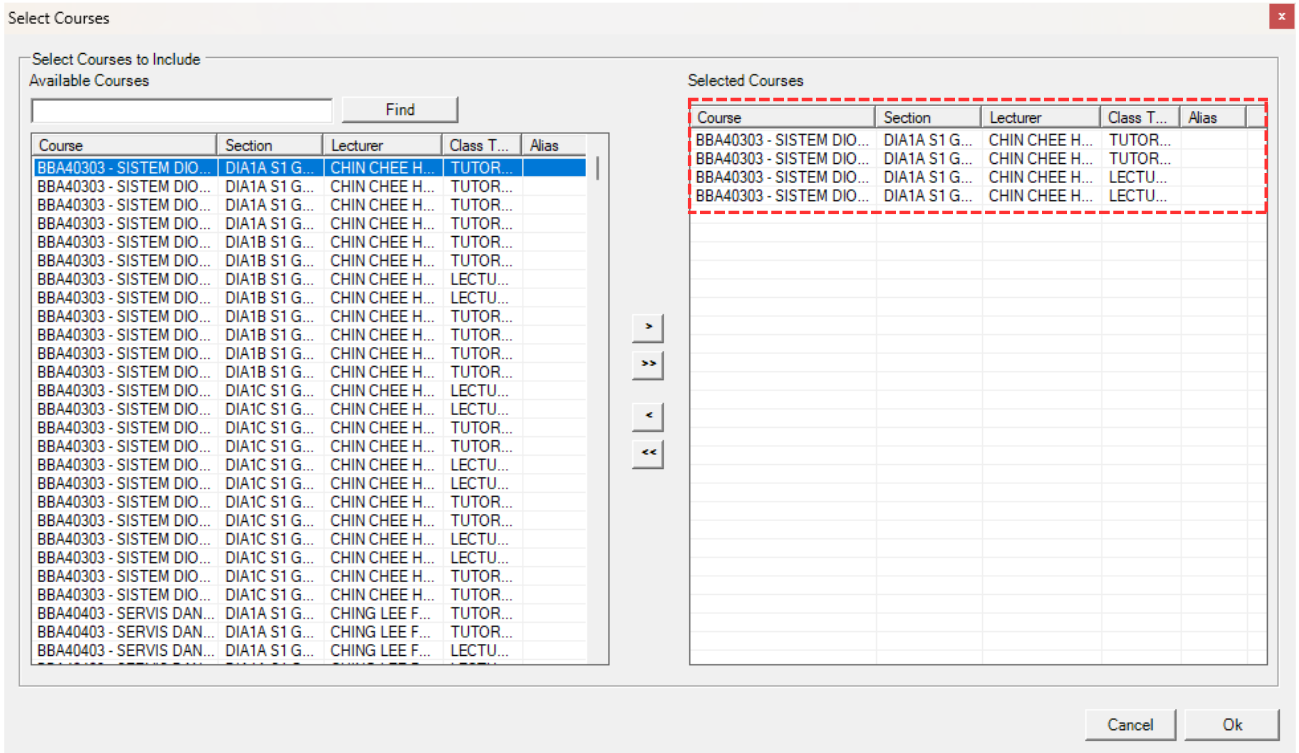
Diagram 3.2.5 Course Moved To The Right Side
This is how it will looks like once Batch Grouping is added.
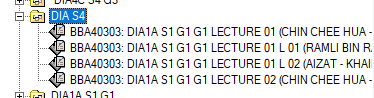
Diagram 3.2.6 Batch Grouping Added
2. OR You can simply go to the Tree Structure and right click a constraint group folder. Select Moves To Group and then select Batch Grouping.
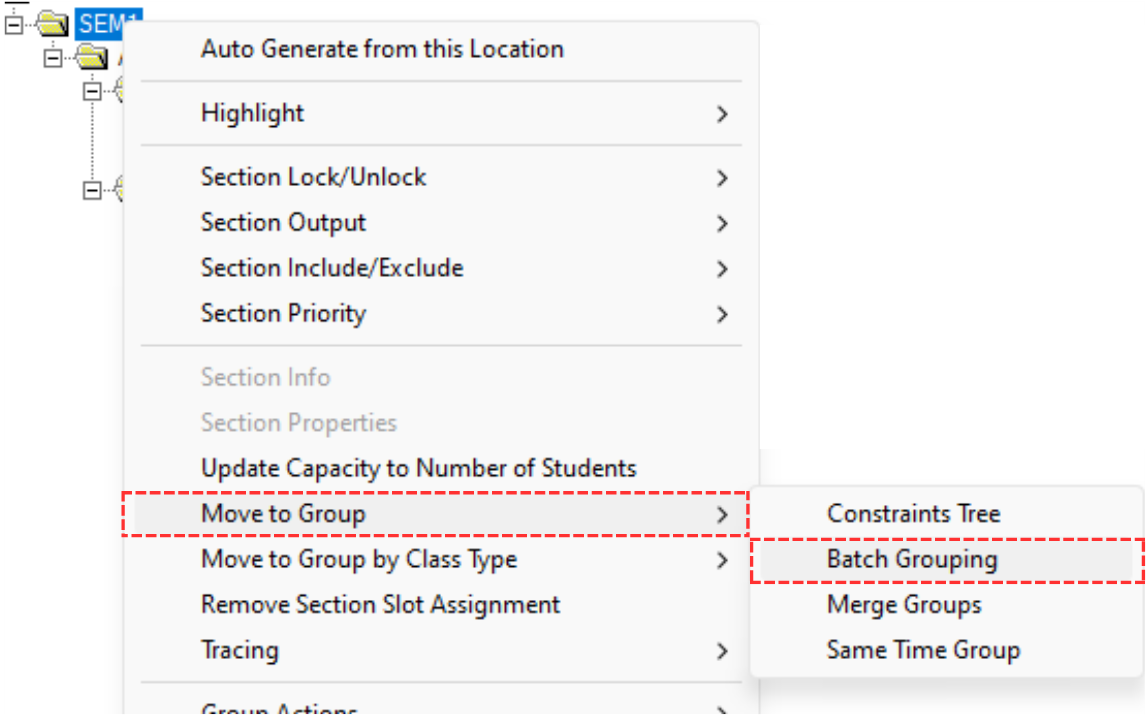
Diagram 3.2.7 Location of Batch Grouping on Right Click
A pop-up will appear, showing Select Group option. You may select from the list or if there none, click Add icon  to add a new Batch Grouping. Click Ok once done.
Note that this will move every constraint folder or section under it to the group as well.
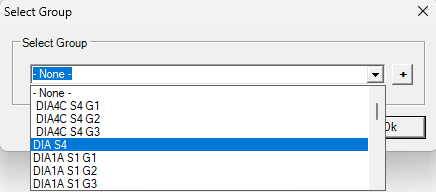
Diagram 3.2.8 Pop-up Select Group
Another pop-up will appear once you click on the selected merge group. Click Yes afterward.
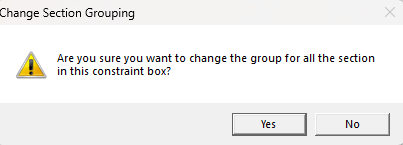
Diagram 3.2.9 Pop-up Confirmation
3. OR you can simply double click on section at tree structure and update the batch grouping.

Diagram 3.2.10 Double Click Section
Section Properties window will appear.
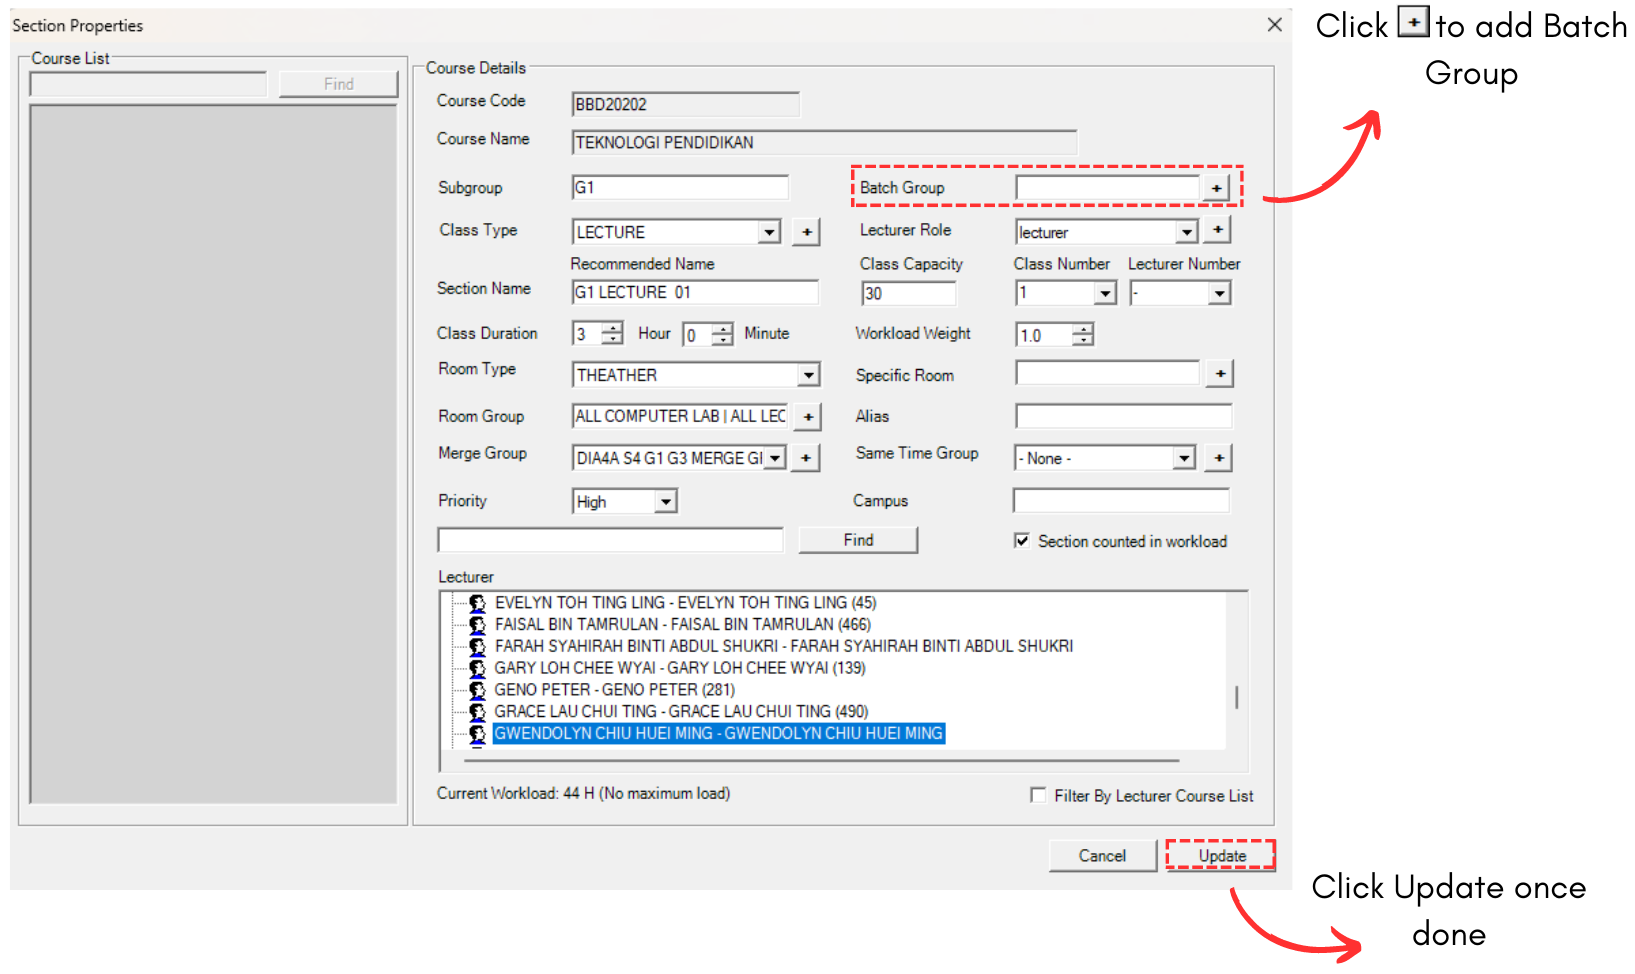
Diagram 3.2.11 Section Properties Window
Click Add Icon  on Batch Group to add Batch.
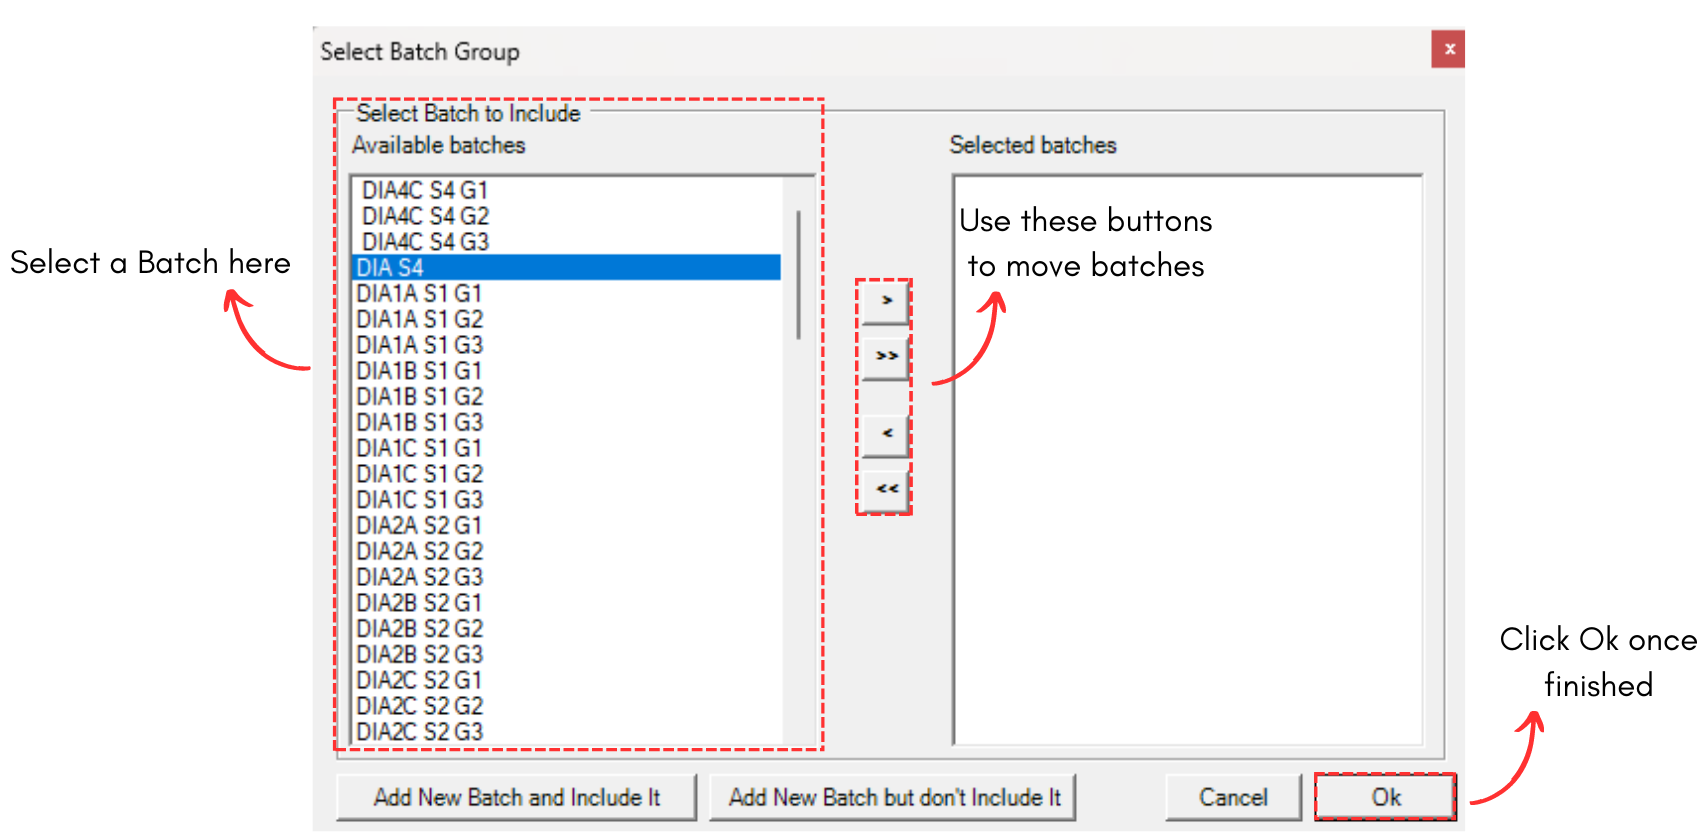
Diagram 3.2.12 Select Batch Group Window
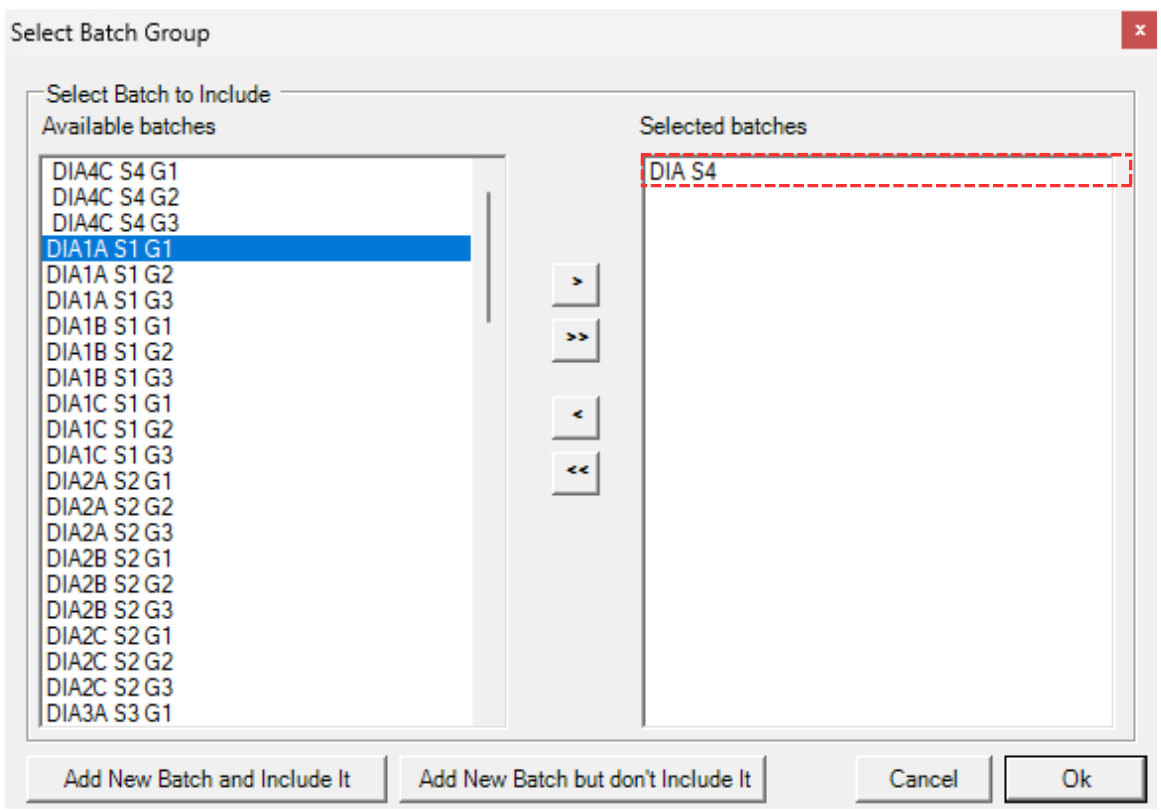
Diagram 3.2.13 Batch Moved To The Right Side
Click Ok once finished in Select Batch Group window and then click Update in Section Properties.