Stage 3: Tree Structure and Data Entry
2. Add in Tree Structure
2.1. Construct From The Tree
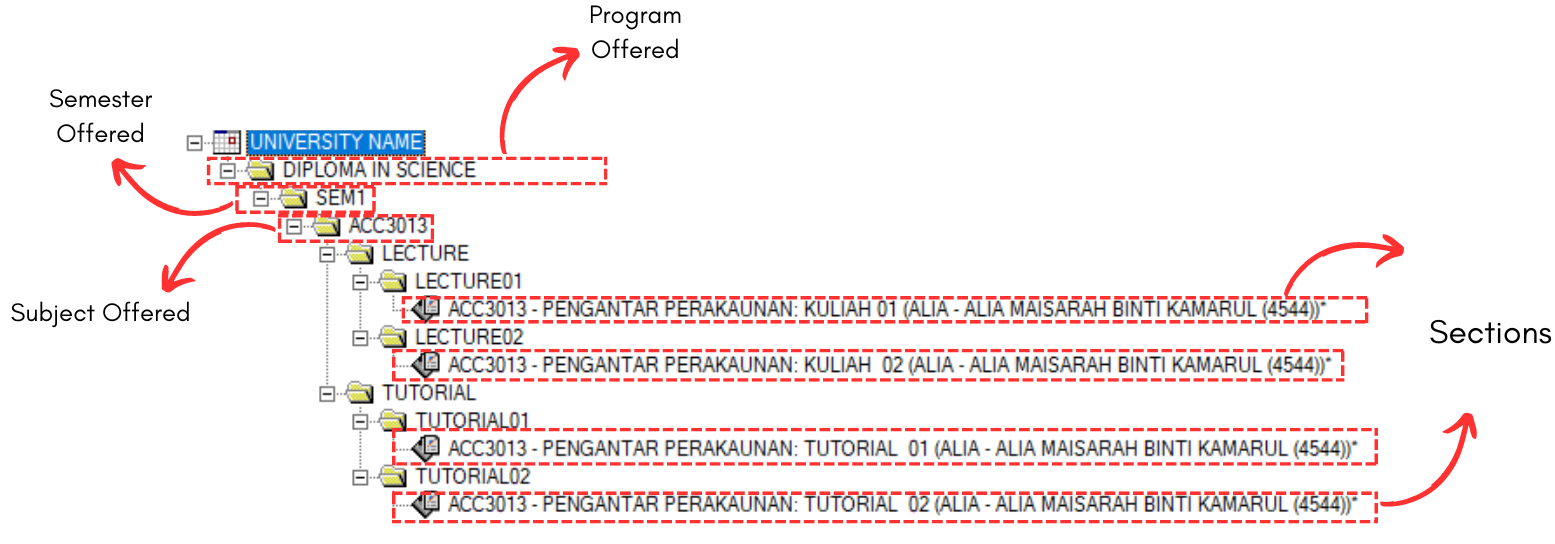
Diagram 2.1.1 Sample of Tree Structure
Every timetable coordinator needs to construct a Tree Structure which usually consists of the following data:
i) All the programs offered
ii) Number of semester offered in each program
iii) Number of subjects offered for each semester
iv) Section: Who teach what subjects, class duration & class offered per week
Create a New Tree Structure
For example, we have a SCENARIO 1:
- 1 Program offered
- 1 Semester offered
- 1 subject offered
- 4 class per week: 2 lectures and 2 tutorials
STEPS 1: Click New timetable icon to create new timetable and then save and rename the schedule under root
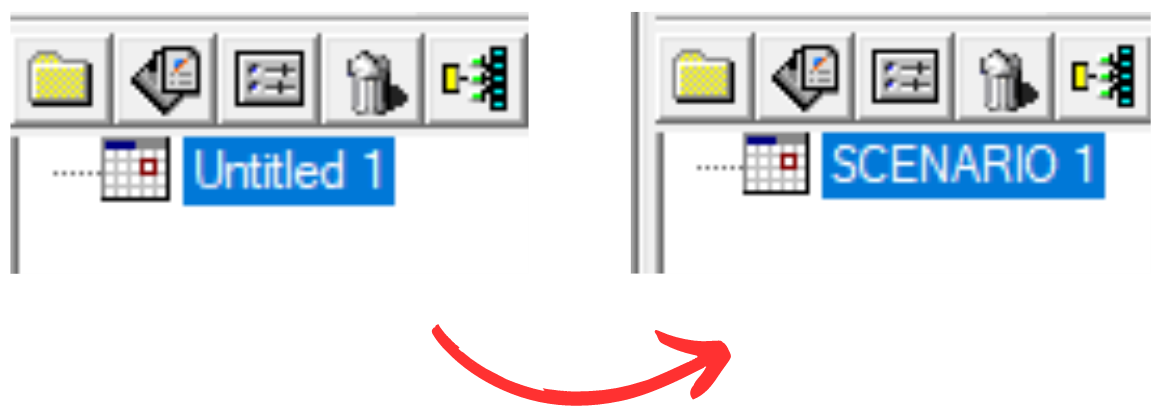
Diagram 2.1.2 File named as Scenario 1
STEPS 2: Click at SCENARIO 1 to add New constrain group  > New constraint group created and rename to program offered (DIPLOMA IN SCIENCE)
Note that to rename, you can select the group or section and click once again. OR you can right click and select Rename Group.
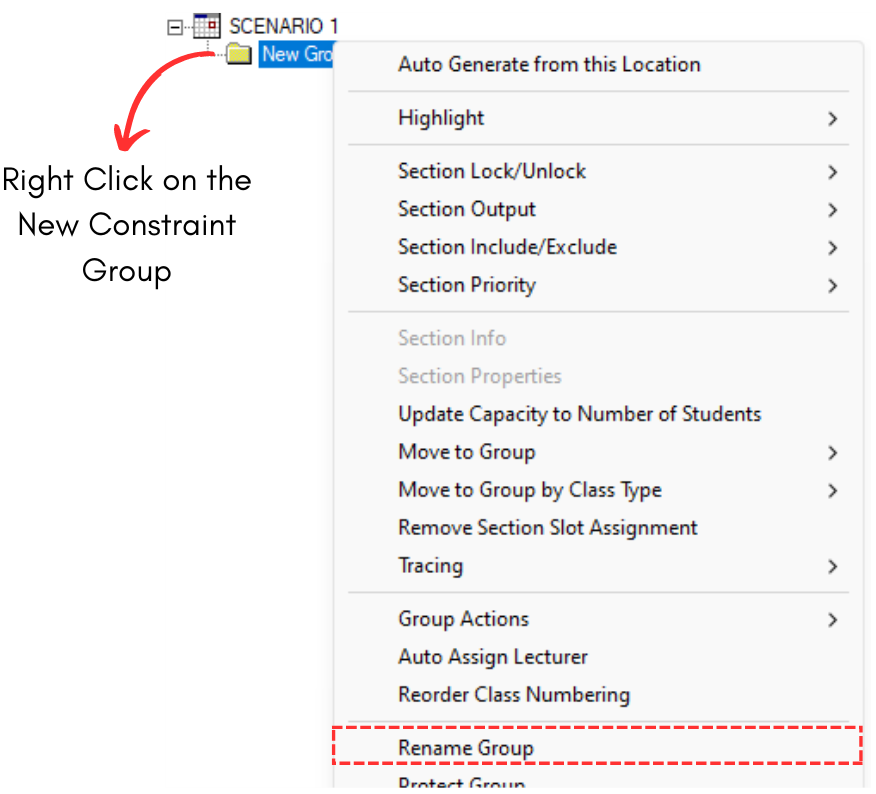
Diagram 2.1.3 Right Click Function on New Constraint Group
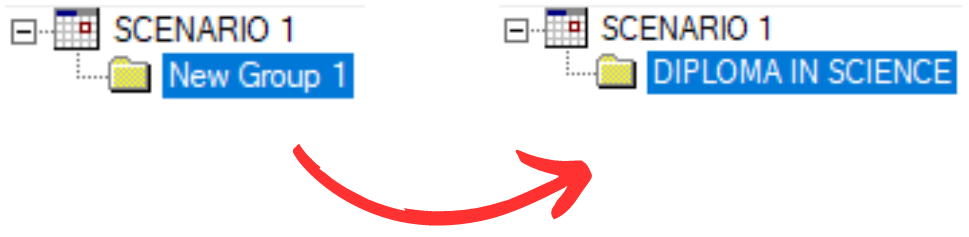
Diagram 2.1.4 Rename to DIPLOMA IN SCIENCE
STEPS 3: Click at DIPLOMA IN SCIENCE to add new constraint group  > New constraint group created will be renamed to semester offered (SEM1)
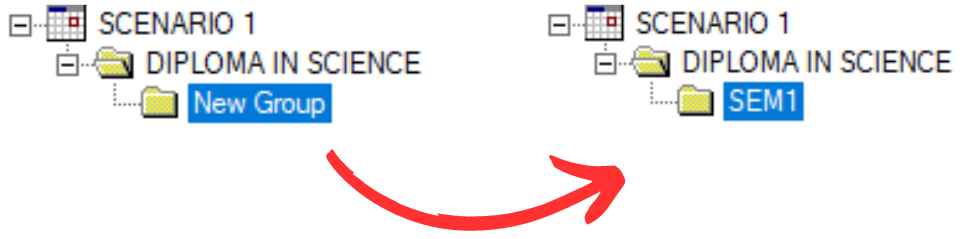
Diagram 2.1.5 Rename to SEM1
STEPS 4: Click at SEM1 to add New constraint group > New constraint group created will be renamed to subject offered (ACC3013)
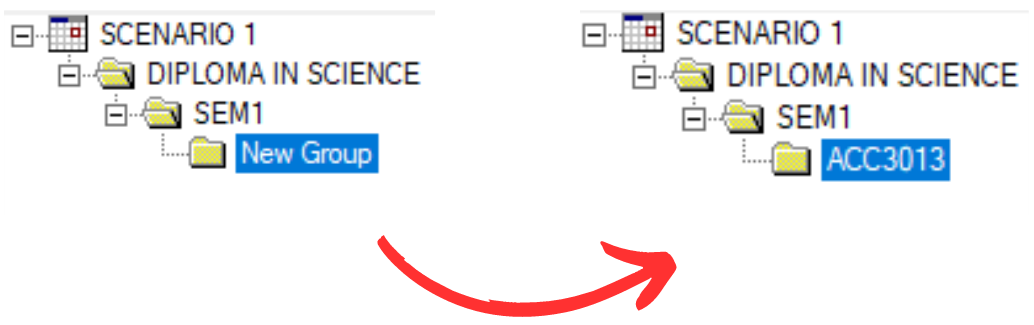
Diagram 2.1.6 Rename to ACC3013
STEPS 5: Click at ACC3013 to add two new constraint group > New constraint group created will be renamed to class offered (Lecture and Tutorial)
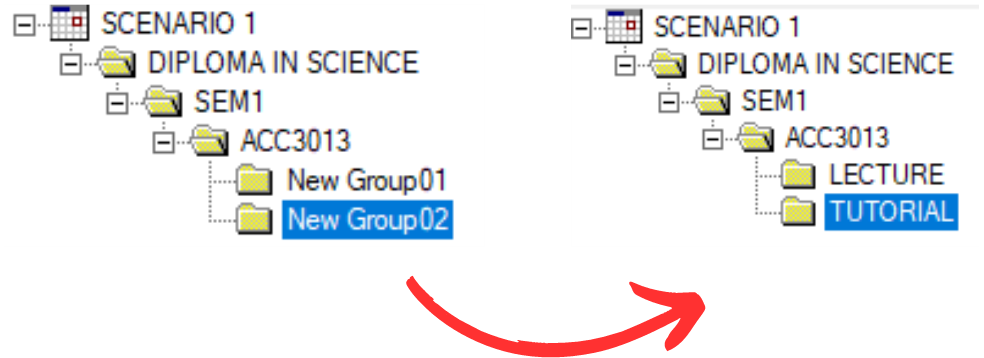
Diagram 2.1.7 Rename to LECTURE and TUTORIAL
STEPS 6: Click LECTURE folder to add two new constraint group > New constraint group created will be renamed LECTURE01 & LECTURE02. Do the same toward TUTORIAL folder and add TUTORIAL01 and TUTORIAL02.
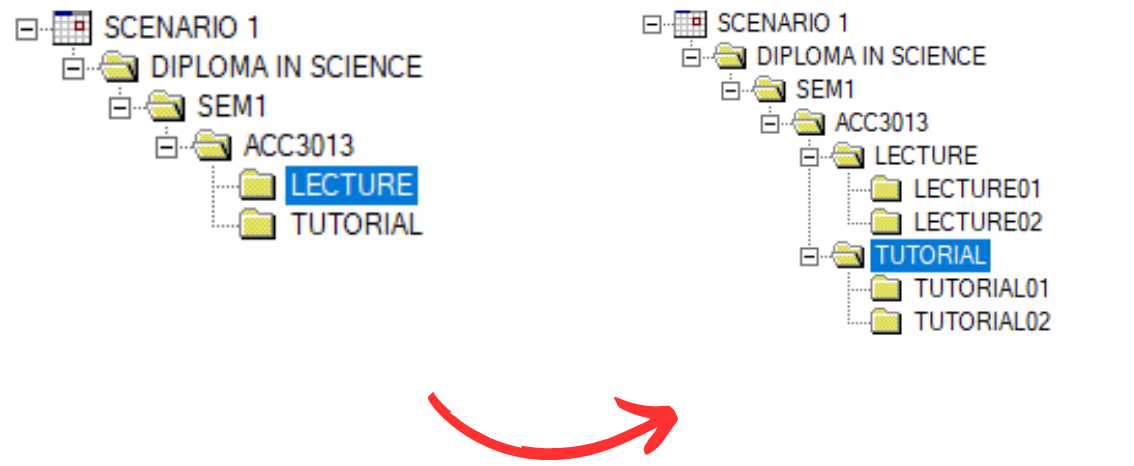
Diagram 2.1.8 Added two folder for each Lecture and Tutorial
STEPS 7: Click LECTURE01 folder to add one Section  > Fill up the section details. Do the rest for LECTURE02, TUTORIAL01 and TUTORIAL02.
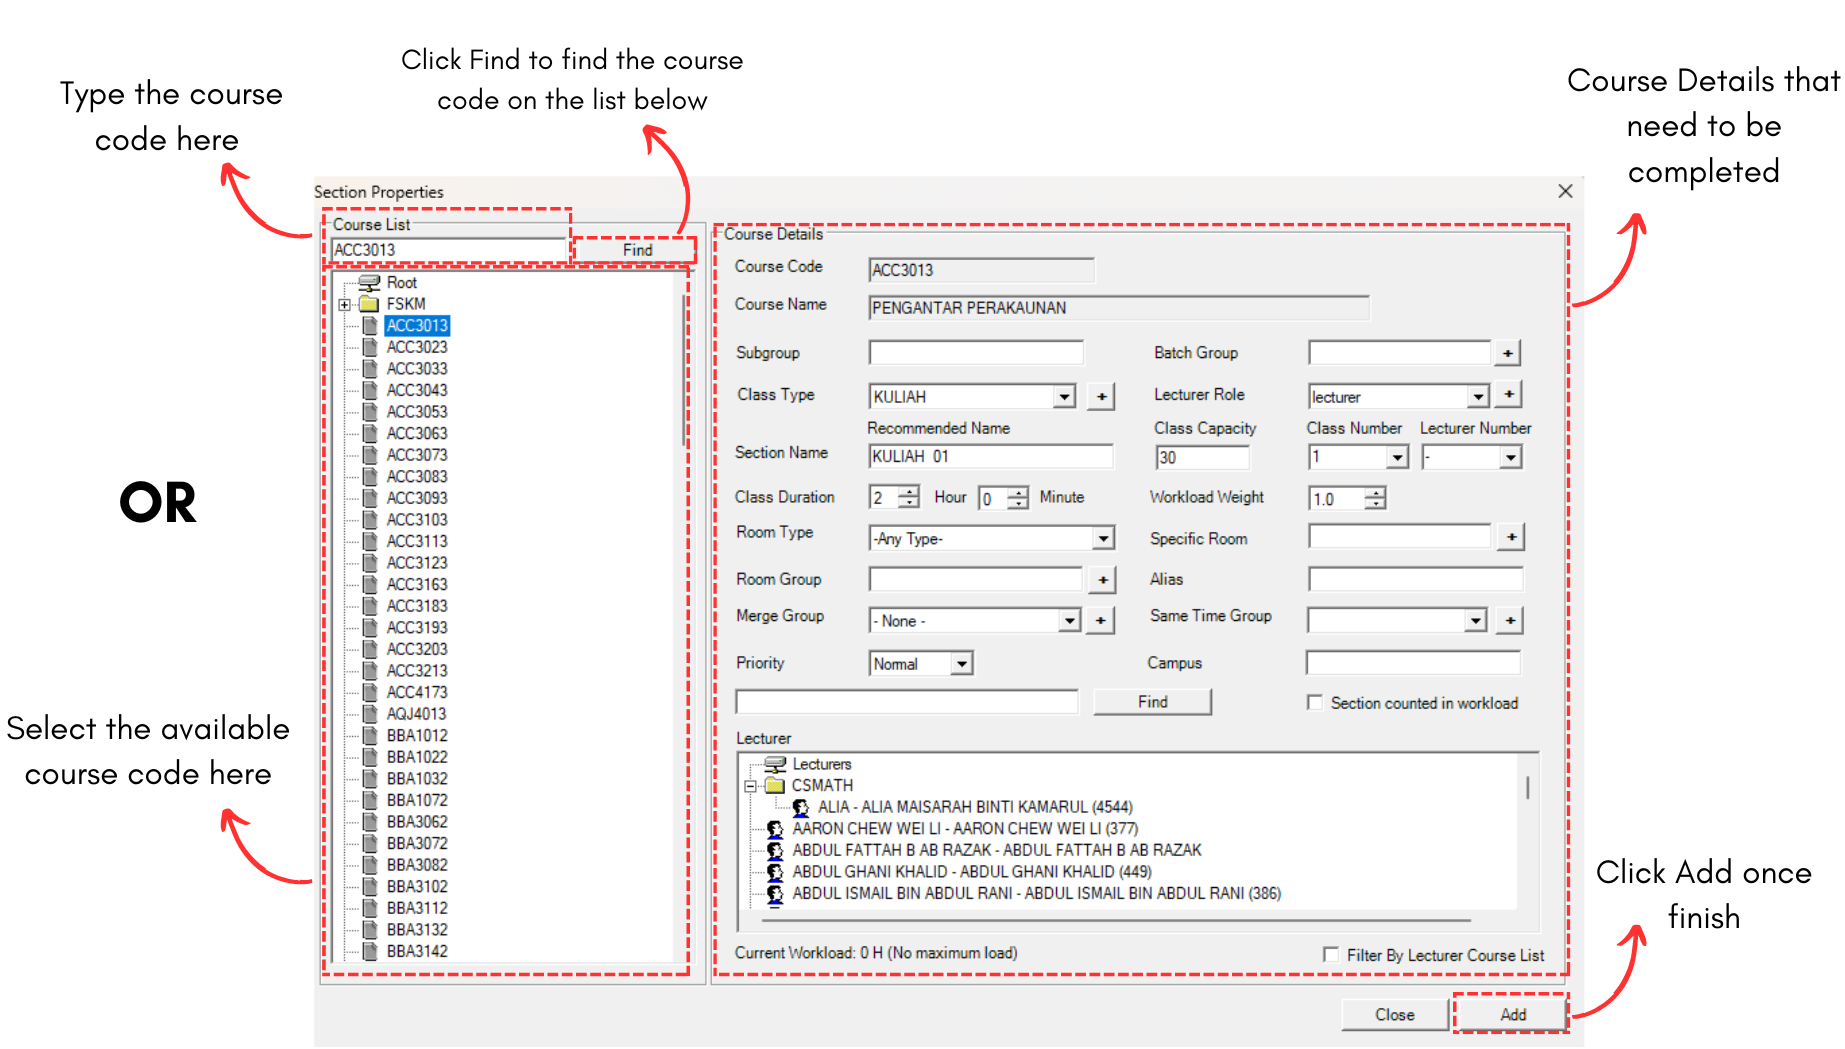
Diagram 2.1.9 Section Properties Window
To fill in the course details, refer to the table below.
|
Subgroup |
Subgroup for the batch or group. It is non-compulsory. |
|
Batch Group |
Batch Group for the section. Select any in the list by clicking Add |
|
Class Type |
Class Type for the section. Select any in the list. If there is none, write down value and click Add |
|
Lecturer Role |
Role for the lecturer in case if there are additional lecturer. Select any in the list. If there is none, write down value and click Add |
|
Section Name |
Name for the section. This will be auto generate once added value to another fields. |
|
Class Capacity |
Capacity for the section's class. |
|
Class Number |
Class section's number |
|
Lecturer Number |
Lecturer's section number |
|
Class Duration |
Default on how long the class will be held. |
|
Workload Weight |
Default on how much the workload of the section weight. |
|
Room Type |
Type of the room for section's class. Select any in the list. If there is none, write down value and click Add  |
|
Specific Room |
Specific room for the section's class. Select any in the list. If there is none, write down value and click Add It is non-compulsory. |
|
Room Group |
Group of the room if there is any. Select any in the list. If there is none, write down value and click Add It is non-compulsory. |
|
Alias |
Additional Name for the section. It is non-compulsory. |
|
Merge Group |
Merge Group for section. Select any in the list. If there is none, write down value and click Add It is non-compulsory. |
|
Same Time Group |
Same Time Group for section. Select any in the list. If there is none, write down value and click Add It is non-compulsory. |
|
Priority |
Priority in generating the timetable. |
|
Campus |
Campus for the section's class. It is non-compulsory. |
Table 2.1.1 Course Details Explanation
Below is the example of the sections added in the tree.
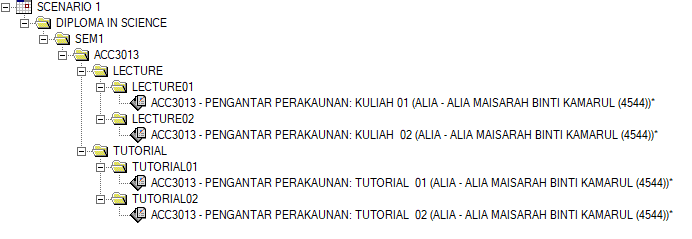
Diagram 2.1.9 Sections under class offered