Stage 4: Constraint Setting
1. Group Constraint
You can set constraints at the Data Entry. There are 2 types of constraints;
- Group Constraints
- Generate Constraints.
Group Constraints: You can set constraints from Parent folder to child folder in which settings set at Parent will automatically inherit by the child folder.
Step 1 : Getting to Set Constraints window
Step 1.a : Click Constraint Tree Tab to open up Tree Structure
Step 1.b : Double Click on any Group Folder (Yellow Folder)
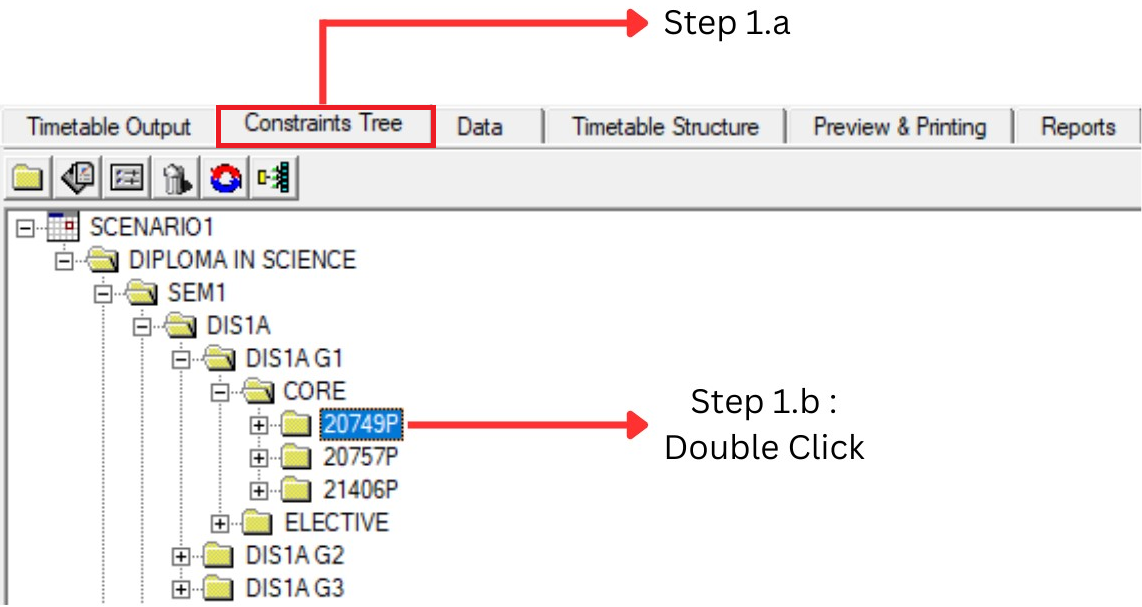
Diagram 1.4 : Getting to Set Constraints window
Step 1.c : Set Constraint window appear
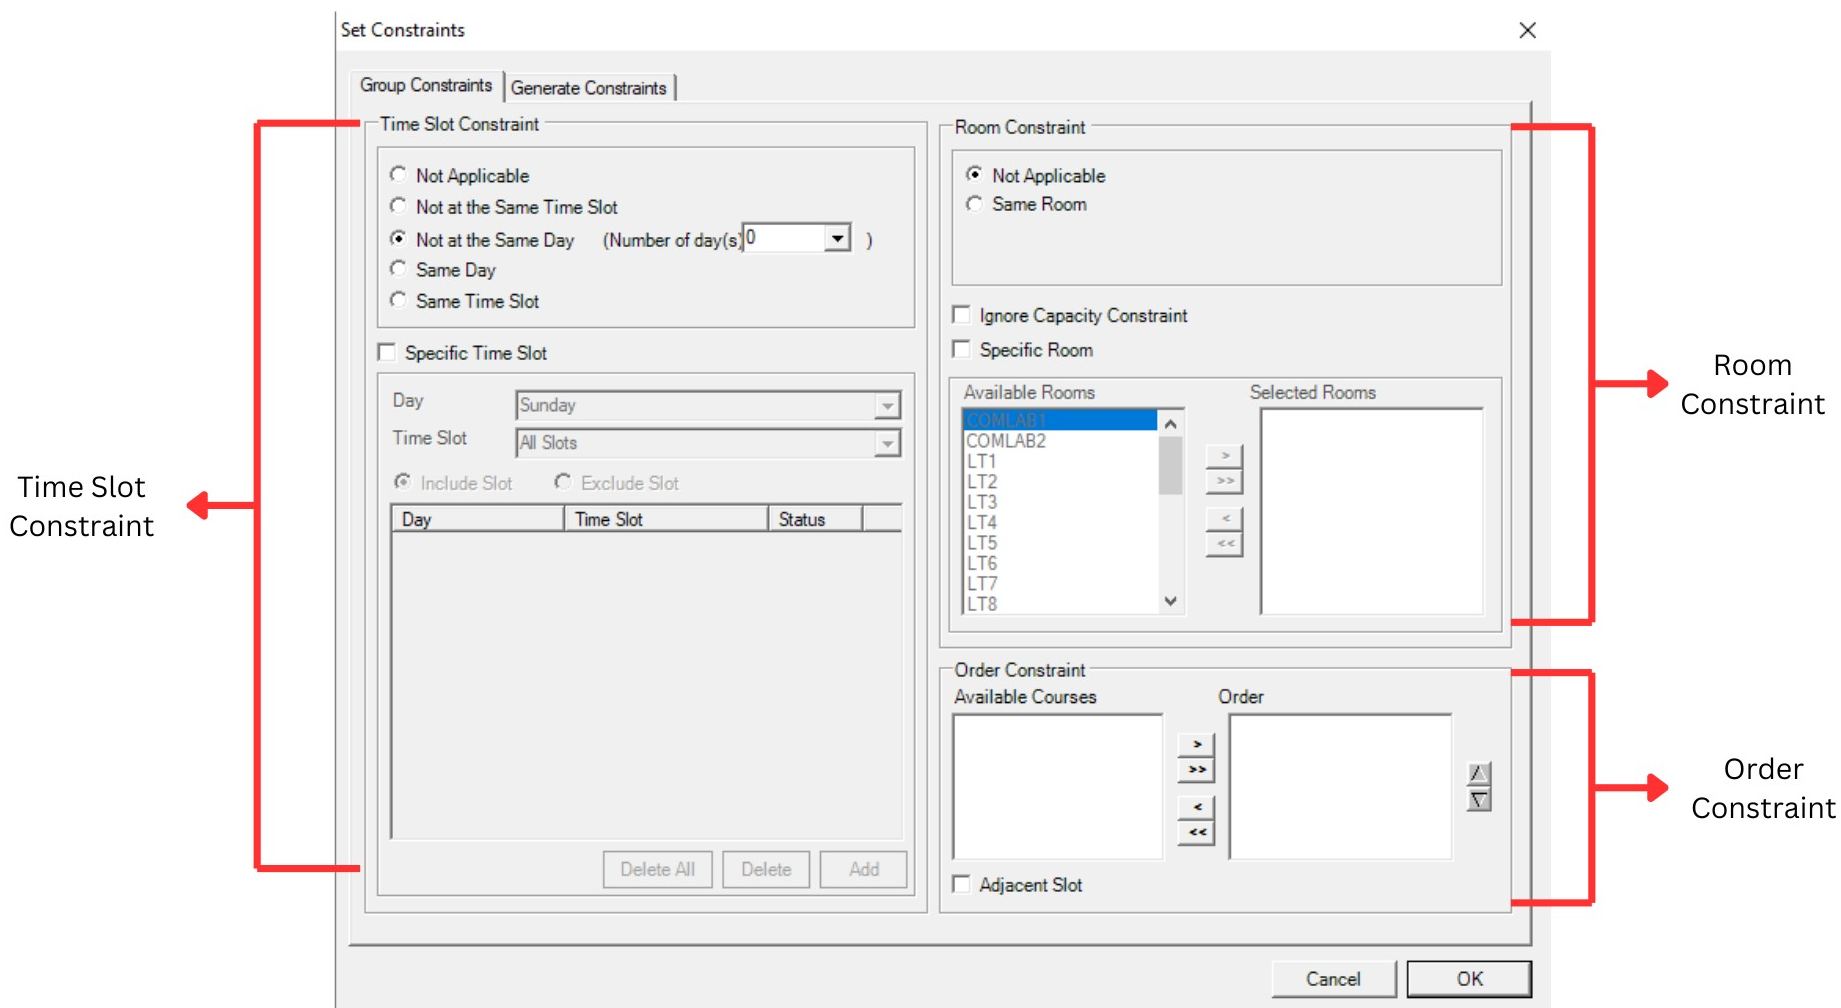
Diagram 1.5 : Set Constraints window
Step 2: Setting the Appropriate Constraint
1. Time Slot Constraint
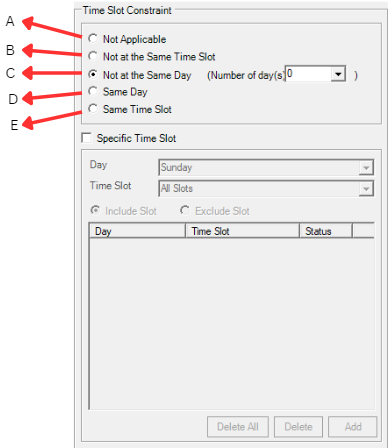
Diagram 1.6 : Time Slot Constraint
A. Not Applicable | Default Setting. It is used also when no particular
Time Slot Constraint apply |
B. Not at The Same Time Slot | The Child under the Folder will not clash with each
other, usually use this constraint for the
Same Batch of Student to avoid clashing. |
C. Not at the Same Day | User normally set these constraints for courses that prefer to have the classes in different days. Example, 1st Lecture and 2nd Lecture prefer to be in different days. |
D. Same Day | Normally apply at the Course Code folder |
E. Same Time Slot | User can set this constraint for 2 purposes: 1. Same Time Class This setting will be set at the designated folder (SAME TIME) which is Same Time Class Folder. This is to make sure that the Sections under the Parent folder will be slotted on the same time but at different venue/room. 2. Merging Class This setting is normally being set at the designated folder (MERGE) which is Merging Class Folder. This setting will ensure that the Sections under the Parent folder will be combined (merged) into the same time and same room slot. Please Note: User need to select “Same Time Slot” and “Same Room” which is found at the “Room Constraint”. User need to click on the “Ignore Capacity Constraint” if the total number of merging class exceed any of the rooms’ capacity in room list |

Diagram 1.7. Constraint for Same Time Class
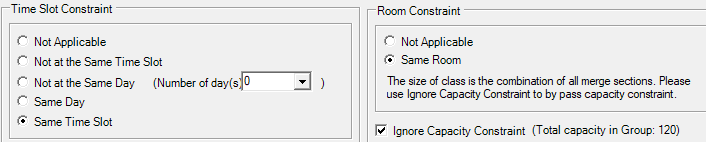
Diagram 1.8 Constraint For Merging Class
F. Specific Time Slot
User can either “Include’ or ‘Exclude” the Specific Time Slot by choosing the Day and specific Time Slot before Clicking Add button.
User can add as many time slots or days according to the demand.(Note : In order to add exclude slot, you must first include all the slots in the day)
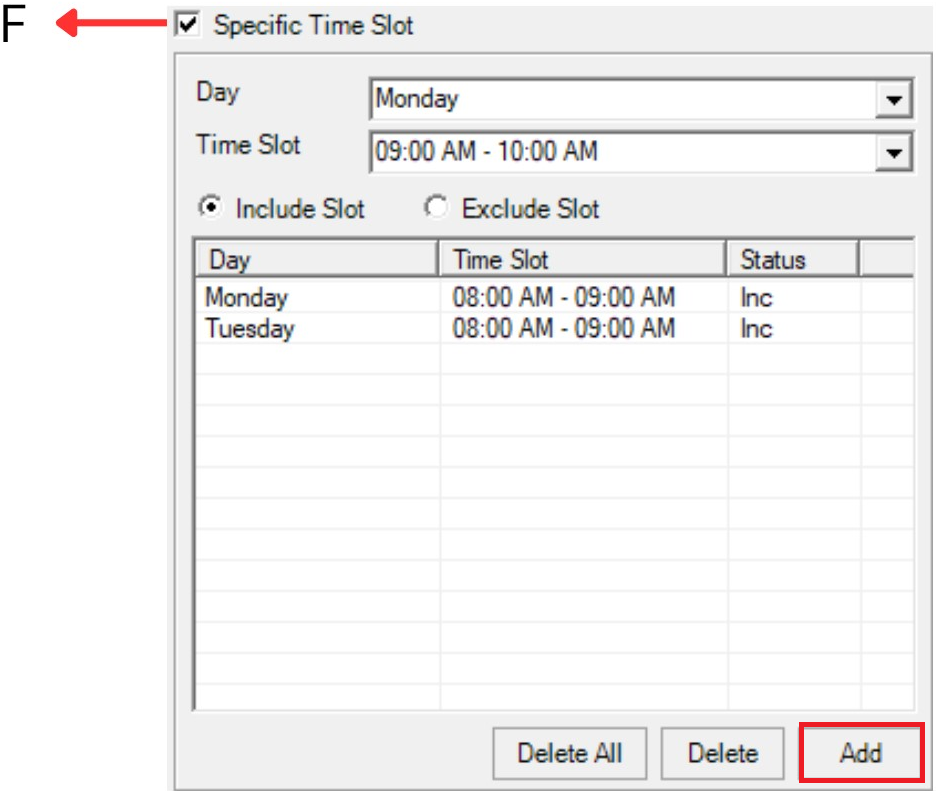
Diagram 1.9 : Specific Time Slot
2. Room Constraint
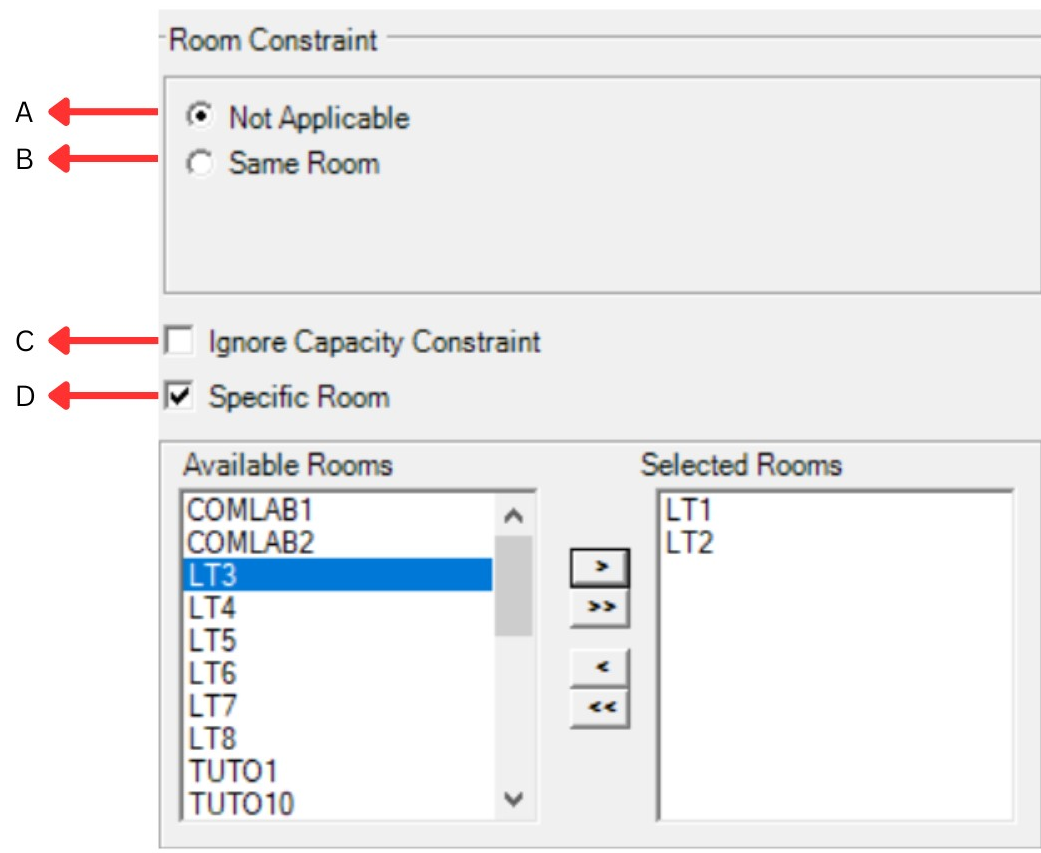
Diagram 1.10 : Room constraint boxA. Not Applicable | Default Setting. It is used also when no particular Time Slot Constraint apply |
B. Same Room | This constraint setting will set all the Sections under
the Parent folder to be allocated at the same room.
Also it is used in the Merging class. |
C. Ignore Capacity Constraint | User will use this constraint to bypass the Room Capacity in order to suit with the Class Size. If “Ignore”, the class size can fit in the classroom that has a smaller capacity. |
D. Specific Room | User can select 1 or few specific rooms in the Room list. If few rooms are selected, the Sections under the Parent folder will be assigned according to the Room Type and Room Capacity from the list of selected rooms. Please Note :
|
3. Order Constraint
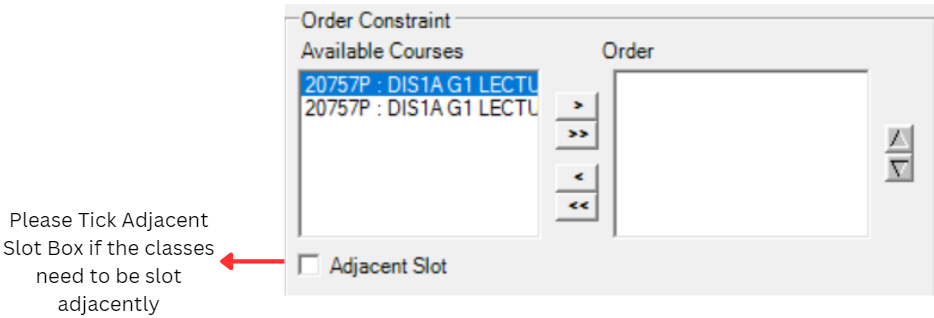
Diagram 1.11 : Order Constraint BoxUser can fix the way of ordering to make sure that Lecture 1 comes first in the week before Lecture 2 by using this constraint. User needs to move the Lecture 1 first and then the Lecture 2 will be moved consecutively after that to the Box on the right side. “Adjacent” box can be checked if the user wants the 2 classes (Lecture 1 & 2) to be slot adjacently- one after another in the same day.