Stage 2: Timetable Structure
2. Timetable Output Structure
2.1. How To Setting Time Structure
![]()
Diagram 2.1.1: Location of time structure
1. Click Timetable Structure and click Time Structure to open up Time Structure window
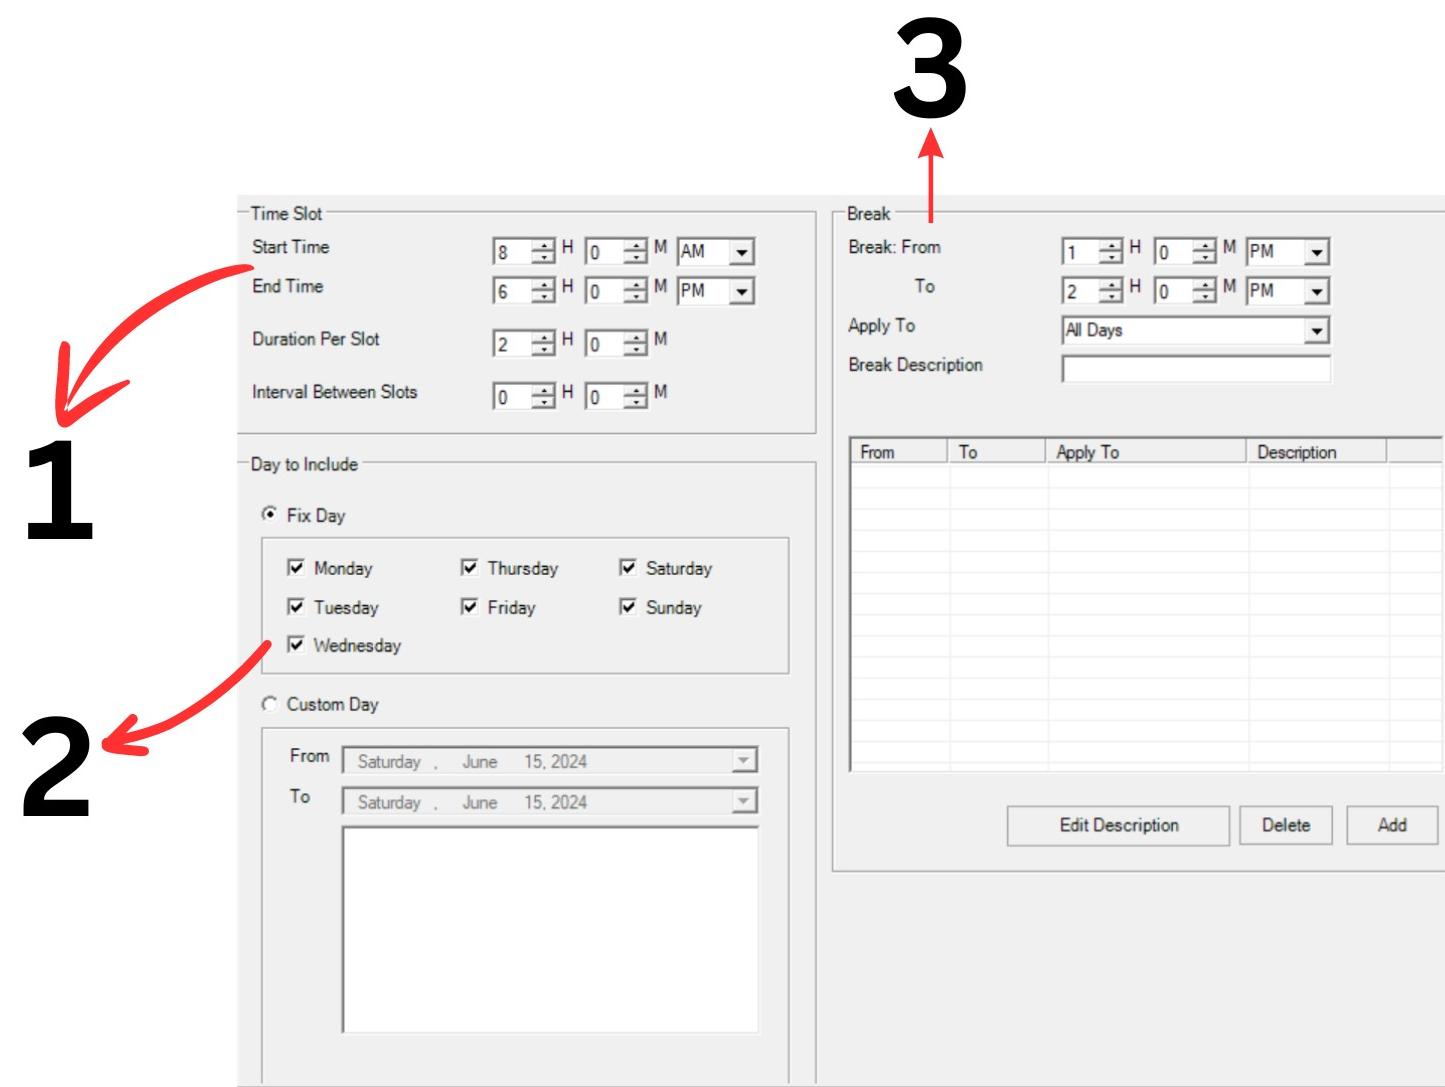
Diagram 2.1.2: Time Structure Window
2. Set your preference in every section. Time slot and Day to include is compulsory but not compulsory for Custom day and Break.
1. Time Slot
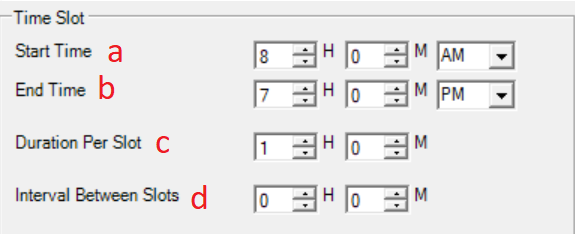
Diagram 2.1.3: Time Slot Section
Set your preference in time slot:
a. Starting time of the day in the schedule. Example 8.00 AM
b. Ending time of the day in the schedule. Example 7.00 PM
c. Time taken for each slot. (1 hour; if there are 2 hours and 3 hours class, user need to set 1 hour)
d. The interval between slots refers to the amount of time that separates one slot from the next.
2. Day to Include
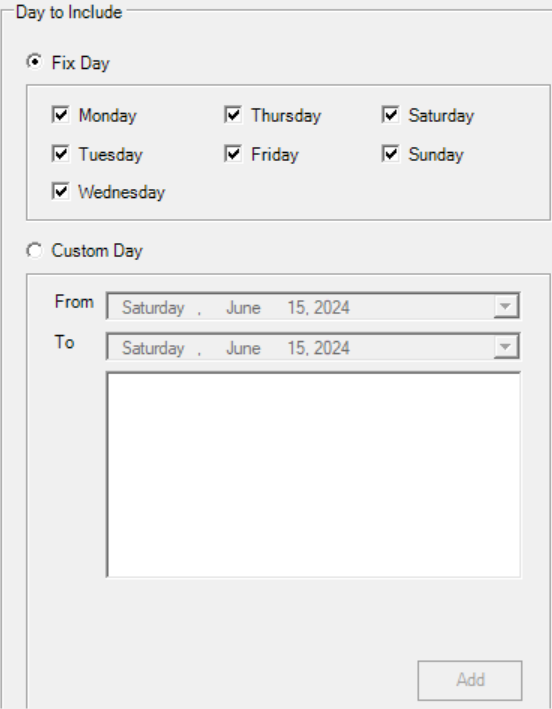
Diagram 2.1.4: Day to include section
Select and tick the day to include in your timetable output. (Select Custom Day ONLY for Exam Timetable or Short Courses. E.g. 1
Week Course)
3.Break
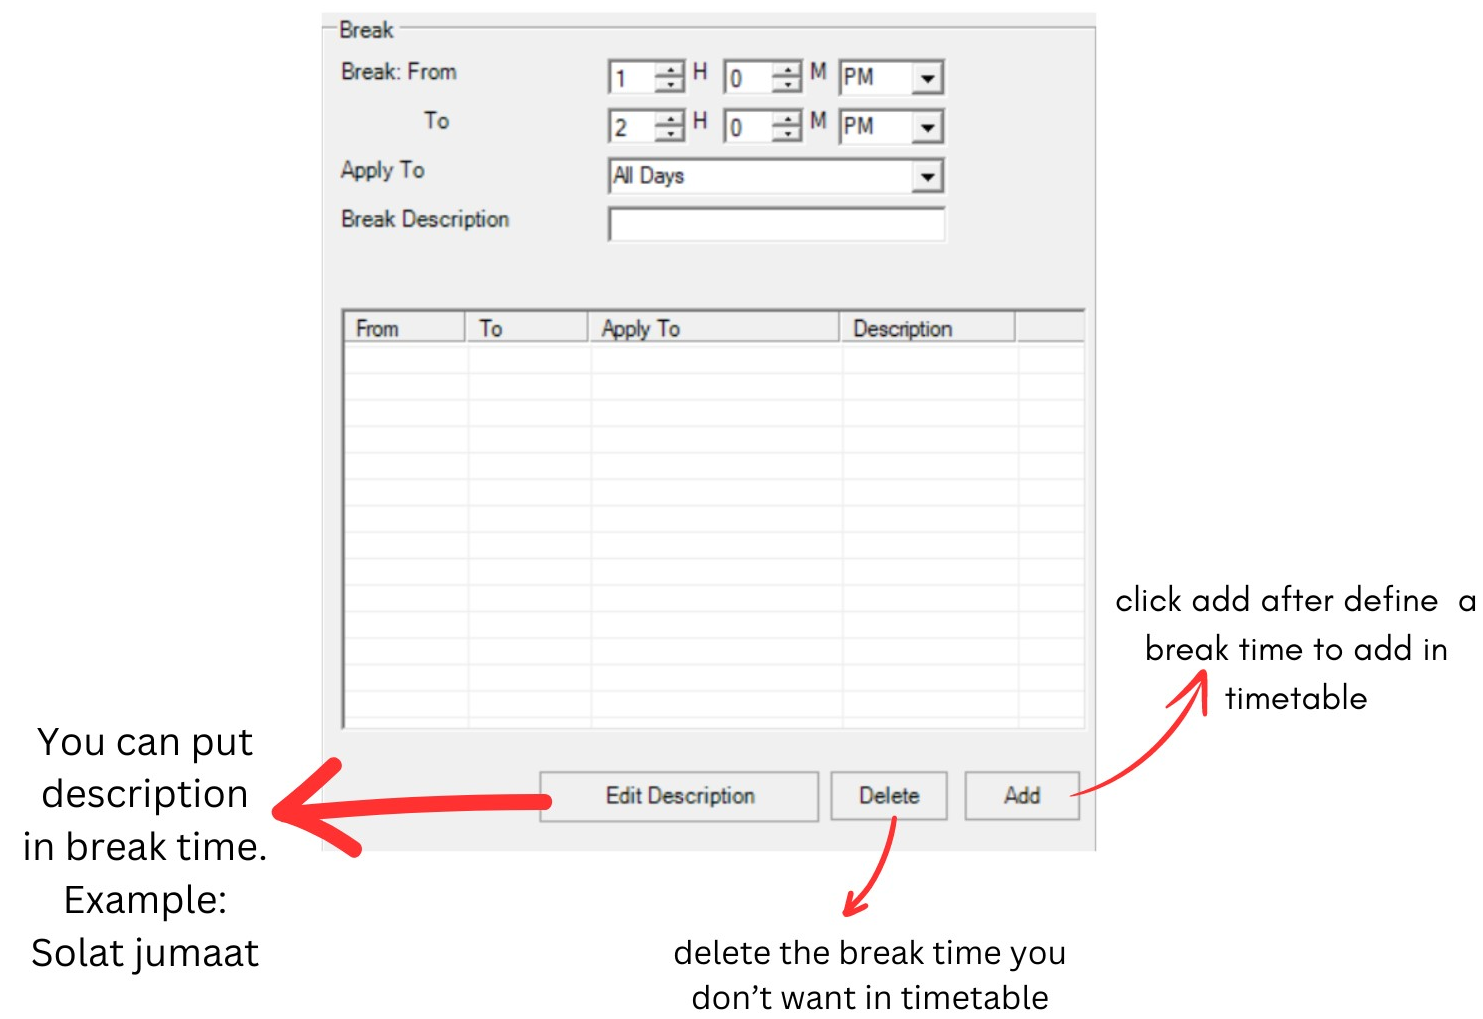
Diagram 2.1.5: Break section
Define the Break Time. NOTED this is a General Break Time for all the classes.
If there is different break time for different programs/batch of students/classes, there will be no break time
in the General Break Time.
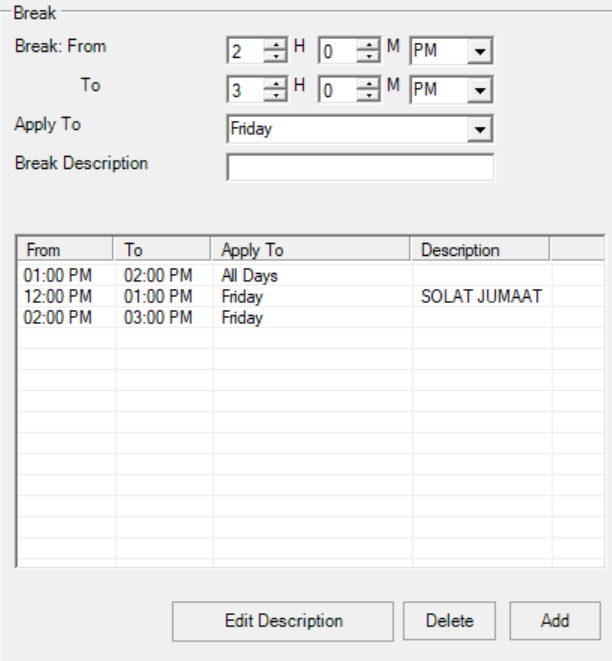
Diagram 2.1.6: Filled break section
 to produce Time structure in Timetable Output